
DIY Simple Face Moisturizer: Your Guide to Smooth, Hydrated Skin
DIY Simple Face Moisturizer
This blog will guide you through creating a simple yet effective face moisturizer. Perfect for all skin types, this formula is designed to hydrate, soothe, and nourish your skin while being gentle and easy to make at home.
Description
This DIY face moisturizer uses lightweight, non-greasy ingredients to hydrate and soften the skin. It’s perfect for maintaining skin’s moisture balance and promoting a healthy skin barrier without clogging pores.
Why This Face Moisturizer?
Store-bought moisturizers can sometimes be packed with unnecessary chemicals, fragrances, and irritants. This homemade formula allows you to control every ingredient, ensuring it’s safe, effective, and tailored to your skin’s needs. It’s cost-effective, beginner-friendly, and leaves your skin feeling hydrated and smooth.
Benefits of This Moisturizer
• Hydrates deeply without leaving a greasy residue.
• Repairs and soothes the skin barrier with humectants and emollients.
• Gentle enough for sensitive skin, while being effective for all skin types.
• Customizable to include your favorite active ingredients or essential oils.
Benefits of Each Ingredient Used
• Distilled Water: Hydrates and acts as a solvent for other ingredients.
• Glycerin: A humectant that draws moisture into the skin for long-lasting hydration.
• Sunflower Oil: A lightweight emollient rich in linoleic acid that helps repair the skin barrier.
• Cetearyl Alcohol: Stabilizes the formula and adds a creamy, smooth texture.
• Emulsifying Wax NF: Combines oil and water phases to create a stable emulsion.
• Panthenol (Vitamin B5) : Soothes, moisturizes, and improves skin elasticity.
• Allantoin: Calms irritation and promotes skin healing.
• Preservative (e.g., Optiphen or Germall plus): Prevents microbial growth and extends shelf life.
• Optional Essential Oil : Adds a pleasant scent and potential skin benefits (e.g., lavender for calming).
Phase A (Water Phase):
• Distilled Water: 74g
• Glycerin: 4g
Phase B (Oil Phase):
• Sunflower Oil: 5g
• Cetearyl Alcohol: 2g
• Emulsifying Wax NF: 5g
Phase C (Cool Down Phase):
• Panthenol (Vitamin B5): 2g
• Allantoin: 0.5g
• Preservative (e.g., Optiphen): 1g
• Optional Essential Oil: 0.5g
Detailed Instructions
1. Sanitize Your Equipment: Clean all tools, containers, and surfaces to prevent contamination.
2. Prepare Phase A (Water Phase):
• In a heat-resistant beaker, combine distilled water and glycerin.
• Heat the mixture to 70–75°C.
3. Prepare Phase B (Oil Phase):
• In another heat-resistant beaker, combine sunflower oil, cetearyl alcohol, and emulsifying wax.
• Heat to the same temperature (70–75°C).
4. Combine Phases:
• Slowly pour Phase B into Phase A while continuously stirring to form a smooth emulsion. Use a whisk or stick blender for better emulsification.
5. Cool Down Phase:
• Allow the emulsion to cool to approximately 40°C.
• Add panthenol, allantoin, preservative, and optional essential oil. Stir thoroughly to ensure everything is evenly incorporated.
6. Check and Adjust pH:
• Test the pH of the moisturizer and adjust to 5.0–5.5 if necessary (see below).
7. Packaging:
• Transfer the moisturizer into sanitized jars or bottles. Seal tightly and store in a cool, dry place.
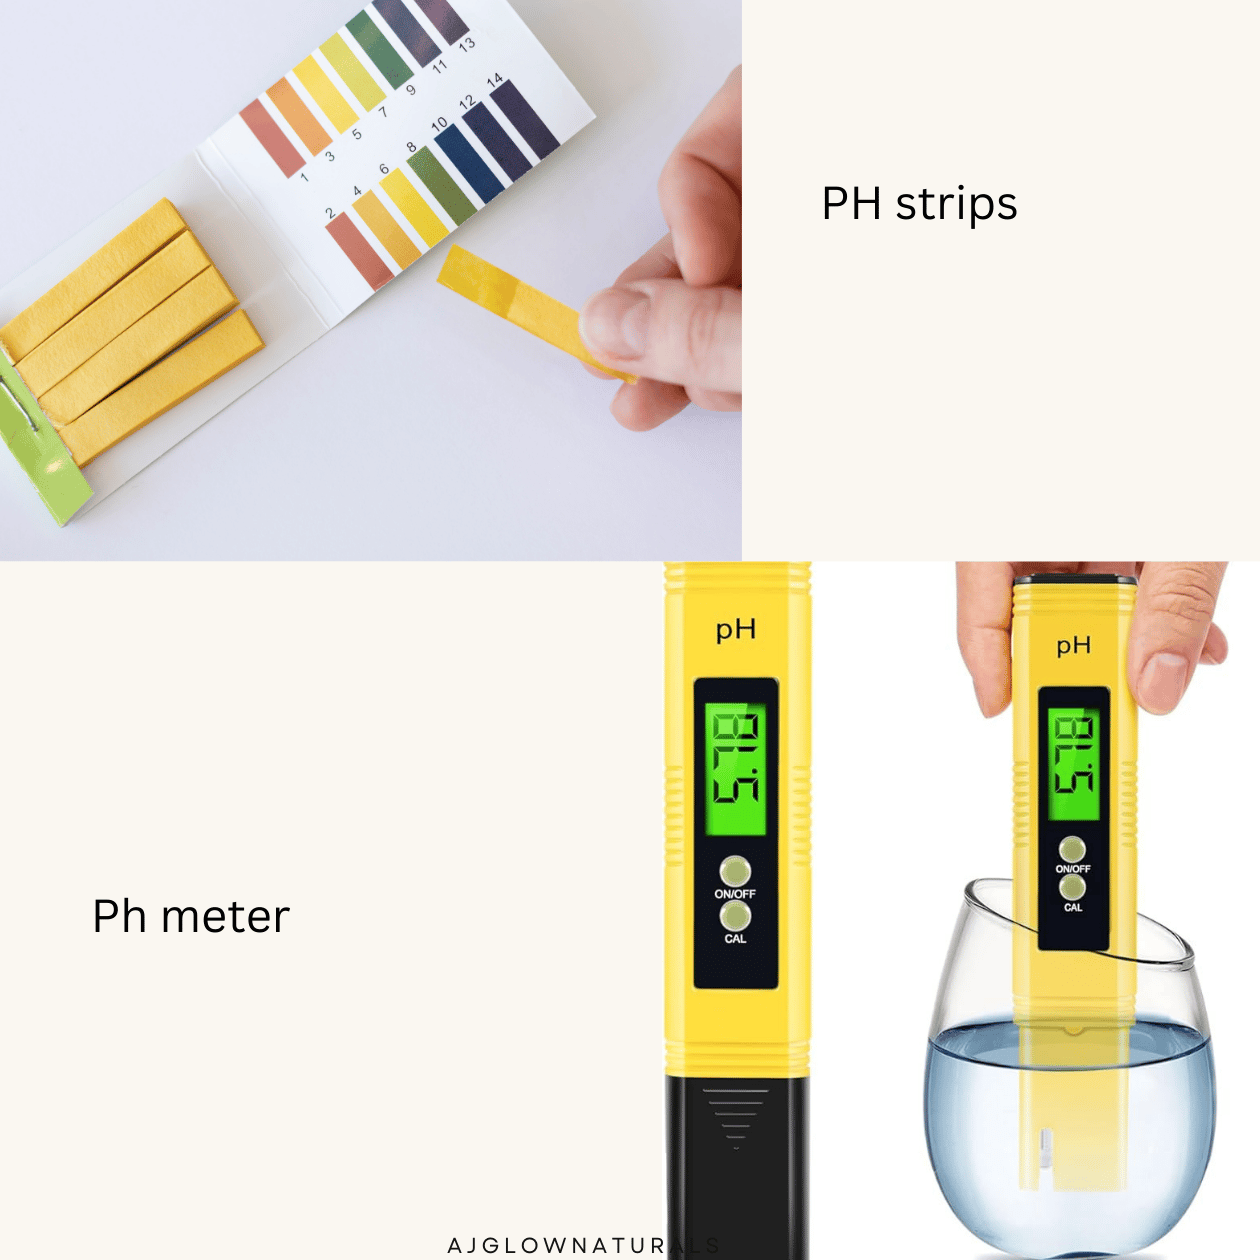
The pH (5.0) and Why
The ideal pH for this moisturizer is 5.0, which closely matches the skin’s natural pH (4.5–5.5). This ensures the product is gentle, supports the skin barrier, and prevents irritation. A balanced pH also helps active ingredients like panthenol and allantoin perform effectively without compromising the skin.
How to Adjust pH (High or Low) • If the pH is too high (>6.7):
• To lower the pH, add a small amount of citric acid solution (dissolved in distilled water) drop by drop, stirring and testing until the pH reaches 5.0–5.5.
• If the pH is too low (<3.0):
• To raise the pH, dissolve 1.25g of sodium bicarbonate (1/4 teaspoon) in 5–10ml of distilled water.
• Add the solution drop by drop, stirring thoroughly and testing the pH until it reaches 5.0–5.5.
Quick Calculation:
• 1/4 teaspoon of sodium bicarbonate = 1.25g.
• Dissolve 1.25g of sodium bicarbonate in 5–10ml of distilled water.
How to Use This Face Moisturizer
1. Start with clean, dry skin.
2. Apply a pea-sized amount of moisturizer to your face and neck, gently massaging in circular motions until fully absorbed.
3. Use morning and night for best results.
Who Is This Face Cream For?
This face cream is suitable for all skin types, including sensitive, dry, combination, and normal skin. For oily or acne-prone skin, use a small amount to avoid overhydration.
Can You Add Other Actives?
Yes, you can customize this moisturizer by adding active ingredients like niacinamide, hyaluronic acid, or botanical extracts. When adding actives:
• Ensure they’re compatible with the formula’s pH.
• Add them during the cool-down phase to preserve their effectiveness.
• Check manufacturer guidelines for recommended usage rates.
You can add 0.5g of Vitamin E oil during the cool-down phase (after the mixture has cooled to 40°C). Vitamin E not only nourishes the skin with antioxidant benefits but also helps extend the shelf life of your moisturizer by preventing oxidation.
Final Thoughts
This DIY simple face moisturizer is a beginner-friendly, cost-effective way to care for your skin. It’s hydrating, soothing, and perfect for daily use. Customize it with your favorite actives or essential oils to make it uniquely yours!
For more DIY skincare tips, click here [https://payhip.com/AJGlowNaturals
Love this recipe? Follow me for more skincare tips, DIY recipes, and natural beauty inspiration!