

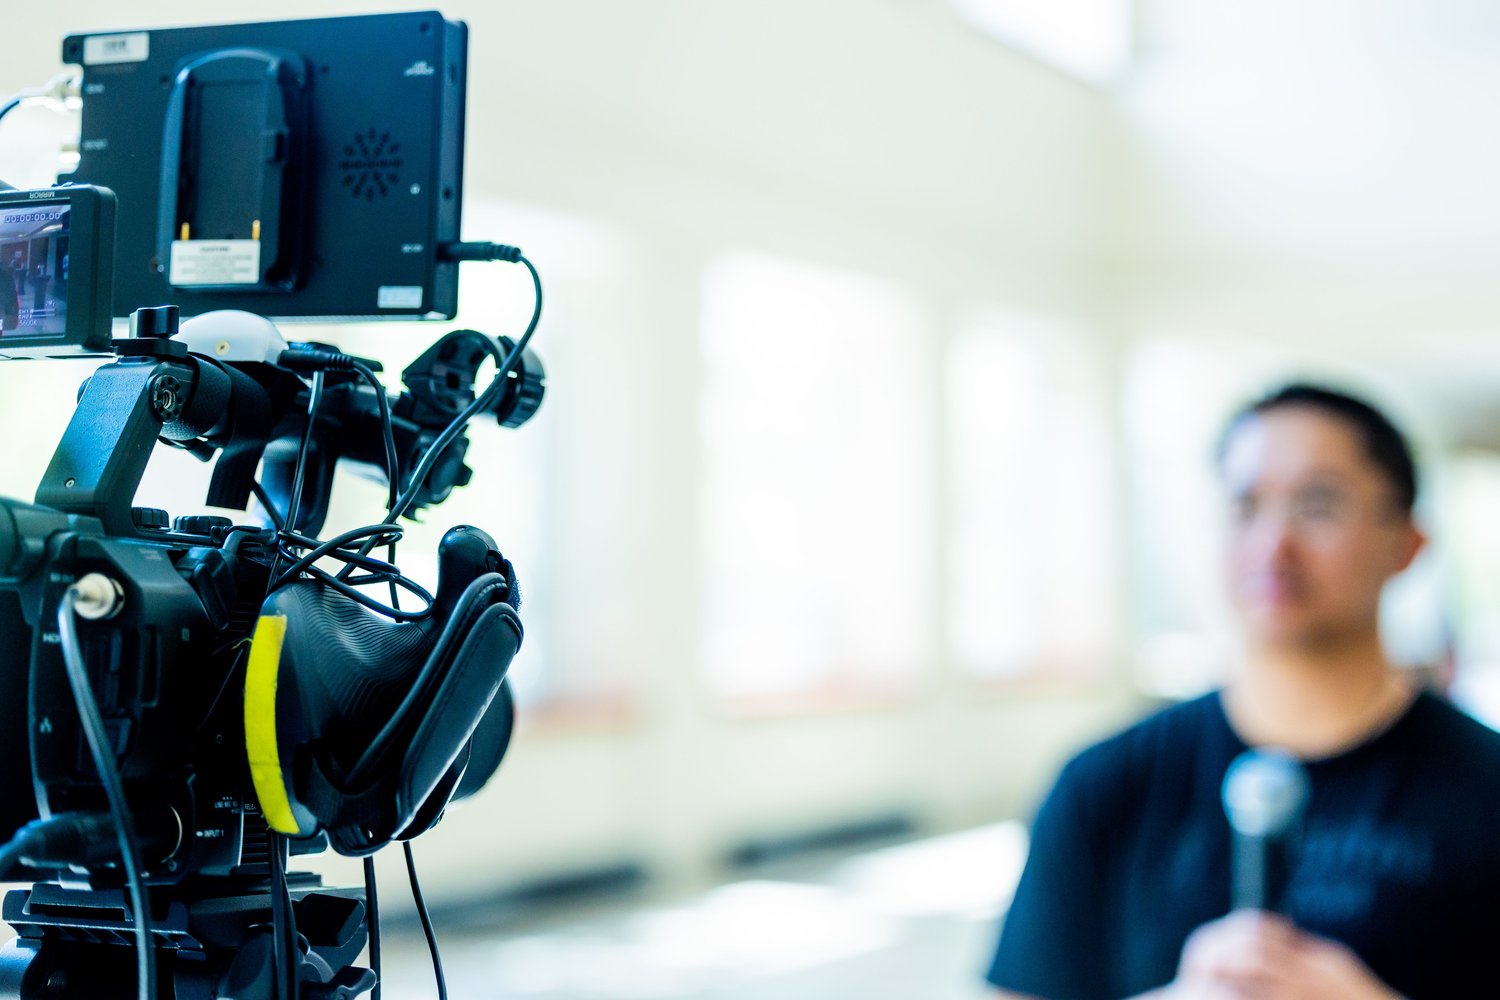
Real estate videographers spend a lot of time learning how to make houses look good.
Then someone sits down in front of the camera.
Suddenly the room becomes a different problem.
The windows that looked beautiful in the property footage may be too bright behind the speaker. The kitchen that felt spacious through a 16mm lens may look awkward behind a person. The ceiling lights create shadows under the eyes. The agent sits against the wall because that is where the chair happens to be. A large window is nearby, but it is lighting the wrong side of the face.
The technical requirements are still manageable.
You usually need a good room, a good background, one flattering source of light, a sensible camera position, and enough control over the environment that the speaker feels separated from the house without looking like they were transported into a studio.
That is the standard I want for most real estate interviews.
A builder talking about craftsmanship should look like they belong inside the home they built.
An agent introducing a listing should feel connected to the property.
An architect should be surrounded by the materials, drawings, or spaces that support what they are saying.
The lighting should help the subject look healthy, confident, and dimensional while allowing the house to remain part of the story.
This chapter builds that setup from the room outward.
Table of Contents
• Why Interview Lighting Matters in Real Estate Media
• Start With the Background
• Use the Property as Production Design
• Create Subject-to-Background Separation
• Choose the Camera Position Before the Lights
• Pick a Sensible Interview Lens
• Set Camera Height and Eyeline
• Decide Whether the Speaker Looks at Camera
• Compose the Frame
• Leave Room for Vertical Crops
• The One-Light Interview Setup
• Window Light as the Key
• Adding a Soft LED Key
• Key-Light Position
• Source Size and Softness
• Feather the Light
• Fill Light and Negative Fill
• The Two-Light Setup
• The Three-Light Setup
• Edge and Hair Lights
• Background Lights
• Practical Lamps
• Working With Mixed Color Temperatures
• When to Turn the Ceiling Lights Off
• White Balance for Interviews
• Expose the Face First
• Protect Bright Windows
• Glasses and Reflections
• Skin Shine and Specular Highlights
• Lighting a White Kitchen
• Lighting a Dark Office or Wood Interior
• Lighting Builder Interviews on Job Sites
• Lighting Agents in Occupied Homes
• Two-Camera Interviews
• Two-Person Interviews
• Portraits From the Same Setup
• Seated vs. Standing Portraits
• Posing and Body Position
• Hands and Gestures
• Sound and Lighting Need to Cooperate
• Cable and Stand Safety
• A 15-Minute Interview Setup
• A Minimal Equipment Kit
• A Standard Professional Kit
• Common Interview Lighting Mistakes
• Frequently Asked Questions
Why Interview Lighting Matters in Real Estate Media
Property footage can survive a surprising amount of inconsistency.
The kitchen is brighter than the hallway.
The exterior is cooler than the bedroom.
The camera moves through several environments.
The audience expects variation.
An interview is different.
The viewer may stare at the same face for:
Ten seconds.
Thirty seconds.
Two minutes.
Every problem has time to become visible.
You begin noticing:
Poor skin tone.
Harsh shadows.
A bright window growing out of the subject’s head.
A lamp intersecting the face.
A crooked camera.
Bad eye line.
A flat background.
Reflections in glasses.
A chair placed directly against a wall.
Good interview lighting keeps those distractions quiet so the viewer can listen.
Start With the Background
I usually choose the background before I build the lighting.
Walk through the property and look for a frame that tells you something about the client.
For an agent, that might be:
A strong living room.
Kitchen.
Entry.
Covered patio.
For a builder:
Architectural detail.
Custom cabinetry.
Wood beams.
Large windows.
Finished fireplace.
Construction activity.
For an architect or designer:
Materials.
Plans.
Millwork.
Furniture.
A recognizable feature of the project.
The background should support the person rather than compete with them.
Use the Property as Production Design
A furnished house already contains production design.
Use it.
Look for:
Lamps.
Plants.
Artwork.
Furniture layers.
Door openings.
Windows.
Architectural lines.
Cabinetry.
Texture.
Depth.
A good interview background often includes several layers.
Subject.
Then perhaps a chair or table.
Then architectural elements.
Then a deeper wall or window.
That feels much richer than placing the subject eighteen inches in front of a blank wall.
Create Subject-to-Background Separation
One of the fastest ways to improve an interview is simply moving the subject forward.
Give yourself distance between:
Subject.
and:
Background.
Even a few feet can help.
That distance allows you to:
Control focus.
Reduce distracting detail.
Create more depth.
Place background lighting separately.
Keep the subject from casting shadows onto a wall.
The room begins to feel larger on camera.
Professional Tip
When scouting an interview location, I will often move the chair before I move any lights. The best position for the furniture in the room is rarely the best position for the person on camera.
Choose the Camera Position Before the Lights
Lighting becomes much easier once the frame is locked.
Set the camera.
Choose the background.
Choose the focal length.
Choose the subject position.
Then light what the camera actually sees.
If you build the lighting first and decide the frame afterward, you may discover:
Light stand in shot.
Modifier reflection in glass.
Background too bright.
Subject too close to the wall.
Window entering frame.
Solve composition first.
Pick a Sensible Interview Lens
Real estate photographers are comfortable with wide lenses.
That instinct can cause trouble with people.
A very wide lens placed close to the subject can exaggerate:
Nose.
Hands.
Forehead.
Distance between facial features.
For a normal single-person interview, I usually want a more natural perspective.
A moderate normal-to-short-telephoto field of view works well when the room allows it.
A wider environmental portrait can be excellent when the architecture matters, but back the camera away and keep the subject away from the extreme edge of the frame.
The house should feel spacious.
The person should still look human.
Set Camera Height and Eyeline
For a seated interview, start with the camera close to eye level.
Slightly above or slightly below can work depending on the subject and look.
Extreme height usually introduces a visual message you may not want.
Too low can feel imposing.
Too high can make the person look small.
Eye level feels conversational.
Then decide where the person looks.
Decide Whether the Speaker Looks at Camera
There are two common approaches.
Direct to Camera
The speaker looks into the lens.
Useful for:
Agent introductions.
Social content.
Calls to action.
Educational videos.
Direct client messages.
The audience feels personally addressed.
Off-Camera Interview
The speaker looks toward an interviewer positioned close to the camera.
Useful for:
Builder stories.
Testimonials.
Designer interviews.
Documentary-style pieces.
Longer conversations.
The subject can speak naturally to another person rather than performing toward a lens.
Place the interviewer close enough to the lens that the eye line still feels connected to the viewer.
Compose the Frame
A basic medium interview frame works well for most real estate content.
Usually:
Chest or waist upward.
Eyes around the upper third.
Enough headroom to breathe.
Background visible.
Avoid excessive empty space.
If the speaker looks off camera, leave slightly more room in the direction of the gaze.
Watch the edges.
Do not let:
Doorframes.
Plant stems.
Lamp poles.
Window mullions.
Cabinet edges.
appear to grow directly from the person’s head.
A two-inch camera move can often fix the problem.
Leave Room for Vertical Crops
Real estate interviews are increasingly reused.
One horizontal builder interview may become:
Website film.
YouTube video.
Instagram Reel.
Agent Story.
Vertical testimonial.
If you know vertical delivery is likely, compose with that possibility in mind.
Keep the important elements closer to center.
Avoid placing the subject so far to one side that a vertical crop becomes impossible.
You can also record a dedicated vertical version after the main interview.
That is often cleaner than asking one composition to solve every format.
The One-Light Interview Setup
You can make a very good interview with one light.
The setup is simple:
Camera.
Subject.
Background.
One large soft source.
Place the key light off to one side of the camera and slightly above the subject’s eyes.
Then use the room itself for everything else.
A window may provide fill.
A white wall may bounce light.
A lamp may create background warmth.
The existing architecture creates depth.
Professional interview-lighting examples from B&H, Westcott, and Aputure commonly begin with this same basic idea: establish one controlled soft key, then shape the existing location around it rather than trying to illuminate every surface independently.
Window Light as the Key
Before unpacking a light, look at the windows.
A large window can be an excellent source.
Position the subject so the window is:
To one side.
Slightly forward.
Close enough to create usable intensity.
Then expose the face.
A north-facing or shaded window can create beautiful soft light.
Direct afternoon sun through the same opening can be much harder to control.
Window light is attractive partly because the source is large relative to the subject.
It creates gradual transitions from light to shadow.
Westcott’s current interview-training examples make the same practical point: evaluate the ambient and window light first, then decide whether artificial light needs to replace, supplement, or shape it.
Adding a Soft LED Key
Continuous LED lighting is extremely practical for interviews because you can see the result while you work.
Put a softbox or other large modifier on the fixture.
Bring it reasonably close to the subject.
Set brightness.
Match or intentionally complement the existing color environment.
You now have consistent light even if:
Clouds move.
Sunlight changes.
The interview lasts longer than expected.
A soft constant key also makes it easier to capture matching B-roll or portraits immediately after the interview. Westcott’s documentary-lighting example specifically uses continuous lighting to maintain visual consistency between interview and supporting footage.
Key-Light Position
A practical starting position is roughly 30–45 degrees off camera and slightly above eye level.
Then adjust by looking at the face.
You are looking for:
Clean eyes.
Shape across the cheek.
A natural nose shadow.
Visible texture.
No deep black eye sockets.
Move the light.
Do not assume the first angle is correct because it matches a diagram.
Faces are different.
Rooms are different.
Glasses are different.
Source Size and Softness
A larger apparent source produces softer transitions.
That means:
Large modifier.
Close to subject.
is usually more flattering than:
Small bare light.
Far away.
This is one reason a modest LED through a good modifier often creates a better interview than a more powerful bare fixture.
The modifier is part of the lighting system.
Feather the Light
The brightest part of a softbox does not have to point directly at the subject.
Turn it slightly past them.
Let the edge of the beam do the work.
This is called feathering.
It can help:
Reduce hot spots.
Control background spill.
Reduce reflections.
Create a smoother falloff.
Westcott demonstrates this exact technique in its documentary-interview example, turning the key away from reflective background surfaces while maintaining good illumination on the subject.
Fill Light and Negative Fill
Once the key looks good, examine the shadow side of the face.
You have three choices.
Leave It
Often the best choice.
Natural contrast gives the face dimension.
Add Fill
Use:
Reflector.
White wall.
Second soft light.
Bounce.
This reduces contrast.
Add Negative Fill
Place a black flag, curtain, foam board, or other dark surface near the shadow side.
This absorbs bounce and increases shape.
Negative fill can be extremely useful inside:
White kitchens.
Bright living rooms.
Rooms with white walls on every side.
Those environments naturally fill shadows whether you want them to or not.
The Two-Light Setup
My second light often goes toward the background rather than the face.
You already have:
Soft key.
Natural fill.
Use light two to create depth.
Possible uses:
Warm a wall.
Highlight cabinetry.
Edge a plant.
Create separation on the shoulder.
Light an architectural feature.
That small background adjustment often does more for perceived production value than adding another light directly to the person.
The Three-Light Setup
A traditional three-light arrangement might include:
Key.
Fill.
Back or edge light.
You can use that.
You do not have to.
A modern real estate interview may instead use:
Soft key.
Edge light.
Background light.
with the room providing fill.
Or:
Window key.
Negative fill.
Background light.
Think in jobs rather than formulas.
Ask what the image still needs.
Edge and Hair Lights
A subtle edge light can separate a dark jacket from a dark room.
Place the source:
Behind.
Above.
To one side.
Keep it out of frame.
Aim at the shoulder or hair.
Use less than you think.
The common beginner mistake is creating a bright glowing line around the subject.
That draws attention to the lighting.
A small amount of separation is usually enough.
Background Lights
Background lighting works best when it feels motivated.
You might illuminate:
Wood wall.
Brick fireplace.
Cabinetry.
Plant.
Artwork.
Texture.
Architectural feature.
Avoid randomly painting colored light onto a wall unless the client’s brand supports that aesthetic.
Most builder and agent interviews benefit from an environment that still feels like the actual property.
Practical Lamps
Practical lights are fixtures visible inside the frame.
Table lamp.
Floor lamp.
Pendant.
Sconce.
Fireplace.
They can add depth and warmth.
Do not assume every practical needs to be on.
Turn each one on and ask:
Does this improve the image?
A lamp can create:
Warm background interest.
Or:
A clipped white blob beside the person’s face.
Use it intentionally.
Working With Mixed Color Temperatures
Homes contain all kinds of light.
Daylight.
Warm decorative lamps.
Cool LEDs.
Under-cabinet lighting.
Recessed cans.
Television screens.
Exterior blue light.
Mixed color can look beautiful when the separation is intentional.
It looks messy when every source is fighting for control.
A common approach is:
Neutral or daylight-balanced key on the face.
Warmer practicals in the background.
That creates a clear visual hierarchy.
Westcott uses this approach in one current documentary example, pairing a daylight-matched key with warmer edge and background lighting to create separation while keeping the subject natural.
When to Turn the Ceiling Lights Off
Overhead lighting is often the first thing I test.
Turn it off.
Look again.
Ceiling fixtures frequently create:
Dark eye sockets.
Bright forehead.
Uneven color.
Hot spots.
Unwanted shadows.
Reflections in glasses.
The room may look dramatically better with the practical lamps and your key doing the work.
Sometimes the overhead fixtures are part of the house and help the environment feel natural.
Keep them when they improve the scene.
White Balance for Interviews
Set a deliberate white balance.
Do not let automatic white balance wander during a long answer.
If the camera sees:
Warm lamp.
Cool window.
White shirt.
Wood wall.
its interpretation can shift slightly as the subject moves.
A fixed white balance gives the edit consistency.
Match your key source to the dominant environment or deliberately create a warm/cool relationship.
Then leave the camera stable.
Expose the Face First
The face is the priority.
Set the key.
Set exposure.
Then manage the environment.
If the background is slightly dark, that can help.
If a practical lamp clips a little, you may accept it.
If the subject’s forehead is overexposed, fix it.
Monitor exposure with the tools your camera provides.
Histogram.
Waveform.
Zebras.
False color.
The exact method matters less than consistency.
Protect Bright Windows
A window behind the subject can create an attractive frame.
It can also become a large white rectangle.
You have several options:
Increase key-light output.
Move the subject or camera.
Choose a different time.
Close sheers.
Change the angle.
Expose darker.
Use a different background.
A bright but readable window often feels natural.
Trying to hold every tiny exterior highlight can force the subject lighting into unnecessary complexity.
Make a deliberate compromise.
Glasses and Reflections
Glasses are one of the most common interview-lighting problems.
The subject sits down.
You turn on the softbox.
Now the entire modifier appears in both lenses.
Try:
Raise the key.
Move it farther sideways.
Feather it.
Lower the camera slightly if composition permits.
Adjust the glasses gently on the subject’s face.
Change the subject’s head angle.
Small moves can dramatically reduce the reflection.
Do this before the interview starts.
Do not plan to repair thirty minutes of moving reflections in post.
Skin Shine and Specular Highlights
A soft source can still create shine.
Watch:
Forehead.
Nose.
Cheeks.
Bald or closely shaved heads.
Solutions include:
Moving the source farther to the side.
Feathering.
Making the source larger.
Reducing intensity.
Light powder when appropriate and available.
Keep the skin dimensional.
Avoid trying to make every highlight disappear.
Lighting a White Kitchen
A white kitchen is bright.
It also reflects everything.
The key may bounce from:
Cabinets.
Ceiling.
Island.
Walls.
The result can become extremely flat.
Try:
Turn off overhead lighting.
Move the subject away from white walls.
Use negative fill.
Keep the key directional.
Let part of the kitchen fall darker.
Do not light the entire room evenly.
Depth requires contrast.
Lighting a Dark Office or Wood Interior
Dark rooms create the opposite problem.
A small light on the subject may leave the background dead.
Instead of blasting more light everywhere, choose one feature.
Maybe:
Desk lamp.
Bookcase.
Wood beam.
Artwork.
Window.
Add a subtle background source.
Now the room has depth without becoming artificially bright.
Lighting Builder Interviews on Job Sites
Job sites have their own problems.
Open framing.
Temporary lighting.
Mixed daylight.
Large unfinished rooms.
Reflective materials.
Noise.
Safety.
Use the environment.
Position the builder where:
The work can be seen.
The background is organized.
Crew activity will not constantly interrupt.
The sun will remain manageable.
Keep the equipment footprint small.
One strong soft key and a thoughtful background usually beats building a studio in the middle of an active construction site.
Lighting Agents in Occupied Homes
Occupied homes require restraint.
You may have limited space.
Furniture cannot all be moved.
The seller is present.
Children or pets may be nearby.
Do not arrive expecting a twenty-minute lighting build.
Choose:
Good room.
Good chair.
Window.
Compact key.
Clean background.
Work efficiently.
The production should leave the property in the same condition you found it.
Two-Camera Interviews
A second camera gives the editor flexibility.
Common setup:
Camera A — medium.
Camera B — tighter.
Keep the cameras far enough apart that the angle change feels intentional.
Watch background intersections from both cameras.
A lamp that looks beautiful behind Camera A may appear to grow from the subject’s ear on Camera B.
Set both frames before finalizing the lights.
Two-Person Interviews
Two people create a wider lighting problem.
Options include:
One large soft source covering both.
Separate keys.
One subject slightly forward.
Two-camera cross coverage.
Keep the lighting consistent enough that the pair feels like they belong in the same environment.
Watch nose direction.
Eye line.
Chair height.
Spacing.
Do not spread them so far apart that the composition feels like a conference panel.
Portraits From the Same Setup
Once the interview ends, you already have:
Subject dressed.
Lighting built.
Camera ready.
Property background selected.
Take still portraits.
You can often create:
Horizontal environmental portrait.
Vertical portrait.
Closer head-and-shoulders image.
Social profile image.
Website banner image.
That adds useful client value with very little extra setup time.
Continuous lighting makes the transition especially easy because the scene already looks the way it looked on video.
Seated vs. Standing Portraits
Seated works well for:
Interviews.
Long conversations.
Relaxed builder stories.
Formal executive content.
Standing can feel:
More energetic.
More direct.
More natural for an agent.
If the client will speak for several minutes, seated is often easier.
For a thirty-second listing introduction, standing may suit the energy better.
Posing and Body Position
Avoid placing the torso completely square to camera by default.
A slight body angle can create shape.
Then bring the face back toward:
Lens.
or:
Interviewer.
Keep shoulders relaxed.
Do not over-pose someone who needs to speak naturally.
The person should still be able to breathe, gesture, and think.
Hands and Gestures
Some clients naturally gesture.
Let them.
Others freeze their hands because a camera is present.
For seated interviews, giving the hands somewhere comfortable to rest can help.
Lap.
Chair arms.
Table edge.
Avoid instructing the subject to hold an unnatural hand pose for a ten-minute interview.
Natural movement looks better.
Sound and Lighting Need to Cooperate
A beautiful lighting setup is useless if the softbox blocks the boom microphone.
Coordinate the frame around:
Key light.
Boom.
Lavalier.
Camera.
Eye line.
The microphone needs to remain close enough for good audio while staying outside the shot.
If you are working alone, finish the lighting before finalizing the boom position, then check again through the viewfinder.
Cable and Stand Safety
Real homes are not closed film sets.
People walk through them.
Children.
Agents.
Clients.
Homeowners.
Crew.
Use stable stands.
Sandbag where appropriate.
Route cables away from traffic.
Avoid blocking exits.
Keep hot or heavy fixtures away from delicate surfaces.
Protect floors.
The more expensive the home, the less impressed the client will be by a complicated setup that damages something.
A 15-Minute Interview Setup
When time is limited, I use a simple sequence.
Minute 1–3: Find the Frame
Choose:
Background.
Chair.
Camera angle.
Minute 4–6: Place Subject and Camera
Set:
Camera height.
Focal length.
Eye line.
Composition.
Minute 7–10: Build the Key
Use:
Window.
or:
Soft LED.
Fix glasses reflections.
Minute 11–12: Shape the Background
Turn practicals on or off.
Move one distracting object.
Add a background light only if needed.
Minute 13–14: Audio
Mic the subject.
Check levels.
Minute 15: Final Review
Check:
Focus.
Exposure.
White balance.
Frame.
Glasses.
Background.
Microphone.
Record.
That workflow is enough for a large percentage of real estate interviews.
A Minimal Equipment Kit
You can cover many interviews with:
Camera.
Tripod.
Normal-to-short-telephoto lens.
One compact bi-color LED.
Soft modifier.
Light stand.
Reflector or black cloth.
Audio kit.
Extension cable.
Sandbag.
That fits in a manageable vehicle loadout.
A Standard Professional Kit
A more complete kit might include:
Two or three continuous LEDs.
Large softbox.
Grid.
Compact softbox.
Small background or edge light.
Reflector.
Negative-fill material.
Flags.
C-stand or boom.
Extension power.
V-mount batteries.
Sandbags.
Clamps.
Audio kit.
The point of carrying more equipment is flexibility.
Do not feel obligated to unload all of it.
Common Interview Lighting Mistakes
Subject Against the Wall
The image feels flat and shadows become harder to control.
Wide-Angle Lens Too Close to the Face
Facial proportions begin to distort.
Camera Too Low
The interview can feel unnecessarily imposing.
Camera Too High
The speaker may appear diminished.
Bright Window Directly Behind the Head
The viewer’s eye goes to the background first.
Lighting the Entire Room
The image loses depth.
Key Light Directly Above Camera
The face becomes flat.
Modifier Too Far Away
A potentially soft light behaves like a smaller, harder source.
Softbox Reflection in Glasses
Solve it before recording.
Overhead Lights Left On Automatically
Ceiling lighting may create poor face shadows and mixed color.
Automatic White Balance
Color can drift during the interview.
Practical Lamps Blown Out
Background lights become distracting white shapes.
Too Much Hair Light
The subject develops a bright artificial outline.
Background Light With No Motivation
The room starts to look like a set.
Every Light Set to the Same Brightness
Visual hierarchy disappears.
No Vertical-Crop Planning
The social version cuts off the subject or architecture.
Two Cameras With Different White Balance
The editor spends the entire interview matching color.
Great Picture, Bad Audio
The finished interview still feels amateur.
Complicated Setup in an Occupied Home
Production becomes slower and riskier than the job requires.
Common Mistake
Photographers often try to improve an interview by adding another light. Before adding anything, move the subject, move the camera, move the key, or turn off an existing room light. Positioning solves more interview problems than equipment.
Frequently Asked Questions
How many lights do I need for a real estate interview?
One good soft key is enough for many interviews.
The property itself may provide window fill, practical lighting, and background depth.
Where should I put the key light?
A useful starting point is about 30–45 degrees off camera and slightly above the subject’s eyes. Adjust based on the subject’s face, glasses, room, and desired contrast.
How close should the softbox be?
Generally close enough to remain a large apparent source and create soft light, while staying outside the frame and allowing room for the subject and microphone.
Should the light be above the subject?
Usually slightly above eye level works well.
Avoid extreme top lighting that creates deep eye sockets.
Should I use a window instead of a light?
If the window produces beautiful and stable light, absolutely.
Artificial lighting becomes useful when you need more control or consistency.
Should the window be behind the subject?
It can be, especially if the key is strong enough to balance the face. A side window is often easier to use.
Should I turn off the ceiling lights?
Test both ways.
I frequently turn them off because they can create unattractive shadows and mixed color.
Keep them when they help the property feel natural.
What color temperature should I use?
Match the dominant environment or choose a deliberate contrast.
A daylight-facing room often works well with a daylight-balanced key and warmer practical lights behind the subject.
Should I use auto white balance?
I prefer a fixed white balance for interviews so the color does not shift while the person speaks.
What lens should I use?
A normal or short-telephoto perspective works well for most talking-head interviews.
Use a wider lens when you want the property to play a larger role, but maintain enough camera distance to avoid unflattering facial distortion.
Is 35mm too wide?
Not necessarily.
It can be excellent for environmental portraits and wider interview frames.
Pay attention to camera distance and edge distortion.
Is 85mm too tight?
It may be difficult inside smaller homes.
Use whatever focal length gives you a natural face and enough environment for the story.
Where should the camera be relative to the subject’s eyes?
Eye level is a dependable starting point for seated interviews.
Small adjustments can be made intentionally from there.
Should the agent look directly at the camera?
For direct introductions and social content, yes.
For documentary-style interviews and testimonials, an off-camera interviewer often feels more natural.
Where should the interviewer stand?
Close to the lens so the subject’s eye line remains connected to the viewer.
How far should the subject sit from the background?
Create as much useful separation as the room allows.
Even a few feet can dramatically improve depth.
How do I make a white kitchen look less flat?
Create direction.
Use a soft key from one side.
Turn off unnecessary room lighting.
Add negative fill.
Let part of the background fall darker.
How do I light a dark wood room?
Light the subject cleanly, then add a small amount of background illumination to one useful feature rather than flooding the whole room.
How do I stop a softbox from reflecting in glasses?
Try raising it, moving it sideways, feathering it, changing the subject’s head angle, or adjusting the camera slightly.
Should I use a hair light?
When the subject needs separation from the background.
Keep it subtle.
Do I need a fill light?
Often no.
Natural room bounce may already create plenty of fill.
What is negative fill?
A dark surface placed near the subject to absorb bounced light and create more contrast on the shadow side of the face.
Should I expose for the windows or the face?
The face is the priority.
Balance the window as far as practical using your key, camera placement, exposure, timing, or background choice.
Should the background be darker than the subject?
Often slightly darker works well because it helps the subject separate.
There is no requirement that every interview follow that look.
Can I use practical lamps?
Yes. They can add warmth and depth.
Control brightness and placement so they support the frame.
Should every practical lamp be on?
No.
Turn on only the fixtures that improve the composition.
How do I shoot an interview in a small bedroom or office?
Use a compact source, place the camera as far back as practical, move the subject away from the nearest wall, and simplify the background.
How do I light an interview on a construction site?
Keep the setup small.
Find a clean background that communicates the project, use one controlled key, and prioritize crew safety and sound.
What if sunlight changes during the interview?
Artificial key lighting can keep the face stable.
You can also position the subject where direct sun changes affect the background less dramatically.
Should I use continuous LED or flash?
Use continuous lighting for video interviews.
It allows you to see the result while recording and can also be used for still portraits afterward.
How bright should the background be?
Bright enough to contain visible detail and depth.
Avoid competing with the face.
Should the background be blurred?
Some separation helps, but the property should often remain recognizable.
Real estate interviews benefit from showing where the person is.
Should I shoot wide open?
You can, but leave enough depth of field that normal subject movement does not constantly push the eyes out of focus.
Should I use two cameras?
Two cameras make longer interviews easier to edit and give you a natural way to hide cuts.
They add setup time and require careful matching.
How should I frame the second camera?
Usually tighter or at a meaningfully different angle.
Avoid two nearly identical frames.
Should both cameras have the same white balance?
Yes, unless you have a deliberate reason to do otherwise.
Matching cameras saves significant editing time.
Should I plan for vertical video during the interview?
Yes when social delivery is expected.
Keep important composition near the center or record a dedicated vertical version.
Can I shoot portraits after the interview?
Yes. This is one of the most efficient times to capture agent or builder portraits because the lighting, background, and subject are already prepared.
Should a portrait use the same camera angle as the interview?
It can.
You may also reposition the camera slightly, tighten the frame, or have the subject stand.
How much gear should I bring into an occupied home?
Bring enough to solve likely problems.
Keep the active setup as small as the job allows.
What should I buy first for interview lighting?
A dependable continuous light and a good soft modifier provide more value than a collection of small specialty fixtures.
Do I need RGB lights?
No.
Bi-color white light handles the majority of professional real estate interviews.
RGB becomes useful for branded or stylized background accents.
Should interview lighting look cinematic?
It should look intentional, flattering, and appropriate to the client.
A dramatic film look can be useful for some builders or luxury brands.
A straightforward agent interview may benefit from a cleaner and simpler treatment.
What is the fastest way to improve my interview footage?
Improve the room choice and key-light position.
Those two decisions change almost everything else.
Recommended REPT Course Lessons
Episode 2 — Required Equipment and Software
Interview production adds continuous lights, modifiers, stands, batteries, audio gear, and safety equipment to the normal property-media kit.
Episode 3 — Exterior Photography Workflow
Exterior-light awareness carries directly into video. Understanding sun direction and changing daylight makes window-backed interviews and outdoor builder content much easier.
Episode 4 — Interior Photography Workflow
Strong interior photographers already understand perspective, room depth, leading lines, window balance, practical lighting, and visual clutter. Interview composition applies those same instincts to a person inside the space.
Episodes 5–8 — Editing Workflow
Consistent white balance, matched cameras, clean exposure, and controlled lighting reduce correction work later and make interview edits much easier.
For the complete training path through property photography, video, editing, client work, and professional real estate media production:
Real Estate Photography Training Course & Products
Continue Your REPT Training
Interview lighting becomes easier when your normal property fundamentals are already strong.
You know how to read a room.
You understand window direction.
You notice clutter.
You recognize architectural lines.
Now you are adding a person to the composition.
Free REPT First Listing Starter Kit
If you are preparing for one of your first property assignments, focus first on a reliable field workflow.
The Free REPT First Listing Starter Kit is the best next step for building that foundation:
Free REPT First Listing Starter Kit
Complete Real Estate Photography Training
For the deeper path through equipment, interiors, exteriors, editing, video, client production, and building a professional real estate media business:
Real Estate Photography Training Course & Products
Explore the REPT Knowledge Base
Continue through the connected photography, video, audio, editing, business, and client-service chapters:
Visit Real Estate Photography Training
Explore current REPT training resources and industry analysis:
Real Estate Photography Training
Follow Malachi on Instagram
See current real estate photography, video work, lighting examples, editing observations, and field notes:
Malachi Gobart — Real Estate Photography
Related Articles
Continue through the REPT Knowledge Base for connected chapters covering:
• Audio Production for Real Estate Video
• Voiceover and On-Camera Presentation for Real Estate Video
• Real Estate Video Sound Design and Music Editing
• Real Estate Video Tours and Short-Form Content Creation
• Video Editing for Real Estate Media
• Agent Social-Media Content
• Builder and Brokerage Media Strategy
• Equipment and Software for Real Estate Media
Explore the REPT Knowledge Base
Final Takeaway
Interview lighting becomes much easier when you stop treating the room as an obstacle.
Real estate media gives us an advantage.
We are usually standing inside a visually interesting location already.
There are windows.
Architecture.
Furniture.
Depth.
Materials.
Practical lighting.
The property can do a large part of the work.
I usually begin by walking around with the camera before I unload every light.
Find the room.
Find the angle.
Move the chair.
Look at the window.
Decide what should be behind the person.
Then build only the lighting the frame still needs.
Most of the time, that means one soft key.
Sometimes the window is already the key.
Sometimes a white wall is already the fill.
Sometimes the lamp behind the subject gives you the background separation.
A second or third fixture should solve a visible problem.
That approach matters on real estate jobs because speed matters.
We are often filming in:
Occupied houses.
Model homes.
Construction sites.
Client offices.
Homes that need to remain clean.
The interview setup has to coexist with the property.
There is also a larger creative question.
A builder interview should still feel like the builder.
An agent should still feel like the agent.
The lighting should give them shape and confidence while leaving enough of the real environment visible to support what they are talking about.
You rarely need to make the living room look like a soundstage.
You need to find the strongest version of the living room that was already there.
Then place the person inside it deliberately.
The technical order I use is simple.
Background.
Subject.
Camera.
Key.
Everything after that earns its place.
That sequence keeps the interview connected to the property and prevents the gear from becoming the production.
Sources
• B&H — Three Interview Lighting Setups to Use in Any Situation — published September 15, 2025.
• Westcott University — Cinematic Lighting for Documentary Interviews — published October 13, 2025.
• Westcott University — Lighting Breakdown: How to Film a Corporate Video — published May 9, 2025.
• Aputure — “Every Shoot Is a Puzzle”: A Guide to Videography Lighting With Tom Shaw — published May 6, 2026.
Comments ()