

I used to think coloring was just about filling in spaces—grab a pencil, stay mostly inside the lines, and call it a masterpiece! Like a Picasso in progress, but with fewer rules and more enthusiasm. Unless, of course, you were five years old and thought coloring outside the lines was a revolutionary artistic statement. But then I wondered, why do some coloring pages look smooth, rich, and almost professional, while mine resembled a five-year-old’s fridge art? (No offense to five-year-olds—some of them are very talented.) The secret? Technique.
If you’ve ever wanted to elevate your coloring skills, these 10 techniques will help transform your artwork from simple to stunning. Whether you're an occasional colorist or aiming to create frame-worthy masterpieces, these tips will equip you with the ability to blend, shade, and add texture like a pro.
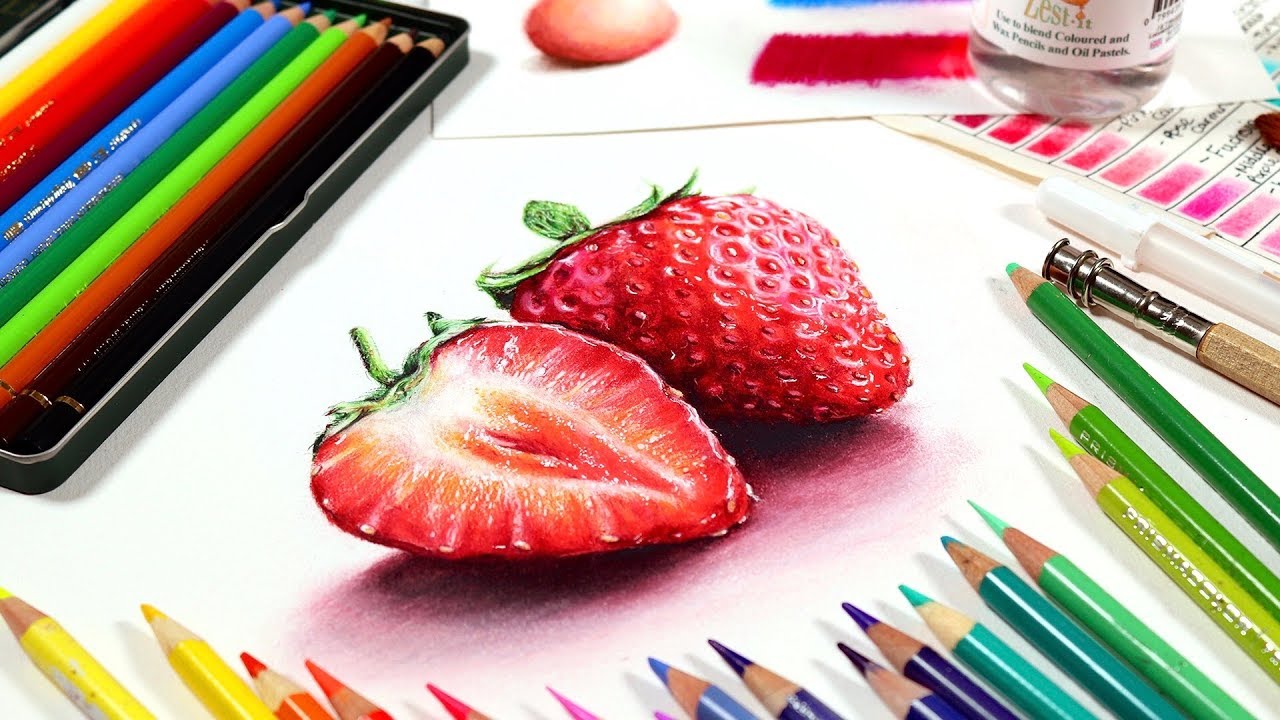
1. Layering: Build Up the Color
Instead of pressing hard for instant color, build up layers gradually. Pressing too hard can make your artwork look like you were in an arm-wrestling match with your colored pencils—and lost. Pressing too hard, too soon, can lead to waxy buildup, snapped pencils, and a personal vendetta against your art supplies. Start with light strokes, then deepen the tone with additional layers. This prevents streaks and allows for smoother blending.
2. Blending: Smooth Color Transitions
Want smooth shading that doesn’t look like you handed your colored pencils to a toddler? Try blending colors using:
✔ A colorless blender pencil – Smooths out transitions effortlessly. ✔ Cotton swabs or tissues – Soften hard edges for a dreamy look. ✔ A white or lighter-colored pencil – Fades one color into another for subtle shifts.
3. Burnishing: The Polished Look
Press firmly with a white or transparent pencil over your layers for a sleek, almost painted look. Think of it as giving your colors a spa day—they come out smooth, glowing, and refreshed. This process “burnishes” the pigment into the paper, creating a smooth, waxy finish.
4. Hatching & Cross-Hatching: Textured Effects
Instead of solid colors, use short, parallel lines (hatching) or intersecting lines (cross-hatching) to create shading, movement, or even a woven effect. Think of it as giving your artwork a tiny pinstripe suit—like a detective noir sketch, full of mystery and sophistication.
5. Stippling: Dot Your Way to Depth
Instead of shading with strokes, use tiny dots to create color density. The closer the dots, the darker the shade. Perfect for subtle skin tones or a distinctive, artistic touch!
6. Scumbling: Circular Motion for Smooth Blending
Instead of using straight strokes, apply color with small circular motions. This maintains an even texture and prevents visible pencil lines.
7. Glazing: Add Light, Transparent Layers
Use a very gentle touch to layer different colors softly on top of each other. Pressing too hard, too soon, can turn your peaceful sunset sky into a wildfire. Think of layering a delicate puff pastry—except with less butter and more patience. This technique yields subtle color shifts and a more natural, seamless appearance.
8. Using Solvents: Dissolve for a Painted Effect
Odorless mineral spirits or rubbing alcohol can break down the wax in colored pencils, making them resemble paint. Bonus: Your coloring might look innocent, but your art table will tell a different story, like a crime scene of misplaced creativity. Use a small brush or cotton swab to blend.
9. Mixing Mediums: Explore Beyond Colored Pencils
Combine colored pencils with:
✔ Watercolor washes – For a soft, blended background. ✔ Ink or gel pens – To add crisp details and bold outlines. ✔ Pastels – For a dreamy, smudged effect with extra texture.
10. Highlighting & Shadows: Add Depth & Dimension
Use a white gel pen or eraser to lift highlights. Add deeper shadows with complementary dark colors (not just black) for a more realistic effect.
Best Tools for These Techniques
To achieve the best results, ensure you're using the correct tools:
✔ Blender pencils and burnishers – Help smooth transitions and create a polished look. ✔ Tissues and cotton swabs – Great for soft blending without streaks. Also useful if your coloring session gets emotional (no judgment). ✔ High-quality paper – Prevents wax buildup and allows for multiple layers. ✔ Erasers and white gel pens – Perfect for highlights and corrections. Also ideal for turning ‘strategic mistakes’ into ‘intentional artistic choices.’
Try These Fun Coloring Challenges
If you genuinely want to test these techniques, try these:
Before & After Challenge – Color a simple design, use these techniques, and compare the results! Two-Color Challenge – Use only two colors and add depth with layering and shading. Texture Experiment – Apply different shading techniques to make an object (wood, metal, fur) look realistic.
Final Thoughts: Your Coloring Skills Just Leveled Up
Coloring is more than just filling in spaces—it’s a creative escape, a stress reliever, and a reason to set aside your to-do list for a moment. And hey, if all else fails, you can always label your work as abstract and very avant-garde. With the proper techniques, you can add depth, texture, and life to every page. So, grab your pencils, choose a technique (or five), and start experimenting!
Why settle for ordinary pages when you can create something spectacular? Grab one of our high-quality coloring books and bring your creativity to life today!
Ready to test out your coloring techniques. Grab one of our high-quality coloring books at https://payhip.com/inkylinesandwords, and bring your artwork to life.
Comments ()