Introduction
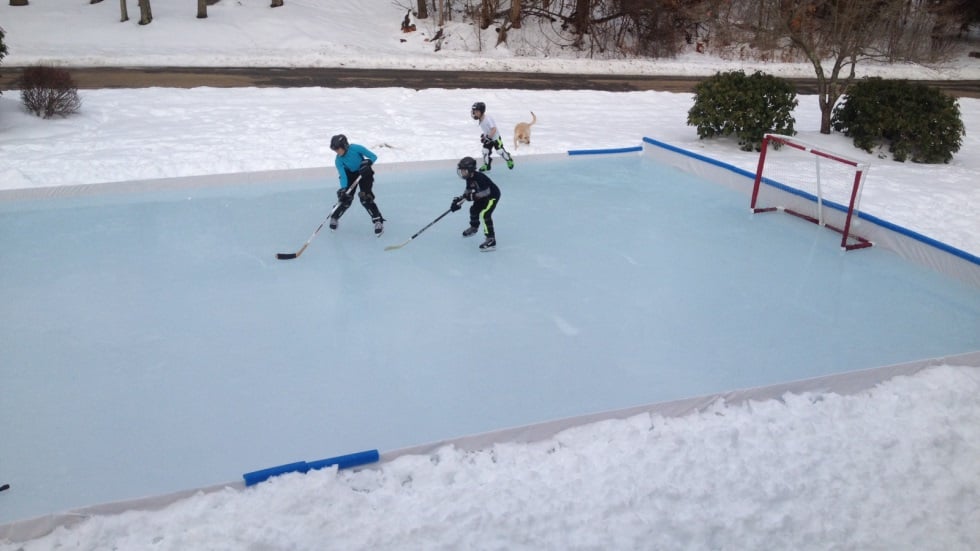
Stepping into your backyard and gliding onto your own ice rink is a dream for many. A personal skating space offers convenience, endless fun, and an affordable option compared to public rinks. Whether for casual skating, hockey practice, or family entertainment, this project is a fantastic way to enjoy the colder months.
One of the simplest and most affordable ways to construct a backyard ice rink is by using a tarp as the base. This guide provides detailed instructions on choosing the right location, assembling a sturdy frame, and maintaining a smooth ice surface all winter long.
Materials Required
Before starting, gather the necessary supplies to streamline the setup process. Here’s what you’ll need:
- Durable, waterproof tarp (polyethylene) poly plastic tarp or heavy duty vinyl tarp material)
- Wooden planks (2x8 or 2x10 boards to form the perimeter)
- Screws, brackets, or stakes (to hold the wooden boards together)
- Flat ground (essential for uniform ice thickness)
- Garden hose (to fill the rink)
- Sustained cold temperatures (ideally below 25°F)
- Bricks, clamps, or sandbags (to keep the tarp secure)
- Shovel or ice resurfacer (to maintain the surface)
- Outdoor lighting (optional) (for extended skating hours)
Step 1: Select the Best Location
Finding the right spot is the foundation for a successful ice rink. Consider these factors:
- Flat ground is crucial: A sloped area results in uneven ice.
- Avoid trees overhead: Leaves, branches, and debris will affect ice quality.
- Choose a size that fits your yard: A compact option is 20x40 feet, while larger rinks might be 40x60 feet.
- Leave space around the perimeter: This allows skaters to move freely and prevents damage to fences or structures.
Once the location is chosen, clear the area of obstacles, debris, and anything that could damage the tarp.
Step 2: Build a Solid Frame
The wooden frame serves as a boundary to contain the water. Follow these steps:
- Arrange the wooden boards based on your desired rink size.
- Join the boards at the corners using screws, brackets, or stakes for stability.
- Ensure the frame is level by making adjustments as needed.
- Reinforce the structure if planning for multiple seasons.
A properly built frame is essential to keep the tarp in place and support the freezing water.
Step 3: Install the Tarp
The tarp acts as a liner, preventing water from soaking into the ground. Follow these guidelines:
- Spread the tarp inside the frame, ensuring full coverage.
- Avoid punctures: Be careful when handling the material.
- Secure the tarp edges using bricks, clamps, or sandbags.
- Smooth out wrinkles to prevent ice inconsistencies.
A well-installed tarp keeps water contained and helps create a uniform ice layer.
Step 4: Add Water and Freeze
Once the frame and tarp are secured, it’s time to fill the rink:
- Wait for a cold stretch where temperatures remain below freezing.
- Use a garden hose to fill the rink gradually.
- Let each layer freeze before adding more water.
- Avoid walking on thin ice until fully frozen.
Patience is key to achieving high-quality ice that is safe and smooth for skating.
Step 5: Keep the Ice in Top Shape
Regular upkeep ensures a great skating experience. Here’s how to maintain the rink:
- Clear snow promptly to prevent rough patches.
- Resurface by spraying water in thin layers.
- Fill cracks with a snow-and-water mix to maintain a solid surface.
- Avoid salt or chemicals that could weaken the ice.
By staying on top of maintenance, your rink will remain smooth and safe all season.
Safety Considerations
Skating should be enjoyable and safe. Follow these precautions:
- Ensure ice is at least 2-3 inches thick before use.
- Supervise children to prevent accidents.
- Have emergency supplies on hand (first aid kit, flashlight, extra clothing).
- Encourage skaters to wear proper gear.
Taking safety seriously ensures everyone can enjoy the rink without unnecessary risks.
Enhance the Experience
Adding features can elevate your backyard rink. Consider these ideas:
- Install outdoor lighting for evening skating.
- Set up benches for putting on skates and taking breaks.
- Add hockey goals or cones for additional activities.
- Decorate the rink to make it more inviting.
Customizing your rink adds to the enjoyment and makes it more engaging for everyone.
Conclusion
Constructing a backyard ice rink is an exciting winter project. A well-planned rink provides endless entertainment, whether for casual skating or hockey practice. By selecting a suitable location, building a sturdy frame, properly securing the tarp, and maintaining the ice, you can enjoy your rink all season long.
Gather your skates, invite family and friends, and embrace the magic of winter right in your own yard. This DIY rink will become a seasonal tradition that brings joy year after year.

