
Embroidery is a timeless art form and a wonderful way to add a custom flourish to a variety of textiles. What’s more, learning how to embroider can be relatively easy if you follow a few basic tips and tricks. Read on for our comprehensive guide to embroidery for beginners.
What’s the difference between machine embroidery and hand embroidery?
The main difference between Hand and Machine Embroidery is the stitching process. Hand Embroidery allows for a variety of stitches, thread and fabrics. Every work is unique to the sewer who performed the embroidery. Machine embroidery is very uniform and each piece, if multiple items are stitched, is all identical.
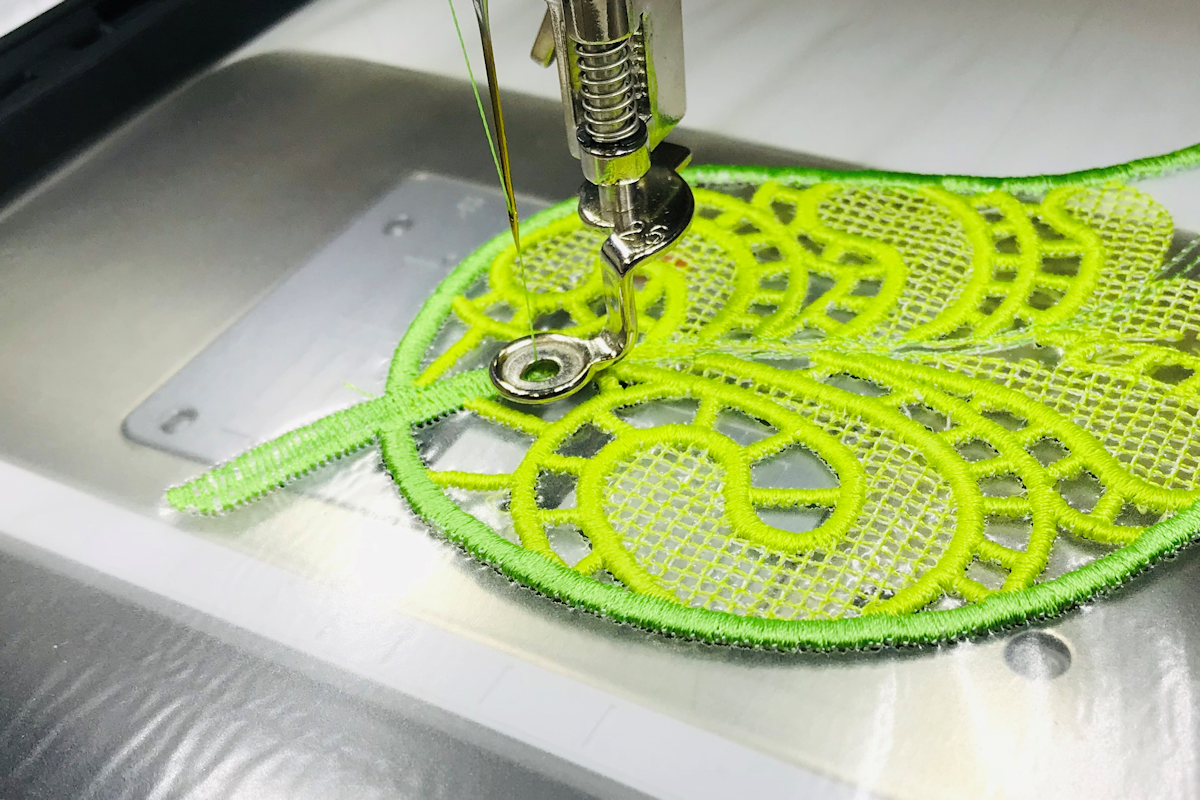
Machine Embroidery is computer generated. Pre-made patterns are imputed into a computer program that controls the stitching on the embroidery machine. All designs are uniform in their stitches and each project looks exactly the same. There is no variance for the stitchery’s passion of the art form. The design will be stitched just as the computer pattern dictates. Machine Embroidery cannot have threads divided as the Hand Embroidery needle artist can do with the hand projects. Threads are typically made of rayon, polyester or metallic threads are used and give an artificial look. Very seldom can the design be given a more dimensional look and this is due to the type of stitching that has to occur with Machine Embroidery. And finally, Machine Embroidery for the most part has very little “collective value” due to the fact that it is mass produced.
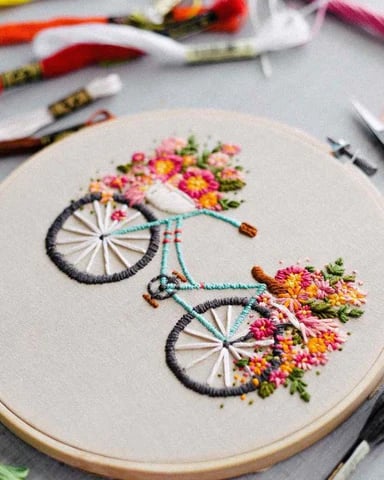
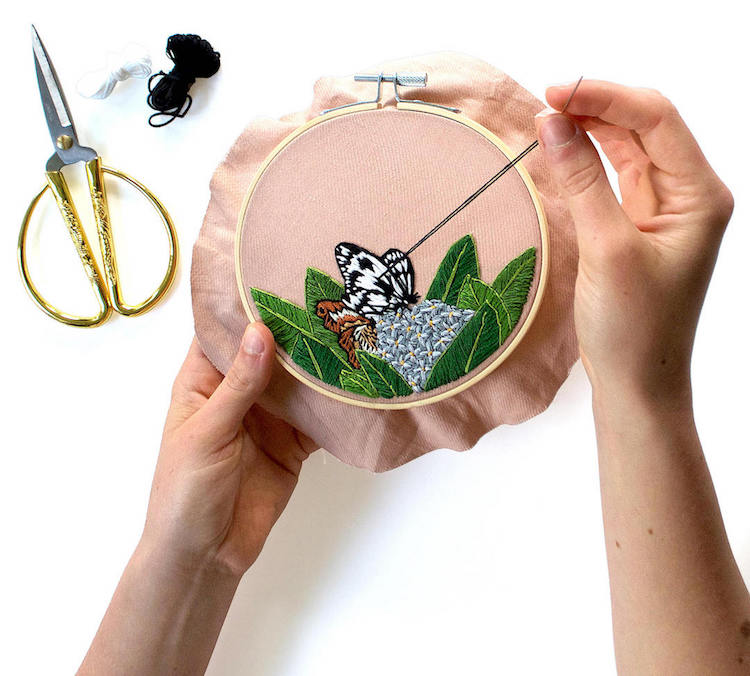
Hand embroidery begins by stretching the fabric on a hoop of either wood or plastic. The hoop size depends on what the sewer is comfortable with. The size of the hand embroidery needle and the thread choice are dependent on the type of Hand Embroidery chosen for the project. Along with needle and thread choice, the needle artist adds their own personal touch to their embroidery making the project “come alive”. Like anything that is a craft, it takes time and practice to perfect stitches, but if it is something one chooses to master, it brings great satisfaction to both the sewer and recipient. Each piece of Hand Embroidery is unique. Even if it is duplicated with the same pattern, it is the needle artist’s discretion that makes each piece a one of a kind work of art. Part of Hand Embroidery’s uniqueness is due to the types of threads used. The most often used threads are cotton or silk. These threads have wonderful smoothness and sheen to them, lending to the beautiful shading that is possible with certain Hand Embroidery stitches. More detail can be achieved because of the various thicknesses of the threads. And lastly, Hand Embroidery is a keepsake. It has “collective value” because it is time consuming and requires workmanship and artistry.
WHAT KIND OF EMBROIDERY MACHINE DO I NEED?
Obviously, a machine capable of machine embroidery is a necessity. Because machine embroidery has become so popular, most major manufactures include this function on many of their models. Purchase all sewing machines from a local, reputable dealer instead of buying a machine from a big-box store or online, where there is little to n support available after purchase. Reputable dealers offer educational classes about machine functions, properly maintain the machine at your request and often bring in knowledgeable instructors for inspirational project classes. This type of support is an invaluable bonus to your purchase.
The cost of an embroidery machine ranges from less than $500 to more than $10,000. Lower-priced machines limit the stitching size of a single design, but they don’t necessarily limit the embroidery quality.
- Cost: An embroidery-only machine with limited embroidery field size isn't hard to fit into most budgets, while a top-of-the-line combination sewing and embroidery machine is more of an investment. Machines are also available at every point in between. Visit a dealer to try a variety of machines so that you can choose one that fits your budget and includes features you want and need.
- Embroidery Size: In general, the embroidery fields on home machines start at 4" x 4" and increase to sizes that will accommodate an entire jacket back in one hooping. If you want just a taste of embroidery, the smaller embroidery fields like 4" x 4" and 5" x 7" will lower the machine's cost and may prove more versatile than you think as you learn to manipulate designs. It's important to know that hoop size and embroidery field are not necessarily the same. If your machine's field is 4" x 4", attaching a 6" x 10" hoop won't allow you to stitch larger designs—even if you can make the larger hoop fit onto the machine.
- Features: What sort of screen does the machine have? How easy is it to transfer designs to the machine for stitching? What can you do with designs in the machine: change the size, rotate, program multiple designs into the embroidery field for one hooping? Are accessories (other hoop sizes or computer software) or upgrades available to increase your capabilities?
- Training: What embroidery how to resources are available to you once you've made the purchase? Dealers may offer classes or individual instruction as part of the purchase price, while brands may also offer videos and online projects to help you discover all the features of your machine.
What supplies do I need to get started with programmable machine embroidery?
When it comes to embroidery basics, you’ll first need a machine that can read the embroidery designs and stitch them. You can choose between embroidery-only machines and those that combine both sewing and embroidery functions. (Combination machines also allow you to experiment with hand-guided embroidery.) The machine will come with an embroidery hoop or hoops that can be mounted on the machine.
Next, you'll need a selection of threads. Most machine embroidery designs have been digitized to stitch correctly with 40-weight machine embroidery threads. Don't switch to another thread weight when you're starting out (unless the design you've chosen specifies it); the stitches will either appear too far apart or overlap unattractively. Do invest in several colors of thread since buying a collection of colors is a simple way to start, and you can add other colors as you begin specific projects. Basic embroidery threads are usually polyester or rayon and come in a range of finishes from shiny to matte.
You'll also need bobbin thread. For the proper tension, digitized designs are stitched with a lightweight bobbin thread. The good news is, you'll only need white thread for your bobbin, regardless of the colors on the embroidery's right side, because the bobbin thread isn't visible from the front of the work. Add black bobbin thread to your supplies if you're embroidering on dark fabrics.
Begin with a machine needle designed for embroidery that is optimized to work with embroidery threads at high speed. Embroidery needles are available in sizes 11 and 14. The smaller (size 11) needle will work on most fabrics, but it's nice to have a size 14 needle available for heavy fabrics, or if you have problems with thread breakage at the needle.
One great advantage in embroidery by machine rather than by hand is that it looks great on almost any fabric. The secret lies in the unseen underlayer we refer to as stabilizer.
When you're learning how to do embroidery, the choices for embroidery stabilizers may seem daunting. To get started in embroidery, you can purchase just three: a tear-away, for embroidering on stable woven fabrics; a cut-away, to support embroidery throughout the life of a knit fabric; and water-soluble, to use as a topper on towels or as a base for freestanding lace designs.