How i did the end caps on my markers
Here is a small guide on how i did my end caps om my markers

Here is a small guide on how i did my end caps om my markers
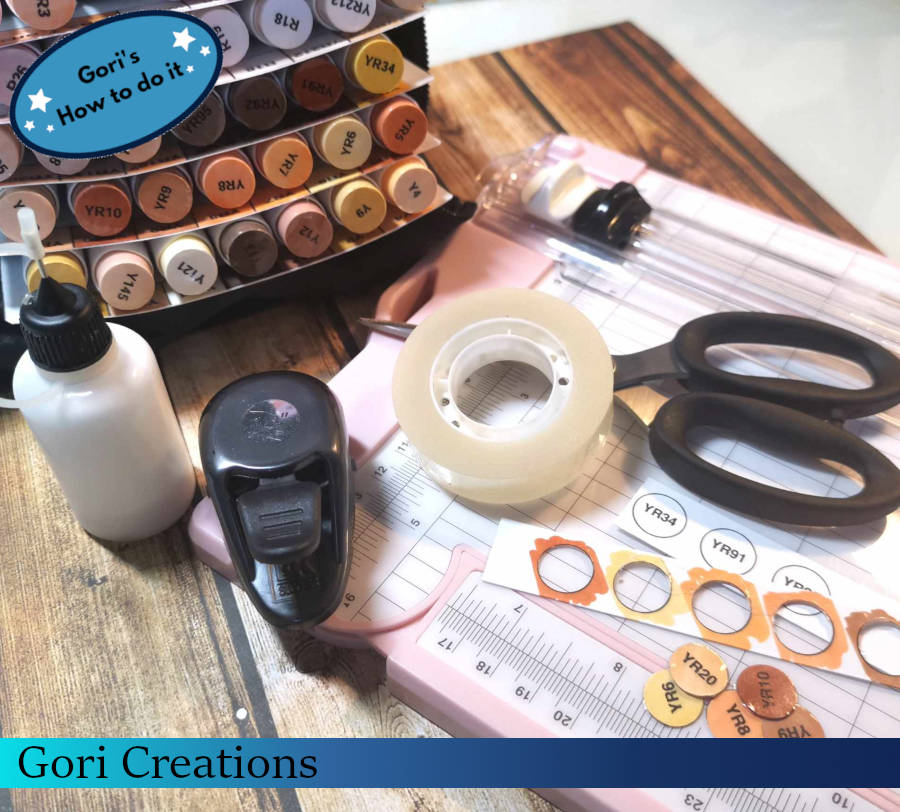
Let’s get everything ready for your creative project!
Here’s what you’ll need:
Cut or trim the paper into strips - this will make the whole process much easier.
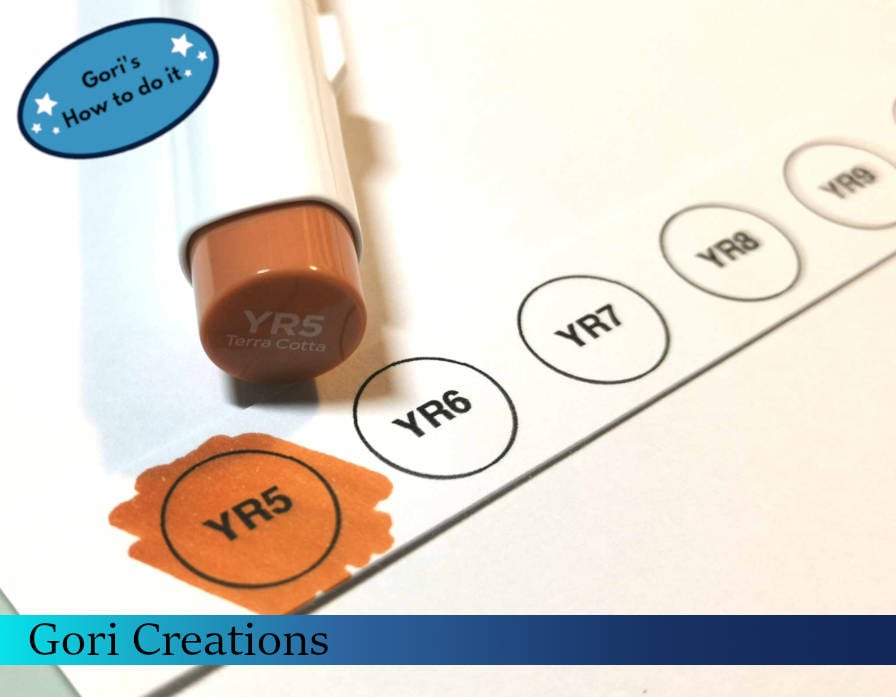
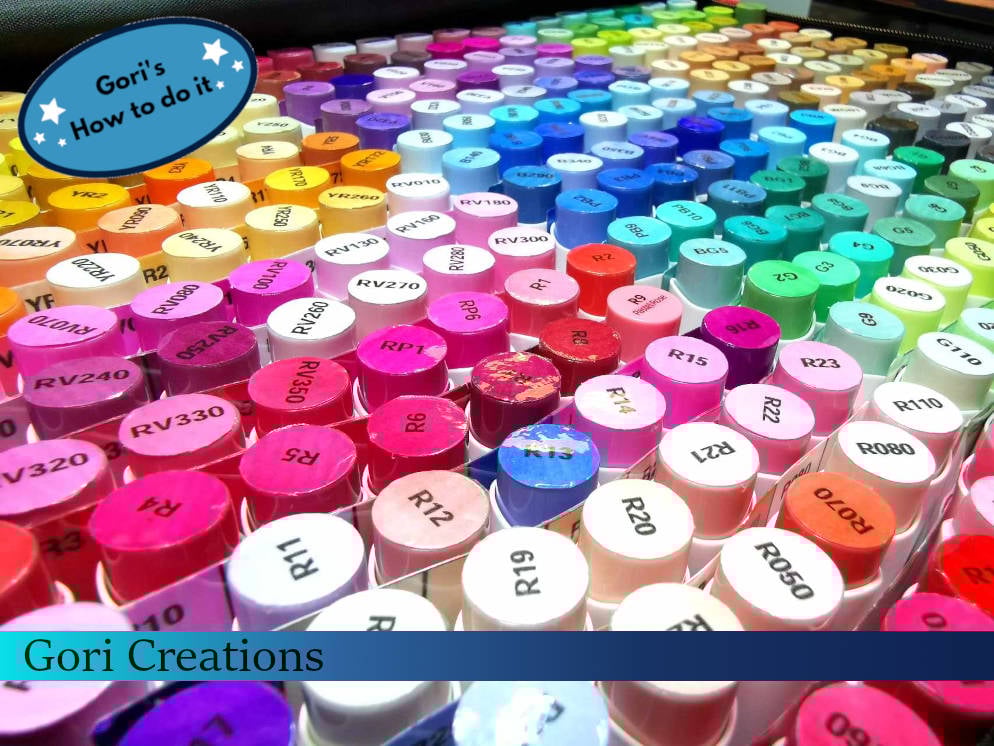
Now, color each circle with the shade that matches the code inside the circle.
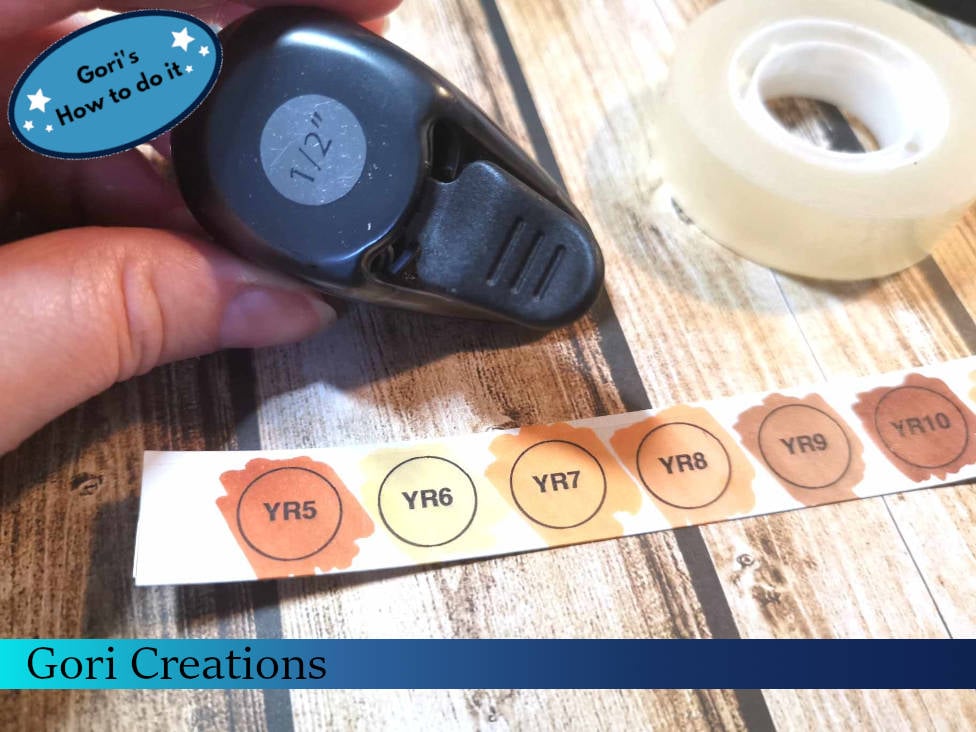
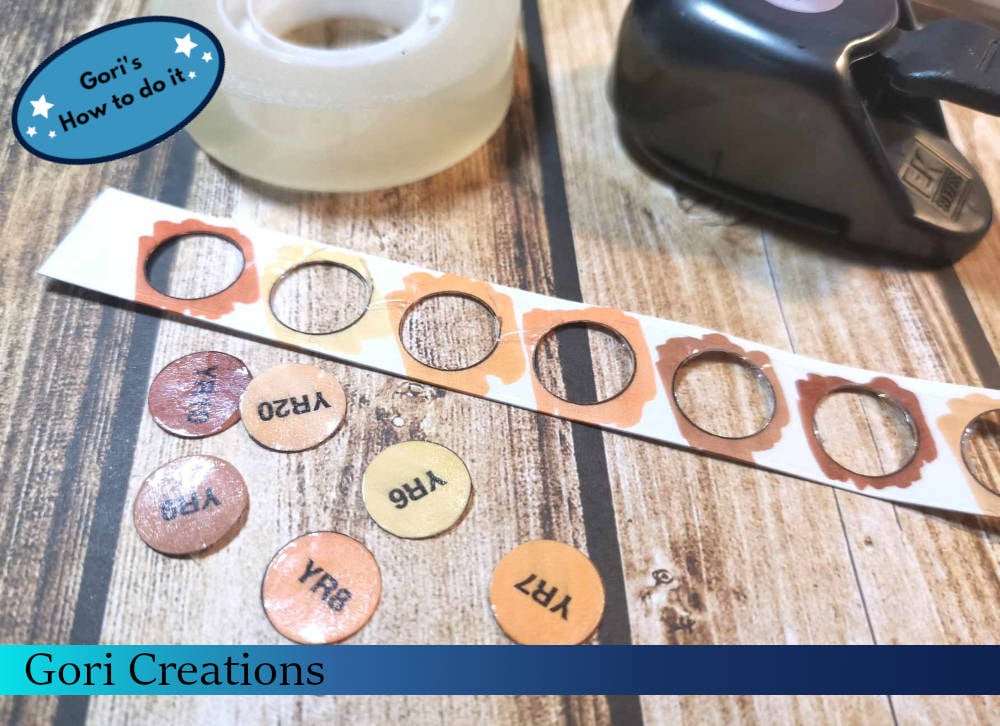
Once you've colored a row, apply clear tape over it for extra protection, then use your punch to cut out each circle, one by one.
Make sure to punch as precisely as possible for a clean, centered design in each circle - this will ensure a polished and professional look!
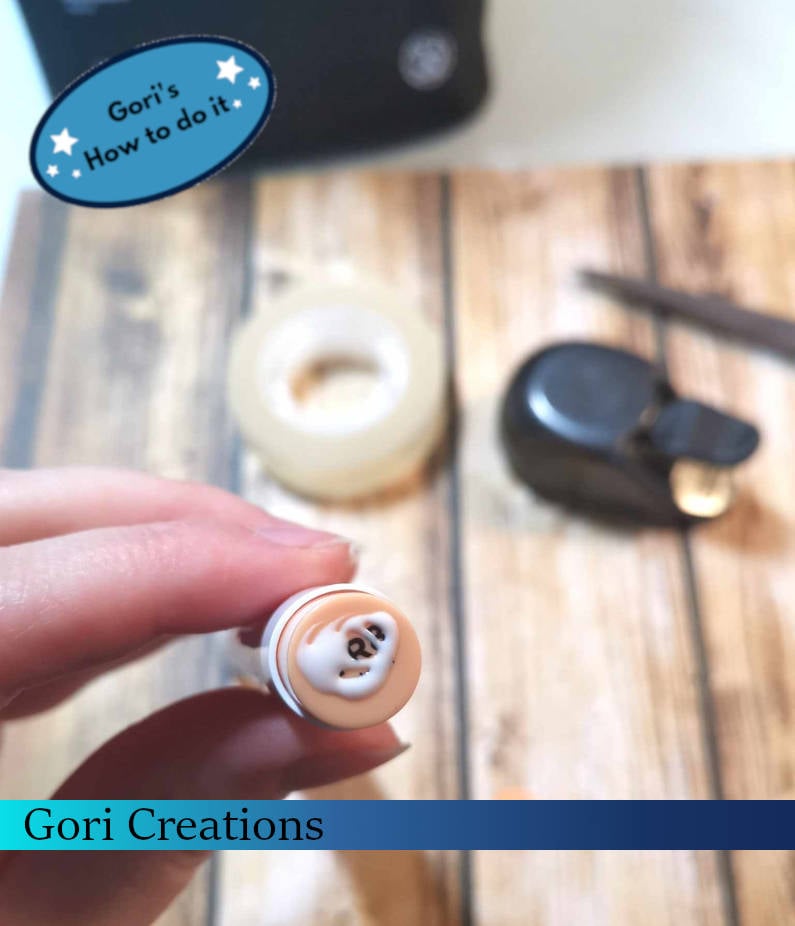
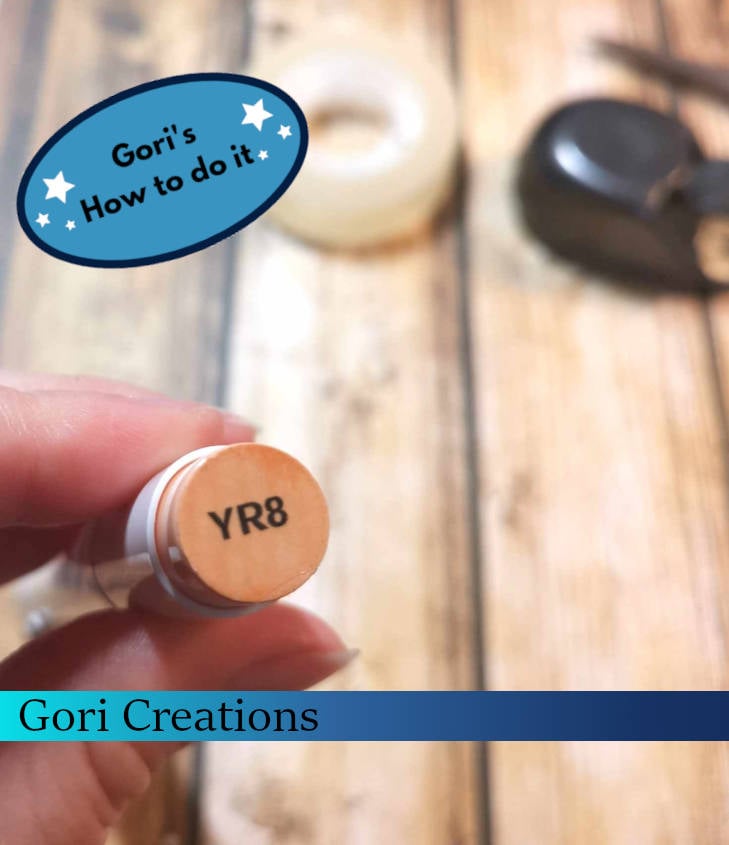
Now, take the marker that matches the color of the circle and apply a small amount of glue to the tip.
And then, attach the circle to the end of the marker, ensuring it’s securely in place.
Once the circle is attached, give it a moment to set and make sure it stays firmly in place. You now have a beautifully customized marker with a perfect color - coded end! Enjoy!