

The Good and the Beautiful just released their newly revised Language Arts Level 3 which you can get for free here. I’m quite surprised at how easy the download was compared before; however, printing may prove difficult especially the not-so-straightforward Spelling Practice Book.
👉🏼Click [coming soon] to watch the tutorial in YouTube👈🏼
After a day of geeking out, I finally figured how to easily print the practice book in a way that saves time, ink, and paper. Usually I print the cover pages (front and back) separately, but this time we will be printing them together with the rest. FYI, I use MacBook and Adobe Acrobat. Let’s begin…
👉🏼Watch how to print the readers here👈🏼
Under Pages to Print, select Pages. We will do it in batches because for some reason it doesn’t let me paste the entire series of numbers. Here are the pages to print:
1st batch
1,72,11,73,2,74,3,75,4,76,5,77,6,78,7,79,8,80,9,81,10,82,11,83
2nd batch
12,84,13,85,14,86,15,87,16,88,17,89,18,90,19,91,20,92,21,93,22,94,23,95
3rd batch
24,96,25,97,26,98,27,99,28,100,29,101,30,102,31,103,32,104,33,105,34,106,35,107
4th batch
36,108,37,109,38,110,39,111,40,112,41,113,42,114,43,115,44,116,45,117,46,118,47,119
5th batch
48,120,49,121,50,122,51,123,52,124,53,125,54,126,55,127,56,128,57,129,58,130,59,131
6th batch
60,132,61,133,62,134,63,135,64,136,65,137,66,138,67,139,68,11,69,11,70,11,71,140
Under Page Sizing & Handling, select Multiple. We will be printing 2 pages per sheet, so select Custom 1 by 2. Page order should be Horizontal.
Tick Print on both sides of paper and Flip on short edge. (If you don’t see this option, try clicking Printer next to Page Setup at the bottom of the printer dialogue box and look for Two-Sided Printing option.) Set orientation to Landscape.
As a good practice, click Advanced at the top of the dialogue box and tick Print as Image before hitting Print.
After that, print the next batch…
Here’s my printer dialogue box:
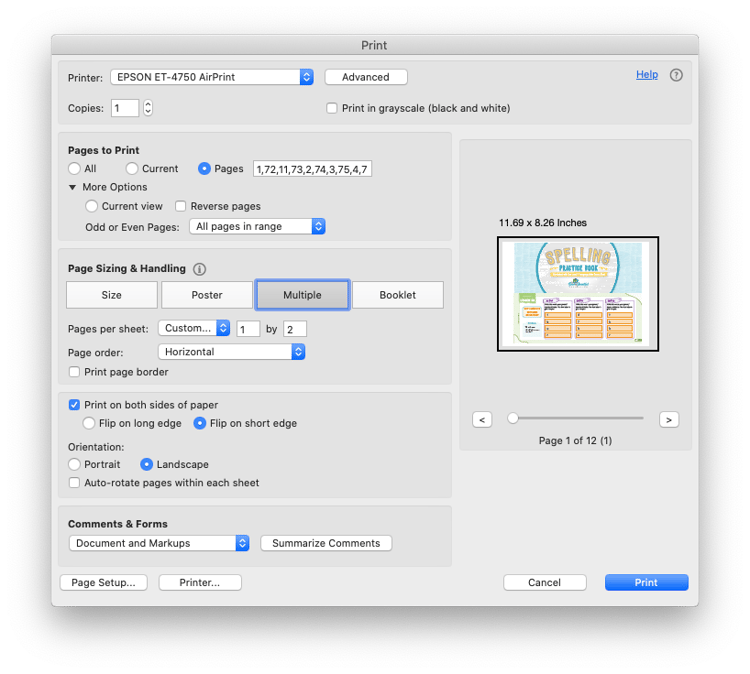
I printed using A4 size paper, so the white spaces around are wider than what I reckon would be on a US letter size.
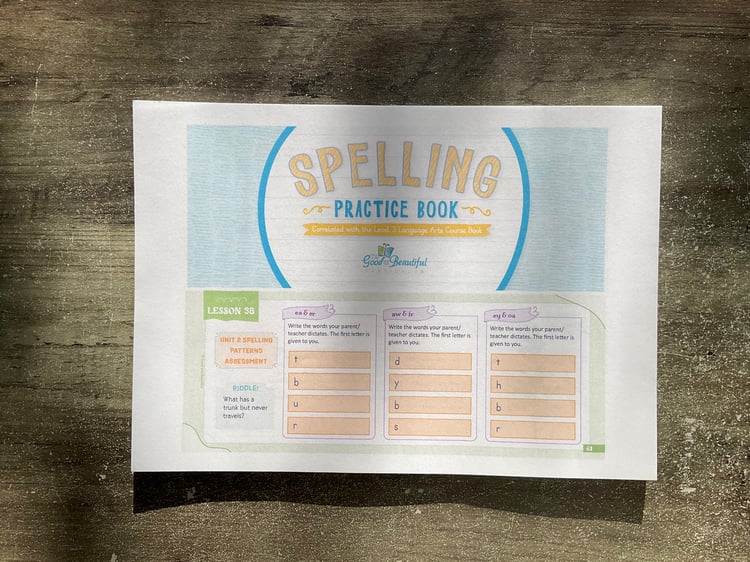
Next, cut across the middle as shown below:
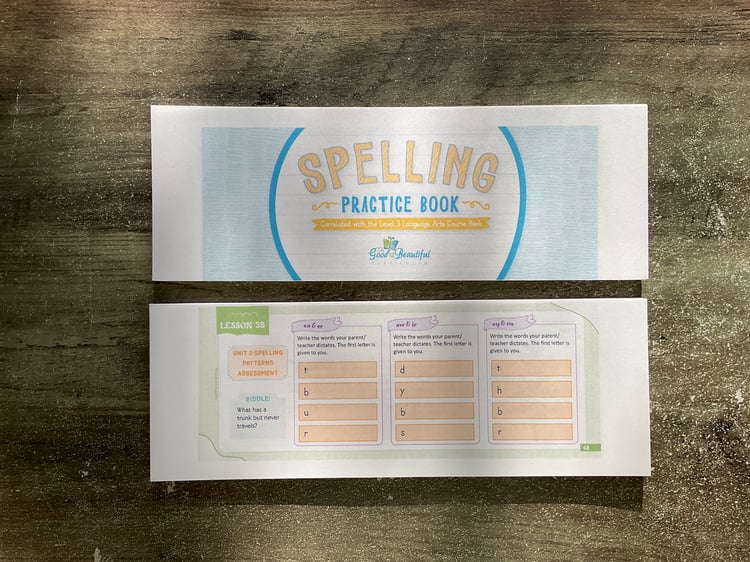
Then, place the top half over the bottom half. That’s it. Done!
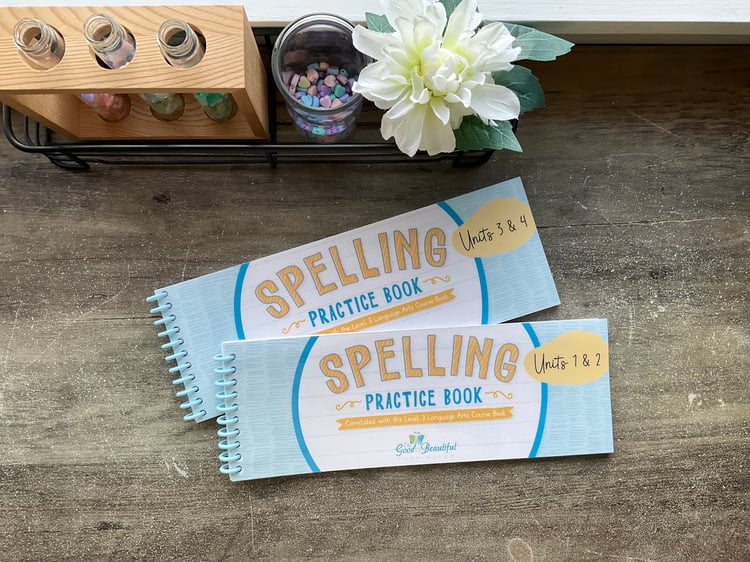
You can choose to laminate the front and back covers for added structure and bind however you like. But because the finished book was thicker than my binding coil, I ended up splitting it into 2 books with custom cover pages. (Download the cover pages that I made here.)
Hope this helps. Till next time. Have a joy-filled homeschooling!
🌟 Chat with us on 👉🏼 Messenger
🌟 Like our 👉🏼 Facebook Page
🌟 Subscribe to our 👉🏼 YouTube
🌟 Buy from our 👉🏼 Etsy Shop
Comments ()