

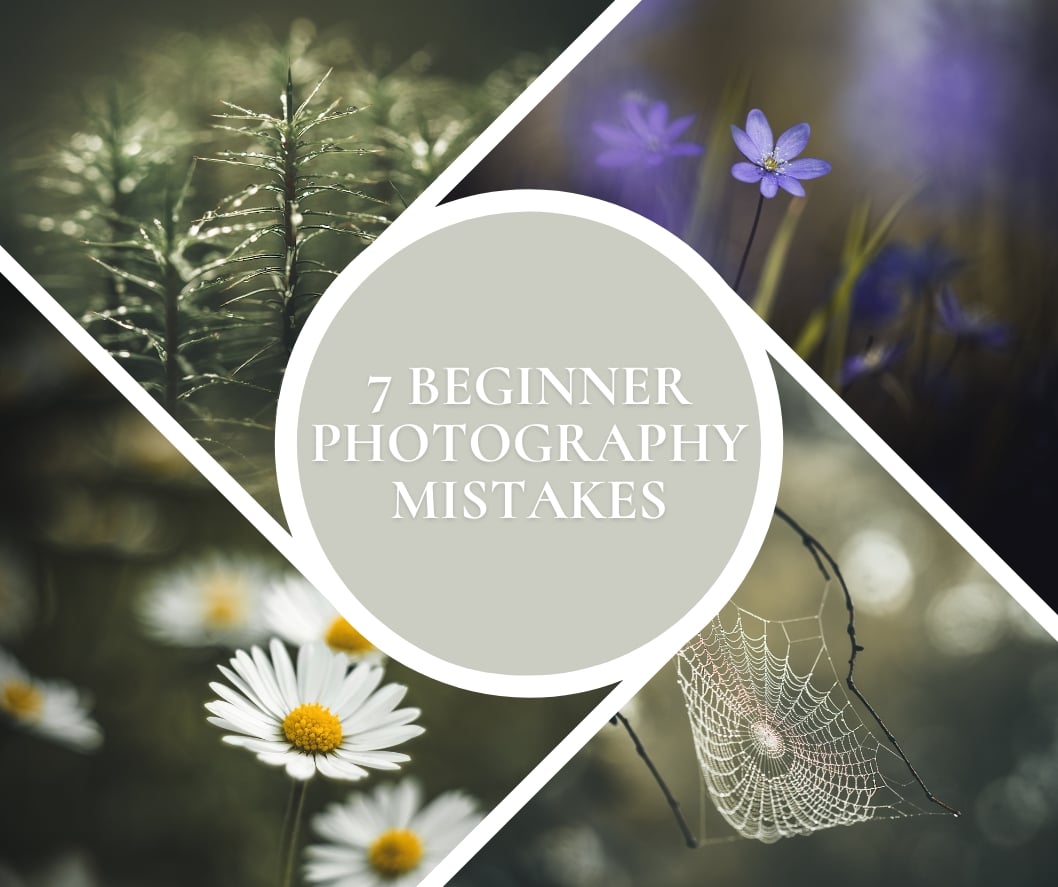
In this post, I’d like to address some of the most common mistakes I made when I was just starting out as a nature photographer. I’ll show you a few examples of what I used to do and how I do it now.
But first, I’d like to tell you how I got into photography in the first place.
I’ve been interested in taking photos for as long as I can remember. My dad used to photograph butterflies with a film camera, and I think that’s what sparked my interest. So why did I choose nature photography? Probably because I have always lived surrounded by nature and developed a deep connection with it. I really wanted to express that connection through my pictures.
At first, I would shoot with compact digital cameras. I only got my first DSLR when I was around 20. It was the Canon EOS 500D and it served me well for many years.
It wasn’t until I joined Instagram in 2019 that I really decided to take photography more seriously. Instead of just randomly shooting whatever I found interesting, I actually started learning things, like how the camera works, how to edit pictures, and so on. I also decided to focus on close-ups and macros because it’s the little details that I find the most fascinating. This is the road that led me to where I am now.
Here are 7 common mistakes beginner photographers make:
1. Relying on Auto mode
I used to do this a lot, because I didn’t bother to learn how to manually adjust the settings.
Relying entirely on auto mode is a good starting point, but it limits your control over the settings, and auto mode is not perfect for all shooting situations. For instance, if you would like to control the depth of field, you need to be able to adjust the f-stop (aperture).
Fix: Learn how to use manual mode, or at least semi-automatic modes. This will help you control exposure, depth of field, and motion. Read your camera's manual, explore books, or watch YouTube tutorials - whatever works best for you. My biggest lesson came when I bought my first manual lens, the vintage Helios 44-2. I could no longer rely on auto settings and had to adjust everything myself.
2. Not focusing on composition (and angle)
This is a very common mistake. Poorly composed photos lack impact, often due to distractions or a lack of a focal point. The wrong perspective can also make or break the shot.
Fix: Follow compositional guidelines like the rule of thirds, leading lines, and framing. Ensure your subject is the clear focus. Experiment with different angles. For flower photography, it's often necessary to get down to ground level (a flip-screen can be very useful for this) because most flowers look their best when photographed from a side angle at their height.
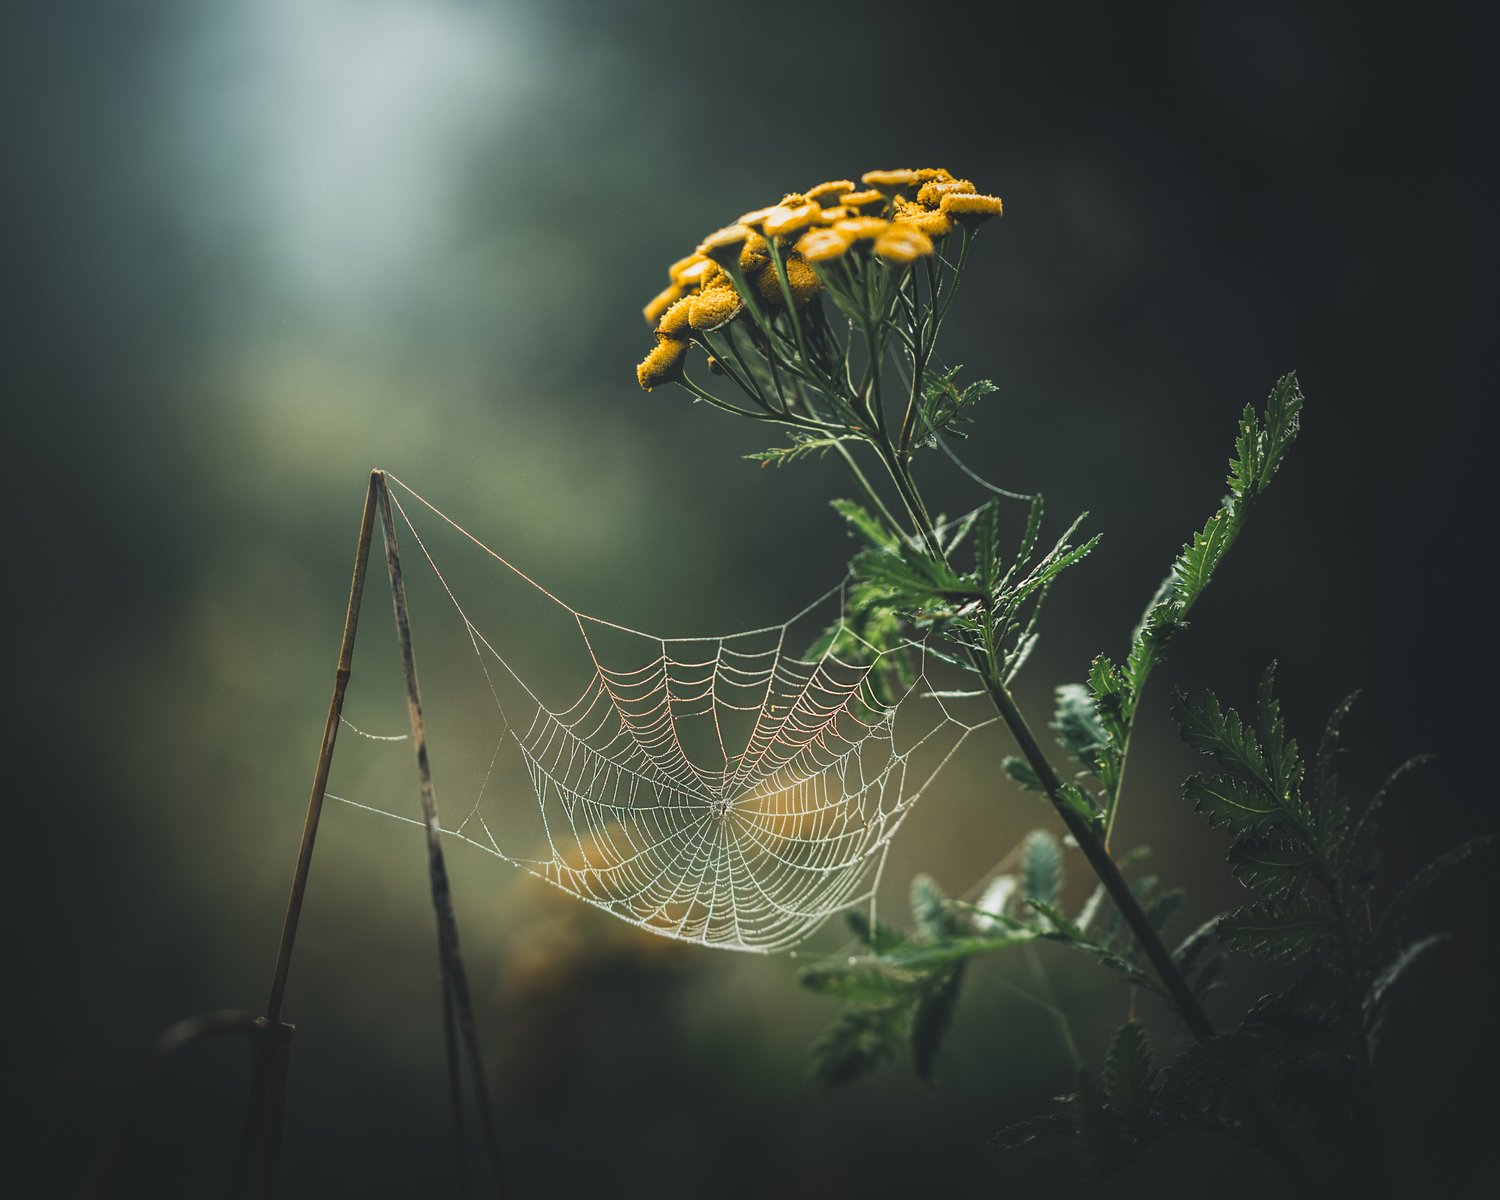
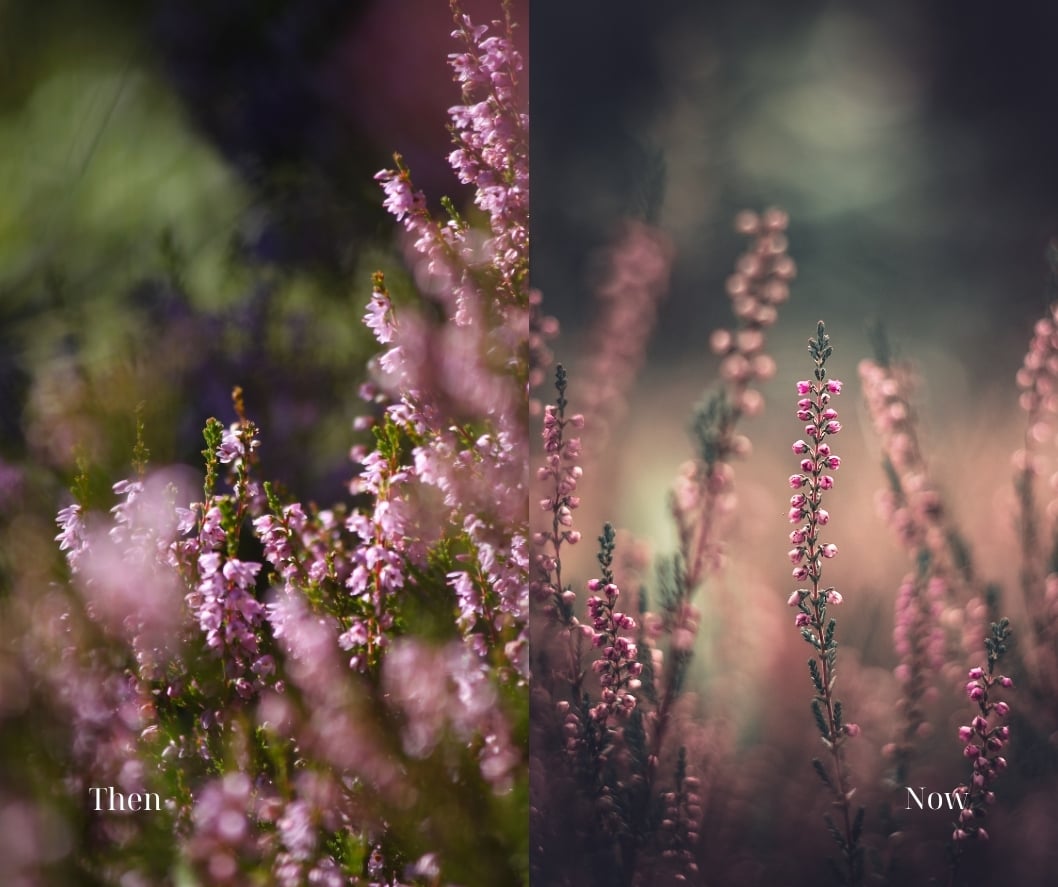
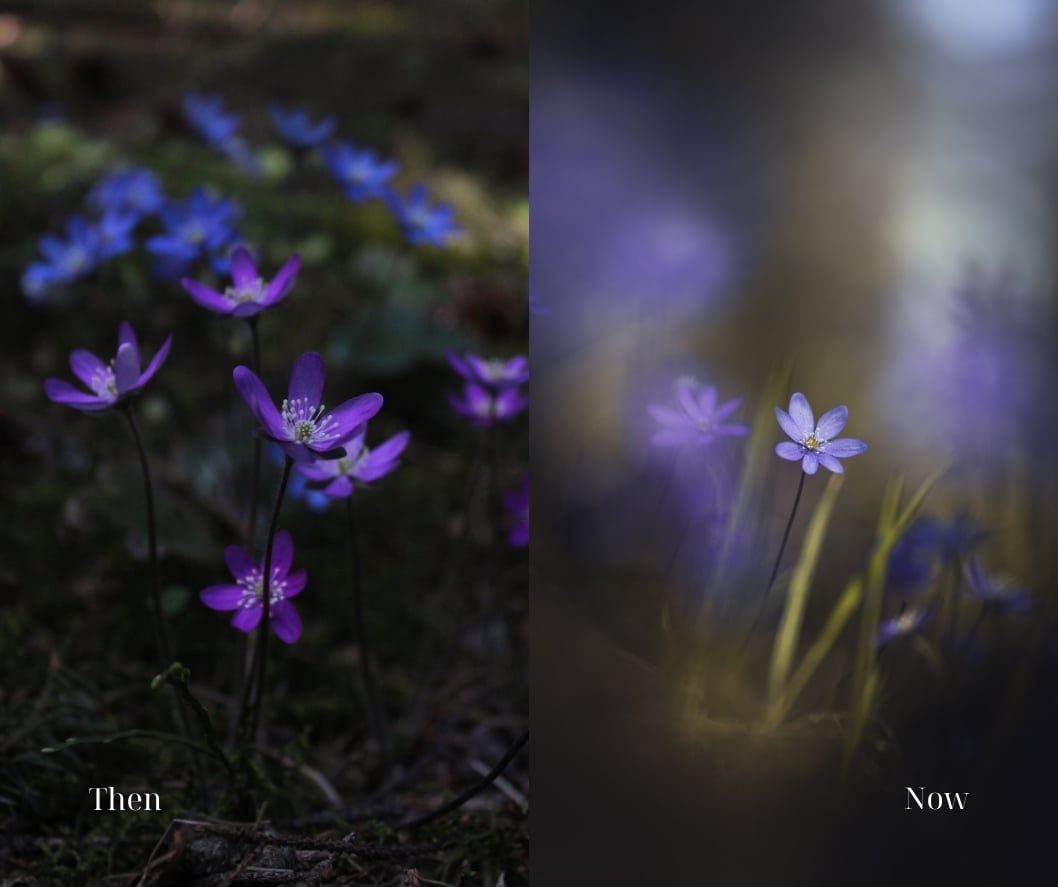
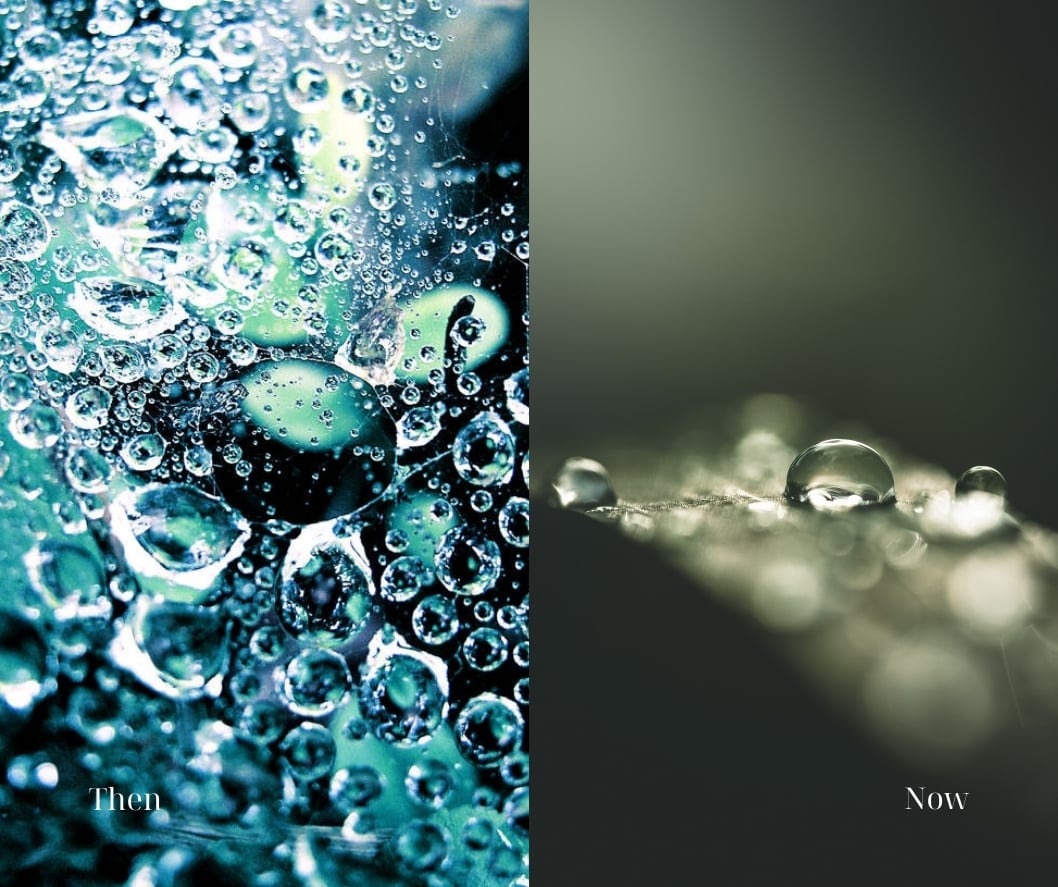
3. Not paying attention to backgrounds
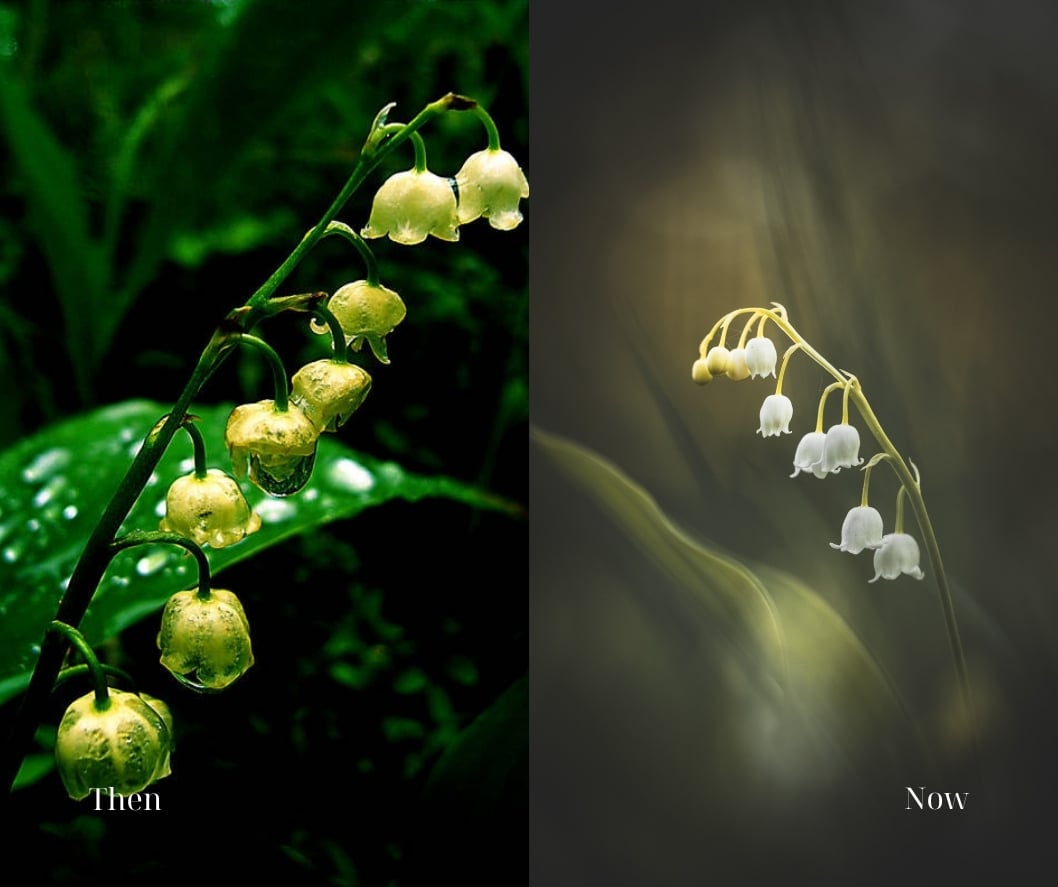
A cluttered or distracting background can ruin a well-exposed and well-composed image. I personally prefer soft, dreamy backgrounds or backgrounds with an interesting bokeh effect.
Fix: Look carefully at your background before shooting. Use a wide aperture to blur the background, or reposition yourself to eliminate distractions. Choosing the right lens is also a very important factor. A 100 mm fast prime lens will give you a smoother background than a 35mm lens.
4. Ignoring the importance of lighting
Not paying attention to the direction and quality of light can lead to flat and over- or underexposed images.
It used to be a common thing for me to shoot at midday on a sunny day and then wonder why my photos looked like crap. Bright daylight is often harsh and unflattering for most subjects.
Fix: Focus on shooting during the golden hours (early morning or late evening) for soft, warm light. Cloudy, overcast days are also a good option. On days like this, the clouds serve as a diffuser that creates soft, even light that’s easy to work with.
5. Not shooting in RAW
Many beginners shoot in JPEG, which compresses image data and limits your ability to make adjustments in the editing process.
Fix: If I didn’t shoot in RAW, I wouldn’t be able to create all these dramatic edits.
RAW images will capture all the data your camera sensor records. This enables greater flexibility in editing, such as recovering shadows, adjusting exposure, and fine-tuning colors without losing quality.
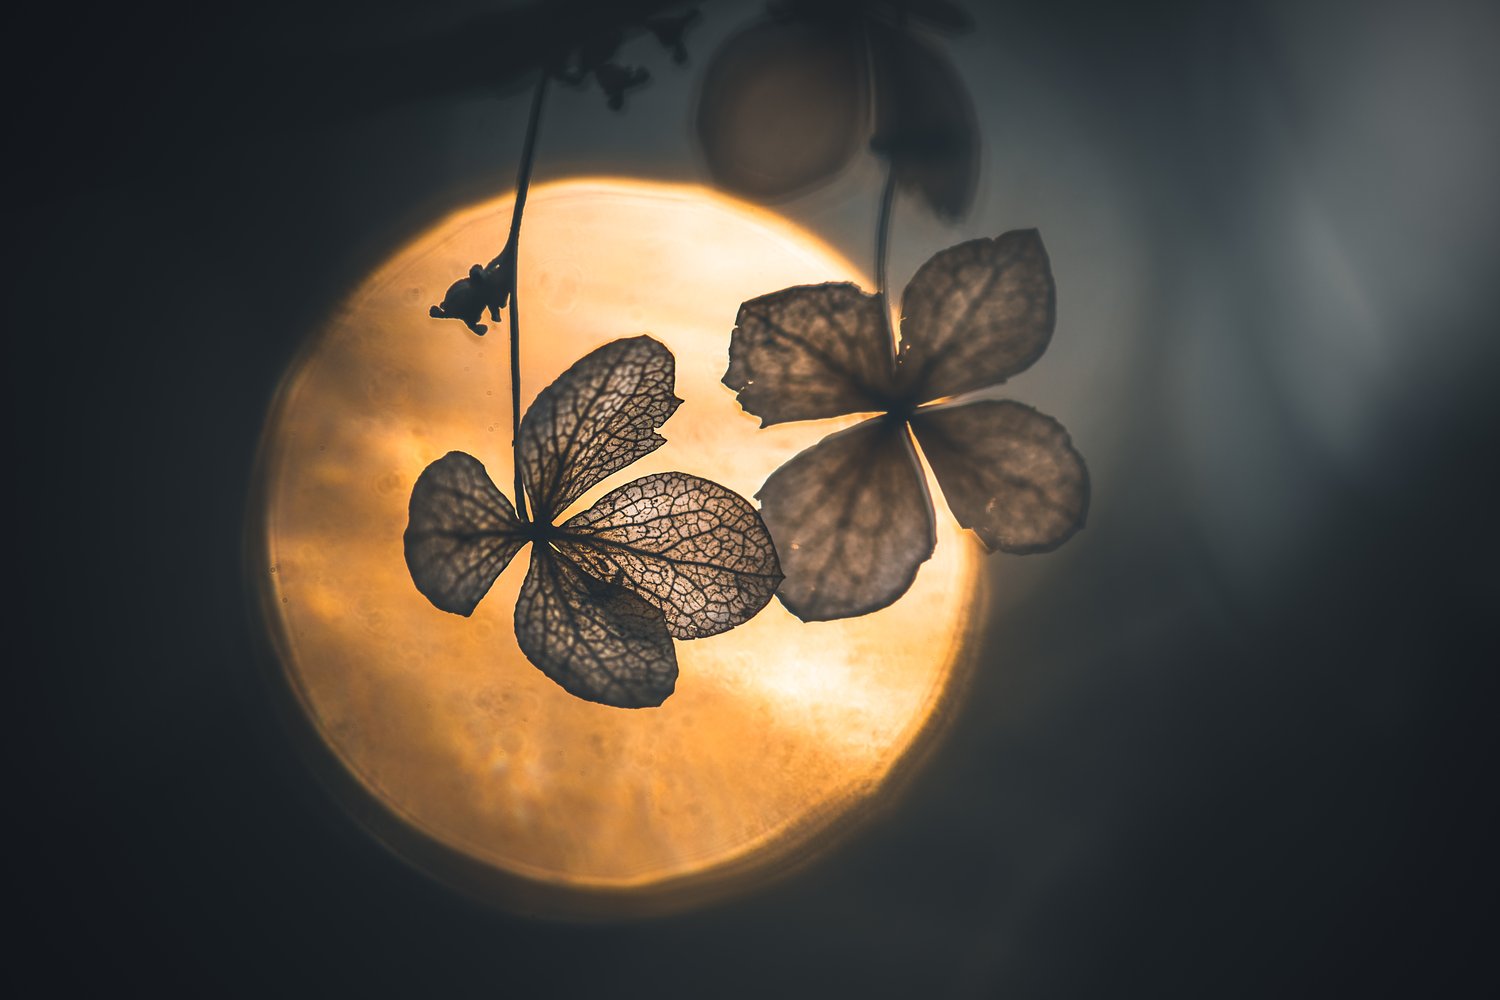
6. Overdoing edits
I used to be quite heavy-handed when it comes to editing. When you’re first learning to post-process images, it can be so exciting that you overdo it. Oversaturating, over-sharpening, too much contrast - can make your photos messy and unnatural in bad way.
Fix: I don’t think there’s anything wrong with highly edited images, but you need to find a balance. Learn how to use colors in a favorable way. A color wheel is a useful tool that helps you understand the relationships between colors. I often use complementary colors in my edits to make them stand out.
7. Thinking that it’s all about the gear
It’s very common among beginners to think that if you own an expensive camera (or lens), your photos will automatically look good. This is not true.
The gear will not do the work for you, it won’t make up for the lack of skills or a creative eye.
Fix: Creating exceptional photos takes hard work. In order to get those results you need to practice, practice and practice. And to find out who you are as an artist. What’s your artistic vision and the story you want to tell?
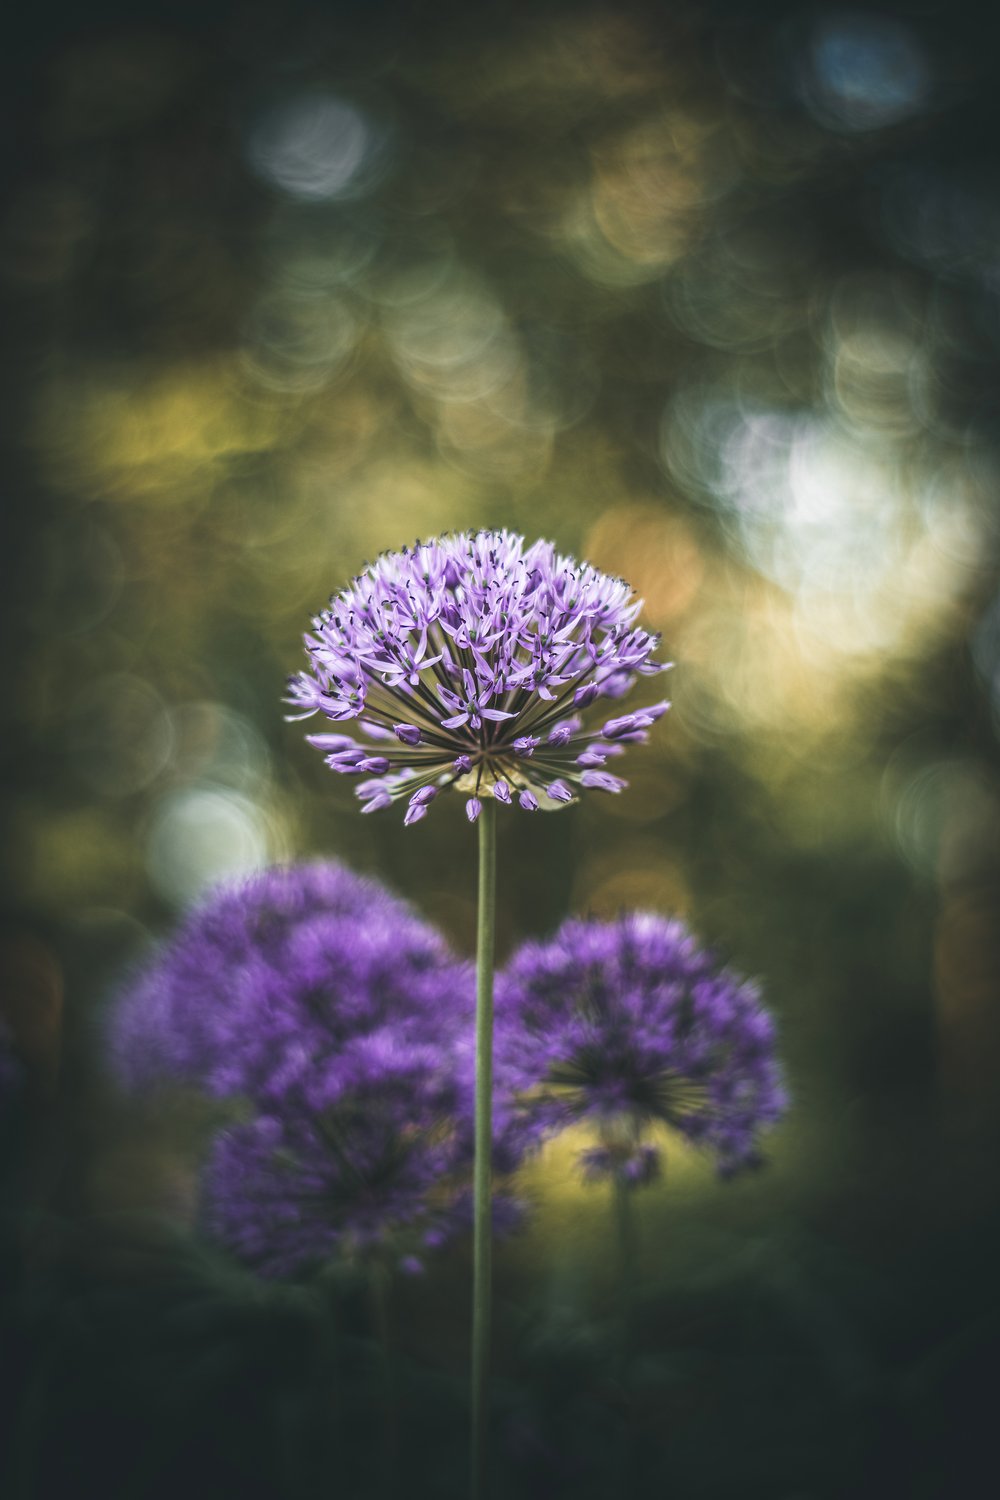
This photo was taken with a lens that costs a little over 20 euros.
Would you believe it?
Final words:
Whether you are just starting out with photography or are an advanced shooter, I’m sure you’re familiar with at least few of the mistakes I listed above. I still make mistakes every day, there’s nothing wrong with that. What matters most is that you learn from them.
Growing as an artist and a photographer is a lifelong journey. There’s always something new to discover and absorb. Take your time and enjoy the process!
Is there something you would like to add? Did you find these tips helpful? You can share your thoughts in the comments below, or send a message via IG @_syysmyrkkylilja
Comments ()