
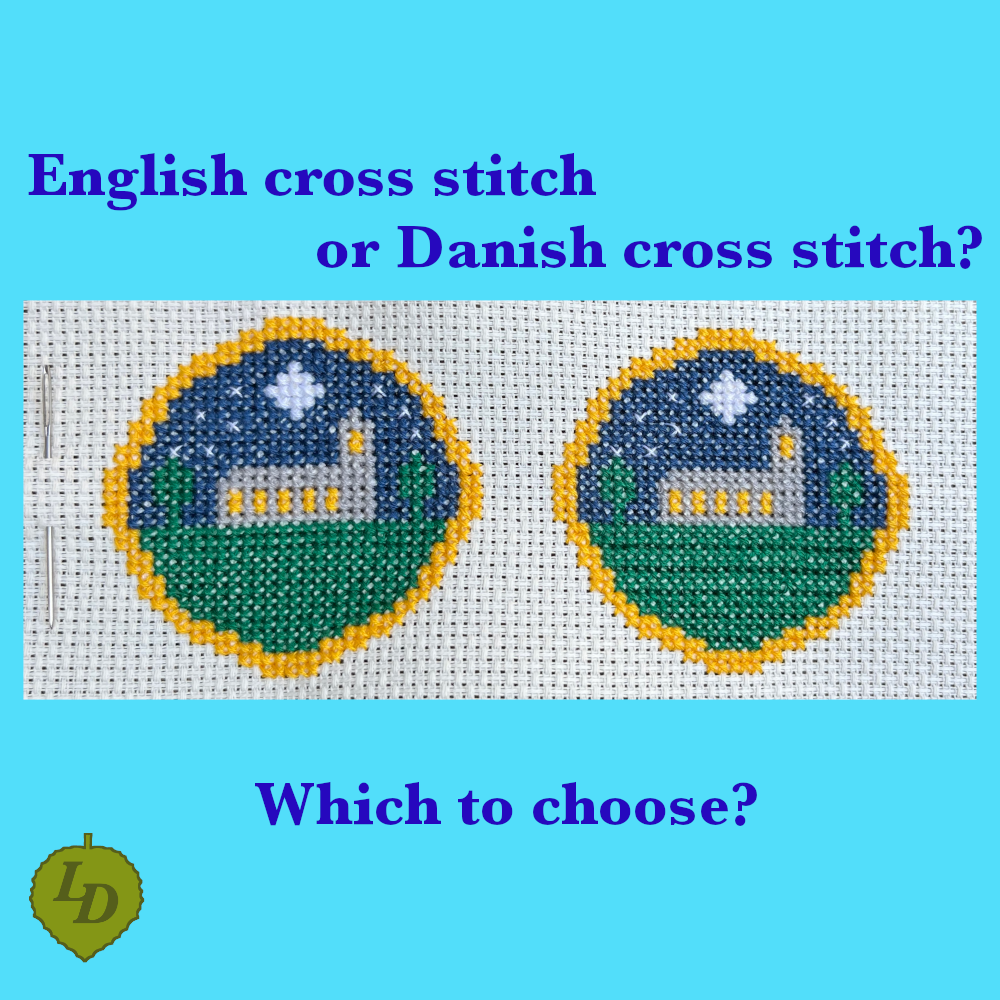
I’d never heard of either until I saw a pin demonstrating the differences between the two: English cross stitch apparently works each cross separately, Danish works a row of half cross stitches then goes back and finishes them. This means that I have always used Danish cross stitch without knowing it. Interestingly, my Mum was taught the English method.
So my first step was to check Weldon’s Encyclopaedia of Needlework, printed in London at some point between 1935 and 1950. Weldon’s stated that cross stitch should be worked bottom left to top right, bottom right to top left, one stitch at a time but that ‘…some people prefer to do all the under stitches first, then cross them all afterwards.’ Neither method was given a name, but I found it interesting that the single stitch at a time method was taken to be the usual way of working.
I can understand why the Danish method is now the more popular - it is fast and easy and lets you move around a complex pattern very efficiently, moving from one place to the next without being stranded at the edge of the work with no way out but to cut the thread and start again in the middle.
However, I had a small pattern that worked the same design twice side by side - it’s a two-sided Christmas bauble - and I couldn’t help wondering what it would be like to try the English alongside the Danish. After all, there must be advantages to it for it to exist, surely?
I was finishing another small pattern when I saw the pin so I tried the English out and found it frustrating and slow. I almost gave up on it. But I had another pattern to start and the temptation was too great to abandon the chance to try the English method out properly from the beginning, so I set to work.
To begin with my expectations were that the English cross stitch would be slower, that it would use more thread and that it would give a more uneven finish.
Here’s what I found
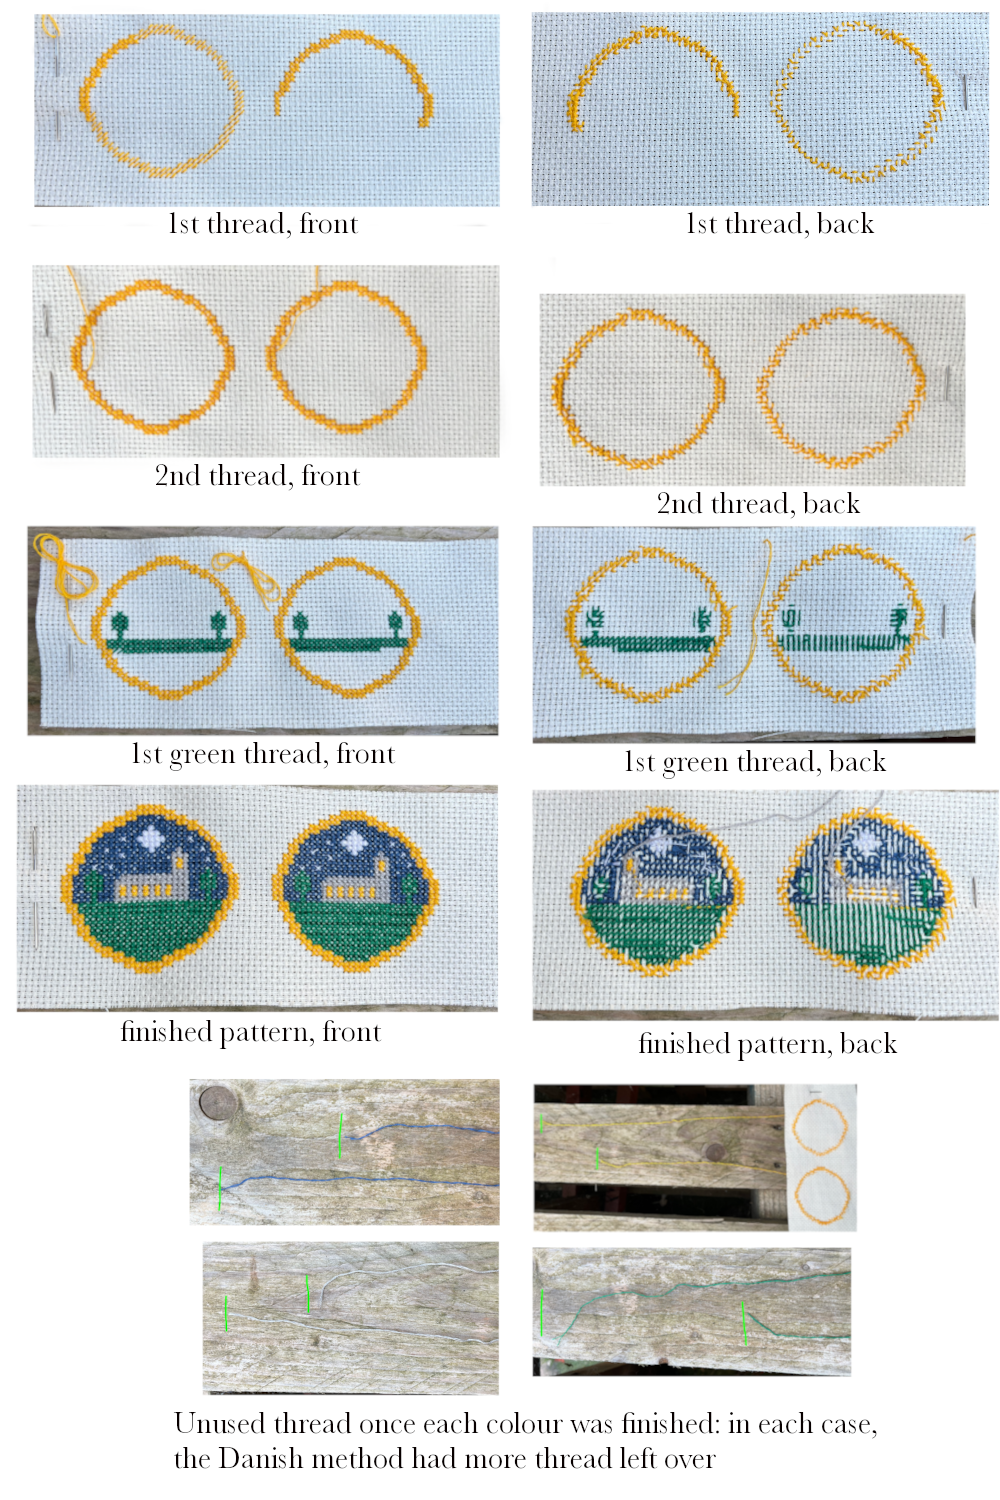
In all the following pictures, the design with the needle next to it is worked solely in Danish cross stitch, the other in English. I worked the same number of threads at a time in each and then took a picture of front and back to compare. When I finished working a colour, I laid out the remaining thread to compare how much thread was used.
Advantages
- This pattern has large areas of single colour and this suits the English method. I would say there is little difference between the two methods here and, personally, I liked having a finished block of stitches whenever I stopped.
- Unpicking mistakes was easier in the English method. I tend to jump around quite a bit when working the top stitches in Danish in order to bring the thread back to where it needs to be for the next section, so unpicking can take quite a while. The English was very logical to unpick.
Disadvantages
- Being counted cross stitch, working the outer ring in English was more time-consuming that the Danish, in that it was easier to scope out the pattern in half cross stitch first and make sure the ring closed properly. With the English, the counting had to be correct at every point or you’d get to the end, find the two ends of the circle didn’t meet and then have an awful lot of unpicking to do to put it right. It helped that I worked the ring in English secondly and so had already learnt the pattern.
- You will see in ‘finished pattern, front’ that the green area has definite lines across it. I think that’s because I changed the order of working the thread when working right to left as opposed to working left to right. Right to left was 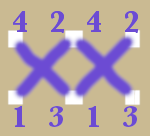 and left to right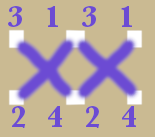
When working the sky above, I changed this to 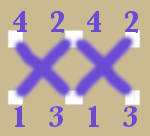 for left to right and it got rid of the lines.
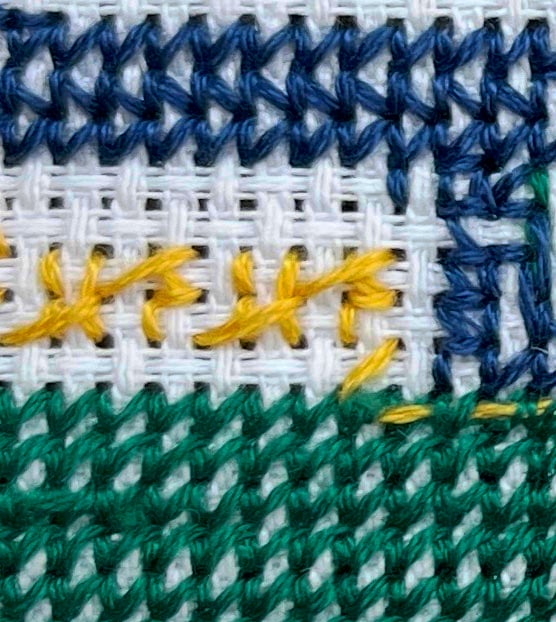
This close up of the back shows that my first attempt in green gave the same pattern on the back and lines on the front, whereas the second attempt in blue reversed the pattern on the back and lost the lines on the front. I don’t have an explanation for this, but if you want a ridged effect on the front of your work when working in English cross stitch, here’s the answer!
- Working a complex pattern is more difficult with the English method. This was mitigated a little when I decided that the small stars should be worked in single thread, but the English method took more planning. With the Danish, I started at the top of the large star and worked each row across in half cross stitches. If the small stars had also been in double thread, I could have come to the end of the middle row of the big star, worked each small star half cross nearby, worked back again filling in the top stitches then carried on with the big star, working half crosses to the other side, repeating working the small stars, then back to the big star to finish the half crosses. As it was, I worked each star in the same way, in that I worked all the cross stitches in the big star first, ending in the middle, then separated the two threads, ran them through to opposite sides, worked each small star separately and finished the thread in the outer ring.
- Working the church windows was easier in the Danish: it was much more efficient to work up 2 half crosses, down 2 half crosses, across one stitch to the next group, repeat then up to the tower window and finish off. The English stitches give a much more untidy effect on the back.
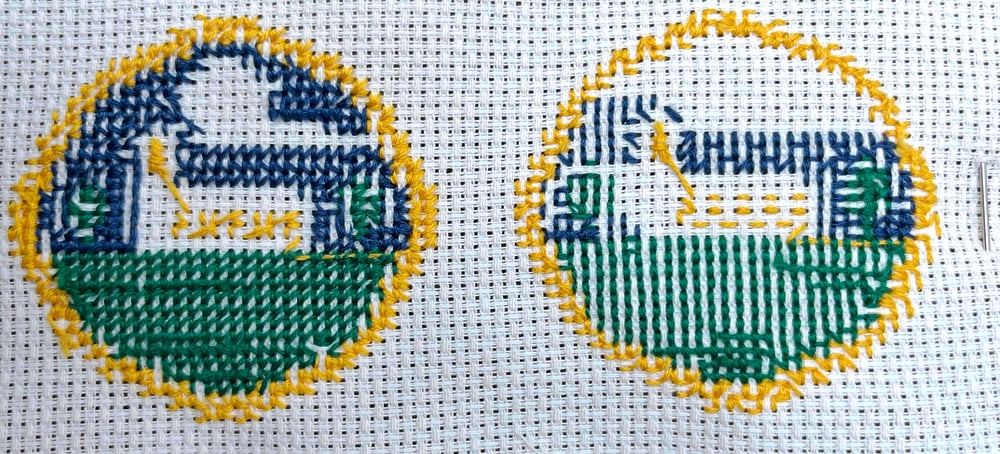
- As suspected, the English did use more thread, but not significantly so. I used the same total number of thread lengths for each pattern, it was just how much was left at the end that varied. This means that it would be possible to used either method for a kit containing a set number of thread lengths without issue.
No difference
- Time taken. I was pleasantly surprised by the English method. Not being of a scientific mind, I didn’t think to time how long each thread took to finish, but it didn’t feel any longer in the English. Once I got into the rhythm of it, it was just as quick to work as the Danish.
Conclusion
English cross stitch is definitely a method worth trying. I’m going to use it in future for background stitching and any large areas of a single colour - I like the psychological lift it gives to see a completed area at the end of a thread, rather than a sea of half crosses waiting to be finished.
I also like the feel of the finished English method - it feels sturdier than the Danish.
Plus the fact that it actually takes no longer than the Danish method.
The English is a very useful skill and I will be using it in combination with the Danish from now on - the Danish for flexibility in complex patterns, the English for solid coverage of large areas.