

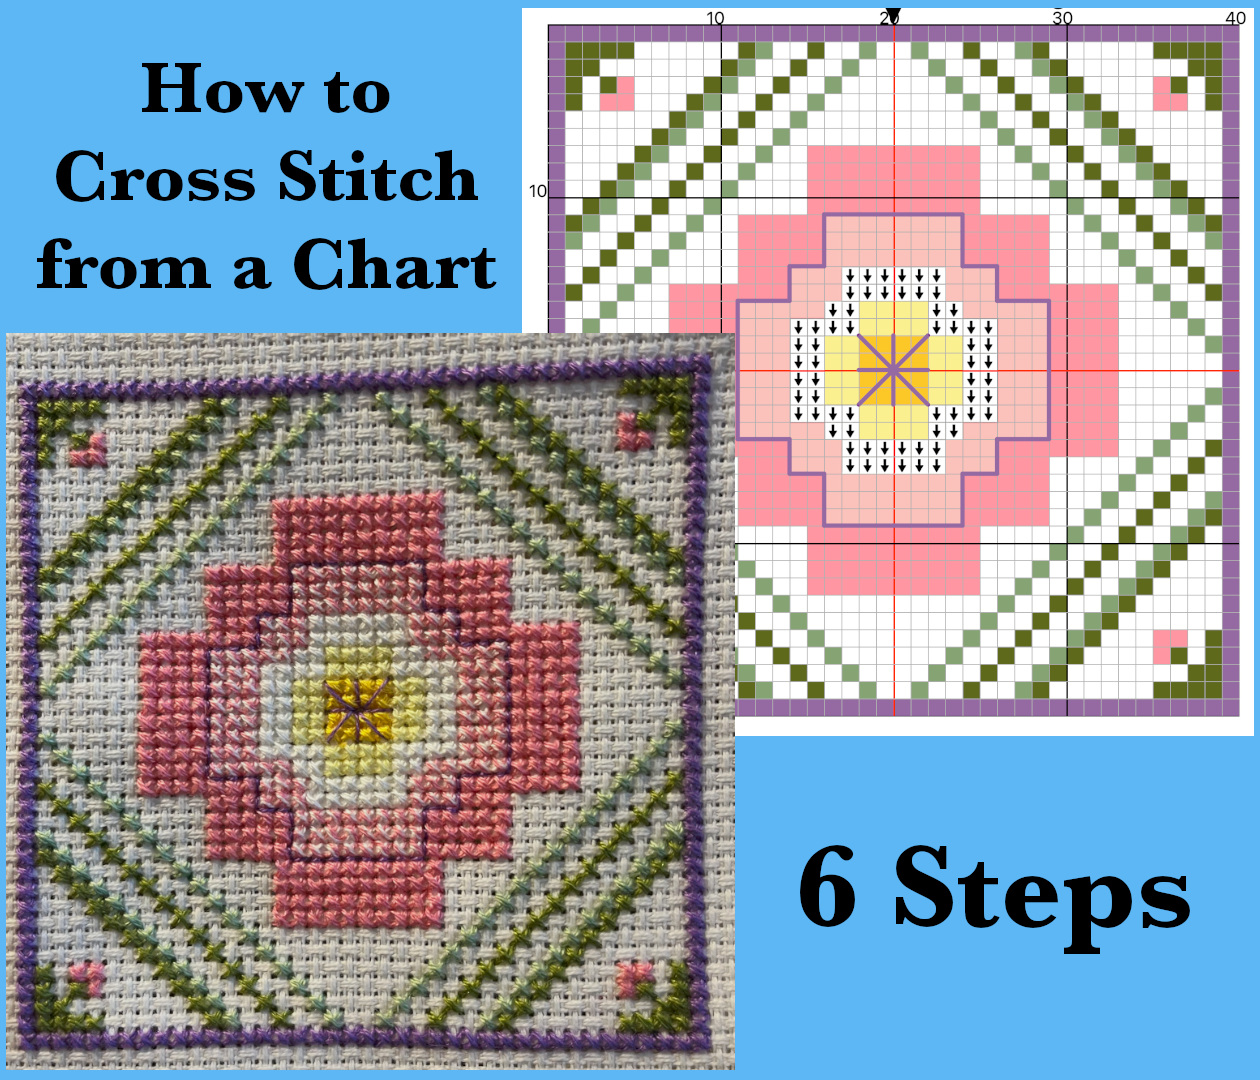
FREE DOWNLOADABLE PATTERN INCLUDED
Step 1 - What is Cross Stitch?
Cross stitch itself is worked as a square stitch where two lengths of thread cross over one another in an X shape. Usually, those X arms are of the same length, so the completed stitch occupies a square. This is why cross stitch charts are printed on squared paper: each square equals the space for one stitch. Cross stitch can be worked on any fabric, including evenweave linen (where the warp and weft are at 90° and evenly spaced, so that any pattern worked on them stays square).
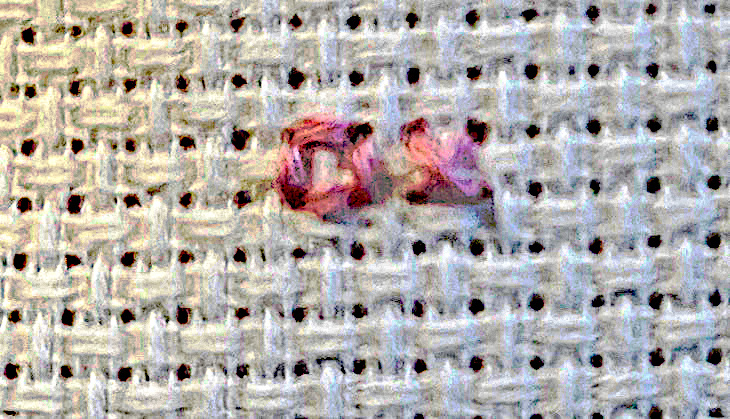
Aida is the usual fabric used and it's what we will concentrate on here. The aida has regular holes: four holes in a square.
Step 2 - Introduction to the Chart
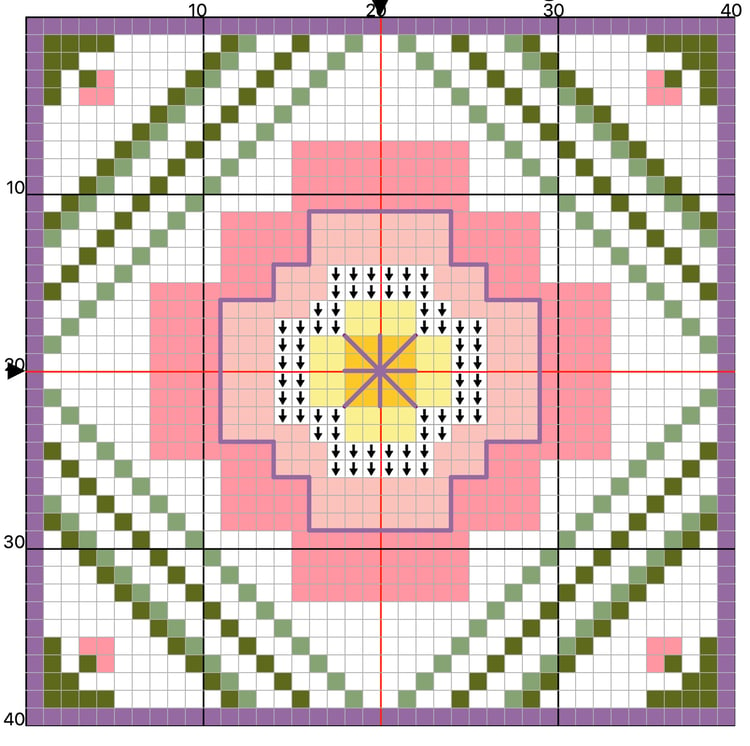
Each thread colour has its own symbol or colour or sometimes both.
Often a thicker line marks every 10 stitches making a grid pattern.

The centre lines are marked at the top and one side or at top and bottom and both sides. Usually there are arrows pointing inwards: along one of the grid lines if the centre of the pattern falls between four stitches; or pointing at the middle of the squares between two grid lines if the centre falls on one stitch.
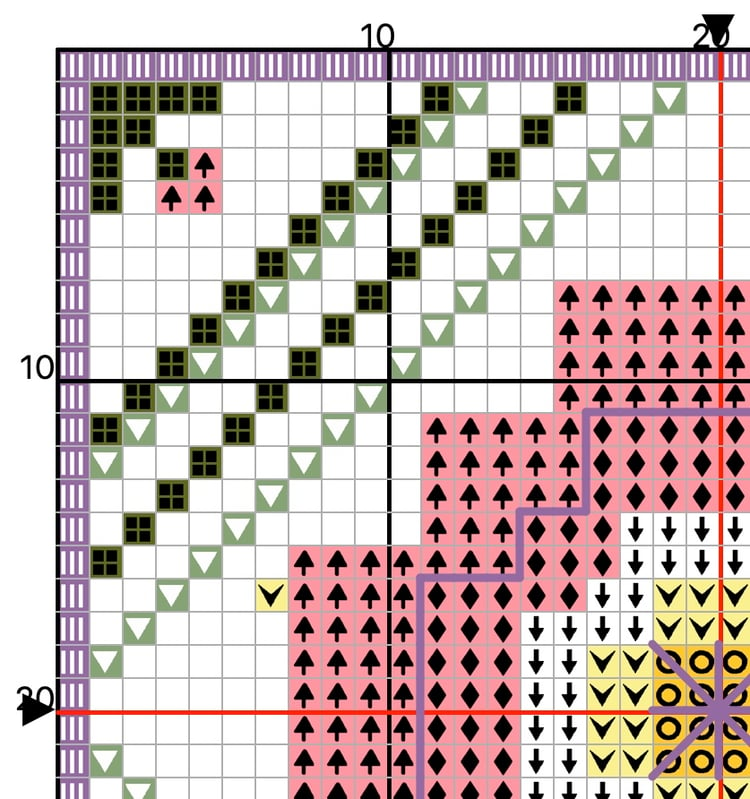
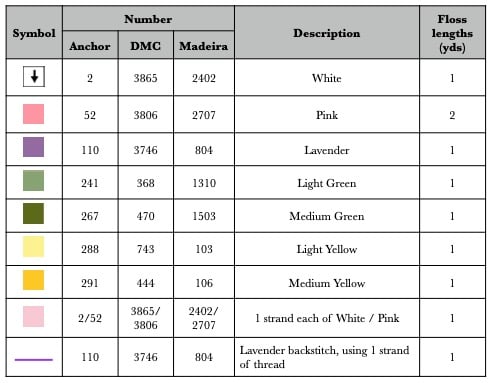
A key to the symbols is generally provided in a table near to the chart.
Step 3: Identify and sort the threads
If using a kit, sort the provided thread into the separate colours and then match each to its symbol in the table.
Sometimes colours are difficult to identify because they are similar shades – use the number of yards quoted in the table to differentiate them.
Find a way to label them – the traditional way is a card sorter. If one isn't provided, a spare piece of card or side of a box will do with holes punched into it.
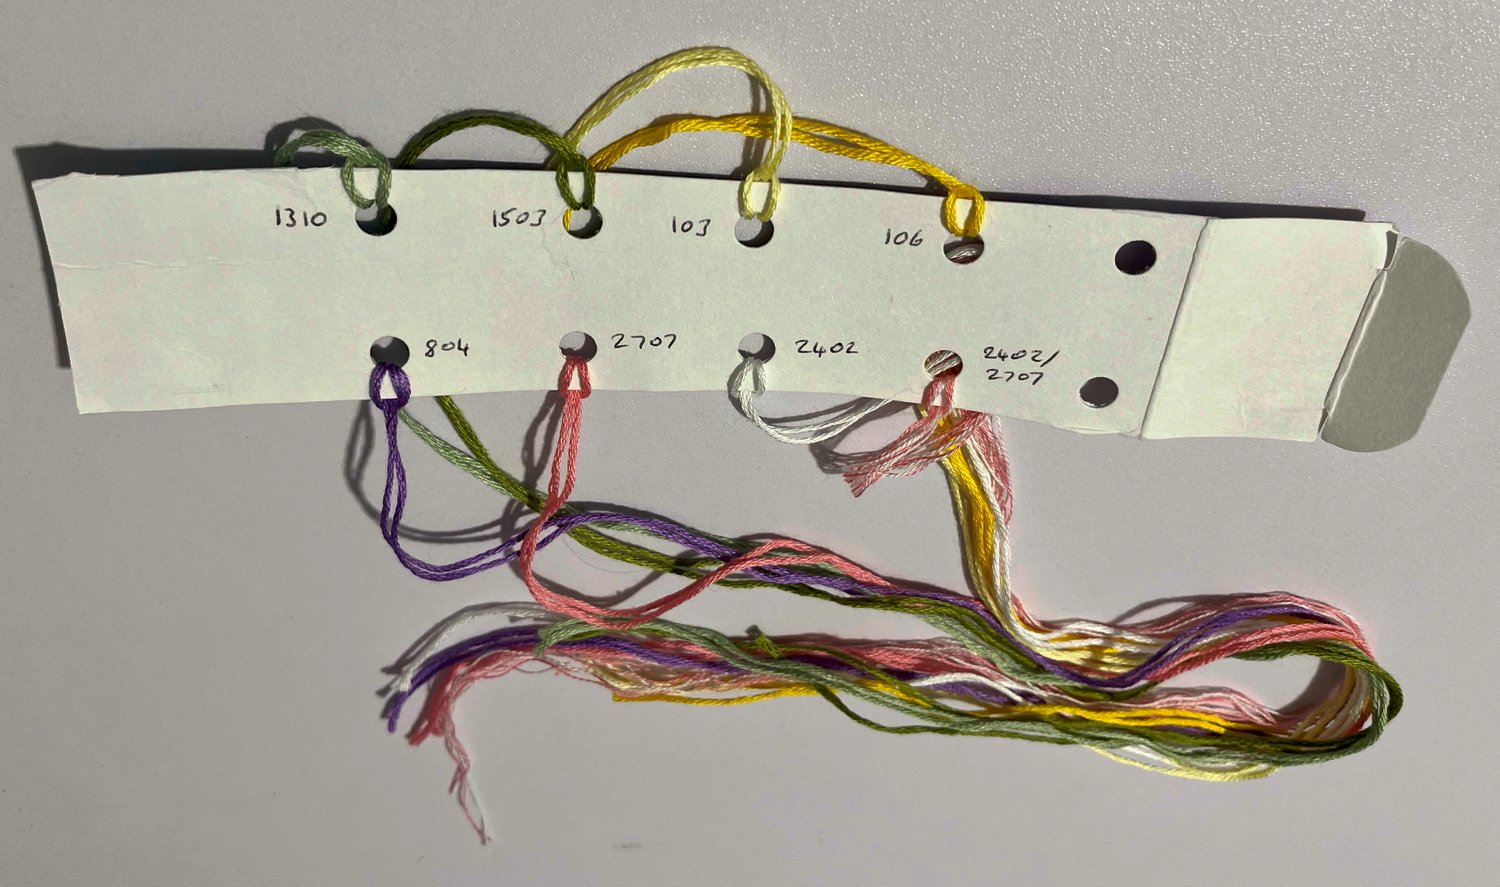
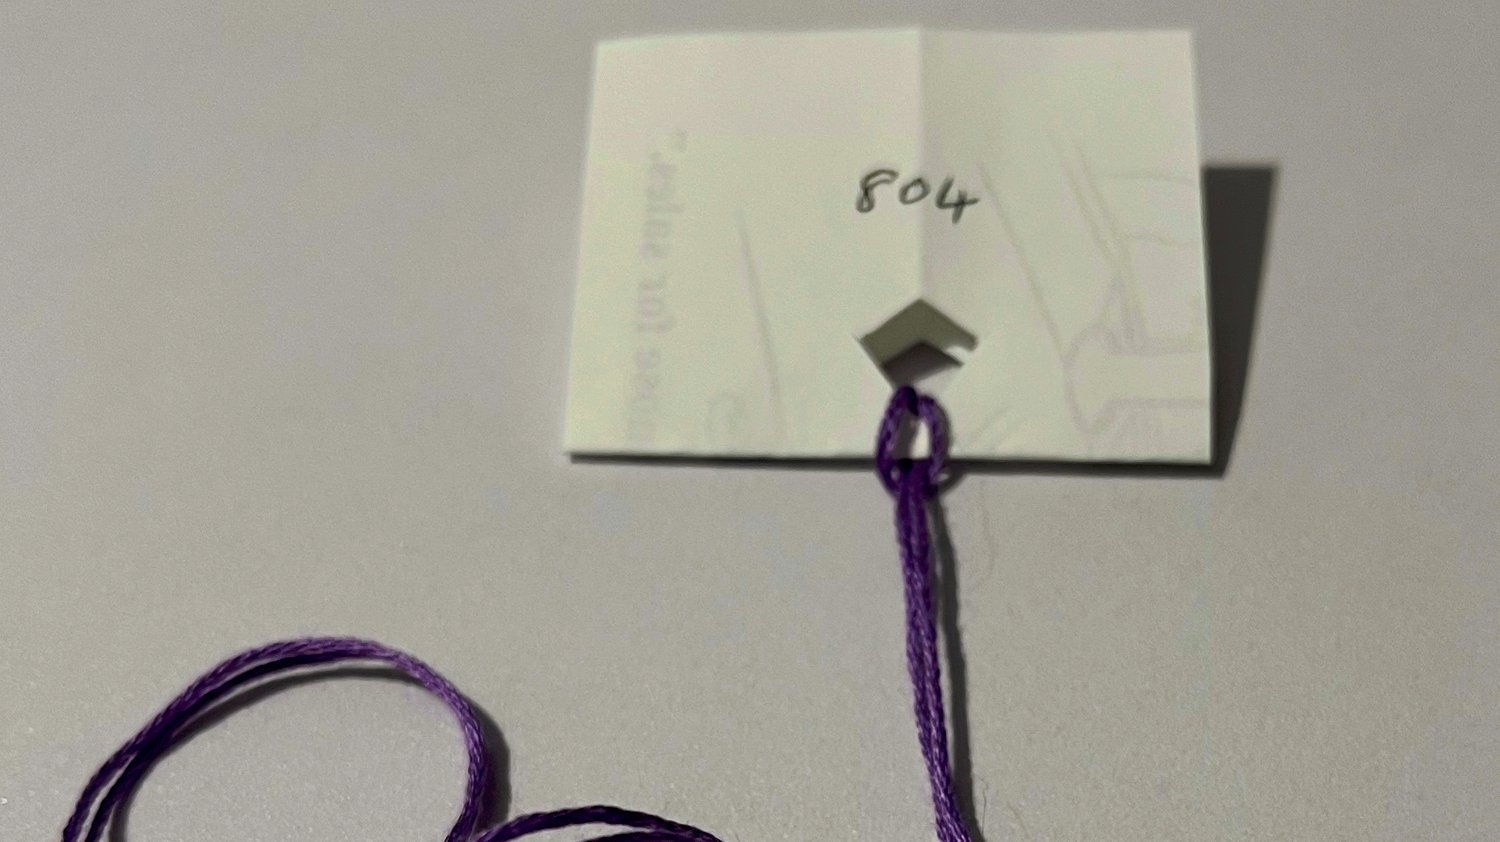
Or a square of paper with the thread number or name written on it and a hole cut in – thread the length of that thread through the hole and tie loosely so the label doesn't fall off.
The table of instructions should also tell you how many strands of thread to use with each stitch – this varies but often cross stitch is 2 strands and back stitch 1 strand.
If providing your own thread, you can cut it as needed from the skein, or make a card sorter as detailed above.
Threads are usually cut to a yard length for the kit – I use them as a yard, divided into how many strands are needed. My school embroidery teacher taught that no length of embroidery thread should be longer than your forearm, roughly half a yard. What is sure is that the longer the thread, the more likely it is to tangle. Somewhere between half and 1 yard is best – try it and see.
Step 4: Prepare the fabric
This is divided into three parts: 1) find the centre, 2) ascertain that the fabric is big enough, 3) secure the edges of the fabric so that they don’t unravel as you work.
1) Fold the aida in half one way and in half the other so that it is now a quarter of its size. Open it out and where the two fold lines intercept indicates the centre.
Thread your needle with some brightly coloured spare thread. You can use some of the embroidery thread, but if you’re going to measure the fabric as in 2) then it makes much more sense to get hold of some tacking (basting) thread - it’s very useful and a lot cheaper than the embroidery thread.
Either way, pull a piece of thread through the centre hole and then back through the neighbouring hole, securing the ends with a loop or easily undoable knot at the back so you don't lose the centre stitch as you go back to the chart to decide what to do next.
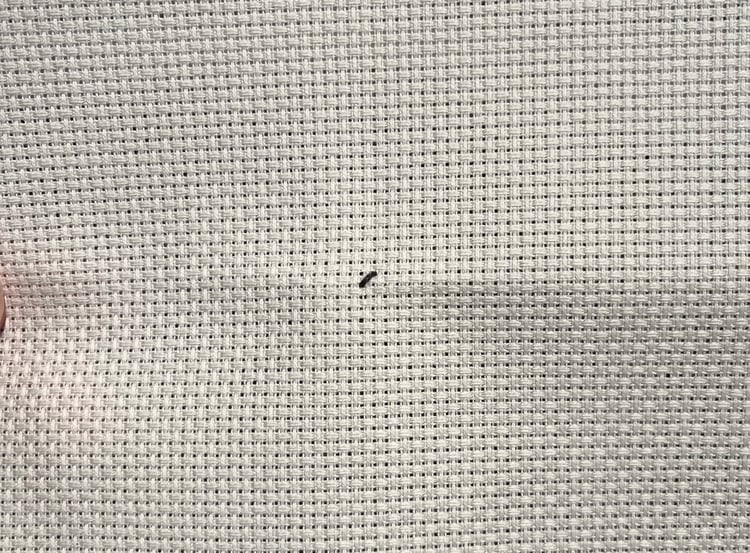
2) If the aida came with the kit, or the chart gives a recommended fabric size and you have that, then go onto 3).
If you're providing your own fabric and you're not sure if it's big enough, now you can count the stitches and find out. Take a length of tacking thread and check the chart. Does the centre fall on a hole between four stitches or on a single stitch? Follow the arrows in from the edges of the chart and see where they meet in the middle: if a single stitch, then count this as stitch 1; if a hole, then choose which hole of the two your coloured thread goes through on the Aida is the centre and count from that. It doesn't matter which: you won't - or shouldn’t - be working right to the very edge of the fabric. At minimum 1 inch of unworked fabric should be left to allow for mounting and finishing, preferably 3 or 4 inches.
Now count up 10 stitches from the centre: bring your thread up at 10, count 10 and take it down, count 10 and up, count 10 and down, however many times needed for half the total stitches of the kit. For the rose pattern, this is twice, or 20 stitches (the total is 40 stitches). If the fabric is bigger than this total, fine; if it is smaller, find another piece of fabric (or another smaller design).
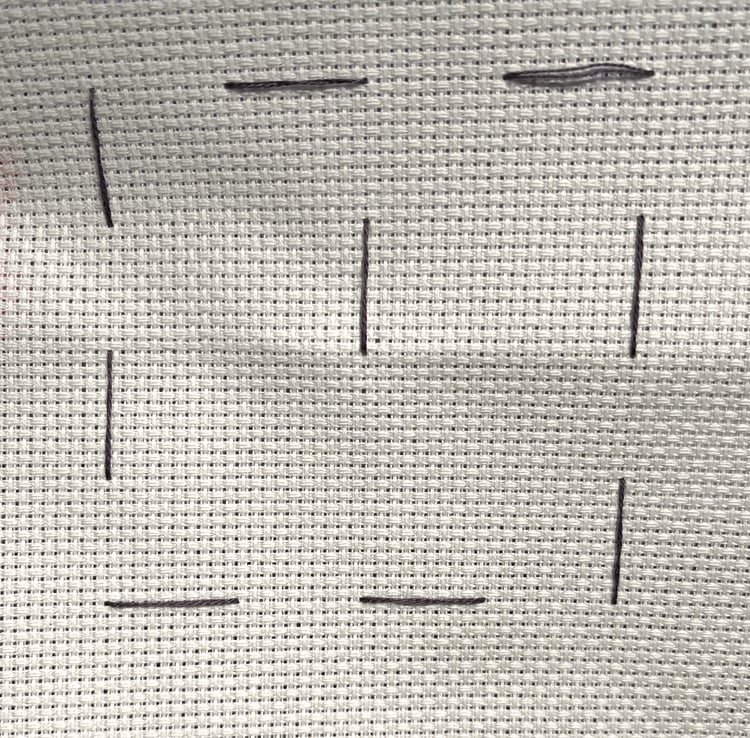
Marking up the grid on the fabric?
I must admit this is not something I had heard of until I came across a Reddit post where someone had ruled the 10 lines onto the Aida to mimic the grid on the chart. Comments underneath revealed that other people tack the lines in thread or use fabric pens that can be washed out afterwards.
Two points on this: if it helps, then by all means do it. DO NOT draw the lines on with pencil – it cannot be removed and will be visible after finishing. Washable fabric pens or tacking thread would both work.
– I don't bother with this but I was trained differently and have adapted my stitching to do what suits me. Pick and choose from these ideas to find what suits you.
3) Secure the edges. I am really lazy about this. I tend to work on frames, so the frame itself prevents unravelling beyond the very edge of the fabric and so I just leave it unfinished. The drawback to this is that the raw edges of aida unravel very easily and are prone to being caught up in the stitching at the back of the work. The aida threads can be cut off as they become troublesome, but it’s much better to secure the edges before you begin.
Option 1: Fold an edge over and secure with overcast stitch or work a hem.
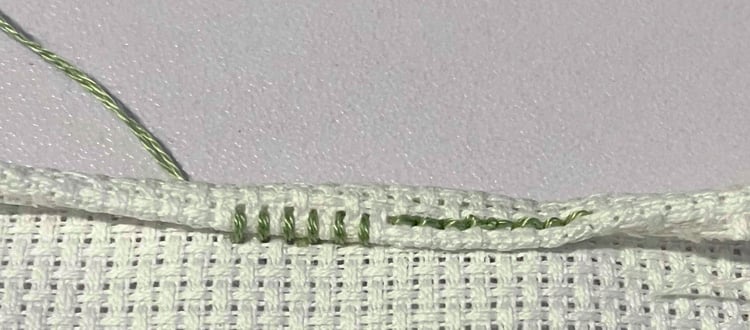
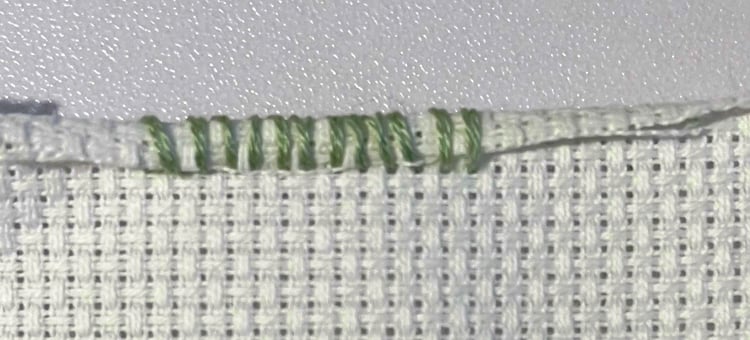
Option 2: Tape the edges - masking tape is best here. No folding of the fabric needed, just trim the edge straight and remove any errant threads, put half the length of tape over that edge, then fold it over to the back and press tight. Taped edges will need to be cut off when the work is finished, so make sure there is sufficient fabric to lose this area and still have enough for finishing or mounting the work.
- Are you using a frame? Then now is the time to mount the thread in it. Most frames come with instructions. Some clip the fabric in place, some have an inner hoop that goes behind the fabric and an outer one that slips over the top, trapping the fabric in between. Some large frames have fabric edges to which the working fabric can sewn, then the upper and lower arms of the frame can be tightened.
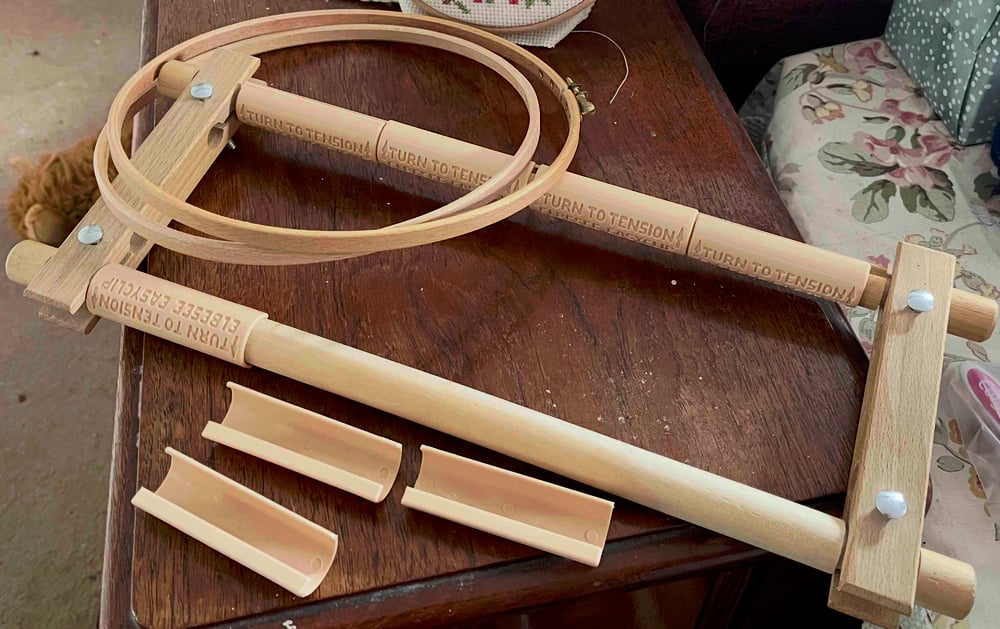
It’s worth taking your time on this. Try to get the fabric as straight as possible. The fabric needs to be taut - not pulled or strained, but it shouldn’t move as the thread is pulled through it. If the lines of holes are distorted in the fabric, then it is too tight. It should look square in the frame - all the holes travelling in straight lines on a flat surface with no slackness or bulges.
Step 5 - How to Cross Stitch
For a single cross stitch, bring the thread up from behind the fabric at 7, down at 8, up at 9 and down at 6.
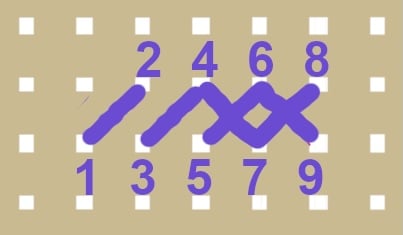
For a row of cross stitch, come up at 1, down at 2, up at 3, down at 4, continue until the end of that row is reached, then up at 9, down at 6, back to the beginning of the row.
It doesn't matter how the stitch is stitched: being right-handed I find it easiest to work as described above, but any combination that suits you will work provided 1) that a cross is produced on the right side of the work and 2) the topmost stitch of every cross faces the same way. Any cross that faces backwards will reflect the light differently in the finished work and stand out.
Starting and Finishing
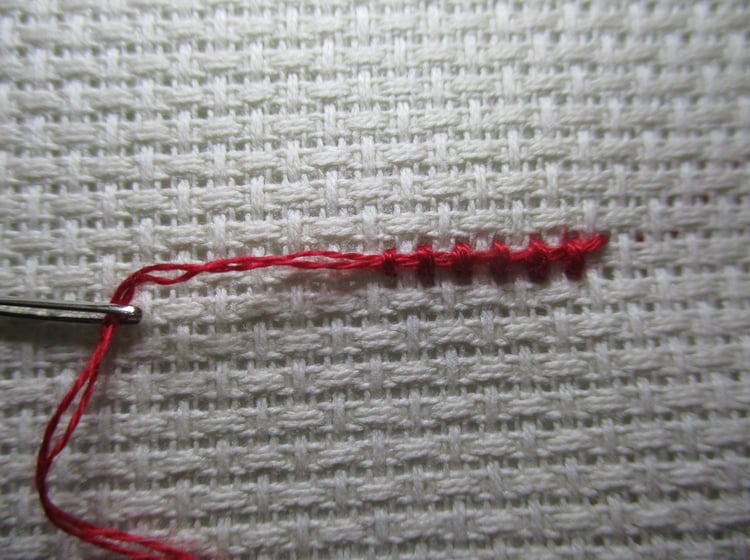
To start a row, leave about an inch (2.5 cm) of thread at the back and work the first few stitches over it to secure it.
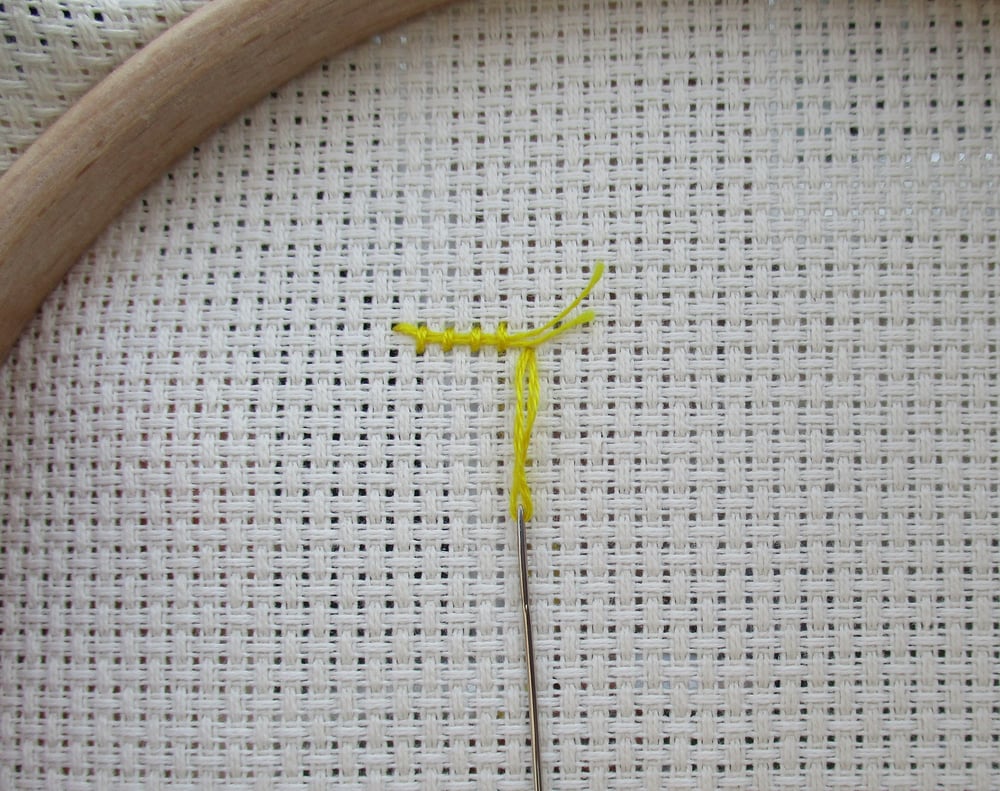
Alternative: fold thread in half, (if 2 strands are needed, fold 1 strand; 4 strands, fold 2 etc.), pass the loop made through the eye of the needle and pull the thread through so that the loop is at the end of the length. Push the needle up through the first hole and down through the second as before, but this time thread it through the loop at the end and pull the thread tight, so it is secured through the loop.
This alternative is certainly an easier way to start but it can be wasteful of thread – when you cut it you end up with two shorter lengths rather than one long one so there is less to use on the next area of that colour: I tend to leave it for areas where there are just one or two stitches of one colour worked within an area of another colour. You will still need to secure the end by running it under the stitches as normal.
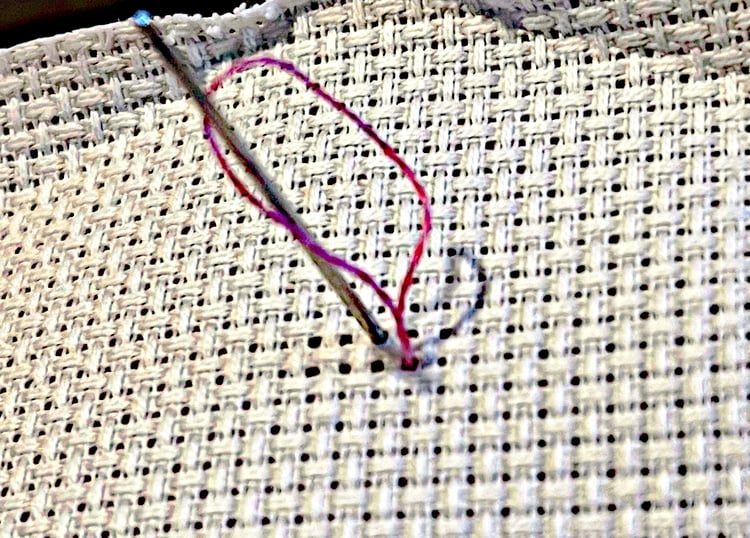
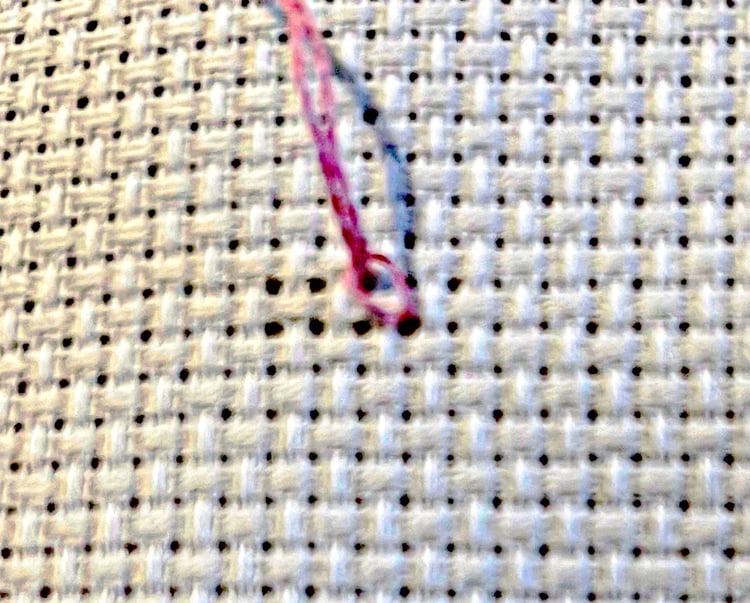
To end a row, run the thread under the worked stitches on the wrong side of the work for about an inch (2.5 cm), then cut.
Step 6 Working from the design
I still follow the way I was taught – start at the centre and fill in the lower left hand corner, the upper left corner, the upper right then lower right. Working round in a circle means that you are always working over blank aida and your arm is never brushing over worked stitches. That is how I was taught as a right-hander.
I was also told that this would help to minimise distortion of the aida as I worked – solid blocks being worked together rather than small areas across the whole fabric. It works for me and I still do this on patterns large and small.
You can also work from a corner: start at the top so the finished work is always above and the empty aida under your arm.
Here is how to start at the centre and some rules to remember.
1. Work lighter colours before the darker
Look at the stitches in the centre: is the centre stitch a very dark colour surrounded by much lighter ones?
Think of the way the thread moves as you stitch – if you work that dark stitch or stitches first, then you must fill in the lighter colours around it. Each cross stitch potentially shares the same hole with three other stitches; if the dark thread is already in that hole then as you pull the lighter colour through the same hole, the whole length of light thread will be physically rubbing against the dark, picking up colour from it. White thread worked alongside red swiftly takes on a pink hue throughout its entire length, so the whole white area becomes pink.
Rule: if the centre stitches are very dark surrounded by lighter colours, then count out to where the lighter colours begin and work them first.
If all the centre colours are dark, or light, or midtone, then don't worry and start with the centre stitch unless the centre stitch is just 1 or 2 stitches: then choose a more substantial area to begin with.
- Now you've identified and labelled your threads; you've identified the centre of your fabric; you've looked at the chart, found the centre stitch and determined whether to start stitching with it or a neighbouring group of stitches. Ensure your needle is threaded with the correct number of strands of the correct colour.
On the chart, find the centre. Count how many stitches up vertically and horizontally your starting stitch is from that centre. Look at the fabric. Find the centre. Count the requisite number of stitches horizontally and vertically from the centre: this is the location of your first stitch. Work it: remember, each stitch occupies one square of aida fabric with a hole at each corner.
Now you build upon that one stitch. If you're confident enough, remove the tacking thread marking the centre: if not, keep it there for reference. Go back to the chart. Identify the next stitch to be worked on the chart: is it one stitch to the right, left, up, down? Go back to the fabric. Work the next stitch in the right place, remembering to secure the end of the thread as you work.
Go back to the chart.
Feeling confident? Are there several more stitches in the row to be worked? Count how many in which direction, go back to the fabric and work them in succession either as single stitches or a row (see Step 5).
Not confident yet? Continue working one stitch at a time, until that area of that colour is completed. Once you have one area, it becomes more and more easy to see where you are on the fabric in relation to the chart.
Now, double-check! Count how many stitches from the edge your last stitch should be: does your last stitch’s position correspond to the chart? Compare the shape of that area of colour with the shape of your stitches: is it the same? Is there a 1 stitch gap between 2 stitches on the chart but it's a 2 stitch gap in your sewing? You've made a mistake. Identify it, unpick your stitches, put it right. Be pleased that you found a mistake and put it right so that you can go on confidently to the next colour.
The whole idea of working with a chart is that, once the first few areas of colours are worked, it becomes easy to find where you are on the chart and simply to work out from that centre point, concentrating on each small area at a time until the whole thing is completed.
Rule: take the time to double-check that your first completed stitches are in the right place: compare them to the chart, count from the centre or the edge, compare your stitching to that on the photograph that came with the kit or chart. Then do the same at regular intervals throughout working the design.
You will make mistakes. That's fine – check often and you'll find mistakes fast and only have a few stitches to unpick. I once stitched a chart of the RAF badge as a gift for my grandfather – I miscounted at one point and did not notice until the two ends of the circle did not meet at the top. I had to unpick over half of it.
Lesson learned: I now randomly check positions of stitches, even when I'm sure they're right.
Chart says this colour should end 9 stitches from the edge and it ends at 8? Something is wrong: go back and check and save yourself a lot of work later on.
General tips:
Should I work all the stitches of one colour before changing to another colour? No. Work one area of a colour, then secure the end, cut the thread and work the neighbouring colour, particularly when starting out.
Rule: don't have long lengths of thread behind the work running from one area of colour to another. Only run the thread from one area to another if it is close: how close is a personal choice. As a rule of thumb 10 stitches is the limit. Also don't just move the needle from one area to another and leave the thread loose at the back: always run it through other stitches on the back, pushing the needle through at minimum one in every three stitches passed on the way to the new area.
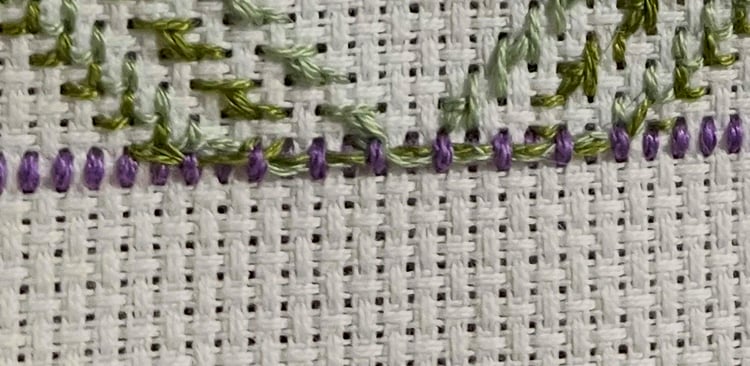
Until a substantial amount of stitching has been completed, it is easier to cut the thread at the end of each colour area and start over at the beginning of the next area.
How tightly should I pull the thread? Snug. Pull the thread through as you work each stitch so that it lies snugly on the front of the fabric – no looseness or obvious gaps, but sitting comfortably on the fabric – the holes through which the thread comes should not be pulled out of shape, or look larger than the unused ones on the either side. There is no need to pull the thread tight – just a gentle tug then let the thread relax afterwards.

Bonus Step 7 How to Backstitch
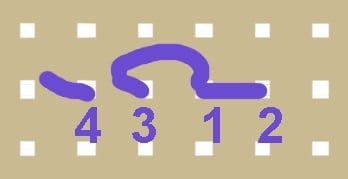
Bring the thread up at 1, down at 2, up at 3, down at 1, up at 4, down at 3, until the end of the row is reached.
Backstitch makes a very neat edging for finished cross stitch and is a popular way to add detail to designs.
Here is the rose pattern without backstitch:
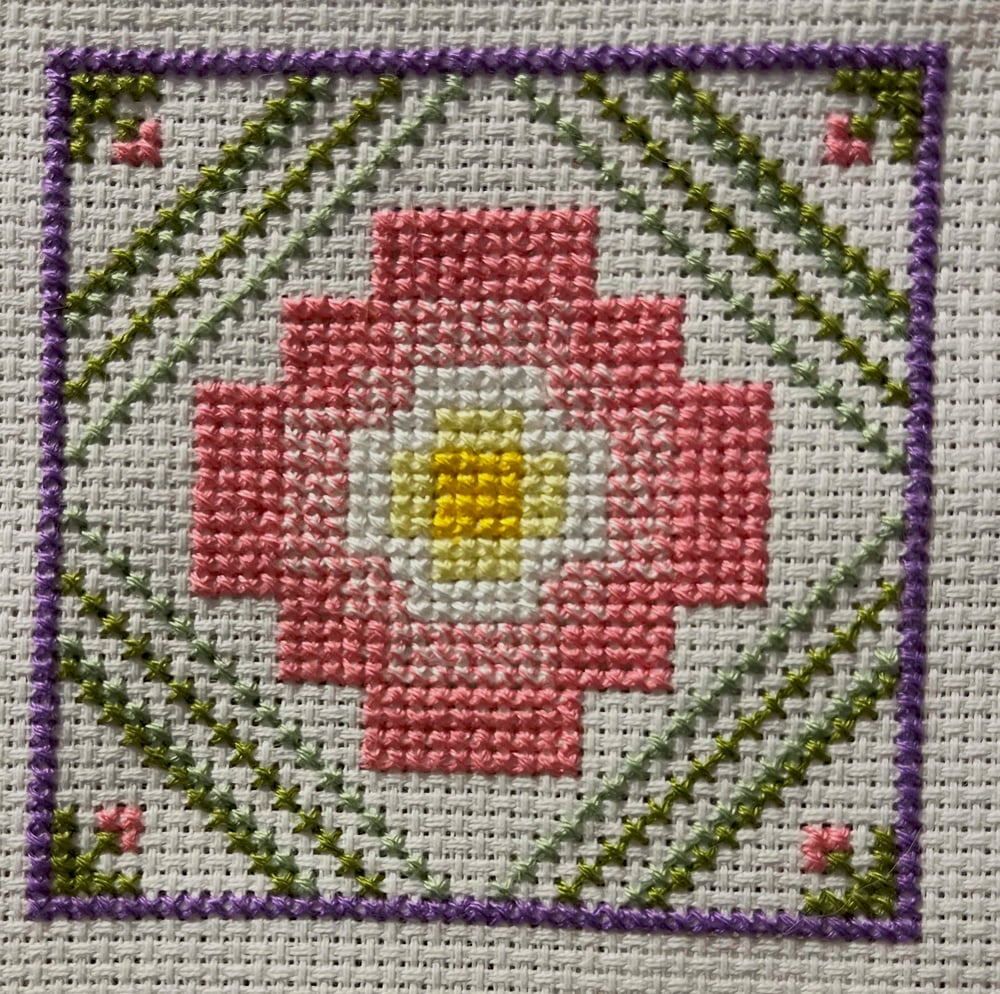
And with backstitch
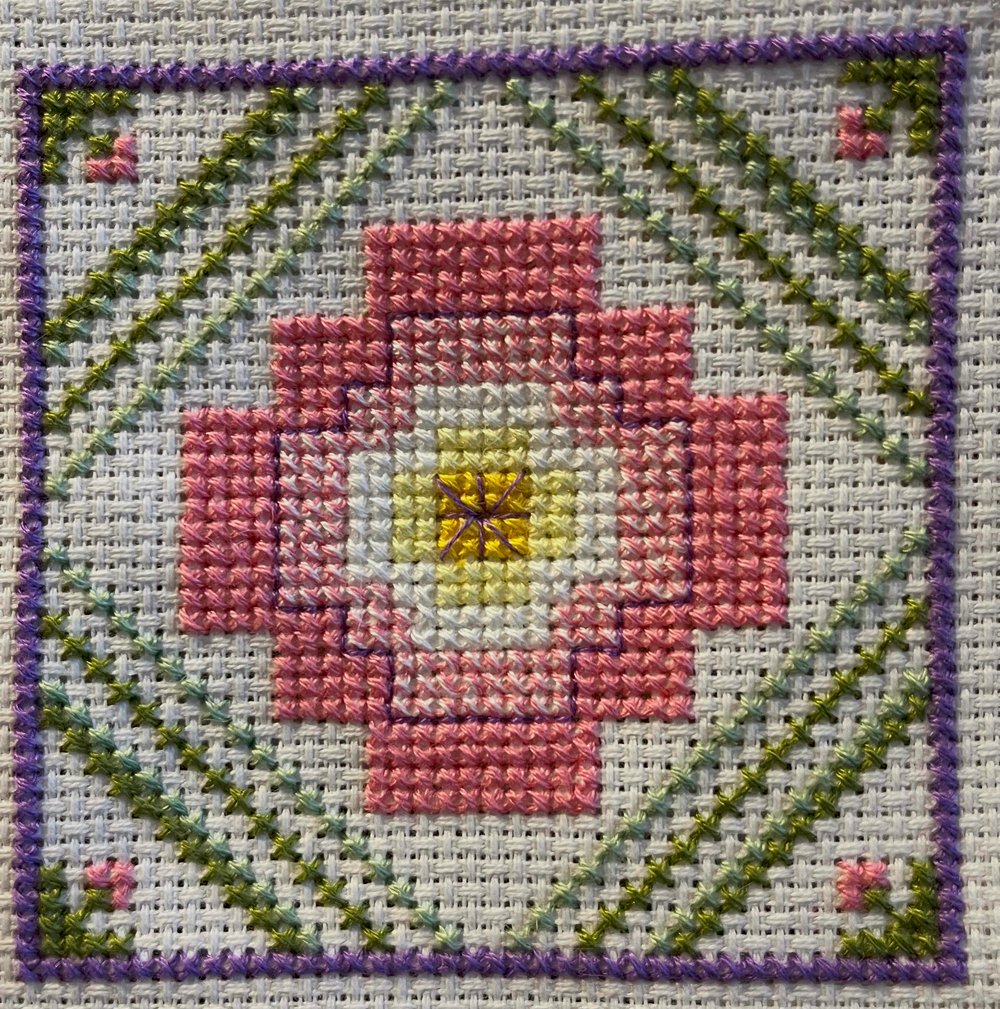
Some kits will have separate charts with and without backstitch, to make it easier to see: others, including my own, put the backstitch onto the cross stitch chart. If unsure of placement of stitches, check the photograph that comes with the design.
AND REMEMBER - you’re doing cross stitch for fun: the world won’t end if you don’t get every stitch in the right place!
DOWNLOAD THE FREE PATTERN HERE