
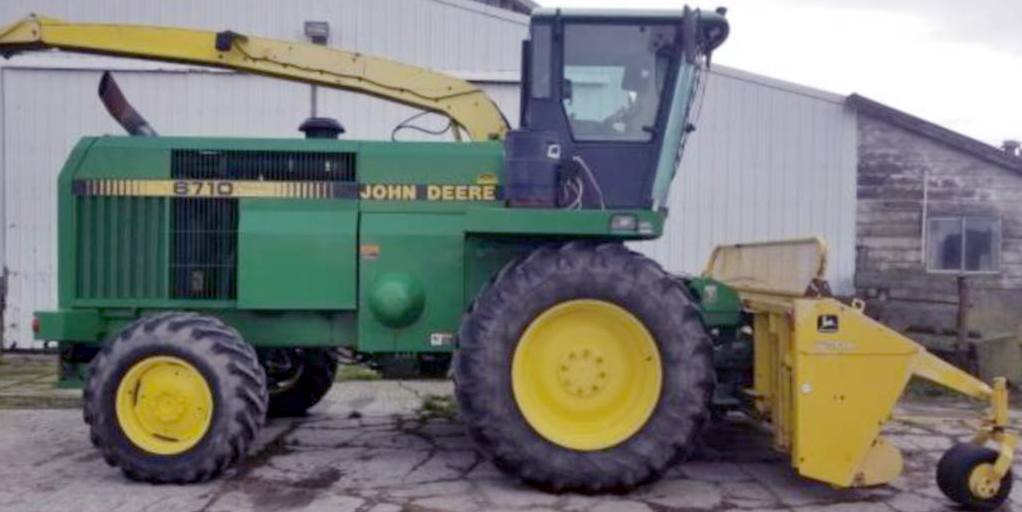
John Deere 6610 6710 6810 6910 Forage Harvester Workshop Repair Service Manual TM4489 PDF - MJODTM4489.zip
TM4489 — John Deere Self-Propelled Forage Harvesters 6610, 6710, 6810, 6910 Diagnosis and Tests Service Manual (TM4489)
Technical manual for John Deere self-propelled forage harvesters, models 6610, 6710, 6810, and 6910, covering diagnosis and testing procedures. Supplied in PDF format.
Complete Diagnostics Test manual with Electrical Wiring Diagrams for John Deere Self-Propelled Hay and Forage Harvesters Models 6610, 6710, 6810, 6910, with all the shop information to maintain, diagnostic, repair, service like professional mechanics.
John Deere 6610, 6710, 6810, 6910 Self-Propelled Forage Harvester workshop technical manual includes:
* Numbered table of contents easy to use so that you can find the information you need fast.
* Detailed sub-steps expand on repair procedure information
* Numbered instructions guide you through every repair procedure step by step.
* Troubleshooting and electrical service procedures are combined with detailed wiring diagrams for ease of use.
* Notes, cautions and warnings throughout each chapter pinpoint critical information.
* Bold figure number help you quickly match illustrations with instructions.
* Detailed illustrations, drawings and photos guide you through every procedure.
* Enlarged inset helps you identify and examine parts in detail.
Total Pages: 1,781 pages
File Format: PDF (bookmarked, ToC, Searchable, Printable, high quality)
Language: English
MAIN SECTIONS
Engine
Fuel, Air Intake and Cooling Systems
Electrical System
Connectors
Alternator
Starting Motor
Electrical System Components
Power Train
Replacing Main Drive Belt
Angled Drive
Transmission and Differential
Final Drives
Hydrostatic Drive, Variable Pump
Hydrostatic Drive, Fixed-Displacement Motor
Hydrostatic Drive, Oil Change
Cam Lobe Motor
Brakes, Steering, Rear Axle
Hydraulic System
Accumulators
Triple Hydraulic Pump
Electromagnetic Control Valve
Reverser Motor
Hydraulic Motor - Discharge Spout
Miscellaneous
Operator’s Cab, Air Conditioning System
Feeding
Length-of-Cut Transmission
Electric Clutch
Feed Roll Channel
Feed Roll Assembly
Locking Pawl
Cutterhead Assembly
Knife Sharpening Device
Cutterhead
Bottom and Outlet Bands
Kernel Processor
Discharge Components
Discharge Fan
General Information
Engine - Operation
Fuel and Air Intake System
Fuel and Air Intake System
Electrical System
General Information
Test Equipment
Electrical System Diagrams
Batteries, Starting Motor, Alternator
Safety Switches, Basic Relays
Engine Shut-Off Device
Instruments
Electronic INFO-TRAK Monitor
Turning Discharge Spout
Raising/Lowering Discharge Spout
Harvesting Unit Float System
Reel Fore-and-Aft Adjustment
Raising Reel
Reel Speed Adjustment
Rotary Crop Divider
676 Rotary Harvesting Unit (North America) from S.N. 501958
Attaching Trailer
Raising/Lowering Harvesting Unit
Pressure Valves, Trailer Dump up to Serial No. 501957
Pressure Valve, Trailer Dump from Serial No. 501958
Main Clutch, Reverser
Four-Wheel Drive
Lighting System
Work Lights
Stop Lights, Horn
Revolving Hazard Warning Lights
Fan, Air Conditioning System
Windshield Wiper/Washer System
Radio, Interior Lighting
Rotary Radiator Screen up to Serial No. 501235
Radiator Screen, Reverse Travel Alarm from Serial No. 501236
Cigarette Lighter, Seat Compressor
Spout Rinsing System
Discharge Spout Flap Adjustment
Main Electronic System
Metal Detector
Electronic Control Unit
Powr-Savr
ROW-TRAK System
676 Rotary Harvesting Unit
Power Train
Brakes, Steering, Rear Axle
Hydraulic System
Cutting Platform Float System
Operator’s Cab
Supplement (July-97) for Technical Manual TM4489 6610, 6710, 6810 and 6910 Self-Propelled Forage Harvesters
tm4489 - 6610, 6710, 6810, 6910 self-propelled forage harvester
Table of Contents
Foreword
Supplement (July-97) for Technical Manual TM4489 6610, 6710, 6810 and 6910 Self-Propelled Forage Harvesters
Section 05: Safety
Group 05: Safety Information
Handle Fluids Safely-Avoid Fires
Prevent Battery Explosions
Prepare for Emergencies
Prevent Acid Burns
Avoid High-Pressure Fluids
Parking and Leaving the Forage Harvester
Support Machine Properly
Wear Protective Clothing
Service Machines Safely
Work In Ventilated Area
Work in Clean Area
Remove Paint Before Welding or Heating
Avoid Heating Near Pressurized Fluid Lines
Illuminate Work Area Safely
Replace Safety Signs
Use Proper Lifting Equipment
Service Tires Safely
Practice Safe Maintenance
Use Proper Tools
Dispose of Waste Properly
Live With Safety
Section 10: General
Group 10: Torques for Hardware
Unified Inch Bolt and Cap Screw Torque Values
Metric Bolt and Cap Screw Torque Values
Section 20: Engine
Group 05: Removing and Installing Engine
Engines of 6000 Series Forage Harvesters
Engine Designation Codes
Specifications
Prior to Removing Engine
Removing the Engine
Repairing the Engine
Installing the Engine
Rear Engine Mounting
Lateral Engine Mounting
Section 30: Fuel, Air Intake and Cooling Systems
Group 05: Fuel System
Fuel System, John Deere Engine
Fuel System, Cummins Engine
General Information
Removing Fuel Tank
Removing Fuel Gauge Sending Unit
Installing the Fuel Gauge Sending Unit
Cooling Element Location (6810 and 6910)
Fuel Circuit (6810 and 6910)
Replacing the Fuel Cooler
Prior to Removing the Cooling Elements
Removing the Cooling Elements
Installing the Cooling Elements
Group 10: Air Intake System
Cooling Element Location (6610 and 6710)
Intercooler and Air Pipes
Replacing the Intercooler
Installing the Intercooler
Air Cleaner (6610 and 6710)
Air Cleaner (6810 and 6910)
Group 15: Cooling System
Removing the Radiator
Installing the Radiator
Replacing the Coolant Level Sending Unit
Replacing the Viscous Drive
Air Intake System (6610 and 6710)
Air Intake System (6810 and 6910)
Checking Rotary Radiator Screen
Rotary Screen Components
Adjusting the Screen
Drive for Rotary Radiator Screen
Section 40: Electrical System
Group 05: Connectors
Special or Essential Tools
Electrical Repair Tool Kit
Electrical Connector Handling
Disconnecting Electrical Circuit
Replacing Connectors
Insulated and Non-Insulated Connectors
Replacing Small MATE-N-LOC MATE-N-LOC is a trademark of AMP Inc. Contacts in Connector Housings
Replacing SURE-SEAL SURE-SEAL is a trademark of ITT Cannon Electric Co. Connector Bodies
Replacing MATE-N-LOC MATE-N-LOC is a trademark of AMP Inc. and CPCCPC is a trademark of AMP Inc. Pin and Socket Contacts
Replacing Deutsch Deutsch Is A Trademark Of Deutsch Co. Connectors
Install Deutsch Deutsch Is A Trademark Of Deutsch Co. Contact
Replace WEATHER PACK WEATHER PACK is a trademark of Packard Electric. Connector
WEATHER PACK WEATHER PACK is a trademark of Packard Electric. Male and Female Connectors
Replacing METRI PACK METRI PACK is a trademark of Packard Electric. Connectors
Replacing Schlemmer Schlemmer is a trademark of Josef Schlemmer GmbH. Connectors
Group 10: Alternator
Specifications
Remove Alternator
Remove Regulator
Disassemble Alternator
Test Rotor for Shorted or Broken Windings
Test Rotor for Grounded Windings
Test Radial Runout of Rotor
Test Stator for Shorted Windings
Test Stator for Grounded Windings
Replace Ball Bearings
Replace Carbon Brushes
Test Diode Plate - General Information
Test Positive Diodes
Test Negative Diodes
Test Exciting Diodes
Assemble Alternator
Install Alternator
Group 15: Starting Motor
Specifications
Remove Starting Motor
Disassemble Starting Motor
Remove Solenoid
Remove End Frame Cover and Gasket
Remove Brushes and Commutator End Frame
Remove Drive End Housing
Remove Overrunning Clutch
Remove Armature
Starting Motor Components
Inspect Armature
Armature Short Circuit Test
Armature Ground Test
Armature Open Circuit Test
Repair Armature
Inspect Overrunning Clutch and Pinion
Ground Circuit Test for Field Windings
Open Circuit Test for Shunt Windings
Open Circuit Test for Field Windings
Remove Field Windings (IfNecessary)
Install Field Windings
Short Circuit Test for Shunt Windings
Inspect and Repair Brushes
Test Brush Holder for Ground
Measure Brush Spring Tension
Assemble Starting Motor - Preparations
Assemble Starting Motor
Place Commutator End Frame Over Armature
Twist Brush Leads (B) 180 Degrees
Install Brush Ground Straps (B)
Install Commutator End Frame
Place End Frame Cover onto Field Frame
Install Solenoid
Attach Solenoid
Install Field Coil Connector (A), Washers and Nuts
Install Shunt Lead Wire (A), Lock Washer and Nut
Install Starting Motor
Group 20: Electrical System Components
Engine Oil Pressure Sending UnitB1
Coolant Temperature Sending UnitB2
Reverser Motor Pressure SwitchB4
Hydrostatic Oil Temperature Sending UnitB6
Hydraulic Oil Filter Sending UnitB7
Hydrostatic Charge Pressure Sending UnitB8
Air Cleaner Sending UnitB9
Cutterhead Speed Sending UnitB10
Ground Speed Sending UnitB12
Engine Speed Sending UnitB13
Air Conditioning System Temperature SwitchB16
Air Conditioning System Low Pressure SwitchB17
Air Conditioning System High Pressure SwitchB18
ThermostatB19
Main Clutch Pressure SwitchB23
Transmission Oil Temperature Sending Unit B25
Sound Sending UnitsB26 andB27
Fuel Tank Sending UnitB28
Rotary Radiator Screen Drive MotorM2
Cab FanM3
Front Windshield Wiper MotorM4
Spout Flap MotorM6
Sharpening Stone Lowering MotorM9
Knife Sharpening MotorM10
Adjusting End Position Stop of Motor(M10)
Counterknife and Kernel Processor Adjusting MotorsM11, M12, M13, M14
R.H. and L.H. Side Windshield Wiper Motors M15 and M16
PotentiometersR23 and R24
Calibrating PotentiometersR23 andR24
Section 50: Power Train
Group 05: Replacing Main Drive Belt
Replacing Main Drive Belt
Checking Belt Alignment
Group 10: Angled Drive
Special or Essential Tools
Specifications
Remove Angled Drive
Remove Disk Clutch
Install Pulley
Assemble Clutch
Main Clutch, Exploded View
Main Clutch
Main Clutch from Serial Number 500869
Main Clutch Assembly from Serial Number 500869
Main Clutch Assembly from Serial No. 502397 (6810, 6910)
Disassemble Angled Drive
Remove Input Shaft