
John Deere 459 Economy Round Baler Workshop Repair Service Manual TM140619 PDF - MJODTM140619.zip
John Deere 459 Economy Hay and Forage Round Balers Complete Workshop Technical Manual (TM140619)
TM140619 - John Deere 459 Economy Hay and Forage Round Balers Full Workshop Technical Manual (Diagnostics, Operation, Testing, and Repair Service).PDF
Complete Diagnostics and Repair Technical manual with Electrical Wiring Diagrams for John Deere Hay and Forage Round Balers Models 459 Economy, with all the shop information to maintain, diagnostic, repair, rebuild like professional mechanics.
459 Economy Hay and Forage Round Balers workshop Diagnosis repair manual includes:
* Numbered table of contents easy to use so that you can find the information you need fast.
* Detailed sub-steps expand on repair procedure information
* Numbered instructions guide you through every repair procedure step by step.
* Troubleshooting and electrical service procedures are combined with detailed wiring diagrams for ease of use.
* Notes, cautions and warnings throughout each chapter pinpoint critical information.
* Bold figure number help you quickly match illustrations with instructions.
* Detailed illustrations, drawings and photos guide you through every procedure.
* Enlarged inset helps you identify and examine parts in detail.
Total Pages: 1,225 pages
File Format: PDF (bookmarked, ToC, Searchable, Printable, high quality)
Language: English
MAIN SECTIONS
Foreword
General
Safety
Specifications
General Information
Lubricants
Drive Train
General Information
Diagnosing Malfunctions
Drive Train Protection
PTO Driveline
Remove and Install Gear Case
Gear Case Repair
Roll Drives
Rolls
Miscellaneous
Hydraulics
General Information
Diagnosing Malfunctions
Operation and Tests
Tensioning Valve Repair
Cylinder Repair
Hydraulic Bale Ramp (Optional)
Twine Mechanism-Electric (If Equipped)
General Information
Diagnosing Malfunctions
Twine Wrap System Adjustments
Twine Wrap System Repair
Net Wrap (If Equipped)
General Information
Diagnosing Malfunctions
Net Wrap Repair
Electrical System
General Information
Common Electrical Tests and Checks
Diagnosing Malfunctions
Tests and Adjustments
Electrical Diagrams
Electrical Diagrams-BaleTrak™ PRO System
BALETRAK Pro Monitor-Controller Operations
Repair-BALETRAK Pro System
Connector Repair
Pickup
General Information
Diagnosing Malfunctions
Regular Pickup Repair
Miscellaneous
Miscellaneous
Wheel Repair
Gate Repair
Tension Arm Repair
Tongue Repair
Belt Repair
Main Frame Repair
Bale Ramp (If Equipped)
Dealer Fabricated Tools
tm140619 - 459 Economy Round Baler
Table of Contents
Foreword
Section 10: General
Group 05: Safety
Recognize Safety Information
Understand Signal Words
Follow Safety Instructions
Handle Fluids Safely—Avoid Fires
Prevent Battery Explosions
Prepare for Emergencies
Park Machine Safely
Operate Baler Safely
Protect Bystanders
Service Machine Safely
Support Machine Properly
Wear Protective Clothing
Work in Clean Area
Service Machines Safely
Work In Ventilated Area
Illuminate Work Area Safely
Replace Safety Signs
Use Proper Lifting Equipment
Avoid High-Pressure Fluids
Remove Paint Before Welding or Heating
Avoid Heating Near Pressurized Fluid Lines
Service Tires Safely
Practice Safe Maintenance
Use Proper Tools
Construct Dealer-Made Tools Safely
Dispose of Waste Properly
Precautions for Welding
Protect Against High Pressure Spray
Live With Safety
Group 10: Specifications
Machine Specifications—459E
Metric Bolt and Screw Torque Values
Unified Inch Bolt and Screw Torque Values
Service Recommendations For 37° Flare and 30° Cone Seat Connectors
Group 15: General Information
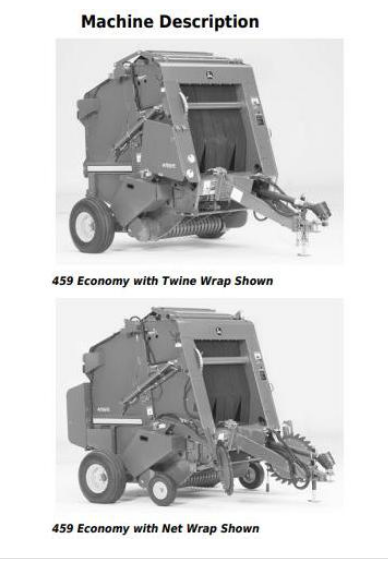
Machine Description
Group 20: Lubricants
Grease
Gear Case Oil
Alternative and Synthetic Lubricants
Mixing of Lubricants
Lubricant Storage
Perform Lubrication and Maintenance
Section 20: Drive Train
Group 05: General Information
Drivetrain Operation
Group 10: Diagnosing Malfunctions
PTO Driveline Difficulties
Shear Bolt Difficulties
Gear Case Difficulties
Drive Chain Difficulties
Group 15: Drive Train Protection
Specifications
Replace Driveline Shear Bolt
Group 20: PTO Driveline
Other Material
PTO Driveline Exploded View with Plastic Shields (Shear Bolt Type)
Repair Shields (Shear Bolt Type)
Install Shield
Repair U-Joint (Shear Bolt Type)
Repair PTO Lock-Back Collar Disconnect (Shear Bolt Type)
Repair PTO Lock-Back Collar Disconnect
Repair PTO Constant Velocity Joint (Shear Bolt Type)
Disassemble and Assemble Constant Velocity Joint (Shear Bolt Type)
Replace Centralizer Bearing
Group 25: Remove and Install Gear Case
Other Material
Specifications
Remove Gear Case
Install Gear Case
Replace Gear Case Hex Shaft
Group 27: Gear Case Repair
Essential or Recommended Tools
Service Equipment and Tools
Other Material
Specifications
Disassemble Gear Case
Gear Case Exploded View
Assemble Gear Case
Group 30: Roll Drives
Specifications
Adjust Lower Drive Roll Chain
Adjust Upper Drive Roll Chain
Check Starter Roll Drive Chain
Adjust Starter Roll Drive Chain
Replace Starter Roll Drive Chain
Remove and Install Starter Roll Sprocket
Remove and Install Lower Drive Roll Sprocket
Check Upper Drive Roll Sprocket Alignment
Group 35: Rolls
Service Equipment and Tools
Specifications
Diagram of Rolls and Belt Routing
Remove and Install Starter Roll
Remove and Install Belt Staggering Roll
Remove and Install Take-Up Arm Roll
Remove and Install Front Idler Roll
Remove and Install Top Idler Roll
Remove and Install Auxiliary Take-Up Roll (If Equipped)
Remove and Install Upper Rear Gate Roll
Remove and Install Lower Rear Gate Roll
Remove and Install Lower Front Gate Roll
Remove and Install Rear Roll of Tension Arm
Remove and Install Center and Front Rolls of Tension Arm
Replace Tension Arm Roll Shaft
Replace Stationary Shaft Roll Bearings
Remove and Install Lower Drive Roll
Remove and Install Left-Hand Side Lower Drive Roll Bearing
Remove and Install Right-Hand Side Lower Drive Roll Bearing
Remove and Install Upper Drive Roll
Install Upper Drive Roll Bearings
Group 40: Miscellaneous
Service Equipment and Tools
Specifications
Adjust Lower Front Gate Roll Scraper
Section 30: Hydraulics
Group 05: General Information
Specifications
Tensioning Valve
Non-Adjustable Relief Valve
Pilot-Operated Check Valve
Install Inline Orifice Correctly
Group 10: Diagnosing Malfunctions
Diagnosing Hydraulic Malfunctions
Group 15: Operation and Tests
Essential or Recommended Tools
Specifications
Hydraulic System Operation
Low Pressure Relief Valve Test
High-Pressure Relief Valve Test—Field Test
High-Pressure Relief Valve Test—Shop Test
Test Tension/Gate Cylinder for Leakage
Test Hydraulic Pickup Lift Cylinders for Leakage
Group 20: Tensioning Valve Repair
Remove and Install Tensioning Valve
Remove and Install Tensioning Valve with Options
Disassemble and Assemble Tensioning Valve
Check Condition of Valve Seat and Poppet
Group 25: Cylinder Repair
Service Parts Kits
Remove and Install Gate Cylinder
Disassemble and Assemble Gate or Tension Arm Cylinder
Disassemble and Assemble Upper Take-Up Arm Cylinder
Group 30: Hydraulic Bale Ramp (Optional)
Repair Hydraulic System with Hydraulic Bale Ramp
Section 50: Twine Mechanism—Electric (If Equipped)
Group 05: General Information
Twine Wrap System Description
Understanding Twine Wrap Terms and Settings
Group 10: Diagnosing Malfunctions
Twine Wrap Difficulties
BALETRAK Pro Monitor-Controller Difficulties
Group 15: Twine Wrap System Adjustments
Specifications
Set Twine Arm-to-Starter Roll, Cutter Link Support, and Twine Arm Stop
Set Twine Cutter-to-Twine Arm
Check and Set Twine Cutter Knife
Set Twine Cutter Contact Tab
Set Clearance Between Cutter Link Support and Twine Arm
Set Twine Cutter Tension
Set Front Twine Arm
Set Twine Indicator Retaining Strap
Set Twine Tension
Set Twine End Wrap Distance
Set Twine Spacing
Group 20: Twine Wrap System Repair
Specifications
Remove and Install Twine Arm Actuator
Install Twine Arm Actuator, Adapter, and Pivot Assembly
Install Twine Arm Stop
Section 60: Net Wrap (If Equipped)
Group 05: General Information
Other Material
Specifications
System Description
Switch Description
Setting Number of Net Wraps
Monitor Display for B-Wrap Baling
Correct Feeding Problems
Prepare Net Wrap After Extended Storage
Check and Adjust Net Wrap Pan
Check and Straighten Net Pan Angle
Checking and Adjusting Net Pan Pressure without Leaf Spring
Group 10: Diagnosing Malfunctions
Net Wrap Difficulties
BaleTrak Pro Monitor-Controller Difficulties
Group 15: Net Wrap Repair
Specifications
Remove and Install Net Wrap Assembly
Repair Cuts on Feed Roll
Remove and Install Upper Feed Roll
Replace Upper Feed Roll Bearings
Remove and Install Lower Feed Roll
Check Net Pan Pressure
Adjust Lower Net Wrap Guide
Replace Lower Front Gate Roll Belt Guide
Replace Cover Hinge Seal
Check Cover Gas Springs
Check and Adjust Cover Latch
Remove Net Wrap Actuator
Install Net Wrap Actuator
Remove and Install Net Wrap V-Belt
Check and Adjust Net Wrap V-Belt Idler Tension
Check and Adjust Net Wrap Switch
Final Adjustment of Net Wrap Switch—In Field
Replace Net Wrap Switch or Switch Arm
Remove and Install Cutoff Knife
Sharpen Cutoff Knife
Adjust Net Wrap Counterknife
Install and Adjust Net Wrap Brush
Adjusting Net Wrap Feed Roll Pressure
Checking Rubber Roll Bearing Support Clearance
Checking and Adjusting Net Wrap Feed Roll Brake Spring
Checking and Adjusting Brake Pad
Checking and Adjusting Net Wrap Feed Roll Brake
Adjusting Net Wrap Stretch
Section 70: Electrical System
Group 05: General Information
Lighting Enhancement Module
Electrical System Description—BaleTrak Pro
Group 10: Common Electrical Tests and Checks
Service Equipment and Tools
Electromagnetic Interference (EMI)