


Chimney
On Sale
$10.00
$10.00
Once upon a time, a friend with kids came over for a visit and saw the tray of blocks that lived on my coffee table. She started talking about how nice it was when folks without kids had toys around for kids to play with when they stopped by.
I did not have the heart to explain that those were my blocks.
They were mine. They were for me. And I will totally share them with you if you visit! But they are very much mine. And I’m going to play with them, regardless of my age or how ridiculous it might seem.
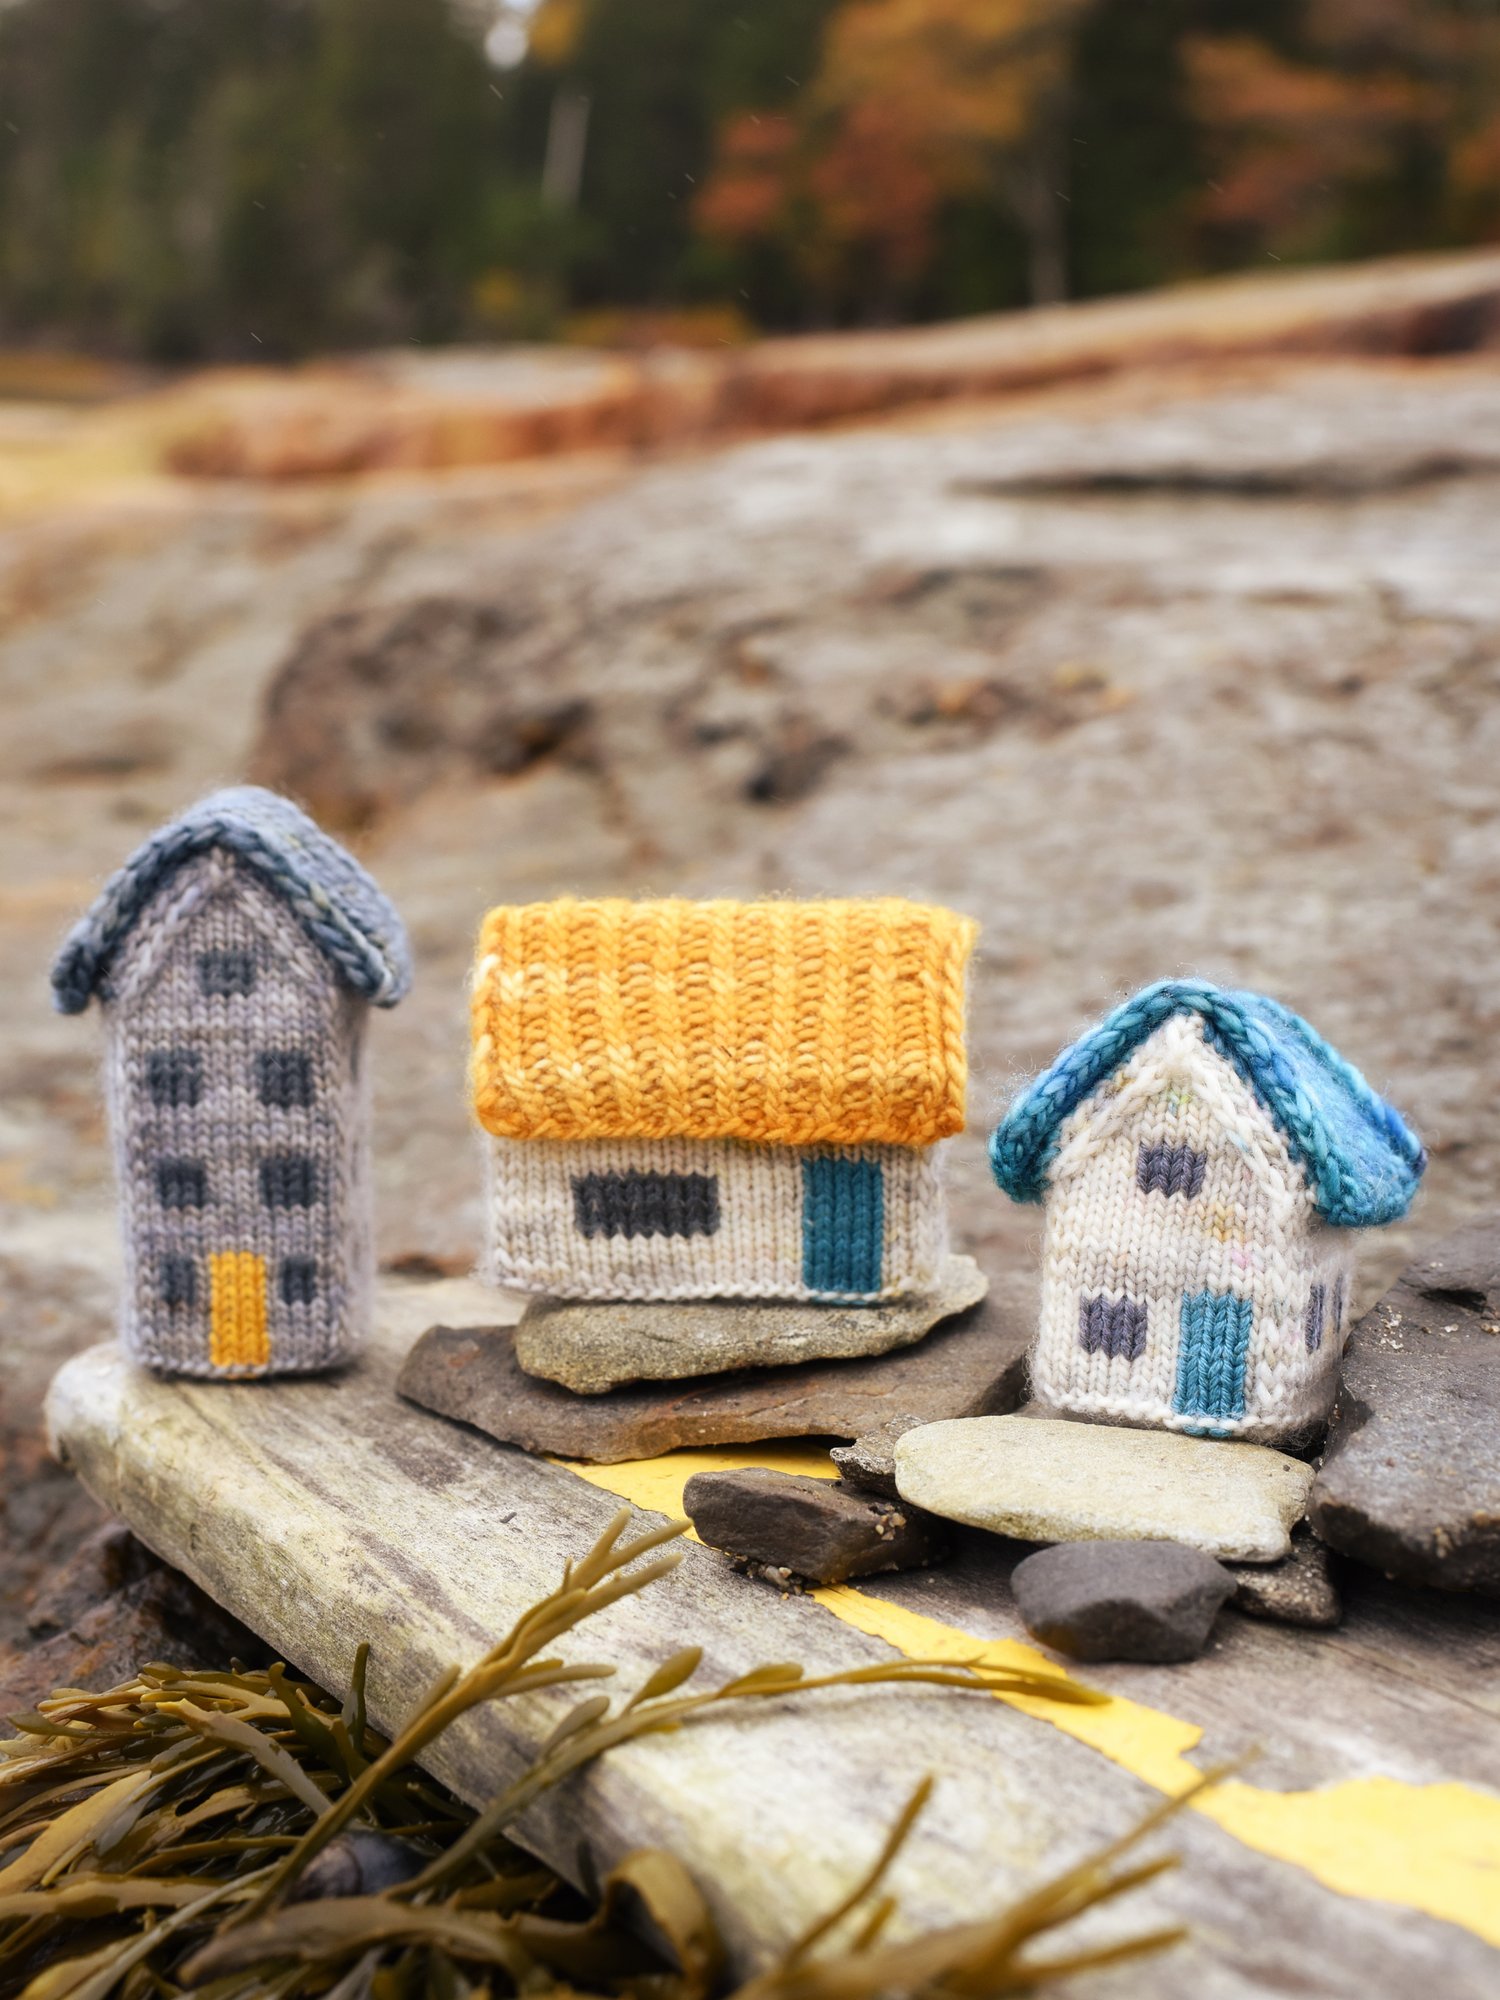
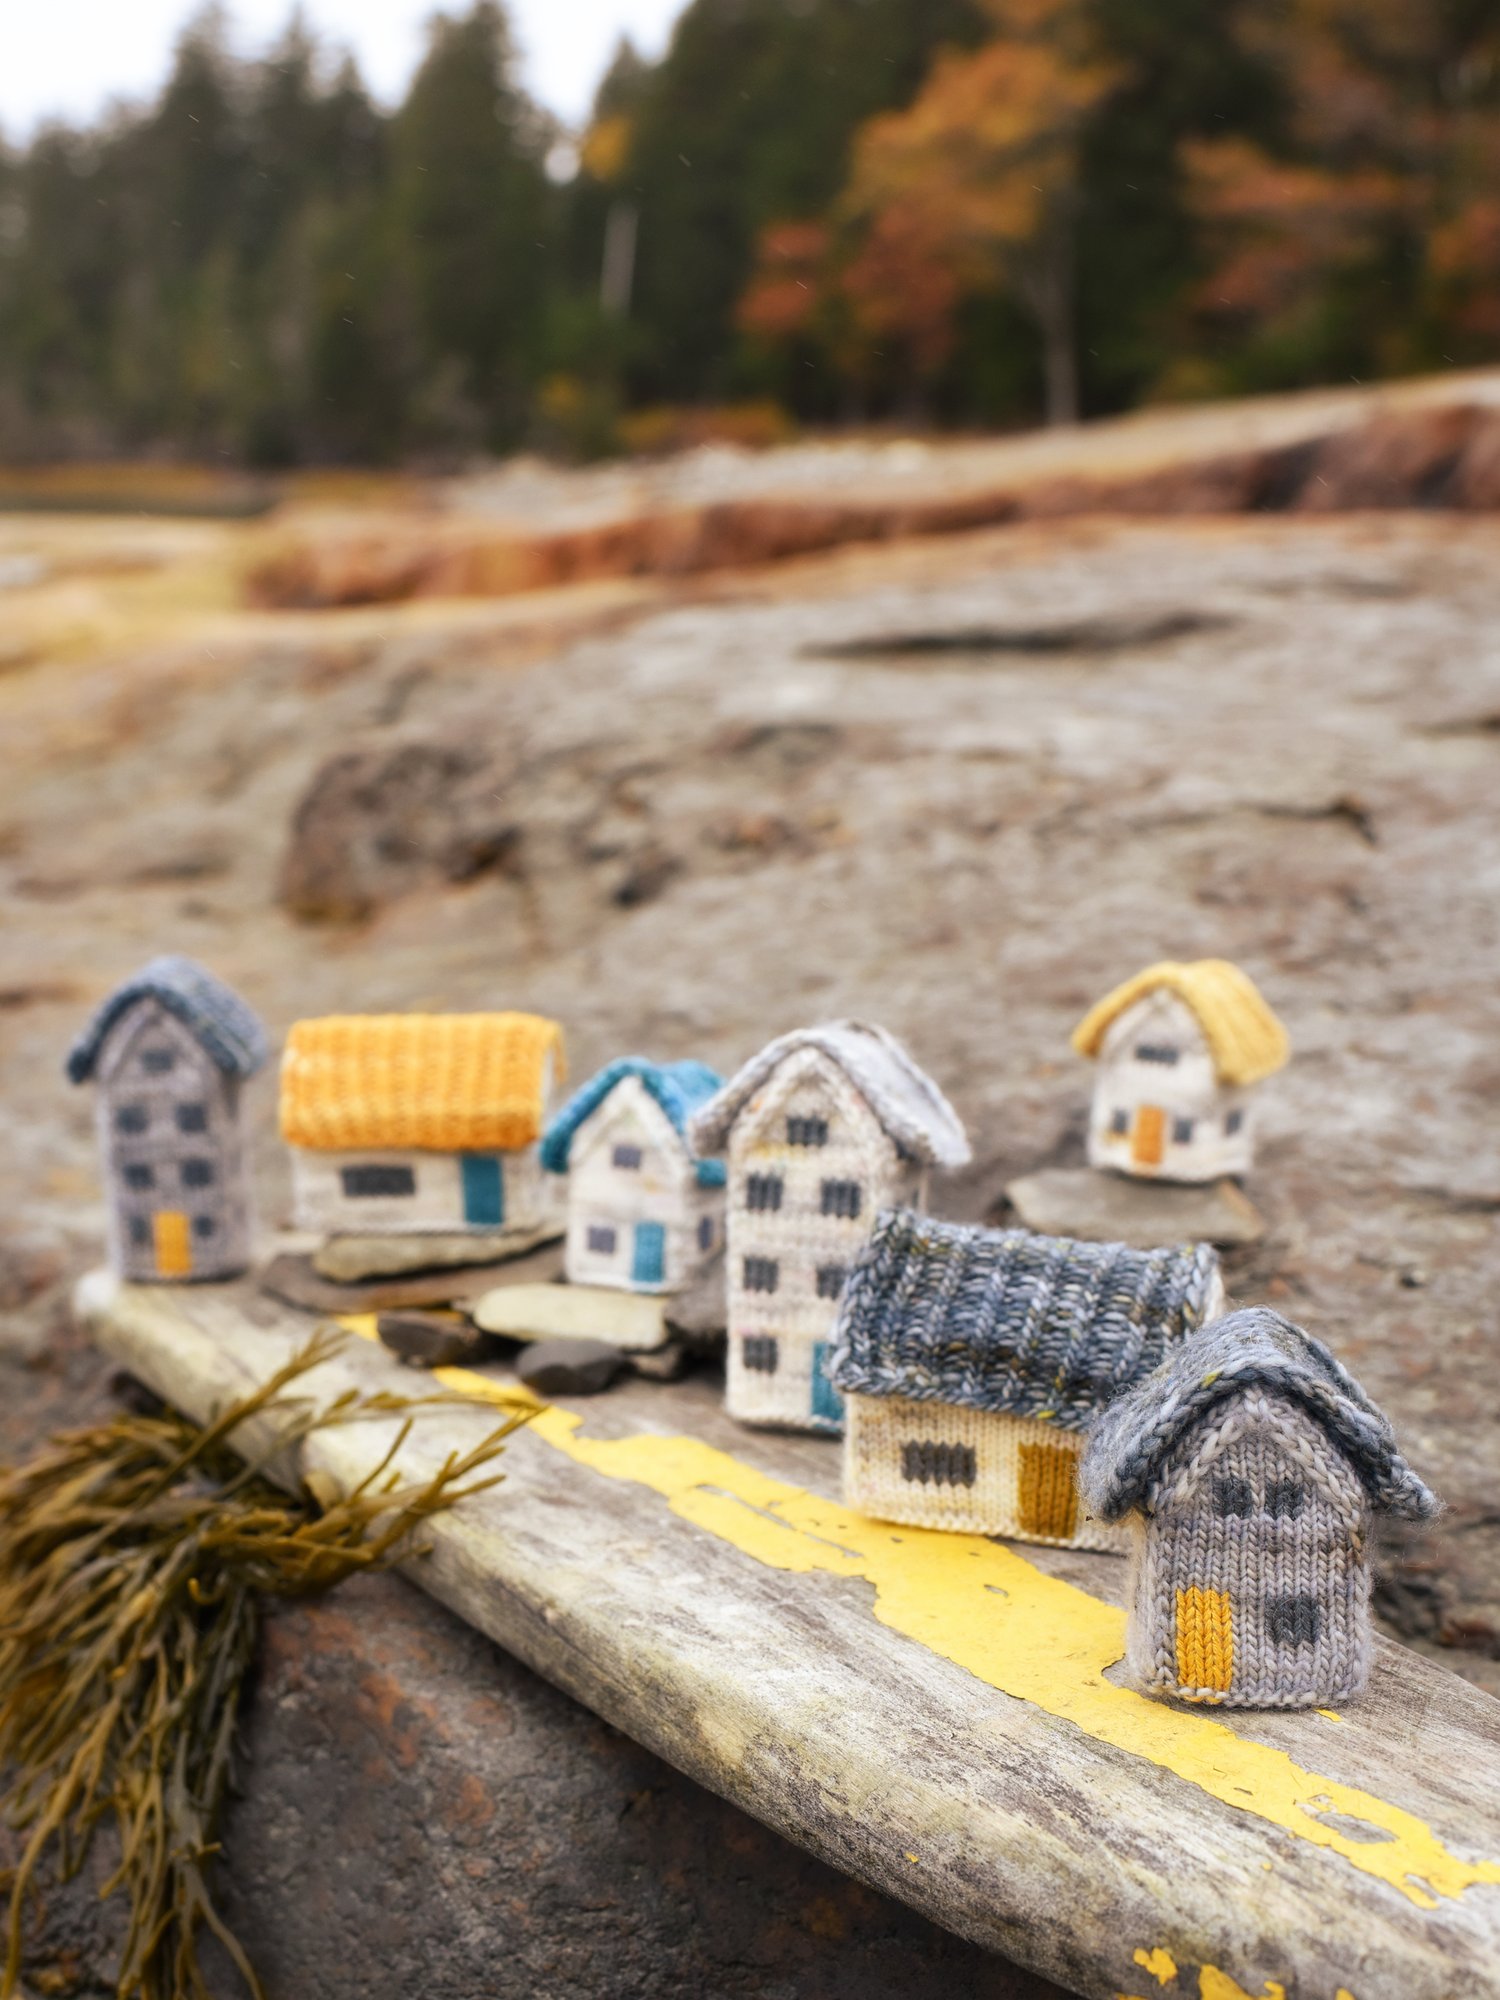
That’s pretty much how I feel about these little houses. I want to play with them. I want to make a whole village. I want houses and a tea shop and a bookstore and a school and everything else I can dream up. I want to use just the right colors and arrange them just so and dream up little stories for the folks who live there. Regardless of my age. Even if it’s ridiculous.
But I will share them with you if you’d like.
General information
This 28-page pattern is tremendously detailed and holds your hand every step of the way. There are pages and pages of step-by-step photos to show you exactly what to expect as you work. The pattern is full of helpful tips on everything from casting on, blocking, filling your houses, and managing your ends.
It’s almost absurdly detailed, but it really does mean you can totally make these, even if you’ve never knit a project like this before!
Skills & scope
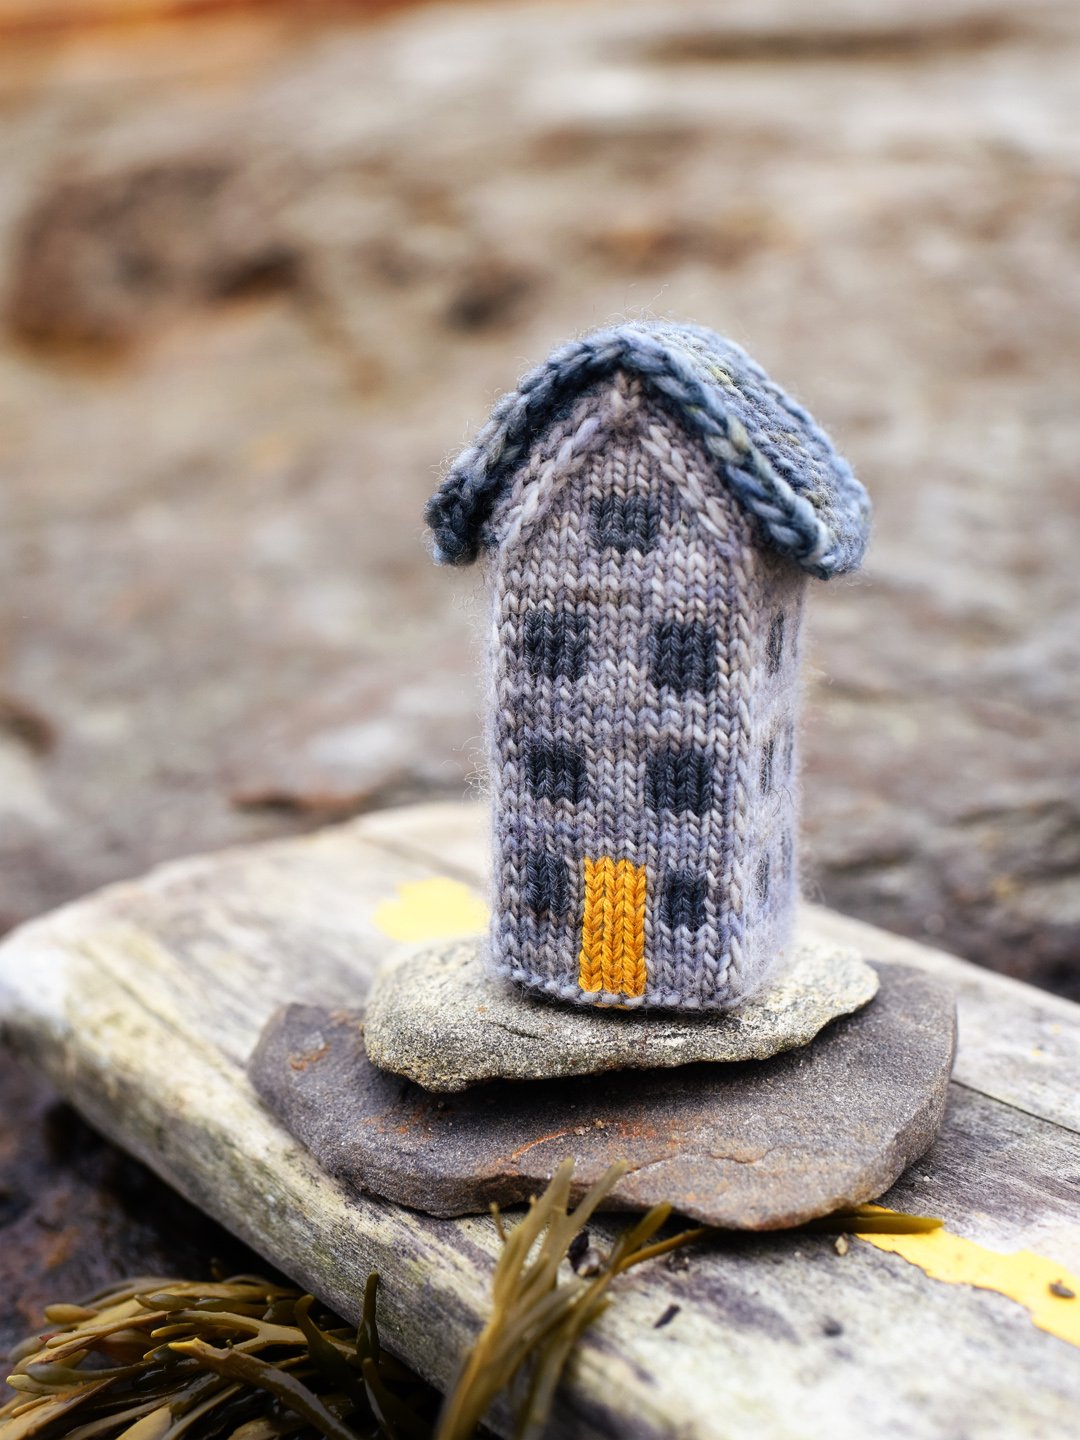
Each house fits in the palm of your hand and takes only a few hours to knit. The knitting is surprisingly mellow, mostly stockinette in the round with a few increases and decreases here and there to give it shape for the building, ribbing worked flat for the roof. A bit of duplicate stitch at the end makes the windows and the doors.
The pattern uses charts, so you will need to know how to follow a knitting chart.
Yarn, gauge & sizing
The pattern comes in three sizes and two house shapes (a square base or a rectangular base). I made mine in fingering weight yarn, but you can make it in any weight of yarn, and the finished size will change depending on what yarn you use. You don’t need to match any particular gauge, but you do need to knit tightly enough to make a firm fabric so your filling doesn’t show through.
You can absolutely use scrap yarn for this.
The houses in the pictures are the smallest size and took less than 100 yards of yarn for each house and less than 50 for each roof. They are worked 10 stitches per inch, but I only worked that tight because I wanted tiny houses. There are sizing guidelines for everything from 6-10 stitches per inch. My houses are between 1.25 and 3.25 inches tall and between 1.25 and 2.5 inches across.
Tools & supplies
You’ll need needles that let you work in the round (circulars or DPNs) in whatever size lets you get a firm fabric with your chosen yarn plus the general knitting tools you need for most projects (scissors to cut your yarn, a darning needle to weave in ends, the occasional stitch marker or bit of scrap yarn to hold stitches). Part of the project is knit in the round, and part flat, so you’ll want to be sure you’re using whatever needles you need to get the same gauge in both cases (some people need a different needle size when knitting flat than when knitting in the round).
You’ll also need something to fill the houses with. I used building blocks, but if you can’t find blocks, I’ve included diagrams you can print and assemble. If you have the tools, materials, and inclination, you could also cut upholstery foam, floral foam, or styrofoam to size, or construct shapes out of plastic canvas, or find items around your house you can use if you’re feeling like a bit of a scavenger hunt. If you want a softer shape, you could also fill your houses with stuffing (this will give a much rounder look than the houses in the pictures). I have a page here with information about the supplies I use in my projects.