
John Deere 5103 5103S 5203 5038D 5104 5204 Tractor Repair & Diagnostic Workshop Manual TM2041 PDF - MJODTM2041.zip
This diagnostics and repair technical manual, complete with electrical wiring diagrams, covers John Deere 5103, 5103S, and 5203 tractors, offering the workshop guidance needed to service, troubleshoot, fix, and rebuild these machines the way professional technicians do.
Inside the John Deere Tractors 5103, 5103S, 5203 series Diagnosis Tests Service Technical Manual, you'll find:
* Numbered table of contents easy to use so that you can find the information you need fast.
* Detailed sub-steps expand on repair procedure information
* Numbered instructions guide you through every repair procedure step by step.
* Troubleshooting and electrical service procedures are combined with detailed wiring diagrams for ease of use.
* Notes, cautions and warnings throughout each chapter pinpoint critical information.
* Bold figure number help you quickly match illustrations with instructions.
* Detailed illustrations, drawings and photos guide you through every procedure.
* Enlarged inset helps you identify and examine parts in detail.
TM2041 - John Deere Tractors 5103, 5103S & 5203 Diagnostic and Repair Technical Manual.PDF
TM2041 - John Deere Tractors 5103, 5103S & 5203 Diagnostic and Repair Technical Manual.EPUB
Total Pages: 1,432 pages
File Format: PDF/EPUB/MOBI/AZW (PC/Mac/Android/Kindle/iPhone/iPad; bookmarked, ToC, Searchable, Printable)
Language: English
MAIN SECTIONS
Foreword
General Information
Safety
General Specifications
Fuel and Lubricants
Serial Number Locations
Features and Accessories
Engine Repair
Engine
Cylinder Head and Valves
Cyl. Block, Liners, Pistons & Rods
Crankshaft, Main Bearings and Flywheel
Camshaft and Timing Gear Train
Lubrication System
Cooling System
Fuel and Air Repair
Fuel System
Air Intake and Exhuast System
Speed Control Linkage
Electrical Repair
Battery, Starter and Alternator
Electrical System Components
Wiring Harness
Power Train Repair
Clutch Housing
Clutch Assembly
'AA' Transmission
'AA+' Transmission
Rear PTO Dual Clutch
Rear PTO Single Clutch
Differential
Final Drives
Steering and Brake Repair
Steering Repair
Brake Repair
Hydraulic Repair
Hydraulic Pump and Filter
JD Rockshaft
MITA Rockshaft
Miscellaneous Repair
Front Axle
Wheels
3-Point Hitch
Front Bumper (For 5103E)
Operator Station Repair
Seat and Support
Operator Platform
Fenders
Operational Checkout Procedures
Operational Checkout Procedures
Engine Operation, Tests and Adjustments
Component Location
Component Location (For 5103E)
Theory of Operation
Diagnosis, Tests and Adjustments
Fuel/Air Operation, Tests and Adjustments
Component Location
Theory of Operation
Diagnosis, Tests and Adjustments
Electrical System Operation, Tests & Adjustments (5038D, 5103, 5103S, 5203, 5104 and 5204)
Component Location
Theory of Operation
Wiring Schematics
Diagnosis, Test and Adjust
Electrical System Operation, Tests & Adjustments (For 5103E)
Component Location
Theory of Operation
Wiring Schematics
Diagnosis, Test and Adjust
Power Train Operation, Tests & Adjustments
Component Location- 'AA' Power Train
Component Location- 'AA+' Pattern Power Train
Theory of Operation- 'AA' Transmission
Theory of Operation- 'AA+' Pattern Transmission
Diagnosis, Tests and Adjustments-Power Train
Steering and Brake Operation, Tests & Adjustments
Component Location
Theory of Operation
Diagnosis, Tests and Adjustments
Hydraulic System Operation, Tests & Adjustments
Component Location
Theory of Operation
Diagnosis
Hydraulic Tests
Adjustments - MITA Rockshaft
Adjustments - JD Rockshaft
Hydraulic Schematics
tm2041 - 5103, 5103S And 5203 Tractors
Table of Contents
Foreword
Section 10: General Information
Group 05: Safety
Recognize Safety Information
Understand Signal Words
Follow Safety Instructions
Handle Fluids Safely—Avoid Fires
Prevent Battery Explosions
Prepare for Emergencies
Prevent Acid Burns
Service Cooling System Safely
Avoid High-Pressure Fluids
Park Machine Safely
Support Machine Properly
Wear Protective Clothing
Work in Clean Area
Service Machines Safely
Work In Ventilated Area
Illuminate Work Area Safely
Replace Safety Signs
Use Proper Lifting Equipment
Service Tires Safely
Avoid Harmful Asbestos Dust
Avoid Heating Near Pressurized Fluid Lines
Remove Paint Before Welding or Heating
Use Proper Tools
Dispose of Waste Properly
Live With Safety
Group 10: General Specifications
John Deere 5103E Tractor
John Deere 5103 Tractor
John Deere 5038D Tractor
John Deere 5103S Tractor
John Deere 5203 Tractor
John Deere 5104 Tractor
John Deere 5204 Tractor
Ground Speed Estimates
Service Recommendations for O-Ring Boss Fittings
Service Recommendations for Flat Face O-Ring Seal Fittings
Metric Bolt and Cap Screw Torque Values
Unified Inch Bolt and Cap Screw Torque Values
Group 15: Fuel and Lubricants
Diesel Fuel
Fuel Storage
Do Not Use Galvanized Containers
Fill Fuel Tank
Diesel Engine Oil
Diesel Engine Coolant
Transmission and Hydraulic Oil
Grease (Specific Application)
Grease
Alternative and Synthetic Lubricants
Lubricant Storage
Group 20: Serial Number Locations
Serial Numbers
Product Identification Number Location
Engine Serial Number Location
Fuel Injection Pump Serial Number Location
Alternator Serial Number Location
Power Steering Valve Serial Number Location
Starter Serial Number Location
Transmission Serial Number Location
Front Axle Serial Number Location
Group 25: Features and Accessories
Features and Accessories
Standard Features
Field Installed Optional Kits and Accessories
Section 20: Engine Repair
Group 05: Engine
Service Equipment and Tools
Specifications
John Deere Engine Repair—Use CTM8
Remove Engine
Remove Engine
Install Engine
Group 10: Cylinder Head and Valves
Special or Essential Tools
Specifications
Torques for Hardware
Cylinder Head - Exploded View
Check Valve Lift
Remove cylinder head
Clean Injection Nozzle Bores
Valve Actuating Parts
Remove Valves and Valve Springs
Checking Cylinder Head Flatness
Clean Valve Guides
Measure Valve Guides
Clean and Inspect Valve Seats
Lapping Valve Seats
Check Valve Recess
Remove Valve Seat Inserts
Valve Seat Insert Installation
Grind Valves
Check Valve Spring Tension
Inspect Valve Rotators
Install Valves
Install Cylinder Head
Torque Turn Tightening Method
Checking Rocker Arm Shaft
Install Rocker Arm Assembly
Valve Clearance
Valve Adjustment Sequence
Install Rocker Arm Cover
Final Work
Group 15: Cyl. Block, Liners, Pistons & Rods
Special or Essential Tools
Specifications
Torques for Hardware
Exploded View
Connecting Rods - General Information
Remove Pistons and Connecting Rods
Measure Cylinder Liner Bore
Remove Cylinder Liners
Cylinder Liner Deglazing
Cylinder Block Cleaning
Check Piston Cooling Jets
Cam Follower Bore Measure
Measure Camshaft Bore
Remove Camshaft Bushing
Install Camshaft Bushing
Measure Crankshaft Bore
Replace Crankshaft Bearing Caps
Cylinder Block Top Desk Flatness
Measure Cylinder Liner Protrusion
Liner Packing Installation
Liner O-Ring Installation
Install Cylinder Liners
Measure Connecting Rod Bearing
Rod Bearing Clearance
Measure Connecting Rod Bushing
Replace Connecting Rod Bushing
Measure Piston Pin
Clean and Inspect Pistons
Measure Piston Pin Bore
Piston Top Ring Groove
Second and Third Piston Ring Grooves
Piston Head and Skirt Checking
Install Piston Rings
Piston Rings Staggering
Piston/Liner Set Information
Assemble Piston and Connecting Rod
Install Piston and Connecting Rod
Measure Piston Protrusion
Complete Final Assembly
Group 20: Crankshaft, Main Bearings and Flywheel
Special or Essential Tools
Specifications
Torques For Hardware
Remove Crankshaft Pulley
Install Crankshaft Pulley
Flywheel Removal
Flywheel Ring Gear Replacement
Install Ball Bearing
Install Flywheel
Remove Crankshaft Rear Oil Seal
Flywheel Housing Replacement
Install Oil Seal/Wear Sleeve
Crankshaft End Play Measure
Remove Crankshaft
Crankshaft Inspection
Check Crankshaft Journal Diameter
Determine Crankshaft Main Bearing Clearance Using PLASTIGAGE PLASTIGAGE is a trademark of DANA Corp.
Regrind Crankshaft
Crankshaft Regrinding Guidelines
Micro-Finishing Specifications
Replace Crankshaft Gear
Install Main Bearing Inserts
Install 2-Piece Thrust Bearing
Crankshaft Installation
Group 25: Camshaft and Timing Gear Train
Special or Essential Tools
Specifications
Torques for Hardware
Remove Crankshaft Front Oil Seal
Remove Timing Gear Cover
Measure Timing Gear Backlash
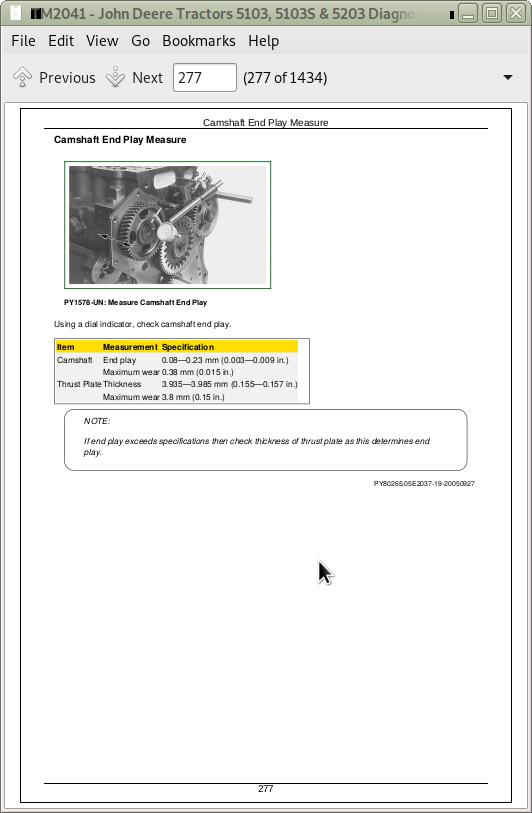
Camshaft End Play Measure
Remove Camshaft
Measure Camshaft Journal
Measure Height of Cam Lobe
Replace Camshaft Gear
Install Camshaft
Check Cam Follower
Idler Gear End Play Measure
Remove Front Plate
Idler Gear Bushing and Shaft Measure
Idler Gear Bushing Replacement
Remove Idler Shaft
Install Idler Shaft Spring Pin
Install Idler Shafts
Install Front Plate
Install Upper Timing Gear Train
Install Lower Timing Gear Train
Install Lower Timing Gear Train