
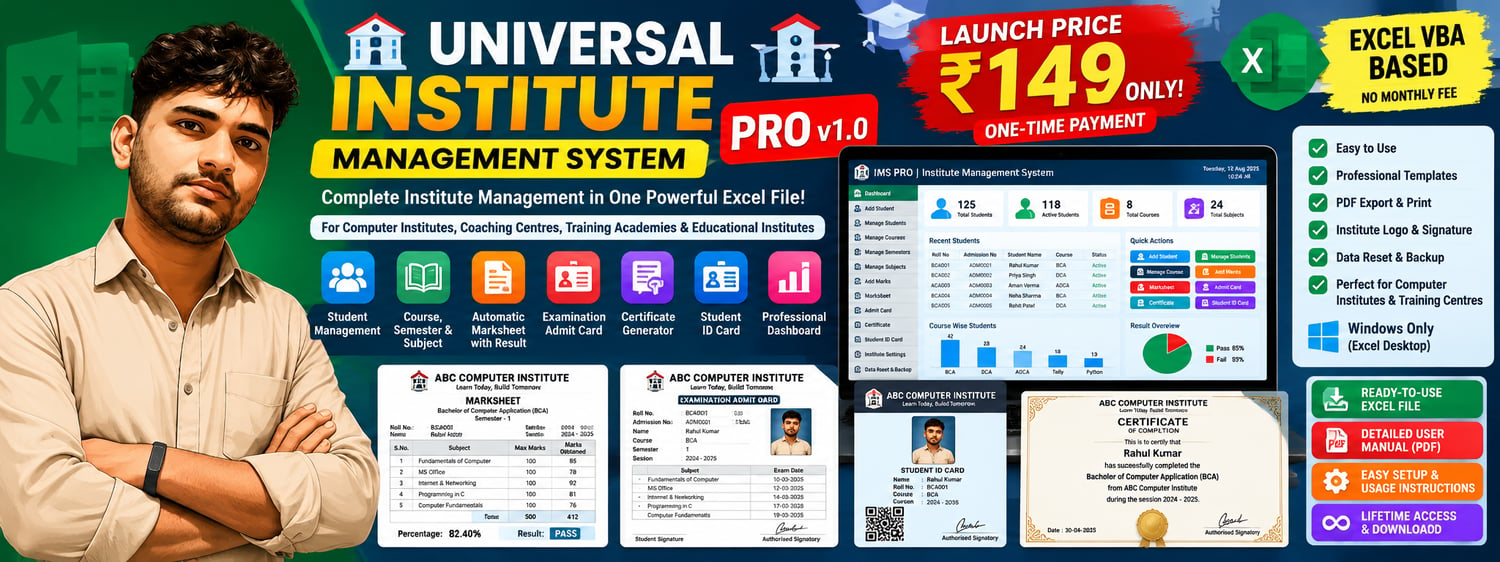
Universal Institute Management System PRO v1.0 | Excel VBA Software | Student Management, Marksheet, Admit Card, Certificate & ID Card
Universal Institute Management System PRO v1.0
Manage Your Entire Computer Institute with One Powerful Excel File!
Are you running a Computer Institute, Coaching Centre, Training Academy, or Educational Institute?
Introducing Universal Institute Management System PRO v1.0, a professional Excel VBA-based management solution designed to simplify student administration, academic records, examinations, and document generation.
No complicated software installation or expensive monthly subscription is required. Just open the Excel workbook, enable macros, and start managing your institute.
Key Features
✅ Professional Dashboard
- Total Students and Active Students overview
- Total Courses tracking
- Quick-access management buttons
✅ Student Management
- Add new students using an easy-to-use popup form
- Search, update, and delete student records
- Store student photos and contact information
- Automatic Roll Number and Admission Number generation
✅ Course Management
- Add, search, update, and delete courses
- Manage course duration and fees
- Active and inactive course status
✅ Semester & Subject Management
- Course-wise semester management
- Add and manage subjects
- Configure maximum and passing marks
- Academic data protection for subjects linked to saved marks
✅ Automatic Marksheet Generator
- Student-wise and semester-wise marksheets
- Automatic total and percentage calculation
- Grade and PASS/FAIL result calculation
- Professional print-ready layout
✅ Examination Admit Card
- Generate student admit cards
- Exam date, semester, and examination centre details
- Student photo and institute branding
- PDF export and print support
✅ Professional Certificate Generator
- Student-based certificate generation
- Institute name, logo, and signature
- PDF export and print-ready format
✅ Student Identity Card
- Vertical student ID card with photo
- Course, session, admission, and contact details
- Institute logo and authorized signature
- Preview and PDF export
✅ Institute Settings
- Customize institute name, address, and contact information
- Add your institute logo and signature
- Reuse institute branding across supported documents
✅ Data Reset & Backup
- Reset demonstration data for fresh use
- Backup functionality for safer data management
Why Choose IMS PRO?
- One Excel workbook for multiple institute management tasks
- Easy-to-use VBA popup forms
- Professional document templates
- Reduced repetitive data entry
- No monthly subscription for the workbook
- Suitable for small and growing educational institutes
Launch Price: Just ₹149 — One-Time Purchase!
Important: This is a Microsoft Excel VBA-based desktop workbook, not a cloud-based or mobile application.
System Requirements
Requirement Details Operating System Windows 10 / Windows 11
Software Microsoft Excel Desktop
Recommended Excel Excel 2019, 2021, 2024 or Microsoft 365 Desktop
File Format .xlsm
Macros Must be enabled
Internet Not required for core offline operations
Excel Online Not supported for VBA execution
Mobile Excel Not supported for VBA execution
Installation & Setup Guide
Step 1 — Download the File
After completing your purchase, download the Excel workbook from your Payhip download page.
Save the file in a dedicated folder on your Windows computer, for example:
Documents\Institute Management System PRO
Step 2 — Open with Microsoft Excel
Open the .xlsm file using Microsoft Excel Desktop.
Do not use Excel Online, Google Sheets, or mobile spreadsheet applications because they cannot run the required VBA macros.
Step 3 — Enable Macros
The workbook requires VBA macros to operate.
If Excel displays a security warning, first confirm that the file was downloaded from your trusted purchase source.
For a trusted file, follow Microsoft's recommended procedure to allow macros. Depending on your Windows and Office security settings, you may need to:
- Close Excel.
- Right-click the downloaded workbook.
- Select Properties.
- If available, select Unblock and click Apply.
- Reopen the workbook and enable content if Excel offers that option.
Do not disable all Office macro security settings globally.
Step 4 — Configure Institute Settings
Open Dashboard → Institute Settings.
Enter your institute details:
- Institute Name
- Address
- Mobile/Contact Number
- Registration Details, where applicable
- Institute Logo
- Authorized Signature
Save the settings.
Step 5 — Configure Courses
Open Manage Courses.
Add your institute's courses, including course name, duration, number of semesters, fees, and status.
Step 6 — Configure Semesters and Subjects
Open Manage Semesters and create the required semesters.
Then open Manage Subjects and add subjects under the correct course and semester.
Enter maximum marks and passing marks accurately.
Step 7 — Add Students
Open Dashboard → Add Student.
Enter student details, select the course, add the student photo, and save the record.
The system generates the student identifiers according to its configured logic.
Step 8 — Enter Examination Marks
Open Add Marks.
Select the student and relevant semester. Enter subject marks and save.
Step 9 — Generate Documents
Use the Dashboard buttons to generate:
- Marksheet
- Examination Admit Card
- Certificate
- Student Identity Card
Verify student details and preview each document before exporting.
Step 10 — Export PDF
Use the available PDF export options to save the documents to your preferred folder.
Step 11 — Maintain Backups
Save your workbook regularly and keep backup copies before resetting data, importing changes, or making major updates.
Important: Avoid renaming or deleting internal worksheets, changing the workbook structure, or editing VBA code unless you understand the dependencies. These changes may affect the system.