
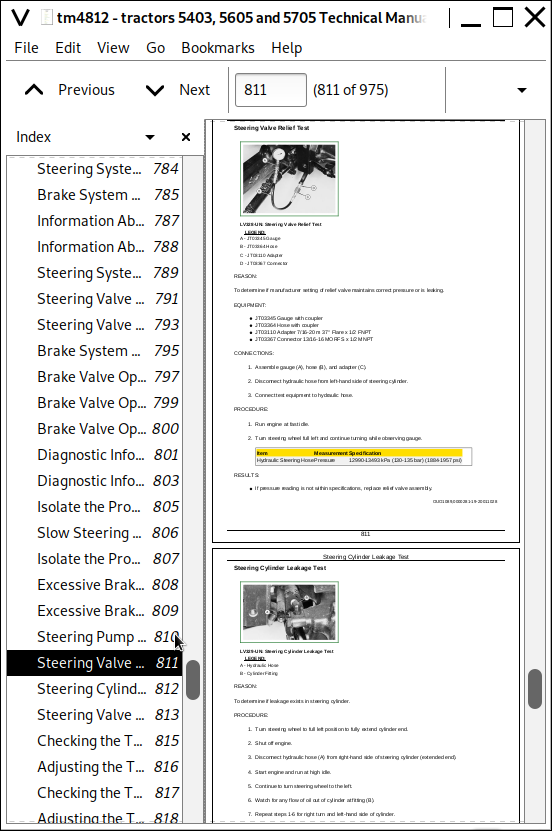
John Deere 5403 5600 5605 5700 5705 Brazil Tractor Diagnostic Repair Service Manual TM4812 Wiring Diagrams PDF - MJODTM4812.zip
This comprehensive technical manual features complete electrical wiring schematics for the John Deere 5403, 5600, 5605, 5700, and 5705 Tractors (Brazil models), delivering every piece of technical data needed to service, troubleshoot, and overhaul these machines the way professional technicians do—covering diagnostics, operation, testing, repairs, scheduled service, and fault-finding.
Contained within the John Deere 5403, 5600, 5605, 5700, and 5705 tractor technical service manual are the following sections:
* Numbered table of contents easy to use so that you can find the information you need fast.
* Detailed sub-steps expand on repair procedure information
* Numbered instructions guide you through every repair procedure step by step.
* Troubleshooting and electrical service procedures are combined with detailed wiring diagrams for ease of use.
* Notes, cautions and warnings throughout each chapter pinpoint critical information.
* Bold figure number help you quickly match illustrations with instructions.
* Detailed illustrations, drawings and photos guide you through every procedure.
* Enlarged inset helps you identify and examine parts in detail.
tm4812 - tractors 5403, 5605 and 5705 Technical Manual.pdf
tm4812 - tractors 5403, 5605 and 5705 Technical Manual.epub
PRODUCT DETAILS:
Total Pages: 971 pages
File Format: PDF/EPUB/MOBI/AZW (PC/Mac/Android/Kindle/iPhone/iPad; bookmarked, ToC, Searchable, Printable)
Language: English
MAIN SECTIONS
Foreword
General Information
Safety
Repairing the Electric System
Battery, Starter Motor and Alternator
Electric System Components
Electric Wiring Harness
Repairing the Power Train
Clutch - TSS Transmission
Carraro Clutch Assembly - (up to series 13693)
LUK Clutch Assembly - (as from series 13694)
TSS Transmission
PTO Drive Shaft
Differential
Final Drive
Mechanical Front Wheel Drive
Repairing the Steering and Brakes
Steering Repair
Brakes Repair
Steering Cylinder - 2WD Axle
Hydraulic Repair
Hydraulic Pump and Filter
Bosch Hydraulic Pump
Hydraulic Oil Cooler
Rockshaft
Selective Control Valve
Third Remote Control Valve
Mechanical Front Wheel Drive
MFWD Special Tools
Technical Data and Adjustment Values
Disassembly
Assembling the Differential
Pinion Depth
Adjusting Backlash
Housing Assemble
Assemble MFWD Axle Shaft
Planetary Gear
Assemble Hydraulic Cylinder
Toe-In Adjustment
ROPS
Roll Over Protection Structure - ROPS
Electric System: Operation and Tests
Location of the Components
Multitest Identification
Electrical System Theory of Operation
Diagnosing, Checking and Adjusting the Electrical System
General Electric Schematic
Transmission: Operation, Tests and Adjustments.
Location of Components - Transmission TSS
Carraro Clutch - Theory of Operation
Eaton Clutch and Transmission TSS -Theory of Operation -
Diagnostics, Tests and Adjustments - TSS Transmission
Brake and Steering: Operation, Tests and Adjustments.
Location of the Components
Steering and Brake -Theory of Operation
Steering and Brake - Diagnosis, Tests and Adjustments
Hydraulics: Operation, Tests and Adjustments.
Location of the Components
Digital Temperature and Presure Analyzer
Hydraulic System - Theory of Operation
Hydraulic System - Diagnosis
Hydraulic Tests-Without SCV
Hydraulic Tests-With SCV
Hydraulic Tests-All
Adjustments
Hydraulic Schematics
Others
tm4812 - tractors 5403, 5605 and 5705
Table of Contents
Foreword
Section 10: General Information
Group 05: Safety
Recognize Safety Information
Understand Signal Words
Follow Safety Instructions
Handle Fluids Safely-Avoid Fires
Prevent Battery Explosions
Prepare for Emergencies
Prevent Acid Burns
Service Cooling System Safely
Handle Chemical Products Safely
Avoid High-Pressure Fluids
Park Machine Safely
Support Machine Properly
Wear Protective Clothing
Work in Clean Area
Service Machines Safely
Work in Ventilated Area
Illuminate Work Area Safely
Replace Safety Signs
Use Proper Lifting Equipment
Keep ROPS Installed Properly
Service Tires Safely
Avoid Harmful Asbestos Dust
Avoid Heating Near Pressurized Fluid Lines
Remove Paint Before Welding or Heating
Use Proper Tools
Dispose of Waste Properly
Live With Safety
Section 40: Repairing the Electric System
Group 05: Battery, Starter Motor and Alternator
Removing and Installing the Battery
Removing and Installing the Starter Motor
Replacing the Alternator/Regulator
Group 10: Electric System Components
Other Material
Replacing the Air Filter Restriction Sensor
Replacing the Coolant Temperature Sensor
Replacing the Engine Speed Sensor
Replacing the Fuel Shut Off Solenoid
Replacing the Engine Oil Pressure Switch
Replacing the Key Switch
Replacing the Tractor Light Switch
Replacing the Direction Indicator Command
Replacing the Dashboard
Replacing the PTO Switch
Replacing the Starter Protection Switch
Replacing the Fuel Level Sender
Group 15: Electric Wiring Harness
Special Tools
Replace Connector Body-Blade Terminals
Replace WEATHER PACK WEATHER PACK is a trademark of Packard Electric. Connector
Install WEATHER PACK WEATHER PACK is a trademark of Packard Electric. Contact
Replacing the Front Electric Wiring Harness
Replace the Rear Electric Harness
Replacing the Battery Harness
Replacing the Rear Working Lights Harness
Section 50: Repairing the Power Train
Group 05: Clutch - TSS Transmission
Other Material
Separate Engine from Clutch Housing
Install Engine to Clutch Housing
Replacing the Clutch Housing Seal
Inspect and Repair Clutch Pedal and Linkage
Adjusting the Clutch Pedal Free Play
Group 10: Carraro Clutch Assembly - (up to series 13693)
Essential or Special Tools
Special Tools
Other Material
Remove and Install the Clutch Assembly
Disassemble and Inspect the Clutch Assembly
Assemble the Clutch Assembly
Adjust the Traction Clutch Finger
Adjust the PTO Clutch Release Finger
Remove and Check the Clutch and Shafts Release Mechanism
Install Clutch Release Mechanism and Shafts
Adjusting the Clutch Pedal Free play
Group 11: LUK Clutch Assembly - (as from series 13694)
Special Tools
Specifications
Remove and Install the Clutch Assembly
Disassemble and Inspect the Clutch Housing
Clutch Assembly
Adjust the Traction Clutch Fingers
Adjusting the PTO Clutch Fingers
Group 15: TSS Transmission
Other Material
Separate the Clutch Housing from the Transmission
Install Clutch Housing to Transmission
Inspect and Repair the Gear and Range Shift Levers
Inspect and Repair the Range Shift Lever
Remove Transmission
Disassemble and Inspect Transmission
Assemble Transmission
Install Transmission
Parking Brake Components for Tractors as from 18041 Series
Install Park Brake Components (park)
Disassemble, Inspect and Assemble the Gear Shift Shaft Assemblies
Disassemble, Inspect and Assemble the Top Transmission Shaft - Transmission with Synchronized Top Shaft (TSS)
Top Mounted Shaft
Assemble Top Shaft
Exploded View of the Top Shaft Collar Shift
Disassemble, Inspect, and Assemble Range Reduction Shaft
Disassemble, Inspect and Assemble Driven Shaft
Remove, Inspect and Install MFWD and Range Gears
Remove, Inspect and Install Reverse Idler Shaft.
Group 20: PTO Drive Shaft
Other Material
Inspect and Repair the PTO Lever and Linkage
Remove and Install the PTO Drive Shaft Assembly
Disassemble, Inspect and Assemble Standard Rear PTO Drive Shaft Assembly
Group 25: Differential
Essential or Special Tools
Remove and Install Differential Assembly
Disassemble, Inspect, and Assemble Differential Assembly
Remove and Inspect Differential Drive Shaft
Install Differential Drive Shaft
Remove, Inspect, and Install Differential Lock Assembly
Differential Cone Point Adjustment
Differential Backlash Adjustment
Group 30: Final Drive
Tools and Service Equipment
Final Drive Turn Tool
Other Material
Remove and Install Final Drive Assembly
Remove and Inspect Planetary Drive Assembly
Install Planetary Drive Assembly
Remove, Inspect, and Install Axle Shaft Assembly
Group 35: Mechanical Front Wheel Drive
Special or Essential Tools
Other Material
Inspect and Repair the MFWD Lever and Linkage
Remove and Install the MFWD Drop Gearbox
Disassemble and Inspect MFWD Drop Gearbox
MFWD Drop Gearbox Cross Section
Assemble MFWD Drop Gearbox
Remove, Inspect and Install MFWD Drive Shaft
Section 60: Repairing the Steering and Brakes
Group 05: Steering Repair
Other Material
Special Tool
Replacement Kits
Remove and Install the Steering Column Valve
Disassemble and Inspect the Steering Valve
Assembling Steering Valve
Inspect and Replace the Steering Hydraulic Lines (Without Oil Cooler)
Inspect and replace the Steering Hydraulic Lines (With Oil Cooler)
Group 10: Brakes Repair
Other Material
Remove and Install the Brake Valve and Pedals
Disassemble and Inspect Brake Valve
Brake Valve Cross Section
Assemble Brake Valve
Remove and Inspect Brakes.
Install Brakes
Inspect and Replace Brake Hydraulic Lines
Group 15: Steering Cylinder - 2WD Axle
General Information
Special Tools
Specifications
Remove Steering Cylinder
Disassemble Steering Hydraulic Cylinder
Assembling the Hydraulic Cylinder
Install the steering cylinder
Section 70: Hydraulic Repair
Group 05: Hydraulic Pump and Filter
Remove, Inspect and Install Mesh Filter
Remove and Install the Hydraulic Pump
Remove Hydraulic Pump External Components
Assemble the Hydraulic Pump
Install External Hydraulic Pump Components
Remove and Install the Hydraulic/Tubing Filter
Inspect and Replace the Return/Supply Hydraulic Lines
Group 05A: Bosch Hydraulic Pump
Hydraulic Pump
Remove and Install Hydraulic Pump
Remove Hydraulic Pump External Components
Disassemble Hydraulic Pump
Assemble Bosch Hydraulic Pump
Group 06: Hydraulic Oil Cooler
Remove, inspect and install the Hydraulic Oil Cooler-5705
Group 10: Rockshaft
Other Material
Inspect and Repair Rockshaft Control Lever
Inspect and Repair Rockshaft Control Mechanism
Inspect and Repair the Draft Support Assembly
Replace Main Relief Valve
Replace Rockshaft Surge Relief Valve
Remove, Inspect and Install Rate-of-drop Valve
Replace the Hydraulic Lift Control Valve
Remove and Install the Rockshaft Case
Remove, Inspect, and Install Rockshaft Lift Arms
Remove, Inspect, and Install Rockshaft Piston and Cylinder
Group 15: Selective Control Valve
Other Material
Disassemble, Inspect, and Assemble Dual Selective Control Valve (SCV)-Straddle Mount Tractors
Checking and Replacing the Hydraulic Hoses-Double Remote Control Valve
Group 16: Third Remote Control Valve
Other Material
Check and Repair the Lever and Linkage.
Remove and Install the Third Selective Control Valve.
Disassemble, Inspect and Assemble the third Selective Control Valve.
Check and Replace the hydraulic hoses-Third Selective Control Valve
Section 80: Mechanical Front Wheel Drive
Group 05: MFWD Special Tools
Special Tools
Group 10: Technical Data and Adjustment Values
Technical Data and Adjustment Values
Group 15: Disassembly
Disassemble MFWD Outer Drive
Group 20: Assembling the Differential
Assembly
Group 25: Pinion Depth