
John Deere MaxEmerge 5, 5e and ExactEmerge Row Unit Repair Service Manual (TM131219) PDF - MJODTM131219.zip
A full-service repair and technical workshop guide for the John Deere MaxEmerge 5 and ExactEmerge Row Unit, packed with everything needed to service, fix, and overhaul these units the way expert technicians do.
The John Deere MaxEmerge 5 and ExactEmerge Row Unit technical workshop manual (repair) covers the following:
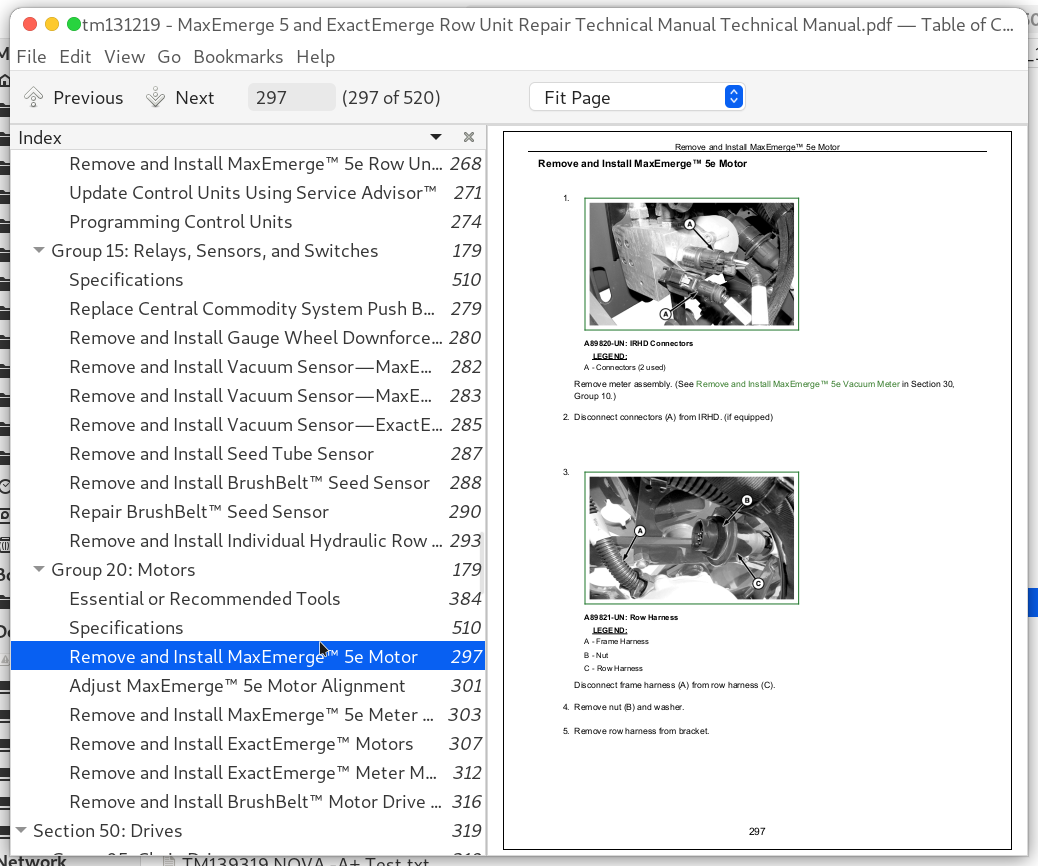
* Numbered table of contents easy to use so that you can find the information you need fast.
* Detailed sub-steps expand on repair procedure information
* Numbered instructions guide you through every repair procedure step by step.
* Notes, cautions and warnings throughout each chapter pinpoint critical information.
* Bold figure number help you quickly match illustrations with instructions.
* Detailed illustrations, drawings and photos guide you through every procedure.
* Enlarged inset helps you identify and examine parts in detail.
tm131219 - MaxEmerge 5 and ExactEmerge Row Unit Repair Technical Manual Technical Manual.pdf
PRODUCT DETAILS:
Total Pages: 520 pages
File Format: PDF (PC/Mac/Android/Kindle/iPhone/iPad; bookmarked, ToC, Searchable, Printable)
Language: English
TABLE OF CONTENTS................1
Section 10: General Information................10
Group 05: Safety................10
Recognize Safety Information................13
Understand Signal Words................14
Follow Safety Instructions................15
Handle Fluids Safely—Avoid Fires................16
Prepare for Emergencies................17
Avoid Harmful Asbestos Dust................18
Practice Safe Maintenance................19
Avoid High-Pressure Fluids................21
Park Machine Safely................22
Support Machine Properly................23
Wear Protective Clothing................24
Handle Agricultural Chemicals Safely................25
Work in Clean Area................27
Service Machines Safely................28
Work In Ventilated Area................29
Illuminate Work Area Safely................30
Replace Safety Signs................31
Use Proper Lifting Equipment................32
Remove Paint Before Welding or Heating................33
Avoid Heating Near Pressurized Fluid Lines................34
Service Tires Safely................35
Use Proper Tools................36
Construct Dealer-Made Tools Safely................37
Servicing Electronic Control Units................38
Welding Near Electronic Control Units................39
Precautions for Welding................40
Keep Electronic Control Unit Connectors Clean................42
Decommissioning — Proper Recycling and Disposal of Fluids and Components................43
Live With Safety................44
Group 10: Lubricants................10
Multipurpose Extreme Pressure (EP) Grease................46
Gear Oil................47
Alternative and Synthetic Lubricants................48
Lubricant Storage................49
Group 15: General Information................11
Unauthorized Modifications................51
Machine Photo................52
Specifications................510
Sealants and Adhesives Cross-Reference Chart................59
Metric Bolt and Screw Torque Values................61
Unified Inch Bolt and Screw Torque Values................63
Face Seal Fittings Assembly and Installation—All Pressure Applications................65
Metric Face Seal Fitting Torque Chart—Standard Pressure Applications................66
SAE Face Seal Fitting Torque Chart—Standard Pressure Applications................68
External Hexagon Port Plug Torque Chart................70
Section 20: Vacuum System................72
Group 05: Vacuum System................72
Adjust Vacuum Gauge................74
Check Row Vacuum—MaxEmerge 5™ Meters................75
Check Row Vacuum—ExactEmerge™ Meters................78
Install Vacuum Sensor Fitting—ExactEmerge™ Meters................79
Install Vacuum Sensor Fitting—MaxEmerge™ 5 and MaxEmerge™ 5e Meters................81
Section 30: Seed Meters................82
Group 05: Row Units................82
Specifications................510
Remove and Install Row Units—MaxEmerge™ 5 Meters................86
Remove and Install Row Units—ExactEmerge™ Meters................89
Remove and Install Rockshaft Mounted Row Units—1795 with MaxEmerge™ 5 Meters................92
Remove and Install Rockshaft Mounted Row Units—1795 with ExactEmerge™ Meters................95
Remove and Install Front Center Frame Row Units—1795 with MaxEmerge™ 5 Meters................97
Check Row Unit Attaching Hardware................100
Group 10: MaxEmerge™ 5 Seed Meters................82
Essential or Recommended Tools................384
Other Material................480
Specifications................510
Repair MaxEmerge™ 5 Vacuum Meter................106
Inspect MaxEmerge™ 5 Vacuum Meter................110
Remove and Install MaxEmerge™ 5 Vacuum Meter................113
Remove and Install MaxEmerge™ 5e Vacuum Meter................117
Remove and Install MaxEmerge™ 5 Vacuum Meter Seal................120
Remove and Install MaxEmerge™ 5 Seed Disk................121
Remove and Install MaxEmerge™ 5 Knockout Assembly................122
Remove and Install MaxEmerge™ 5 Vacuum Meter Brush................123
Remove and Install MaxEmerge™ 5 Double Eliminator................124
Calibrate MaxEmerge™ 5 Double Eliminator................128
Adjust MaxEmerge™ 5 Meter Baffle................131
Adjust MaxEmerge™ 5 Meter Hub................133
Install MaxEmerge™ 5 Dust Seal................136
Group 15: ExactEmerge™ Seed Meters................82
Essential or Recommended Tools................384
Other Material................480
Specifications................510
Repair ExactEmerge™ Meter................141
Inspect ExactEmerge™ Meter................144
Remove and Install ExactEmerge™ Meter with 1.6 bu Hopper................147
Remove and Install ExactEmerge™ Meter................150
Remove and Install ExactEmerge™ Meter Seal................152
Remove and Install ExactEmerge™ Meter Air Duct................153
Remove and Install ExactEmerge™ Seed Bowl................154
Remove and Install ExactEmerge™ Knockout Assembly................155
Remove and Install ExactEmerge™ Baffle Brush................156
Remove and Install ExactEmerge™ Double Eliminator................158
Remove and Install ExactEmerge™ Seed Guide................160
Remove and Install ExactEmerge™ Agitation Strip................163
Remove and Install ExactEmerge™ Wear Plates................165
Adjust ExactEmerge™ Meter Hub................166
Group 20: ExactEmerge™ Seed Placement................83
Remove and Install BrushBelt™ Cartridge................170
Disassemble and Assembly BrushBelt™ Cartridge................172
Section 40: Electrical................178
Group 05: Connector Repair................178
Essential or Recommended Tools................384
Other Material................480
Installation of Repair Wire Assembly (RWA)................189
Use Electrical Insulating Compound................198
Using High-Pressure Washers................199
Connector Information................200
Repair Procedure R-A................201
Repair Procedure R-B................206
Repair Procedure R-C................211
Repair Procedure R-D................216
Repair Procedure R-E................219
Repair Procedure R-F................223
Repair Procedure R-G................227
Repair Procedure R-I................230
Repair Procedure R-J................233
Repair Procedure R-K................238
Repair Procedure R-M................241
Repair Procedure R-N................245
Repair Procedure R-T................249
Repair Procedure R-AA................250
Repair Procedure R-AE................251
Remove and Install Row Unit Wiring Harness—MaxEmerge™ 5................255
Remove and Install Row Unit Wiring Harness—MaxEmerge™ 5e................258
Remove and Install Row Unit Wiring Harness—ExactEmerge™................261
Group 10: Control Units................178
Remove and Install Sensor Node Control Unit................265
Remove and Install ExactEmerge™ Row Unit Control Unit................266
Remove and Install MaxEmerge™ 5e Row Unit Control Unit................268
Update Control Units Using Service Advisor™................271
Programming Control Units................274
Group 15: Relays, Sensors, and Switches................179
Specifications................510
Replace Central Commodity System Push Button Shut-Off Switch................279
Remove and Install Gauge Wheel Downforce Sensor................280
Remove and Install Vacuum Sensor—MaxEmerge™ 5 Meters................282
Remove and Install Vacuum Sensor—MaxEmerge™ 5e Meters................283
Remove and Install Vacuum Sensor—ExactEmerge™ Meters................285
Remove and Install Seed Tube Sensor................287
Remove and Install BrushBelt™ Seed Sensor................288
Repair BrushBelt™ Seed Sensor................290
Remove and Install Individual Hydraulic Row Downforce (IRHD) Pressure Sensor................293
Group 20: Motors................179
Essential or Recommended Tools................384
Specifications................510
Remove and Install MaxEmerge™ 5e Motor................297
Adjust MaxEmerge™ 5e Motor Alignment................301
Remove and Install MaxEmerge™ 5e Meter Motor Drive Coupler................303
Remove and Install ExactEmerge™ Motors................307
Remove and Install ExactEmerge™ Meter Motor Drive Coupler................312
Remove and Install BrushBelt™ Motor Drive Coupler................316
Section 50: Drives................319
Group 05: Chain Drives................319
Adjust Chain Drive-to-Meter Drive Alignment................322
Repair Flex Drive................324
Group 10: Pro-Shaft Drives................319
Remove and Install Pro-Shaft™ Drive Cable................330
Remove and Install Front Meter Drive Gear Case................335
Remove and Install Seed Meter Drive Gear Case................336
Remove and Install Insecticide Meter Drive Gear Case................339
Group 15: Electric Drives................319
Remove and Install Seed Meter Drive Gearbox—MaxEmerge™ 5e................344
Replace MaxEmerge™ 5e Drive Couplers................347
Section 60: Insecticide and Herbicide Meter................349
Group 05: Insecticide/Herbicide Meter................349
Other Material................480
Specifications................510
Remove and Install Insecticide/Herbicide Frame................353
Calibrate Insecticide/Herbicide Meter................356
Insecticide/Herbicide Meter Drive Alignment................360
Section 70: Row Unit Downforce................363
Group 05: Mechanical Row Unit Downforce................363
Specifications................510
Remove and Install Heavy-Duty Downforce Spring Assembly................366
Repair Heavy-Duty Downforce Spring Assembly (Regular Parallel Arms)................369
Repair Heavy-Duty Downforce Spring Assembly (Long Parallel Arms)................371
Group 10: Pneumatic Row Unit Downforce................363
Depressurize Pneumatic Downforce System................376
Inspect Pneumatic Downforce System For Leaks................379
Inspect and Adjust Air Spring................381
Group 15: Hydraulic Row Unit Downforce................363
Essential or Recommended Tools................384
Specifications................510
Depressurize Individual Row Hydraulic Downforce (IRHD) System................386
Prevent Individual Row Hydraulic Downforce (IRHD) System Contamination................387
Remove and Install Individual Row Hydraulic Downforce (IRHD) Solenoid Valve................389
Remove and Install Individual Row Hydraulic Downforce (IRHD) Assembly................391
Disassemble and Assemble Individual Row Hydraulic Downforce (IRHD) Assembly................393
Individual Row Hydraulic Downforce (IRHD) Flushing Procedure................402
Individual Row Hydraulic Downforce (IRHD) Air Purge Test................404
Individual Row Hydraulic Downforce (IRHD) Valve Flush Test................407
Individual Row Hydraulic Downforce (IRHD) Valve Test................410
Section 80: Ground Tools................413
Group 05: Seed Openers................413
Other Material................480
Specifications................510
Double Disk Opener Exploded View—MaxEmerge™ 5................418
Double Disk Opener Exploded View—ExactEmerge™................425
Remove and Install Double Disk Opener Studs................428
Remove and Install Double Disk Shield with Insecticide Tube................429
Remove and Install Seed Tube................430
Inspect and Adjust Seed Opener Blades................433
Replace Seed Opener Blades and Seed Tube Guard................437
Gauge Wheel Bearing Replacement................441
Remove and Install Gauge Wheel Depth Adjusting Handle................442
Adjust Gauge Wheels................445
Remove and Install Gauge Wheel Scrapers................446
Replace Scrapers................448
Replace Rigid Scrapers................449
Replace Rigid Scrapers—ExactEmerge™................453
Replace One-Piece Scrapers................454
Replace Heavy-Duty Scrapers................455
Group 10: Closing Wheels................413
Other Material................480
Specifications................510
Repair Closing Wheels................459
Repair Closing Wheels—Twin Row................462
Center Closing Wheels................464
Adjust Closing Wheel Spacing................465
Adjust Closing Wheel Assembly—Twin Row................467
Stagger Closing Wheels................472
Adjust Closing Wheel Downforce................473
Disassemble and Assemble Closing Wheel (Rubber)................474
Disassemble and Assemble Pneumatic Downforce Closing Wheel Assembly................475
Remove and Install Pneumatic Downforce Closing Wheel Air Spring................477
Group 15: Row Tillage................414
Other Material................480
Specifications................510
Adjust Coulter Bearing................482
Disassemble and Assemble Unit Mounted Row Cleaner Unit with Tapered Wheels................484
Disassemble and Assemble Unit Mounted Screw Adjust Row Cleaner................486
Remove and Install Floating Row Cleaner for Unit Mounted Coulter................488
Disassemble and Assemble Pneumatic Row Cleaner with Unit Mounted Coulter................495
Disassemble and Assemble Pneumatic Row Cleaner without Unit Mounted Coulter................498
Remove and Install Pneumatic Row Cleaner Air Spring................501
Group 20: Fertilizer Opener................414
Specifications................510
Repair Unit Mounted Single-Disk Fertilizer Opener................511
Adjust Unit Mounted Single-Disk Fertilizer Opener................513
Repair Unit Mounted Double-Disk Fertilizer Opener................514
Replace Double Disk Fertilizer Opener Bearing................516
John Deere MaxEmerge 5 and ExactEmerge Row Unit Repair Service Manual (TM131219)