
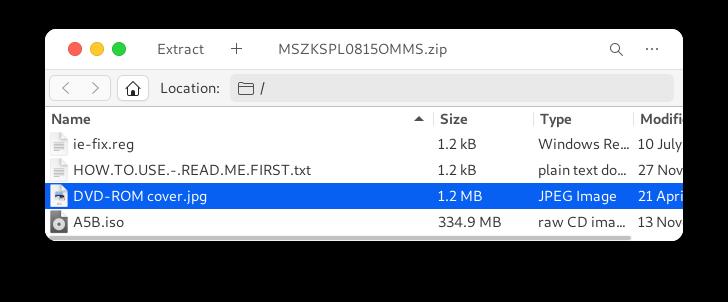
Suzuki Splash A5B Workshop Repair Service Manual 2008-2015 PDF Download - MSZKSPL0815OMMS.zip
This complete digital factory shop manual provides service, upkeep, and fault-finding guidance for the 2008-2015 Suzuki Splash. Diagnostic and repair instructions are explained in thorough detail so you can fix, maintain, rebuild, refurbish, or bring your vehicle back to standard just like a trained technician at a local workshop. This affordable, high-quality manual is fully complete and intact, with no pages missing. It matches the official dealer publication and is guaranteed to work flawlessly, saving you valuable time.
The manual for the 2008-2015 Suzuki Splash is organized into separate sections. Every section deals with an individual component or system and, alongside the usual service procedures, offers steps for disassembly, inspection, and reassembly. A table of contents opens each section. Pages can be located quickly by category, and every page can be enlarged to view fine detail. No computer expertise is required to navigate the manual.
MAKE: Suzuki
MODEL: Splash (A5B Series)
YEAR: 2008 2009 2010 2011 2012 2013 2014 2015
LANGUAGE: EN/DE/ES/FR/GK/HU/IT/NL
REQUIREMENTS
OPERATING SYSTEM (32 bit & 64 bit): Windows XP, Windows Vista, Windows 7, Windows 8, or Windows 10 and above…
BROWSER: All versions of Internet Explorer (32 bit & 64 bit I.E. 6/7/8/9/10/11 tested).
EXCERPT:
Engine Assembly Removal and Installation
Removal
1)Disconnect negative (–) and positive (+) cable at battery.
2)Remove battery from vehicle.
3)Remove glow plug control module.
4)Remove battery tray from vehicle.
5)Remove engine hood after disconnecting windshield washer hose.
6)Remove engine cover.
7)Remove air cleaner assembly with MAF and IAT sensor.
8)Remove intercooler.
9)Remove ECM.
10)Remove cowl top cover and cowl top panel.
11)Drain engine oil.
12)Drain transaxle oil, if necessary.
13)Drain cooling system.
14)Remove right and left side engine under covers.
15)Remove accessory drive belt.
16)With hose connected, detach A/C compressor from its bracket (if equipped).
CAUTION:
Suspend removed A/C compressor at a place where no damage will be caused during removal and installation of engine assembly.
17)Disconnect the following pipes and hoses:
•Brake booster hose (1)
•Intercooler outlet No.2 hose (2)
•Intercooler outlet pipe (3)
•Fuel feed hose (4)
•Fuel return hose (5)
•Radiator inlet hose (6) and outlet hose
•Degassing tank outlet hose (7)
•Heater inlet and outlet hoses (8)
•Clutch hose and pipe (9)
•Vacuum hose (DPF® model) (10)
18)Disconnect the following electric wires:
•Ground wire from exhaust manifold (11)
•Ground wire from upper member (12)
•Magnet clutch switch of A/C compressor (if equipped)
•Each wire harness clamps (13)
•Injector harness (14)
•Injector harness from ECM (15)
•Engine harness (16)
•Main harness (17)
19)Disconnect the following cables from transaxle:
•Gear select control cable (18)
•Gear shift control cable (19)
20)Remove exhaust No.1 pipe.
21)By using chain hoist (1), support engine assemble with engine hangers (2).
CAUTION:
Be sure to remove / disconnect part(s), which interfere with chain hoist, if necessary.
Failure to follow this CAUTION could result in damage by chain hoist.
22)Remove suspension frame.
23)Remove engine left mounting bracket nuts (1) and engine right mounting bracket nuts (2).
24)Before removing engine with transaxle from engine compartment, recheck to make sure all hoses, pipes, electric wires and cables are disconnected from engine and transaxle.
25)Lower engine with transaxle from engine compartment.
26)Support center bearing support, transaxle case and lower crankcase using pad at hatched parts (1) indicated in figure.
27)Disconnect transaxle from engine.
28)Remove clutch cover and clutch disk.
Installation
1)Install clutch cover and clutch disk.
2)Connect transaxle to engine.
3)Lift engine with transaxle into engine compartment using chain hoist.
4)Install engine left mounting bracket nuts (1) and new engine right mounting bracket nuts (2). Tighten these nuts to specified torque.
Tightening torque
Engine left mounting bracket nut (a): 55 N·m (5.6 kg-m, 40.5 lbf-ft)
Engine left mounting bracket nut (b): 55 N·m (5.6 kg-m, 40.5 lbf-ft)
5)Install suspension frame.
6)Remove chain hoist.
7)Install exhaust No.1 pipes.
8)Reverse disconnected hoses, pipes, cables and electric wires for connection in removal procedure.
9)Install A/C compressor to its bracket (if equipped).
10)Install accessory drive belt.
11)Install right and left side engine under covers.
12)Install intercooler.
13)Install cowl top cover and cowl top panel.
14)Install ECM.
15)Install air cleaner assembly with MAF and IAT sensor.
16)Install engine cover.
Tightening torque
Engine cover bolt: 8.0 N·m (0.82 kg-m, 6.0 lbf-ft)
17)Refill engine with engine oil.
18)Refill transaxle with transaxle oil.
19)Refill cooling system with coolant.
20)Refill clutch fluid and bleed air from system.
21)Install engine hood and connect windshield washer hose.
22)Install battery tray.
23)Install glow plug control module.
24)Connect positive (+) and negative (–) cable at battery.
25)Install battery.
26)Verify that there is no fuel leakage, coolant leakage, oil leakage and exhaust gas leakage at each connection.
Main Bearings Inspection
General information
•Service main bearings are available in standard size and 0.127 mm undersize, and standard size and undersize has 3 kinds of bearings differing in thickness.
•Upper half of bearing (1) has oil groove (2) as shown in figure.
Install this half with oil groove to cylinder block.
•Lower half of bearing does not have oil groove.
Visual inspection
Check bearings for pitting, scratches, wear or damage.
If any malcondition is found, replace both upper and lower halves.
Never replace either half without replacing the other half.
Main bearing clearance
NOTE:
Do not rotate crankshaft while gauging plastic is installed.
1)Before checking bearing clearance, clean bearing and crankshaft journal.
2)Install bearing to cylinder block and main bearing cap.
3)Place a piece of gauging plastic (1) to full width of crankshaft journal as contacted by bearing (parallel to crankshaft), avoiding oil hole.
4)Install lower crankcase.
NOTE:
It is not necessary to replace new crankcase bolts for measuring procedure.
5)Remove cap and using a scale (1) on gauging plastic (2) envelope, measure gauging plastic width at the widest point (clearance).
If clearance is out of specification, replace bearing.
Always replace both upper and lower bearing as a set.
Main bearing clearance:
0.026 – 0.050 mm (0.0012 – 0.0019 in.)
Selection of Main Bearings
Standard bearing
If bearing is in malcondition, or bearing clearance is out of specification, select a new standard bearing according to the following procedure and install it.
1)First check journal diameter. As shown in figure, crank web No.4 has stamped alphabets.
Three kinds of alphabets (“A”, “B” and “C”) represent the following journal diameters.
Stamped alphabets on crank web No.4 represent journal diameters marked with an arrow in figure respectively. For example, stamped alphabet “A” indicates that corresponding journal diameter is 50.994 – 51.0000 mm (2.0077 – 2.0078 in.).
Crankshaft journal diameter
Stamped alphabet Journal diameter
A 50.994 – 51.000 mm
(2.0077 – 2.0078 in.)
B 50.988 – 50.994 mm
(2.0074 – 2.0076 in.)
C 50.982 – 50.998 mm
(2.0072 – 2.0074 in.)
Suzuki Splash Workshop Repair Service Manual 2008-2015