
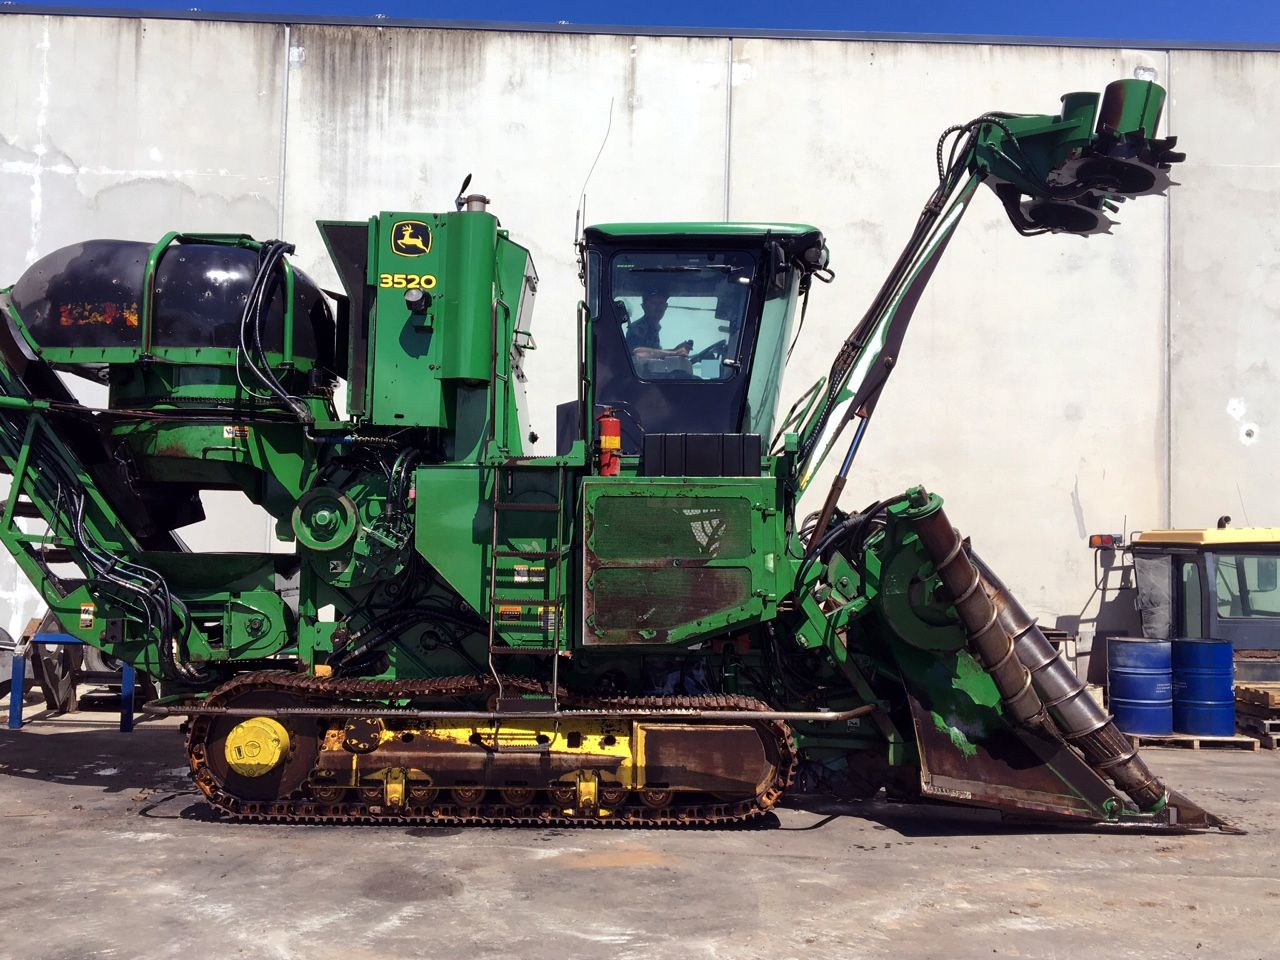
John Deere 3520 3522 Sugar Cane Harvester Repair Service Manual PDF TM100419 - MJODTM100419.zip
John Deere Sugar Cane Harvester 3520, 3522 Repair Service Manual (TM100419)
TM100419 - John Deere Sugar Cane Harvester 3520, 3522 Technical Manual (Repair).PDF
Complete Repair manual for John Deere 3520, 3522 Sugar Cane Harvesters PIN Prefix NW, with all the service information to maintain, diagnostic, repair, rebuild like professional mechanics.
John Deere Track & Wheel Sugar Cane Harvesters 3520, 3522 workshop Repair manual includes:
* Numbered table of contents easy to use so that you can find the information you need fast.
* Detailed sub-steps expand on repair procedure information
* Numbered instructions guide you through every repair procedure step by step.
* Notes, cautions and warnings throughout each chapter pinpoint critical information.
* Bold figure number help you quickly match illustrations with instructions.
* Detailed illustrations, drawings and photos guide you through every procedure.
* Enlarged inset helps you identify and examine parts in detail.
Total Pages: 2,340 pages
File Format: PDF (bookmarked, ToC, Searchable, Printable, high quality)
Language: English
MAIN SECTIONS
Foreword
General
Safety
General Specifications
Fuels and Lubricants
Tune-Up and Adjustments
Engine
Component Removal and Installation
Cooling System
Exhaust System
Auxiliary Coolers
Fuel and Air
Diesel Fuel System
Air Intake System
Electrical
Batteries
Electrical Harness and Connectors
Wire Harness Routings
Sensors and Switches
Lighting
Fuses and Relays
Operator Station
Charging System
Starting System
Power Train
Pump Drive
Hydrostatic Drive Pumps
Hydrostatic Drive Motors
Final Drive Repair
Track
Ground Conditions
Operating Conditions
Undercarriage Wear
Glossary
Track Repair
Wheel
Wheel
Steering and Brakes
Steering Column
Steering Valve and Control Unit
Steering Arms and Pivots
Brakes
Hydraulic System
Hydraulic Reservoir
Hydraulic Pumps
Hydraulic Valves
Hydraulic Cylinders
Hydraulic Motors
Accumulators
Miscellaneous
Handrails and Platform
Shields and Doors
Operator Station
Air Conditioning System
System Components
Seats
Cab
Topper System
Topper
Crop Divider System
Crop Divider
Knockdown Rollers
Knockdown Rollers
Base Cutter System
Base Cutter
Feed Roller System
Rollers
Chopper System
Chopper
Cleaning System
Primary Extractor
Secondary Extractor
Elevator System
Elevator
Dealer Fabricated Tools
Dealer Fabricated Tools
tm100419 - 3520 and 3522 Sugar Cane Harvester Repair Manual
Table of Contents
Foreword
Section 10: General
Group 05: Safety
Recognize Safety Information
Understand Signal Words
Follow Safety Instructions
Work in Clean Area
Service Machines Safely
Emergency Exit
Work In Ventilated Area
Illuminate Work Area Safely
Replace Safety Signs
Use Proper Lifting Equipment
Support Machine Properly
Avoid Heating Near Pressurized Fluid Lines
Handle Fluids Safely—Avoid Fires
Remove Paint Before Welding or Heating
Precautions for Welding
Live With Safety
Avoid Harmful Asbestos Dust
Practice Safe Maintenance
Use Proper Tools
Construct Dealer-Made Tools Safely
Seat Safety Switch
Tilting the Cab
Protect Bystanders
Use Steps and Handholds Correctly
Wear Protective Clothing
Handle Fuel Safely—Avoid Fires
Avoid Static Electricity Risk When Refueling
Service Accumulator Systems Safely
Service Cooling System Safely
Prepare for Emergencies
Use Safety Lights and Devices
Using Cylinder Safety Stops
Safe Transport of Harvester
Avoid High-Pressure Fluids
Wait Before Opening High-Pressure Fuel System
Use Caution on Hillsides
Use Caution On Slopes When Turning
Stopping and Parking
Park Machine Safely
Service Tires Safely
Service Tires Safely
Avoid Electrical Power Lines
Keep Hands Away from Knives
Decommissioning: Proper Recycling and Disposal of Fluids and Components
Prevent Battery Explosions
Handling Batteries Safely
Fire Prevention
In Case of Fire
Servicing Electronic Control Units
Welding Near Electronic Control Units
Keep Electronic Control Unit Connectors Clean
Stay Clear of Harvesting Units
Stay Clear of Rotating Drivelines
Keep Riders and Children Off Machine
Instructional Seat
Install All Guards
Avoid Hot Exhaust
Group 10: General Specifications
Dimensions
Weight
Component Specifications
Engine Specifications
Capacities
Travel Speeds
Interpreting Machine Serial Number
Machine Serial Number
Engine Serial Number
Pump Drive Gear Case Serial Number
Critical Torque Specifications
Identifying Zinc-Flake Coated Fasteners
Unified Inch Bolt and Screw Torque Values
Metric Bolt and Screw Torque Values
Face Seal Fittings Assembly and Installation—All Pressure Applications
Metric Face Seal and O-Ring Stud End Fitting Torque Chart—Standard Pressures
Metric Face Seal and O-Ring Stud End Fitting Torque Chart—High Pressure Applications
SAE Face Seal and O-Ring Stud End Fitting Torque Chart—Standard Pressures
SAE Face Seal and O-Ring Stud End Fitting Torque Chart—High Pressure Applications
Four Bolt Flange Fittings Assembly and Installation—All Pressure Applications
SAE Four Bolt Flange Cap Screw Torque Values—Standard Pressure Applications
SAE Four Bolt Flange Cap Screw Torque Values—High Pressure Applications
Sealants and Adhesives Cross-Reference Chart
Group 15: Fuels and Lubricants
Lubricate Machine Properly
Diesel Engine Break-In Oil — Non-Emissions Certified and Certified Tier 1, Tier 2, Tier 3, Stage I, Stage II, and Stage III
Diesel Engine Oil — Tier 2 and Stage II
Diesel Engine Oil — Tier 3 and Stage III
Diesel Fuel
Lubricity of Diesel Fuel
Diesel Engine Coolant
Diesel Engine Coolant (engine with wet sleeve cylinder liners)
John Deere COOL-GARD™ II Coolant Extender
Additional Information About Diesel Engine Coolants and John Deere COOL-GARD™ II Coolant Extender
Operating in Warm Temperature Climates
Supplemental Coolant Additives
Testing Diesel Engine Coolant
Pump Drive, Base Cutter, and Chopper Gear Case Oil
Hydraulic Oil
Final Drive Gear Oil
Grease
Alternative and Synthetic Lubricants
Group 20: Tune-Up and Adjustments
Tune-Up and Adjustment
Check Oil Lines And Fittings
Basic Electrical Component Handling / Precautions For Vehicles Equipped With Computer Controlled Systems
Programming Control Units
Section 20: Engine
Group 05: Component Removal and Installation
Special Tools
Other Material
Specifications
John Deere Engine Repair—Use CTM
Remove and Install Engine
Remove and Install Serpentine Belt
Inspect Belt Tensioner
Replace Engine Isolators
Group 10: Cooling System
Special Tools
Other Material
Specifications
Test Surge Tank Cap
Test Radiator and Surge Tank
Remove and Install Radiator
Drain, Flush, and Fill Cooling System
Remove and Install Fan
Thermostat Repair—Use CTM
Engine Water Pump Repair—Use CTM
Group 15: Exhaust System
Remove and Install Muffler
Group 20: Auxiliary Coolers
Specifications
Remove and Install Air Conditioning Condenser-Fuel Cooler
Remove and Install Hydraulic Oil Cooler
Remove and Install Charge Air Cooler
Cleaning Charge Air Cooler
Section 30: Fuel and Air
Group 05: Diesel Fuel System
Other Material
John Deere Fuel System Repair—Use CTM
Remove and Install Fuel Filters
Bleed Fuel System—Use CTM
Remove and Install Fuel Tank
Remove and Install Fuel Cooler
Group 10: Air Intake System
Remove and Install Engine Air Filters
Clean and Inspect Primary Air Filter
Remove and Install Air Cleaner Inlet Assembly
Turbocharger Repair—Use CTM
Section 40: Electrical
Group 05: Batteries
Specifications
Servicing Battery
Checking Battery Fluid Level
Preventing Battery Damage
Charging Battery
Battery Disconnect Switch
Remove and Install Batteries
Group 10: Electrical Harness and Connectors
Use Electrical Insulating Compound
Electrical System Visual Inspection
Using High-Pressure Washers
Basic Electrical Component Handling / Precautions for Vehicles Equipped with Computer Controlled Systems
Electrical Connector / Wiring Harness Handling and Repair
Repair Procedure R-A
Repair Procedure R-B
Repair Procedure R-C
Repair Procedure R-D
Repair Procedure R-E
Repair Procedure R-F
Repair Procedure R-G
Repair Procedure R-I
Repair Procedure R-J
Repair Procedure R-K
Repair Procedure R-M
Repair Procedure R-N
Harness Repair — Splice Connector
Group 15: Wire Harness Routings
Cab Harness Routing
Armrest Harness Routing
Front Chassis Harness Routing
Engine Harness Routing
Battery Harness Routing
Rear Chassis Harness Routing
Main Track Harness Routing
Elevator Harness Routing
Group 20: Sensors and Switches
Other Material
Specifications
Replace Engine Sensors and Switches—Use CTM
Remove and Install Engine Access Door Switch
Remove and Install Fuel Level Sensor
Remove and Install Hydraulic Oil Temperature Sensor
Remove and Install Hydraulic Reservoir Level Switch
Remove and Install Hydraulic Reservoir Pressure Switch
Remove and Install Crop Divider Position Sensor (If Equipped)
Remove and Install Base Cutter Position Sensor (Wheel Harvester)
Remove and Install Base Cutter Position Sensor (Track Harvester)
Remove and Install Base Cutter Motor Pressure Sensor
Remove and Install Chopper/Base Cutter Pump Pressure Sensor
Steering Input Device (SID) (Track Harvester)
Remove and Install Primary Extractor Fan Speed Sensor
Remove and Install Air Filter Restriction Switch
Remove and Install Hydrostatic Drive Motor Speed Sensor—Single Speed (Track Harvester)
Remove and Install Hydrostatic Drive Motor Speed Sensor—Two-Speed (Track Harvester)
Remove and Install Hydrostatic Drive Motor Speed Sensor (Wheel Harvester)