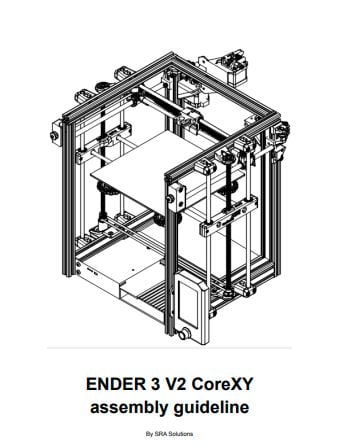
ENDER 3 V2 CoreXY assembly guideline
On Sale
€4.99
€4.99
This PDF product is an assembly guideline to convert ENDER 3 V2 to CoreXY and including a free firmware for the CoreXY printer.
STL Parts link:
https://www.thingiverse.com/thing:5451875
https://www.printables.com/model/254732-ender-3-v2-corexy
You will receive PDF of 55 pages about how to build your own CoreXY step by step, a pre-compile firmware for free, dimentions about how to build you own customized hotend holder and firmware, slicer setups. (press "previews")
You will also receive by mail if any upgrade and news available.
Content of Firmware for Creality 4.2.2 and SKR 1.4 Turbo(free):
-compiled firmware
-Uncompiled firmware
Content of PDF:
Bom list (parts not included in Ender 3 V2)
Frame visualization/checking
1. ) Frame preparation (drill and tap).
2.) Frame assembly
3.) Rear belt guides Left & Right assembly
4.) LEFT and RIGHT Tensioner assembly
5.) Core Y assembly
6.) XY stepper motor assembly
7.) Core X assembly
8.) Timing belts
9.) Z Axis assembly
10.) Limit Switch
11.) Bed assembly
12.) Extruder assembly
13.) Controller assembly
For Creality 4.2.2
For BTT SKR 1.4 Turbo
Firmware: Marlin-2.0x Configuration:
Klipper Configuration
Slicer printer setup:
Draw & Dimensions for customized holder
The pdf doesn’t contains disassembly instruction for Ender 3 v2
need more information: sra3dsolutions@gmail.com
WARNING
Several steps in this assembly guideline require modification of original parts mentioned like wiring electric components, drilling holes and threads tapping and those changes require a level of expertise. DO NOT ATTEMPT ANY WIRING, DRILLING, TREAD TAPPING OF ANY KIND if you lack the knowledge and understanding required. Otherwise personal injury and/or death as well as property damage or loss could occur. Our advice is If you do not fully understand what you are doing then ask a Professional Licensed for the appropriate task.
Disclaimer
All contents provided on this document is for only guideline purposes only. The owner of this document makes no representations or warranty as to the accuracy or completeness of any information mentioned in this document. The owner will not be liable for any errors, omission in this information not for the availability of this information- The owner will not be liable for any kind of loose and/or injuries (including original product warranty) from the display or use of this document and information.
