
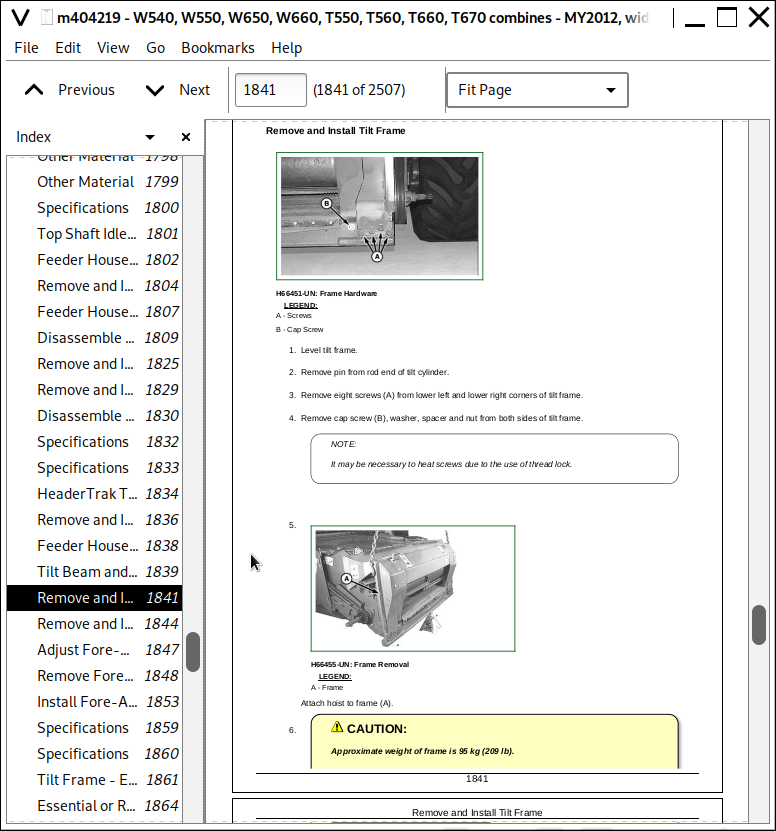
John Deere W540 W550 W650 W660 T550 T560 T660 T670 Combines Wide Cab MY2012-MY2013 Workshop Repair Service Manual (TM404219) - MJODTM404219.zip
Full workshop repair manual covering John Deere Combine Models W540, W550, W650, W660, T550, T560, T660, and T670 equipped with the Wide Cab (International edition) for model years 2012–2013, offering the same workshop guidance professionals rely on to service, maintain, and fix these machines.
The John Deere Combines W540, W550, W650, W660, T550, T560, T660, T670 workshop service repair manual contains:
* Numbered table of contents easy to use so that you can find the information you need fast.
* Detailed sub-steps expand on repair procedure information
* Numbered instructions guide you through every repair procedure step by step.
* Notes, cautions and warnings throughout each chapter pinpoint critical information.
* Bold figure number help you quickly match illustrations with instructions.
* Detailed illustrations, drawings and photos guide you through every procedure.
* Enlarged inset helps you identify and examine parts in detail.
TM404219 - John Deere Combines W540, W550, W650, W660, T550, T560, T660, T670 Technical Manual (Repair).PDF
TM404219 - John Deere Combines W540, W550, W650, W660, T550, T560, T660, T670 Technical Manual (Repair).EPUB
Total Pages: 2,513 pages
File Format: PDF/EPUB/MOBI/AZW (PC/Mac/Android/Kindle/iPhone/iPad; bookmarked, ToC, Searchable, Printable)
Language: English
MAIN SECTIONS
Foreword
General Information
Safety
Specifications
General Repair Information
Fuel, Lubricants, Coolant and Capacities
Engine
Remove and Install Engine
Cooling System
Fuel System and Air Intake System
Air Intake System
Diesel Fuel System
Electrical System
Harness and Connector Repair
Batteries
Wiring Harness Routing
Power Distribution and Location of Control Units
Switches, Sensors and Motors
Electromagnetic Valves
Lights
Operator`s Station
Windshield Wiper
Alternator
Starting Motor
GreenStar™ Components
Power Train
Transmission and Differential - Three-Speed Transmission
Hydrostatic System - Three-Speed Transmission
Transmission and Differential - ProDrive™ Transmission
Hydrostatic Drive Pump - ProDrive™ Transmission
Hydrostatic Drive Motor - ProDrive™ Transmission
Final Drives
Cam Lobe Motor
HillMaster™ System
Steering and Brakes
Steering System
Brakes - Three-Speed Transmission
Brakes - ProDrive™ Transmission
Hydraulic System
Hydraulic Oil Reservoir
Hydraulic Pumps
Hydraulic Valves
Hydraulic Cylinders
HillMaster™ II Hydraulic Cylinders
Motor
Accumulators
Separator Shell
Gull Wing Doors
Operator`s Station
Air Conditioning System (R134a)
System Components
Operator`s Cab
Feeder House Repair
Feeder House
Upper Shaft and Slip Clutch
Feeder House Drives and Reverser Gear Case
HeaderTrak™ Tilt Cylinder and Frame
HillMaster™ II Tilt Cylinder and Frame
Separator, W-Series Combines
Separator Repair
Beater (T Series)
Separator Rotor/Separator Grate (T Series)
Separator Grate (T Series)
Overshot Beater/Stripper (T Series)
Cylinder Drives
Walkers, Walker Shafts and Walker Return Pan
Straw Chopper and Chaff Spreader
Shoe Supply Augers, Cleaning Fan, Chaffer/Sieve Frame
Tailings Elevator and Augers
Tailings Elevator and Auger Slip Clutch (T Series)
Primary Countershaft
Header Electromagnetic Clutch
Grain Tank and Unloading System
Grain Tank Cross Augers
Auger System Drives
Vertical Auger and Lower Gear Case
Horizontal Auger and Gear Case
Clean Grain Elevator and Loading Auger Gear Case
Grain Tank and Extensions
Engine Gear Case and Control Valve
Engine Gear Case and Valve
Special Tools
Essential Special Tools
Recommended Special Tools
tm404219 - W540, W550, W650, W660, T550, T560, T660, T670 combines - MY2012, wide cab - repair -: (International edition)
Table of Contents
Foreword
Section 10: General Information
Group 05: Safety
Recognize Safety Information
Follow Safety Instructions
Understand Signal Words
Prevent Battery Explosions
Handling Batteries Safely
Wait Before Opening High-Pressure Fuel System
Prepare for Emergencies
Handle Fluids Safely—Avoid Fires
Prevent Acid Burns
Avoid High-Pressure Fluids
Protect Against High Pressure Spray
Prevent Machine Runaway
Park Machine Safely
Live With Safety
Install All Guards
Support Machine Properly
Wear Protective Clothing
Work in Clean Area
Service Machines Safely
Service Cooling System Safely
Stay Clear of Rotating Drivelines
Work In Ventilated Area
Illuminate Work Area Safely
Replace Safety Signs
Use Proper Lifting Equipment
Service Tires Safely
Avoid Heating Near Pressurized Fluid Lines
Avoid Hot Exhaust
Remove Paint Before Welding or Heating
Use Proper Tools
Construct Dealer-Made Tools Safely
Practice Safe Maintenance
Protect Against Noise
Dispose of Waste Properly
Avoid Harmful Asbestos Dust
Use Adequate Service Facilities
Servicing Electronic Control Units
Welding Near Electronic Control Units
Precautions for Welding
Keep Electronic Control Unit Connectors Clean
Clean Exhaust Filter Safely
Handle Fuel Safely—Avoid Fires
Handle Starting Fluid Safely
Exhaust Filter Cleaning
Group 10: Specifications
Operating Speeds
Specifications - W540 and W550 Combines
Specifications - W650 and W660 Combines
Specifications - Combines T550 and T560
Specifications - T660 and T670 Combines
Dimension Reference Points (W Series)
Dimensions (W Series)
Dimension Reference Points (T Series)
Dimensions (T Series)
Metric Bolt and Screw Torque Values
Unified Inch Bolt and Screw Torque Values
Assemble and Install Flat Face Seal Fittings - All Pressure Applications
Torque Chart for Metric Flat Face Seal Fittings - Standard Pressure Applications
Torque Chart for Metric Flat Face Seal Fittings - High Pressure Applications
Torque Chart for SAE Flat Face Seal Fittings - Standard Pressure Applications
Torque Chart for SAE Flat Face Seal Fittings - High Pressure Applications
Assemble and Install Four-Bolt Flange Fittings - All Pressure Applications
Torque Values for SAE Four-Bolt Flange - Standard Pressure Applications
Torque Values for SAE Four-Bolt Flange - High Pressure Applications
Group 15: General Repair Information
Tune-Up and Adjustment
Care and Maintenance of Belts
Defective Belts
Prevent Hydraulic System Contamination
Check Oil Lines and Fittings
Basic Electrical Component Handling / Precautions For Vehicles Equipped With Computer Controlled Systems
Programming Control Units
Group 20: Fuel, Lubricants, Coolant and Capacities
Handle Fuel Safely—Avoid Fires
Handling and Storing Diesel Fuel
Lubricity of Diesel Fuel
Diesel Fuel
Testing Diesel Fuel
Biodiesel Fuel
Minimizing the Effect of Cold Weather on Diesel Engines
John Deere Break-In™ Plus Engine Oil
Heavy Duty Diesel Engine Coolant
Supplemental Coolant Additives
Drain Intervals for Diesel Engine Coolant
Operating in Warm Temperature Climates
Testing Diesel Engine Coolant
Additional Information About Diesel Engine Coolants and John Deere LIQUID COOLANT CONDITIONER
John Deere COOL-GARD™ II Coolant Extender
Additional Information About Diesel Engine Coolants and John Deere COOL-GARD™ II Coolant Extender
Liquid Coolant Conditioner
Diesel Engine Oil
Hydrostatic Drive System, Main Hydraulic System and Main Engine Gear Case Oils
Transmission, Final Drives, Feeder House Reverser, Primary Countershaft, Loading Auger Elevator and Dual-Range Cylinder Drive Gear Cases
Grease
Lubricant Storage
Mixing of Lubricants
Alternative and Synthetic Lubricants
Oilscan™ and CoolScan™
Capacities
Section 20: Engine
Group 05: Remove and Install Engine
Essential or Recommended Tools
Specifications
John Deere Engine Repair—Use CTM
Remove Engine—Non IT4
Install Engine—Non IT4
Remove Engine—9.0 L (Interim Tier 4/Stage III B)
Install Engine—9.0 L (Interim Tier 4/Stage III B)
Remove and Install Flywheel Pilot Bearing
Remove and Install Aftertreatment Device Assembly
Disassemble and Assemble Aftertreatment Device
Group 15: Cooling System
John Deere Engine Repair—Use CTM
Remove and Install Rotary Screen
Remove and Install Rotary Screen Drive
Rotary Screen Drive Exploded View (Interim Tier 4/Stage III B)
Remove and Install Rotary Screen Idler Arm and Sheaves
Rotary Screen Idler Arm and Sheaves Exploded View (Interim Tier 4/Stage III B)
Remove and Install Rotary Screen Brush Kit (Optional)
Rotary Screen Exploded View (Interim Tier 4/Stage III B)
Remove and Install Rotary Screen
Remove and Install Rotary Screen Door
Vacuum Fan Assembly Exploded View (Interim Tier 4/Stage III B)
Remove and Install Vacuum Fan Jackshaft
Remove and Install Vacuum Fan Assembly
Remove and Install Vacuum Fan Impeller
Remove Cooling Package (Interim Tier 4/Stage III B)
Install Cooling Package (Interim Tier 4/Stage III B)
Remove and Install Oil Cooler (Interim Tier 4/Stage III B)
Remove and Install Radiator
Remove Radiator (Interim Tier 4/Stage III B)
Install Radiator (Interim Tier 4/Stage III B)
Variable Speed Fan Drive and Driven Assembly Exploded View (Interim Tier 4/Stage III B)
Replace Variable Speed Fan Drive Belt (Interim Tier 4/Stage III B)
Remove and Install Variable Speed Fan Drive Assembly (Interim Tier 4/Stage III B)
Disassemble and Assemble Variable Speed Fan Drive Assembly (Interim Tier 4/Stage III B)
Remove and Install Variable Speed Fan Driven Assembly (Interim Tier 4/Stage III B)
Disassemble and Assemble Variable Speed Fan Driven Assembly (Interim Tier 4/Stage III B)
Lubricate Variable Speed Fan Drive and Driven Assemblies (Interim Tier 4/Stage III B)
Test Radiator
Test Radiator Cap
Replace Thermostats
Repair or Replace Water Pump
Section 30: Fuel System and Air Intake System
Group 05: Air Intake System
Specifications
John Deere Engine Repair—Use CTM
Remove and Install Turbocharger
Turbocharger Repair
Remove and Install Charge Air Cooler
Remove and Install Charge Air Cooler (Interim Tier 4/Stage III B)
Cleaning Charge Air Cooler
Group 10: Diesel Fuel System
Specifications
Remove and Install Fuel Tank
Remove and Install Fuel Tank Shutoff Valve
Replace Fuel Filter (6.8-Liter Engine)
Replace Water Separator Filter (6.8-Liter Engine)
Remove and Install Fuel Filters (9.0-Liter Engine)
Fuel Filters — Removal (Interim Tier 4/Stage III B)
Fuel Filters — Installation (Interim Tier 4/Stage III B)
Clean the Fuel Precleaner (9.0-Liter Engine)
Flush Fuel Precleaner (Heavy-Duty; Option)
Clean Fuel Precleaner (Heavy-Duty; Option)
Replace Fuel Precleaner (Heavy-Duty; Option)
Remove and Install Fuel Prefilter (Interim Tier 4/Stage III B)
Remove and Install Fuel Cooler (Interim Tier 4/Stage III B)
Section 40: Electrical System
Group 05: Harness and Connector Repair
Essential or Recommended Tools
Other Material
Use Electrical Insulating Compound
Using High-Pressure Washers
Electrical System Visual Inspection
Basic Electrical Component Handling / Precautions for Vehicles Equipped with Computer Controlled Systems
Electrical Connector / Wiring Harness Handling and Repair
Repair Procedure R-A
Repair Procedure R-B
Repair Procedure R-C
Repair Procedure R-D
Repair Procedure R-E
Repair Procedure R-F
Repair Procedure R-G
Repair Procedure R-I
Repair Procedure R-J
Repair Procedure R-K
Repair Procedure R-M
Repair Procedure R-N
Repair Procedure R-AE
Repair Procedure R-AF
Repair Procedure R-AG
Repair Procedure R-AH
Repair Procedure R-AI
Repair Procedure R-AJ
Repair Procedure R-AK
Repair Procedure R-AL