
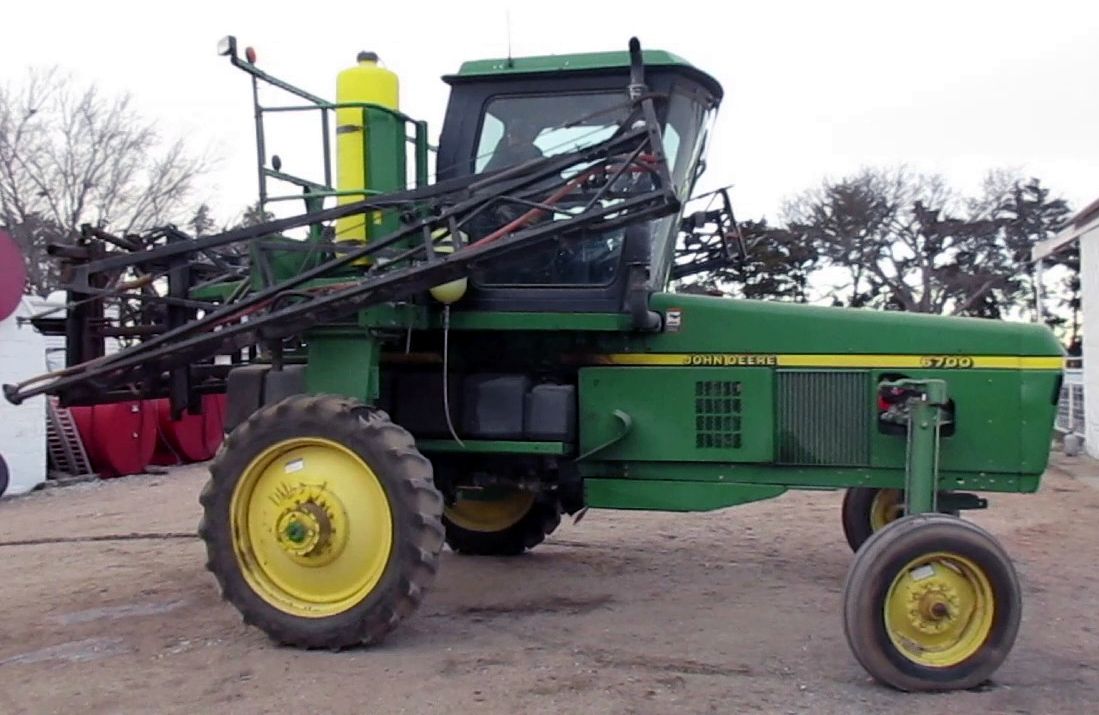
John Deere 6700 and 6700S Self-Propelled Sprayer Repair Technical Manual (TM1742) PDF - MJODTM1742.zip
An all-inclusive service manual for the John Deere Self-Propelled Sprayers 6700, packed with the shop-level guidance professionals use to service, fix, and rebuild equipment.
The workshop repair guide for the John Deere Self-Propelled Sprayers 6700 contains:
* Numbered table of contents easy to use so that you can find the information you need fast.
* Detailed sub-steps expand on repair procedure information
* Numbered instructions guide you through every repair procedure step by step.
* Notes, cautions and warnings throughout each chapter pinpoint critical information.
* Bold figure number help you quickly match illustrations with instructions.
* Detailed illustrations, drawings and photos guide you through every procedure.
* Enlarged inset helps you identify and examine parts in detail.
TM1742 - John Deere 6700 Self-Propelled Sprayers Technical Manual (Repair).PDF
TM1742 - John Deere 6700 Self-Propelled Sprayers Technical Manual (Repair).EPUB
Total Pages: 862 pages
File Format: PDF (bookmarked, ToC, Searchable, Printable, high quality)
Language: English
MAIN SECTIONS
Foreword
General Information
Safety
General Specifications
Fuels and Lubricants
Engine Repair
Remove and Install Engine
Cooling System
Fuel and Air Systems
Air Intake and Exhaust
Diesel Fuel System
Electrical Repair
Connector Repair
Starting System
Charging System
Solenoids, Switches and Relays
Monitoring Systems and Sensors
Wiper and Seat Components
Retractable Ladder
Power Train Repair
Flush Hydrostatic System
Remove and Install Hydrostatic Components
Hydrostatic Drive Repair
Planetary Hub Repair
Steering and Brakes
Remove and Install Steering Components
Steering Column Repair
Steering Valve Repair
Steering Cylinder-Wide Axle
Brake System Repair
Front Wheel and Axle
Hydraulic System
Hydraulic Pump
Hydraulic Valves
Hydraulic Cylinders
Hydraulic Filter
Accumulator
Solution Spray System
Nozzle Repair
Solution Tank-V-Tank
Solution Tank-T-Tank
Solution Pump
Solution Pump Electric Clutch
Solution Control Valves and Sensors
Foam Marker System Repair
Foam Marker System Repair
Operator`s Station Repair
Air Conditioning System
Air Intake System Repair
Seat Repair
Operator`s Cab
Controls
Cab Heater (If Equipped)
Dealer Fabricated Tools
tm1742 - 6700 Self-Propelled Sprayer Repair
Table of Contents
Foreword
Section 10: General Information
Group 05: Safety
Recognize Safety Information
Understand Signal Words
Perform Service Safely
Park Machine Safely
Handle Fluids Safely—Avoid Fires
Prevent Battery Explosions
Prepare for Emergencies
Protect Against High Pressure Spray
Prevent Acid Burns
Wear Protective Clothing
Handle Agricultural Chemicals Safely
Service and Operate Chemical Sprayers Safely
Avoid Contact with Agricultural Chemicals
Clean Vehicle of Hazardous Pesticides
Support Machine Properly
Service Machines Safely
Practice Safe Maintenance
Avoid Harmful Asbestos Dust
Work In Ventilated Area
Work in Clean Area
Remove Paint Before Welding or Heating
Service Accumulator Systems Safely
Avoid Heating Near Pressurized Fluid Lines
Avoid High-Pressure Fluids
Service Tires Safely
Service Cooling System Safely
Illuminate Work Area Safely
Replace Safety Signs
Use Proper Lifting Equipment
Use Proper Tools
Dispose of Waste Properly
Live With Safety
Group 10: General Specifications
Machine Specifications—6700
Machine Specifications—6700S
Dimensions—3-Wheel
Dimensions—4-Wheel (With T-Tank)
Dimensions—4-Wheel
Dimensions—4-Wheel (With T-Tank)
Dimensions—4-Wheel (With V-Tank)
Metric Bolt and Screw Torque Values
Unified Inch Bolt and Screw Torque Values
Face Seal Fittings Assembly and Installation—All Pressure Applications
Metric Face Seal Fitting Torque Chart—Standard Pressure Applications
Metric Face Seal Fitting Torque Chart—High Pressure Applications
SAE Face Seal Fitting Torque Chart—Standard Pressure Applications
SAE Face Seal Fitting Torque Chart—High Pressure Applications
Identification Numbers
Group 15: Fuels and Lubricants
Diesel Fuel
Handling and Storing Diesel Fuel
Lubricity of Diesel Fuel
Heavy Duty Diesel Engine Coolant
Testing Diesel Engine Coolant
Supplemental Coolant Additives
Operating in Warm Temperature Climates
Additional Information About Diesel Engine Coolants and John Deere LIQUID COOLANT CONDITIONER
Testing Diesel Fuel
Diesel Engine Break-In Oil
Diesel Engine Oil
Extended Diesel Engine Oil Service Intervals
Hydrostatic Drive/Hydraulic Oil
Final Drive Oil
Grease
Suspension and Steering Grease
Alternative and Synthetic Lubricants
Lubricant Storage
Hydraulic Brake Fluid
Section 20: Engine Repair
Group 05: Remove and Install Engine
John Deere Engine Repair—Use CTM8, CTM104 and CTM207
Specifications
Decontaminate Spray Equipment
Remove Engine
Install Engine
Group 10: Cooling System
Engine Water Pump Repair—Use CTM8 or CTM104
Essential or Recommended Tools
Specifications
Inspect Cooling System
Remove Radiator
Install Radiator
Inspect Belt Tensioner
Replace Belt Tensioner
Section 30: Fuel and Air Systems
Group 05: Air Intake and Exhaust
Turbocharger Repair—Use CTM8 or CTM104
Remove and Install Air Filter Assembly
Group 10: Diesel Fuel System
Specifications
Injection Pump, Nozzle and Governor Repair—Use CTM8, CTM104 and CTM207
Remove Fuel Tank
Clean and Inspect Fuel Tank
Install Fuel Tank
Section 40: Electrical Repair
Group 05: Connector Repair
Essential or Recommended Tools
Using High-Pressure Washers
Repair Procedure R-A
Repair Procedure R-B
Repair Procedure R-C
Repair Procedure R-D
Repair Procedure R-E
Repair Procedure R-F
Repair Procedure R-G
Repair Procedure R-I
Repair Procedure R-J
Repair Procedure R-K
Repair Procedure R-M
Repair Procedure R-N
Repair Procedure R-AE
Group 10: Starting System
Starter Repair—Use CTM77
Specifications
Remove and Install Starting Motor
Remove, Install and Adjust Neutral Start Switch
Group 15: Charging System
Alternator Repair—Use CTM77
Disconnect Electrical Circuit
Remove and Install Alternator
Group 20: Solenoids, Switches and Relays
Disconnect Electrical Circuit
Remove Side Console
Install Side Console
Remove and Install Key Switch
Remove and Install Light Switch
Remove and Install Turn Signal Switch
Remove and Install Overhead Light Housing and Dome Lamps
Remove and Install Dome Lamp Switch
Replace and Adjust Field Lights
Load Center Identification
Group 25: Monitoring Systems and Sensors
Specifications
Other Material
Disconnect Electrical Circuit
Replace Engine Coolant Temperature Sensor
Replace Oil Pressure Sensor
Replace Engine Speed Sensor
Replace Air Filter Restriction Sensor
Replace Hydraulic Oil Temperature Sensor
Replace and Adjust Ground Speed Sensor
Replace Fuel Level Sender
Replace Chassis Computer Unit/Spray Rate Control Unit (CCU/SRC)
Replace Active Terminator
Replace Passive Terminator
Replace Flowmeter Sensor
Replace Solution Pressure Sensor
Group 30: Wiper and Seat Components
Disconnect Electrical Circuit
Remove and Install Wiper Switch and Circuit Breaker
Remove and Install Wiper Arm and Drive Assembly
Remove and Install Wiper Motor Assembly
Remove and Install Wiper Motor Drive Gear
Remove and Install Seat Raise/Lower Switch on Air-Ride Seats (If Equipped)
Remove and Install Seat Air Compressor Motor
Remove and Install Seat Ride Zone Protector
Group 35: Retractable Ladder
Service Parts Kits
Disconnect Electrical Circuit
Remove and Install Ladder Actuator (If Equipped)
Disassemble, Inspect and Assemble Ladder Actuator (If Equipped)
Section 50: Power Train Repair
Group 05: Flush Hydrostatic System
Flushing Hydrostatic Drive System
Group 10: Remove and Install Hydrostatic Components
Other Material
Specifications
Remove and Install Main Drive Belt
Remove and Install Hydrostatic Pump
Remove Drive Shaft
Inspect Drive Shaft
Install Drive Shaft
Remove and Install Ground Speed Solenoid Valve
Remove and Install Control Valve (Hydrostatic Drive Pump)
Remove and Install Hydrostatic Drive Motor
Remove and Install Planetary Hub
Group 15: Hydrostatic Drive Repair
Service Equipment and Tools
Other Materials
Service Parts Kits
Specifications
General Repair Procedures—Hydrostatic Drive Pump and Drive Motors
Replace Hydrostatic Drive Pump Shaft Seal
Repair Charge Pump (Hydrostatic Drive Pump)
Disassemble and Assemble Ground Speed Solenoid Valve
Adjust Control Valve Eccentric Plug
Replace Hydrostatic Drive Motor Shaft Seal
Group 20: Planetary Hub Repair
Essential or Recommended Tools
Service Equipment and Tools
Other Material
Specifications—Planetary Hubs (Serial Number—5999)
Specifications— Planetary Hubs (Serial Number 6000—)
Disassemble and Assemble Planetary Hub (Serial No.—5999)
Disassemble Planetary Drive Hub (Serial No. 6000—)
Assemble Planetary Drive Hub (Serial No. 6000—)
Section 60: Steering and Brakes
Group 05: Remove and Install Steering Components
Essential or Recommended Tools
Service Parts Kit
Specifications
Remove Steering Column and Steering Valve
Install Steering Column and Steering Valve
Bleed Steering System
Group 10: Steering Column Repair
Inspect and Repair Steering Shaft
Replace Steering Column Bushing
Assemble Steering Column
Group 15: Steering Valve Repair
Essential or Recommended Tools
Specifications
Steering Valve
Disassemble Steering Valve
Inspect Steering Valve Components
Assemble Steering Valve
Group 20: Steering Cylinder—Wide Axle
Specifications
Remove Steering Cylinder
Repair Steering Cylinder
Install and Adjust Steering Cylinder
Group 25: Brake System Repair
Other Material
Specifications
Service Parts Kits
Remove and Install Master Cylinder
Repair Master Cylinder