
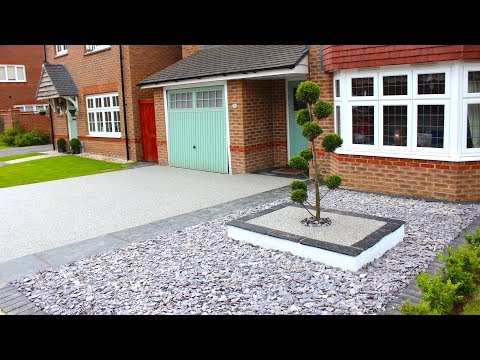
3 Steps to DIY Resin Bound Patio
A patio is the heart of many outdoor living spaces, serving as a place to relax, entertain, and enjoy the garden. Choosing resin bound gravel for your patio offers a stylish, practical, and long‑lasting solution. Unlike traditional paving slabs that can crack or shift, resin bound gravel creates a seamless finish that is permeable, slip‑resistant, and easy to maintain. With SUDwell™ DIY Resin Bound Kits, you can achieve a professional look without the need for expensive contractors. The installation process can be simplified into three essential steps.
The first step is preparing the base. A patio requires a stable foundation to ensure it remains level and durable over time. Begin by clearing the area of any old paving, weeds, or debris. The ground should be level and capable of draining water effectively. Resin bound gravel is permeable, but proper drainage is still important to prevent pooling. For patios, a concrete or asphalt base works best. If you are working with soil, you will need to create a compacted sub‑base using MOT type 1 aggregate, topped with a binder course. Installing edging stones or timber restraints at this stage will help define the boundaries and keep the resin surface neat and contained.
The second step is mixing the resin and aggregate. SUDwell™ DIY Resin Bound Kits make this process straightforward by providing the correct ratio of resin and washed, dried aggregate. Start by combining the two resin components, Part A and Part B, using a drill and paddle mixer for about two minutes. Once blended, pour the resin into a forced‑action mixer and gradually add the gravel. Mix until every stone is evenly coated. It is important to work quickly, as the resin begins curing within 30 to 40 minutes. Planning your batches in advance and having assistance on hand for larger patios will ensure consistency and prevent delays.
The third step is laying and finishing the surface. Pour the resin‑coated gravel onto the prepared base and spread it evenly. Using a steel float, compact and level the mixture to a thickness of around 15 to 18 millimeters. Pay close attention to the edges, pressing firmly against the restraints to avoid gaps. Once the surface is smooth and even, allow it to cure undisturbed for four to six hours. Avoid walking or placing furniture on the patio for at least 24 hours to ensure the resin sets properly. The finished patio will be attractive, slip‑resistant, weed‑free, and fully permeable, making it both practical and visually appealing.
In conclusion, creating a resin bound patio is a manageable project when broken down into these three steps: preparing the base, mixing the resin and aggregate, and laying the surface. With SUDwell™ DIY Resin Bound Kits, you can achieve a professional finish that enhances your outdoor living space. The result is a durable, low‑maintenance patio that will serve you well for years to come, making your garden more inviting and functional.