


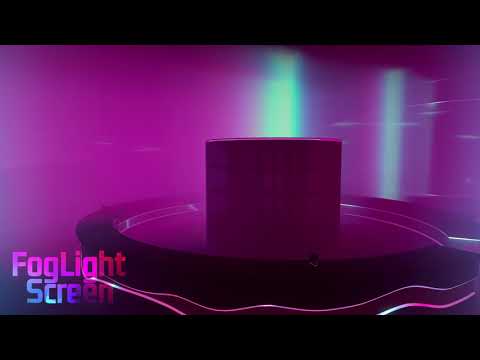
FogLight Screen
FogLight Screen
v1.0.0
This is an asset for PC VRChat Worlds that turns 2D video into 3D volumetric fog/light displays.
It is designed to be used with the ProTV video player, TXL, or any system that can output to a RenderTexture.
You can use many of them in the same world and it comes with a customizable control panel.
Example Uses:
- Fill a room with dynamic video fog
- Make a giant animated aurora in the sky
- Add moody shifting fog along the ground
- Make 3D animated panels and decorations
- Float around in a big pool of light
- Demo World
TL;DR Instructions:
- Import the FogLightScreen package.
- Drag the FogLightScreen prefab from Assets/Lesse/FogLightScreen into your scene.
- If you don't see any visuals, make sure Lighting is turned on in your Scene view.
- Turn on Gizmos as well for resizing controls.
- Use the Inspector window to:
- Assign the video texture you want to use.
- Adjust properties for appearance and performance.
- (Optional) Drag the FogLightScreenControlPanel prefab into your scene and use the inspector to select the settings you want and the screen you want it to affect.
Warnings/Limitations:
- NOT FOR AVATARS: This is for worlds.
- PCVR ONLY: It does not work on Quest headsets.
- CANNOT BE FREELY ROTATED: It is axis-locked to the XY/XZ/YZ planes.
- RAYMARCHED VOLUMETRIC EFFECTS CAN GET COSTLY: The performance cost is per-pixel. This shader is very lightweight but still has its limits. There are performance settings that allow you to tune performance for different situations including huge open spaces or very small ones. It's totally okay to use multiple screens in one world, just be careful to test your FPS (especially if you overlap screens).
- AVATAR/WORLD LIGHTING SUPPORT IS RUDIMENTARY: It's recommended to use AreaLit / LTCGI / Light Volumes separately if you want avatar & environment lighting. This asset does not natively integrate with them. However, it includes some (optional) basic projector lighting which may be sufficient for avatar lighting in some cases.
- I AM NOT A PERSONAL SUPPORT SERVICE: This asset is provided as-is. Setup instructions are included. A ton of effort has gone into making it usable. You are responsible for being able to do basic world editing work on your own (but please do let me know of any bugs!).
Configuration:
- Use the viewport arrow gizmos on the FogLight Screen to resize and reposition it as desired.
- Do not scale the screen object (it won't let you). Use the gizmos or Min/Max Bounds properties.
- Use the Inspector properties to control the orientation, density, and performance settings.
- There are advanced settings for things like tiling, using a sub-region of the UV Map, soft edges, etc.
- Once a video texture is hooked up you won't see visuals when editing in Unity anymore. You can temporarily override this using the "Show Preview in Edit Mode" toggle on the FogLight Screen. This will make it easier to adjust the screen.
- The "Performance" section of the FogLight Screen's settings are VERY IMPORTANT for performance and quality. Small step sizes are costly across large areas. Tune for each use-case.
Step Size:
The fog renders by "stepping" through space and taking a color sample at each position.
If the step size is too small, your GPU will have to do a ton of steps for every pixel.
But if the fog screen is very small you will need a small step size to see anything properly.
Step Size Increase:
This will increase the step size after every step, dramatically improving performance across large spaces at the cost of a noisier effect in the distance. This setting is extremely important in most cases.
- At the top of the inspector is a rough estimate of the best & worst case for the screen you have selected. They are calculated as if you were looking fully across the shortest axis or the largest diagonal.
- Fewer steps = better performance
- Test your FPS in VRChat! There's no absolute rule for step count.
- A max of 50-100 isn't crazy, but lower is better if you can get away with it.
- Generally, the actual step count will be lower than the estimates.
- If you're inside the fog looking outwards.
- If world geometry blocks you from seeing far into the fog.
- If the fog is dense enough to become opaque.
- You can activate some basic avatar/environment lighting at the bottom of the inspector with the "Add Projector Light" button.
- This is a basic Unity Projector light. It is not fancy and I recommended that you still use AreaLit, LTCGI, or Light Volumes separately (especially for environment lighting!).
- There is a gizmo to rotate the light direction and some inspector settings to adjust the front light, backlight, and ambient light strength.
- The Control Panel prefab (FogLightScreenControlPanel) allows you to toggle whichever settings you want to be available in-world.
- All customization is done on the root object. It will even resize itself for you!
- There's a built-in whitelist component on it so you can restrict controls to specific users.
- You can change the range and speed of each slider or let them be automatically calculated.
- It handles networking and interpolates values smoothly automatically.
- Warning: Do not hide the panel by disabling it or networking will break.
ProTV Hookup:
- Place any ProTV player in your scene (such as "Simple (ProTV).prefab") and select it .
- In the Inspector window, find the "Custom Texture Settings" in the "TV Manager" component.
- Click the "Create" button to make the TV output to a RenderTexture asset.
- Select the FogLightScreen object and assign that RenderTexture asset you just created to its "Video Texture" property.
- The default preview visuals will disappear. Don't panic, this is expected.
- If you Build & Test or Publish your world the video player will output to the fog screen now.
TXL Hookup:
- Place any TXL player in your scene (such as "Sync Video Player").
- Select the child object named "Screen Manager".
- In the Inspector window, find the "Render Textures" section and click "Convert to CRT Setup". This will create a RenderTexture asset for you. By default it'll be named something like "VideoTXLCRT-X".
- Select the FogLightScreen object and assign that RenderTexture asset you just created to its "Video Texture" property.
- The initial preview visuals will disappear. Don't panic, this is expected.
- If you Build & Test or Publish your world the video player will output to the fog screen now.
License Terms:
- This purchase grants you a personal license to use this asset in as many of your own worlds as you'd like.
- Credit is not required in your worlds, streams, etc; but it's super nice if you do.
- If you're doing commission work for someone else's world, they should purchase their own license.