


Tomahawk Axe Template Guide - DIY
*DIGITAL TEMPLATE* Based on the A3 pattern you've provided for the Winkler Compact Sayok RnD Tomahawk (famous for its appearance in The Terminal List), here is a step-by-step guide on how to use this template for a DIY build.
Depending on your skill level, you can use this for a prop build (EVA foam/wood) or a functional build (steel).
1. Scale and Print - Since the file name specifies A3 pattern, you must print it correctly to ensure the dimensions are accurate to the real-life axe.
Printer Settings: Set your printer to "Actual Size" or 100% Scale. Do not "Fit to Page," or the dimensions will be off.
Paper: Use A3 paper. if you only have a standard printer, use "Poster Mode" to print across two pieces of A4 paper and tape them together.
2. Transfer the Pattern - Once printed, cut out the individual components: the Head, the Handle (Full Tang), and the Scales (Grips).
For Wood/Foam: Glue the paper cutout directly onto your material using a glue stick or spray adhesive.
For Steel: Trace the outline onto your metal slab using a permanent marker or a scribe.
Tip: Notice the red dashed line on the axe head pattern. This usually indicates the "bevel" or the sharpened edge area. Don't cut the physical material to that line; use it as a guide for where to start grinding/sanding the edge.
3. Shaping the "Full Tang" - The pattern shows a full-tang design (where the metal/core goes all the way through the handle).
The Profile: Cut the main silhouette first.
The Finger Grooves: This specific axe has deep, ergonomic finger grooves. Use a spindle sander, a round file, or a
Dremel to hollow out those curves on the handle to match the template's wavy profile.
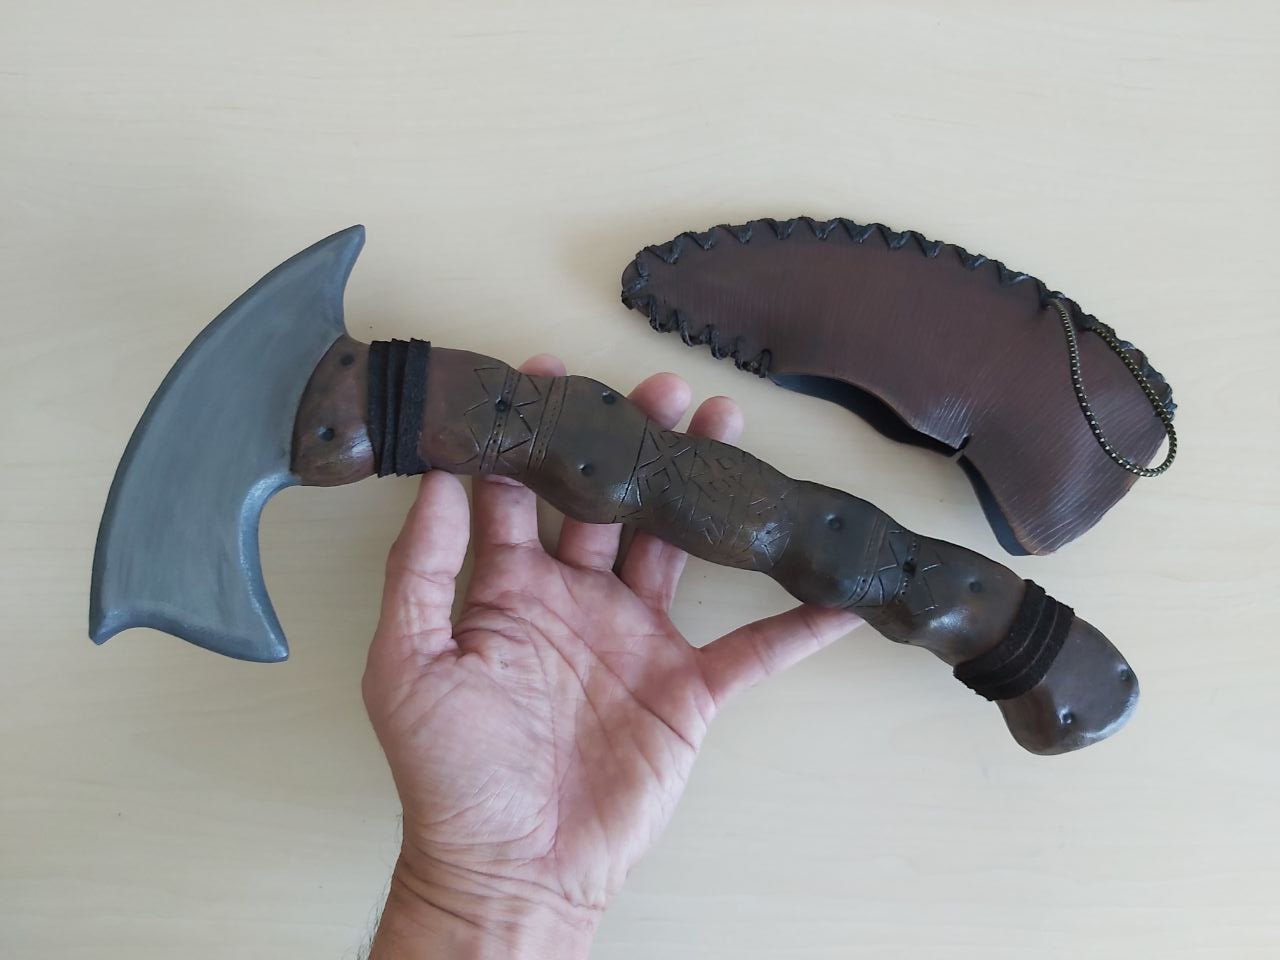
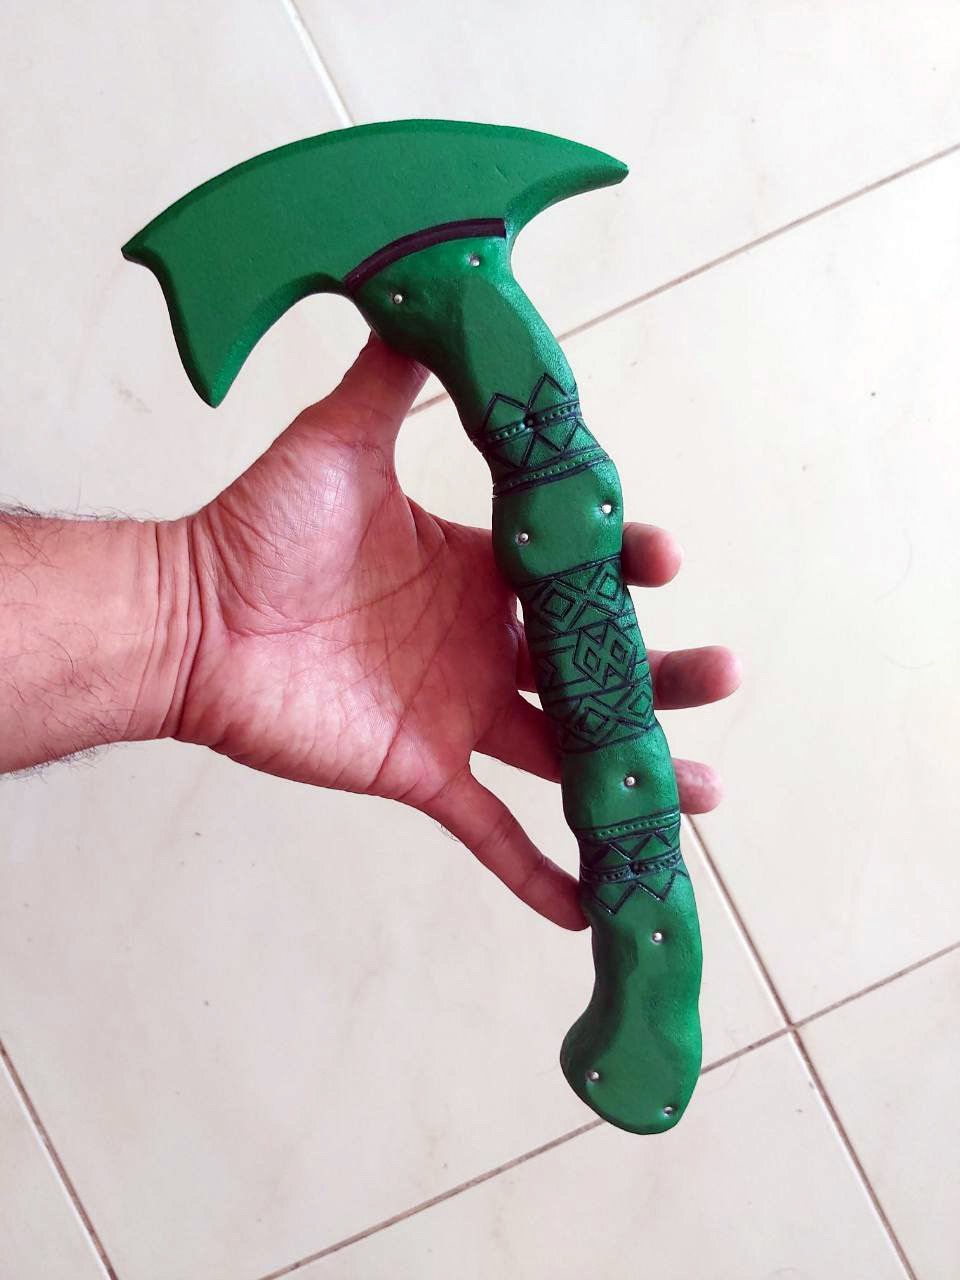
4. Crafting the Tribal Scales - The right side of your template shows the intricate Tribal Maple engraving patterns.
Drill Holes: Note the small circles on the handle template. These are your pin locations. Drill these through your handle scales and the tang simultaneously so they align perfectly.
Engraving: After shaping the wood scales to match the handle's "wavy" profile, use a wood burner or a small triangular file to recreate the geometric tribal patterns shown in the line art.
5. Assembly and Finishing
The Wrap: The template and the reference photo show black cord or leather wrapping near the neck and the pommel. This isn't just for looks; it provides extra grip.
The Sheath: The image includes a pattern for the leather "shuck" (sheath). Notice the heavy stitching along the curved edge; you'll want to use a leather punch to prep those holes before sewing.
Pro-Tips for this Specific Model:
The "Pick" End: The back of the Sayok RnD head is a blunt "poll" or a slight point. Ensure you don't over-sharpen the back unless you want a true spike tomahawk.
Handle Texture: The real Winkler axes have a "scalloped" texture. Use a round rasp to create those divots you see in the photo of the finished axe on the left.
Check here : zdesignworks the making of