

🚀 Break & Retest Supply–Demand Swing Strategy

🚀 Break & Retest Supply–Demand Swing Strategy
Catch Clean Swing Trades After Confirmation — Not Guesswork
A rule-based institutional swing trading system for Forex, Indices, Gold & Crypto
❌ Are You Tired of These Trading Problems?
- Entering trades too early
- Getting trapped in fake breakouts
- Unsure where to place stop loss
- Overtrading with no structure
- Indicators giving late or conflicting signals
👉 This strategy fixes that by teaching you when institutions confirm the move.
✅ The Solution: Break & Retest Supply–Demand Strategy
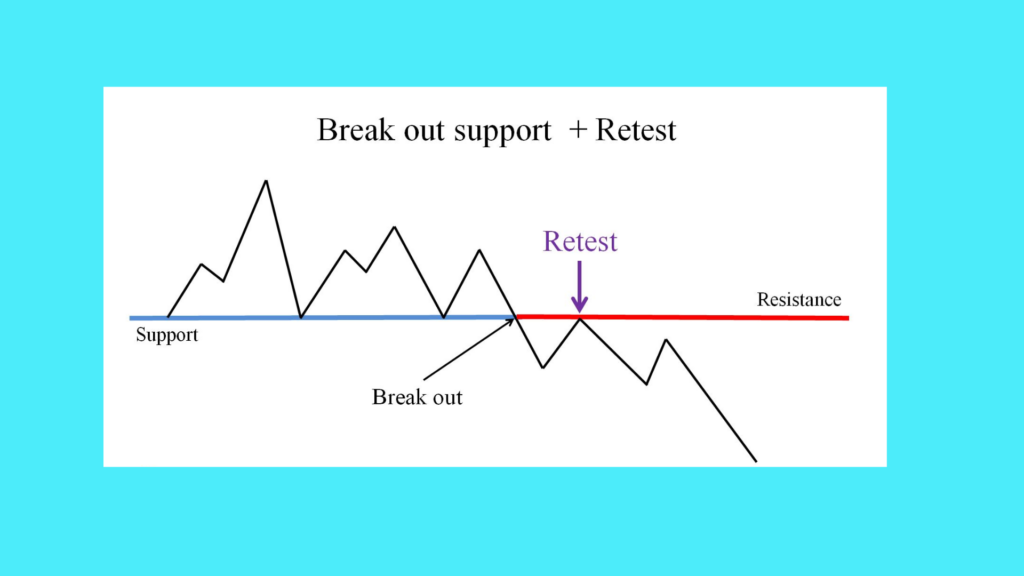
Big moves don’t start randomly.
Institutions:
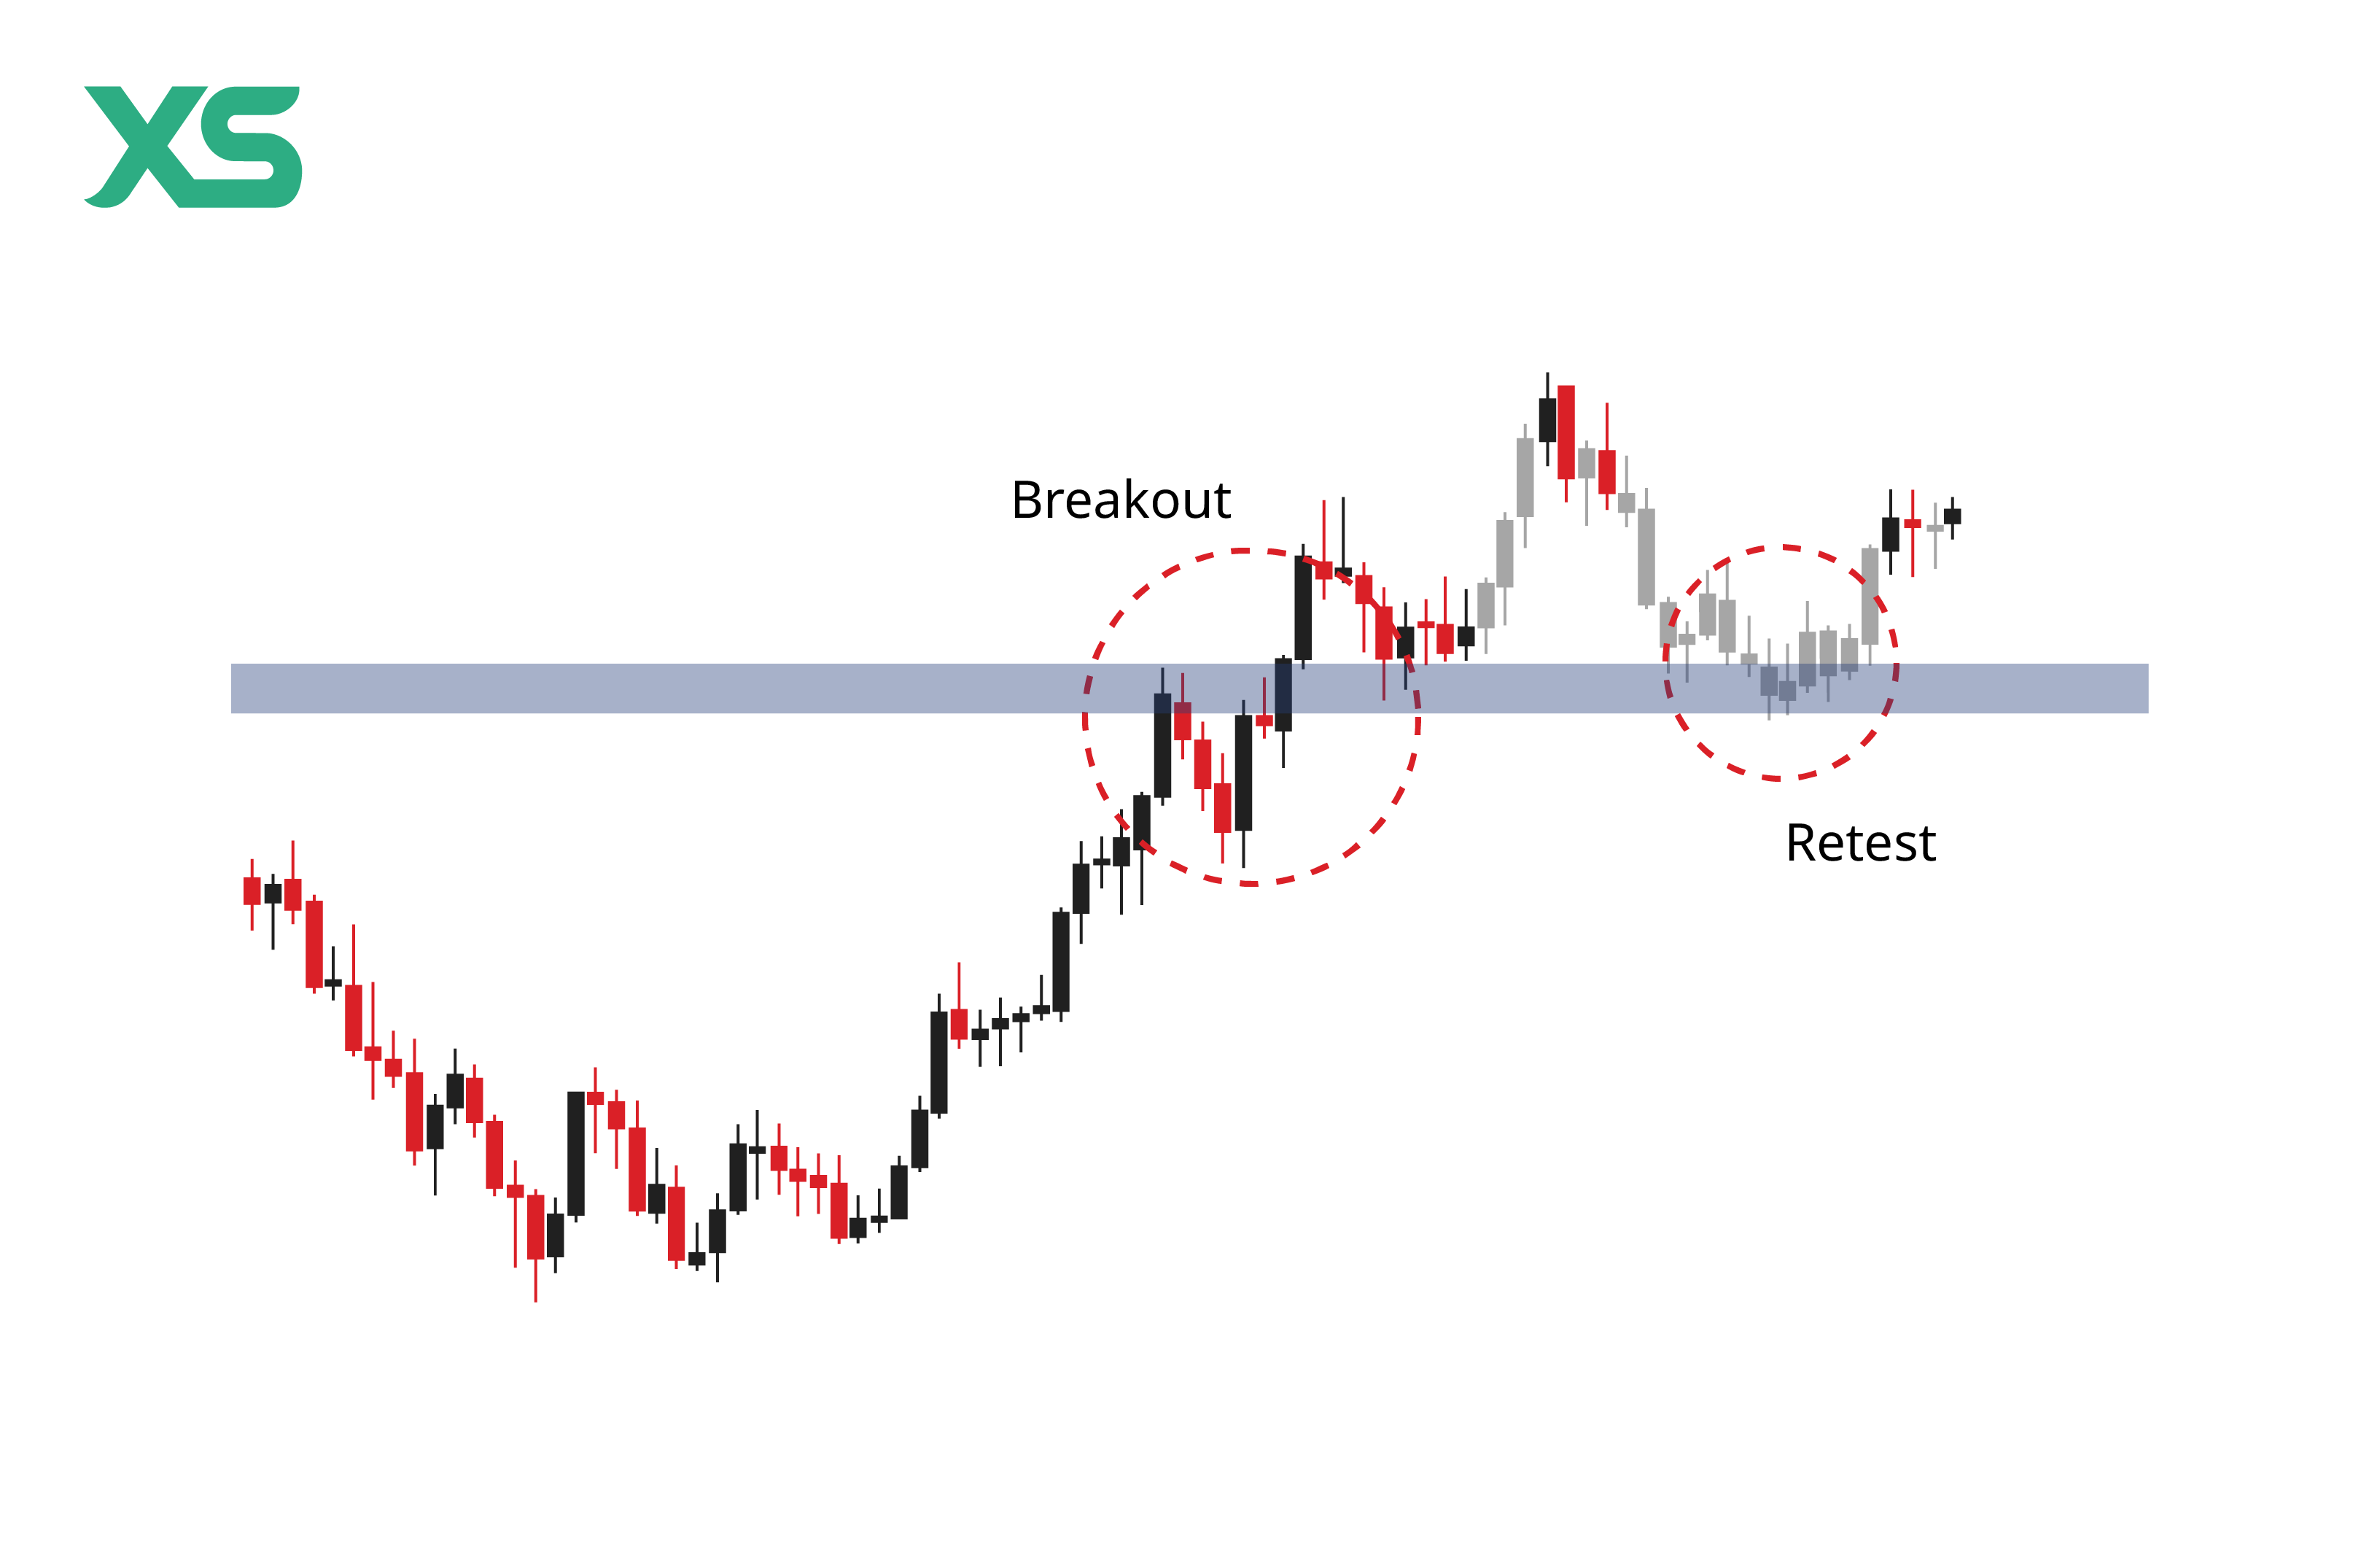
- Break market structure
- Pull price back
- Retest supply or demand
- Continue the real move
This strategy teaches you how to enter after confirmation, not before — removing guesswork and emotional trades.
🧠 What You’ll Learn Inside
✔ How to identify valid structure breaks
✔ Where institutions re-enter the market
✔ How to draw high-probability supply & demand zones
✔ How to avoid fake breakouts
✔ How to target clean 1:3–1:4 swing trades
No indicators.
No complicated rules.
Just price, structure, and confirmation.
📈 Strategy Overview (Simple & Effective)
1️⃣ Market Structure (Higher Timeframe)
- Identify Higher Highs / Higher Lows (bullish)
- Identify Lower Highs / Lower Lows (bearish)
- Use Daily or 4H for bias
👉 Only trade clear structure — no choppy markets.
2️⃣ Break of Structure (BOS)
- Strong candle close beyond structure
- Clear momentum
- No weak wicks or fake breaks
📌 This confirms trend continuation or reversal
3️⃣ Retest Zone (Institutional Entry Area)
- Price pulls back into:
- Broken structure level
- Fresh supply or demand zone
- Zone must be untested
💡 This is where institutions add positions.
4️⃣ Entry Confirmation
Enter only after:
- Engulfing candle
- Strong rejection wick
- Momentum shift
✅ Entry on candle close
❌ No anticipation, no guessing
5️⃣ Stop Loss & Targets
- Stop Loss:
- Below demand (buy)
- Above supply (sell)
- Targets:
- TP1: Recent high/low
- TP2: Next structure zone
📊 Risk–Reward:
Minimum 1:2, typical 1:3 – 1:4
🔥 Why This Strategy Works
✔ Confirmation-based (great for beginners)
✔ Works on all markets & timeframes
✔ No indicators = clean charts
✔ Easy to journal & back test
✔ Reduces emotional trading
This is a strategy traders trust and stick with.
📦 What You Get in This Download
✅ Complete Break & Retest Strategy Guide (PDF)
✅ Step-by-step trading rules
✅ Supply & demand zone logic
✅ Entry, stop & target framework
✅ Real market examples
✅ Risk management rules
📥 Instant Download – Lifetime Access
👤 Who This Is For
✔ Beginners who want confirmation & clarity
✔ Swing traders with limited screen time
✔ Traders tired of indicators
✔ Anyone struggling with fake breakouts
❌ Not for scalpers or gamblers
⭐ Key Benefits
- Trade with confidence
- Avoid false breakouts
- Enter at logical price levels
- Hold winners longer
- Build a repeatable trading system
🔒 Risk Disclaimer
Trading involves risk. This product is for educational purposes only and does not guarantee profits. Always manage risk responsibly.
💰 Get Instant Access Now
👉 Download the Break & Retest Supply–Demand Swing Strategy
📘 Learn how institutions confirm moves
📈 Start catching clean swing setups
⏱ Trade less, earn smarter
🔥 Instant digital download — no waiting
⚡ Ready to Trade With Confirmation?
This strategy gives you clarity, structure, and confidence — everything most traders are missing.
👉 Add to Cart & Start Trading Smarter Today