
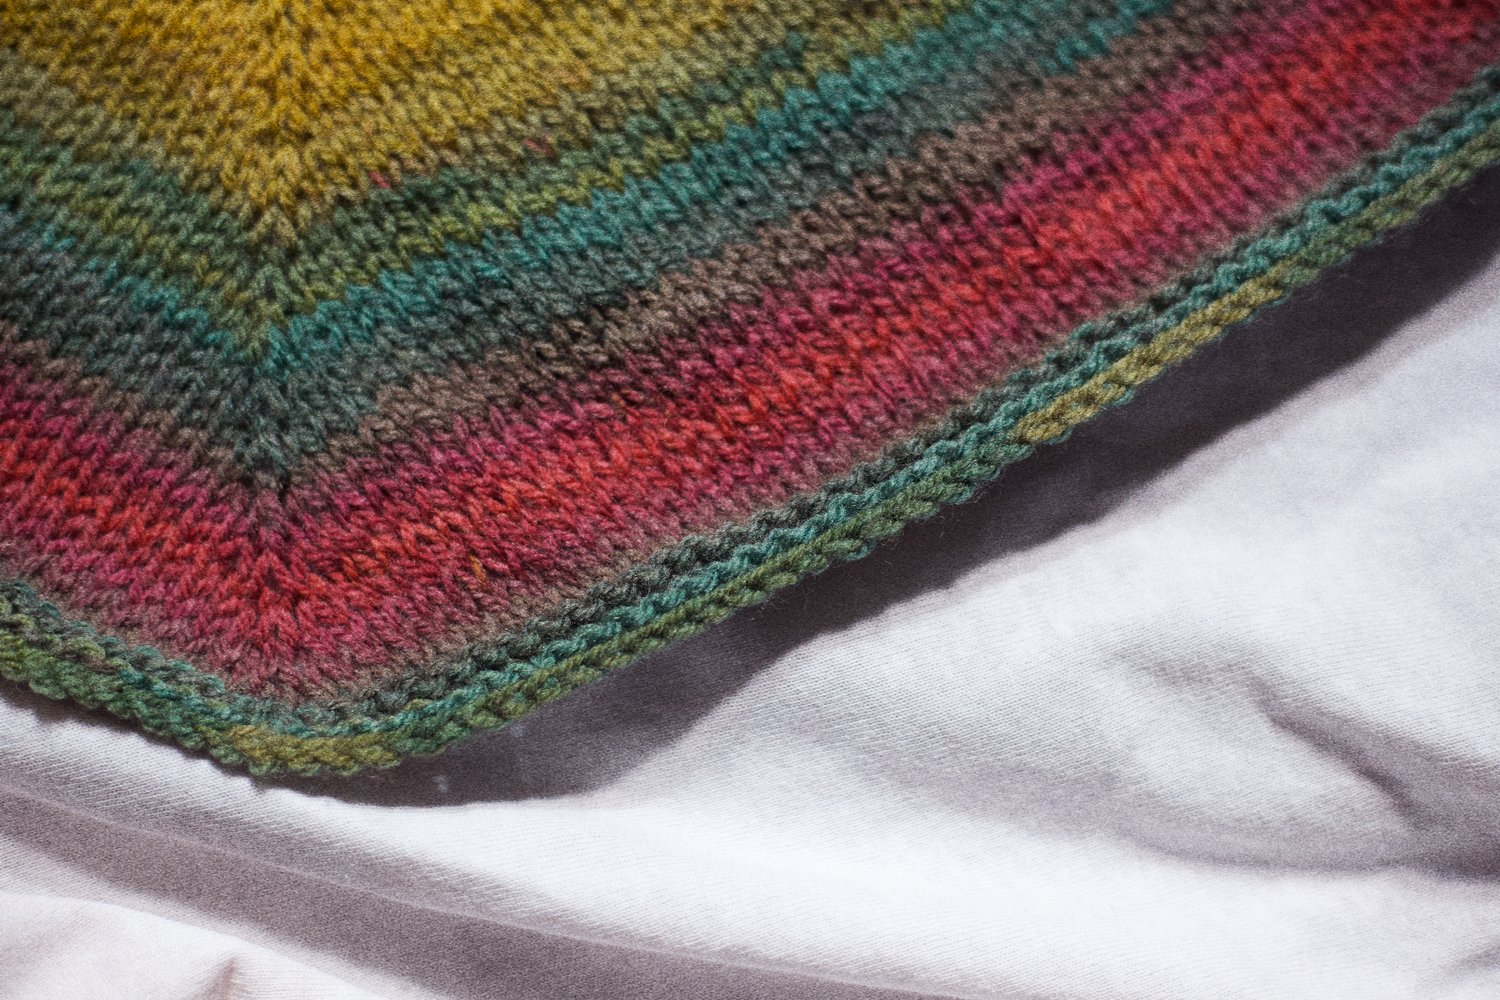
The inspiration for the My Basic Neckerchief comes from a rainy summer evening, while my daughter was having a nap I decided to cast on something easy and the idea for this neckerchief suddenly flooded my head, it was clear what it had to be!
All my patterns are made with second hand yarn resourced from charity shops and I invite you to try and do the same if you’d like.
If you have any questions please feel free to contact me at @isabelbyrose or whenspringawakens@gmail.com
This pattern and the products made from it are for personal use only - you may not copy, resell or share this pattern for free, in keeping with copyright law. If you share your garment from the pattern on social media, please tag me as the designer @isabelbyrose - it not only gives me credit as the designer but also makes me really excited to see, I’d be happy to share your tags on my instagram!!
Don't forget to use the hashtag #MyBasicNeckerchief when tagging!
Enjoy making this neckerchief as much as I enjoyed designing it!!
Materials
Any yarn and any needles!
I used Alpaca dk by Stylecraft and 5mm circular needles but this pattern can be made in any yarn and any desired needles!
2 x markers
Tapestry needle
Abbreviations
CO - cast on
St(s) - stitch(es)
WS - wrong side
RS - right side
K - knit
P - purl
M1R - make 1 right
M1L - make 1 left
Pm - place marker
Sm - slip marker
M - marker
Important things to know
In the () you’ll find the count of stitches until row 9, after that every RS has 4 increases (there will be a list at the end of the pattern with the rows and () of stitches for guidance).
Recommended minimum length is 14 inches long.
Please read the whole pattern before making the garment.
Resources
M1R and M1L
How to M1R (make one right) and M1L (make one left) Knitting Increase - Sheep & Stitch
https://www.youtube.com/watch?v=lsJndA4LzR8
Stretchy bind off
STRETCHY BIND OFF for Beginners (game changing!) - Sheep & Stitch
https://www.youtube.com/watch?v=ha_WXEGE4yg
To count rows I strongly recommend the app Alimaravillas (both in apple and android).
Pattern
CO 3 sts
- (WS) - k1, p1, k1 (3)
- (RS) - k1, m1r, k1, m1l, k1 (5)
- (WS) - k2, pm, p1, pm, k2 (5)
- (RS) - k2, m1r, sm, k1, sm, m1l, k2 (7)
- (WS) - k2, p1, sm, p1, sm, p1, k2 (7)
- (RS) - k2, m1r, k1, sm, k1, sm, k1, m1l, k2 (9)
- (WS) - k2, p2, sm, p1, sm, p2, k2 (9)
- (RS) - k2, m1r, k to m, m1r, sm, k1, sm, m1l, k until you have 2 sts left, m1l, k2 (13)
- (WS) - k2, p to m, sm, p1, sm, p until you have 2 sts left, k2 (13)
Repeat rows 8 and 9 until your desired length.
Repeat row 8.
The 3 last rows :
- (WS) - k to m, sm, p1, sm, k to end.
- (RS) - k2, m1r, k to m, m1r, sm, k1, sm, m1l, k until you have 2 sts left, m1l, k2
- (WS) - k to m, sm, p1, sm, k to end.
Bind off using a stretchy bind off, weave ends, block, and doneeee!!!
Increases ()
Row 10-11 (17)
Row 12-13 (21)
Row 14-15 (25)
Row 16-17 (29)
Row 18-19 (33)
Row 20-21 (37)
Row 22-23 (41)
Row 24-25 (45)
Row 26-27 (49)
Row 28-29 (53)
Row 30-31 (57)
Row 32-33 (61)
Row 34-35 (65)
Row 36-37 (69)
Row 38-39 (73)
Row 40-41 (77)
Row 42-43 (81)
Row 44-45 (85)
Row 46-47 (89)
Row 48-49 (93)
Row 50-51 (97)
Row 52-53 (101)
Row 54-55 (105)
Row 56-57 (109)
Row 58-59 (113)
Row 60-61 (117)
Well done, you finished it!!
If you liked it please consider leaving a review on Ravelry or DM me on IG at @isabelbyrose
Comments ()