

How to Set Up a Tablet Weaving Project: Warping, Threading & Planning Tips
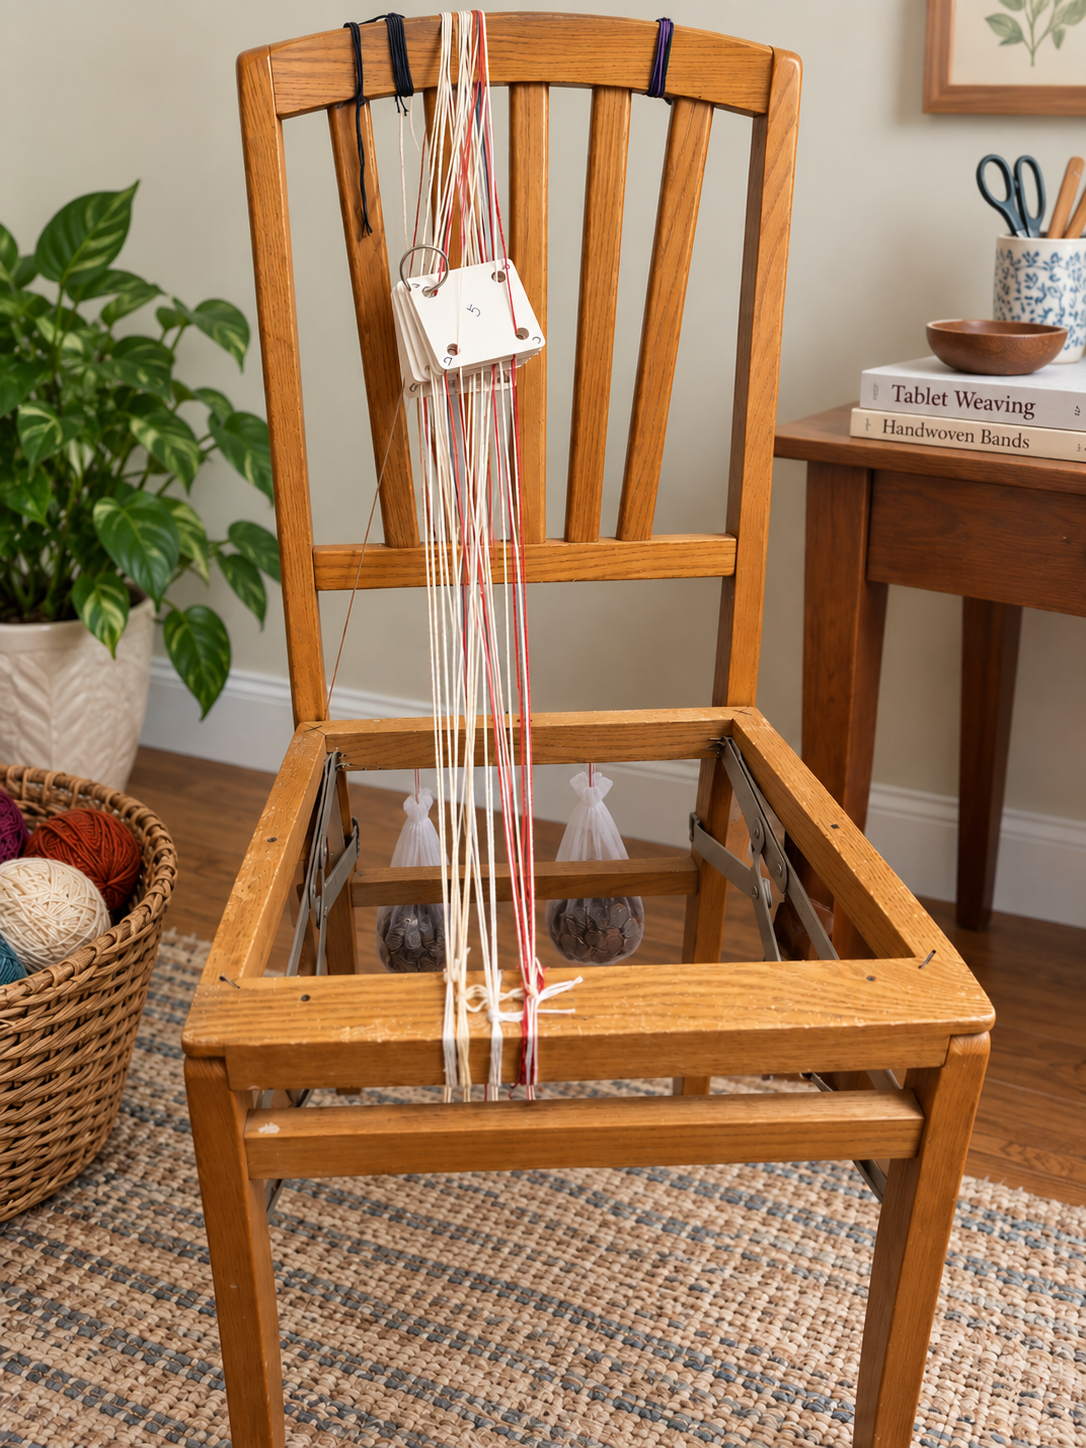
I’m currently warping my chair loom for another tablet weaving project, which means I’m back in that familiar stage where the weaving hasn’t even started—but there are already plenty of decisions to make.
A little planning before you weave can save a lot of frustration later. Here’s my quick tablet weaving setup checklist.
1. Decide What You’re Making
Start with the finished band.
Is it a belt? Trim? Strap? Bookmark? Sample?
Knowing the final use helps you determine your warp length, band width, number of tablets and yarn choice. Remember to allow extra warp for sampling and loom waste.
2. Study the Pattern Before Choosing Yarn
Before pulling colors, look at the structure of your pattern.
Check:
- Number of tablets
- Threading directions
- Number of colors
- Border tablets
- Turning sequence
Then choose colors that work with the design.
**I have to sketch out my own on graph paper using colored pencils!
Quick tip: If your motif depends on contrast, photograph your yarn and view the picture in grayscale. If the colors look nearly identical, the woven design may be harder to see.
3. Record Your Threading
Don’t trust yourself to remember your setup later. I certainly don’t.
Record your tablet numbers, colors, threading direction, starting position and turning sequence.
This becomes especially helpful if you stop halfway through warping—or love the finished band and want to make it again.
It’s also exactly why I made the Made to Learn Tablet Weaving Project Planner: one place to keep the information I’d otherwise have scattered across graph paper, screenshots and random notes.
Find it here: https://payhip.com/madetolearn
4. Check as You Warp
Don’t wait until the entire warp is finished to check your work.
Every few tablets, compare your setup to the pattern.
Finding one incorrectly threaded tablet now is much easier than finding it after everything is tensioned.
5. Know Your Starting Position
Before your first pattern pick, make sure you can answer:
Where am I in the pattern?
Have a system for tracking your rows or picks, especially if you won’t finish the band in one sitting. I use simple picks usually (only forward or backward turning) but I will use a ruler to help me keep track of picks if the turning sequence is complicated.
6. Weave a Small Sample
Don’t judge the pattern from the first few picks.
Give the weaving a little time to settle while watching your:
tension • edges • width • beat • pattern alignment
If something looks wrong, stop and figure out why before continuing.
Twenty more rows usually don’t fix a threading mistake.
My Quick Pre-Weaving Checklist
Before I start the actual pattern, I want to know:
✓ Tablets are in the correct order
✓ Threading matches the pattern
✓ Cards are oriented correctly
✓ Warp tension is consistent
✓ Starting position is correct
✓ Setup has been recorded
✓ I have a way to track my current pick
Then comes the fun part: actually weaving.
When the Pattern Still Doesn’t Look Right
Even a carefully warped project can misbehave.
If the motif shifts, the band starts narrowing, your edges get messy or something simply looks wrong, stop before ripping everything out.
Often the problem can be traced back to one small change.
That’s why I also created the Made to Learn Tablet Weaving Troubleshooting Guide as a quick reference for those “Why is it doing that?” moments at the loom.
And if you want to keep your yarn, threading, colors and pattern notes together from the beginning, the Tablet Weaving Project Planner gives you a dedicated place to record each project.
Because the best tablet weaving project isn’t necessarily the one where nothing goes wrong.
It’s the one where you can figure out what you did—so you can either fix it or do it again.
Made to Learn
Learn to Make.