

Winter in Sweden can be really cold, and even if we have a wood stove and a kitchen stove in our cottage it's still quite cold this time of year inside the cottage. That's why it's been important to prepare with warm clothing when we visit the cottage during winter season.
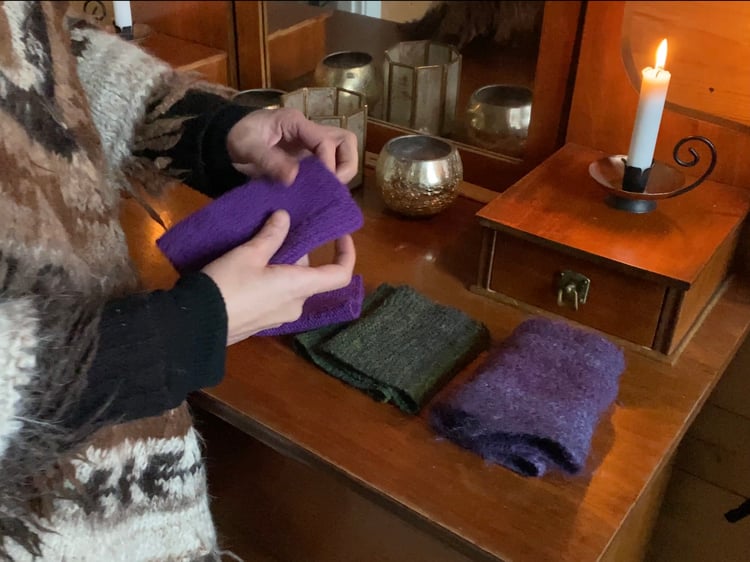
I've been knitting these simple wristwarmers to keep me and my family warm & cozy during winter season.
This is a beginner friendly project. It doesn't have to take you more than a couple of afternoons to complete, and they’re also super fun to make.
Let’s get started!
These are the materials you need for this project:
- Thin wool yarn
- Knitting needles size 2.5
- A pair of scissors
- And a needle
Cast on
A thin wool yarn will create a smooth and flexible fabric and it's nice to work with as well.
So first you’ll have to estimate the length of the yarn end to work with when you you’re casting on.
An easy rule to remember is that you take the length of your project, and multiply by three.
Add some extra length just to be safe.
Start with a slip knot.
Make sure that you have the tail of the yarn towards your thumb.
Cast on 40 stitches.
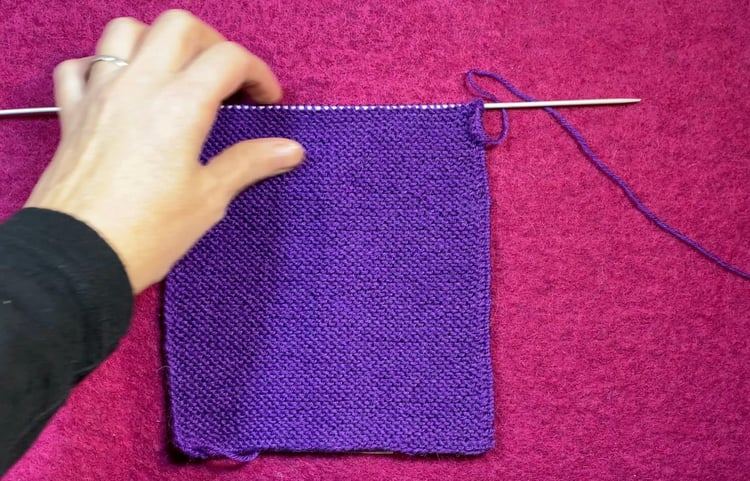
Knitting
When you’re finished with casting on 40 stitches, turn your work and start knitting.
This project is knitted with the garter stitch.
Insert the knitting needle into the front loop of the first stitch, grab the yarn and pull through.
Once you've created a new stitch on the right needle, you can release the stitch from the left needle.
Repeat this process until you get to the end of the row.
Now we'll just turn the work and repeat.
This is basically it.
Your going to repeat this process until you can wrap the work around your wrist with ease.
Measure around your wrist. It’s not supposed to be too tight, but not too loose either.
You want some tension.
Cast off
Knit the first two stitches. Then take the stitch to the right and pull it over the knitting needle. Leave a little slack so it doesn't get too tight.
Then knit another stitch and pull the stitch to the right over the needle and over the stitch to the left.
And repeat the process until you get to the very last stitch.
Leave a long yarn end for later and cut the yarn.
Pull the yarn through the last loop and tighten the loop.
And now it’s time to join the edges together.
Make sure that you fold it with the right side on the inside of the fold and the wrong side out.
Secure with pins to hold it in place and stitch the two edges together.
It doesn’t have to be super fancy. So don’t be alarmed if it doesn’t look too neat.
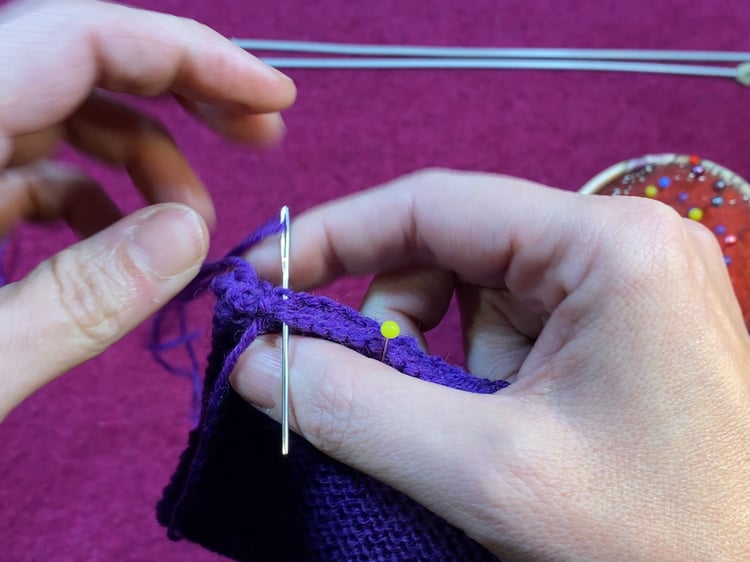
Secure the yarn by stitching back-and-forth a couple of times.
This is the most basic model, but if you want you can crochet a decorative edge or embroider the wristwarmer to your liking as well.
This way of knitting wristwarmers makes them super cozy and comfortable, and you can create as many as you like since it's an easy project to finish.
Comments ()