

Centre short rows are used to make the middle of a piece of crochet taller than the edges. Before trying centre short rows, I recommend you practice the techniques used in both forward and return pass short rows first. You can find tutorials for forward pass and return pass short rows on my blog.
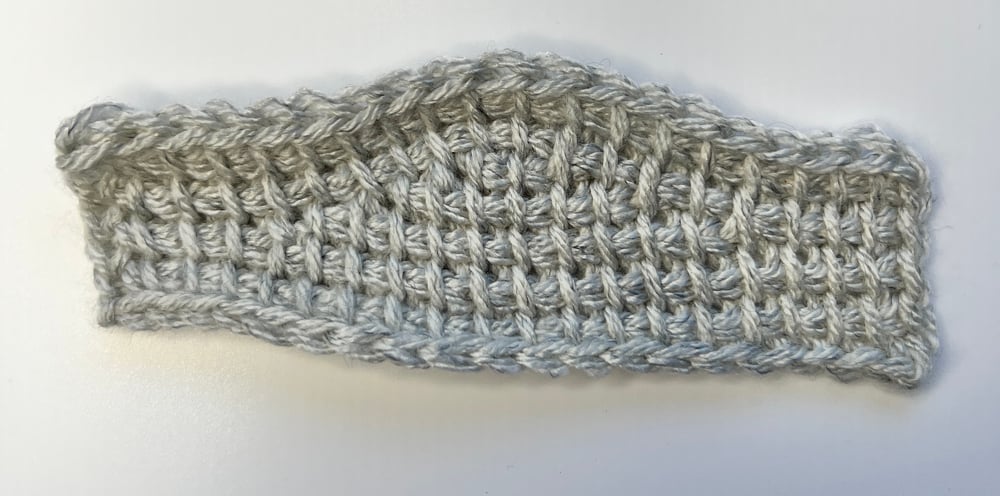
There are two main variations to making centre short rows. First method is when the first short row is the narrowest and each short row gets wider (bottom swatch on below image). I prefer this technique on a drop shoulder sweater or for raising the back of a yoke at the neck. This is because the piece curves along the foundation row edge.
The second method is when the first short row is the widest and each short row becomes narrower (top swatch on below image). I prefer this technique on a curved bottom of a tool-down sweater. This is because the piece curves along the bind off row edge.
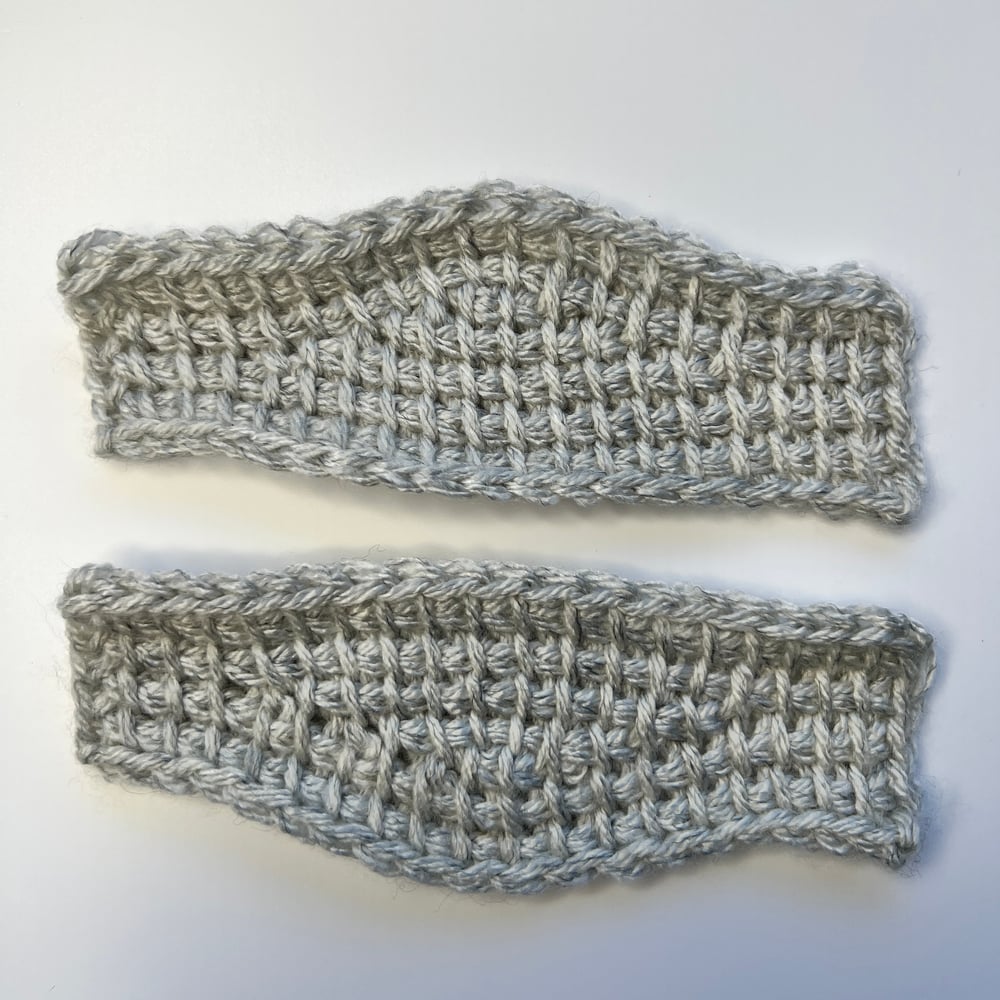
The techniques used for both methods are identical but are worked in a different order. The curving effect you can make with the two variations changes the look of the fabric and the method you use will depend on where you want your curved edge to be - closer to the foundation row or the bind off row.
There can be a lot of counting involved in making centre short rows. A good designer will give you all the different counts required to check the accuracy of your work, but you can avoid all the counting by using markers and understanding how much wider or narrower each short row will be.
In the swatches for this lesson, each short row becomes either narrower or wider by 2 stitches on each side: 4 sts wider or narrower per centre short row.
You can experiment with different shaped curves by making short rows wider or narrower by larger numbers. For example, if you make short rows wider by 5 sts on each FwdP and RetP (10 sts wider per short row), your curve will be more subtle than the one in this lesson.
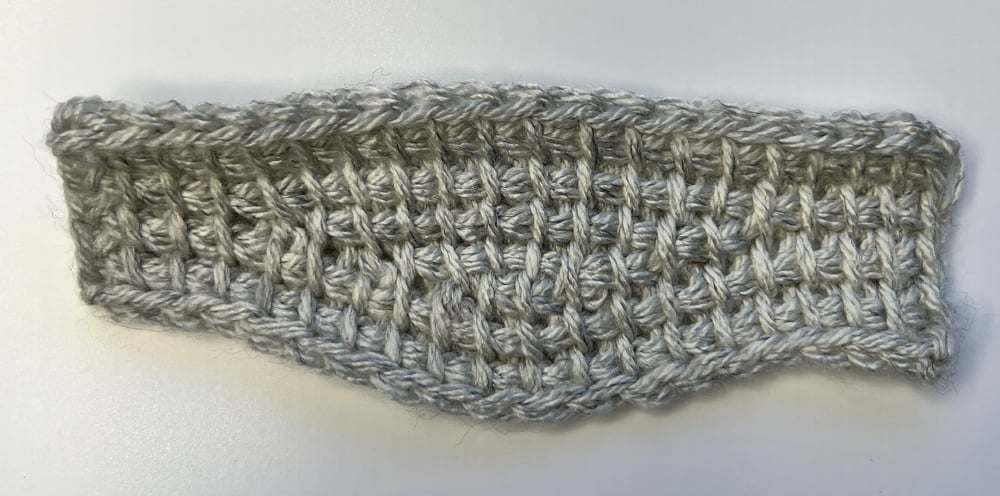
Narrow to wide short rows
Watch this video for a demonstration of making this swatch and refer to the instructions below.
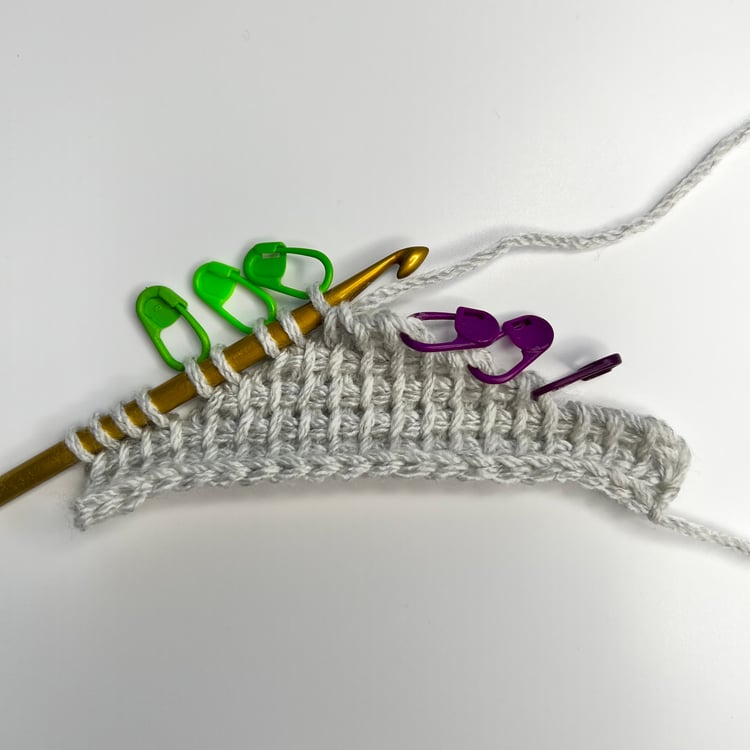
You will need two markers to make this swatch.
Row 1 FwdP: Ch 20, starting with the second loop from hook, pick up a loop in the back bump of each ch – 20 loops on hook.
Row 1 RetP: Ch 1, *yarn over, pull through 2 loops* until 1 loop remains on hook.
Row 2 FwdP: Tss to end, pick up a loop in edge st –20 loops on hook.
Row 2 RetP: As per Row 1 RetP.
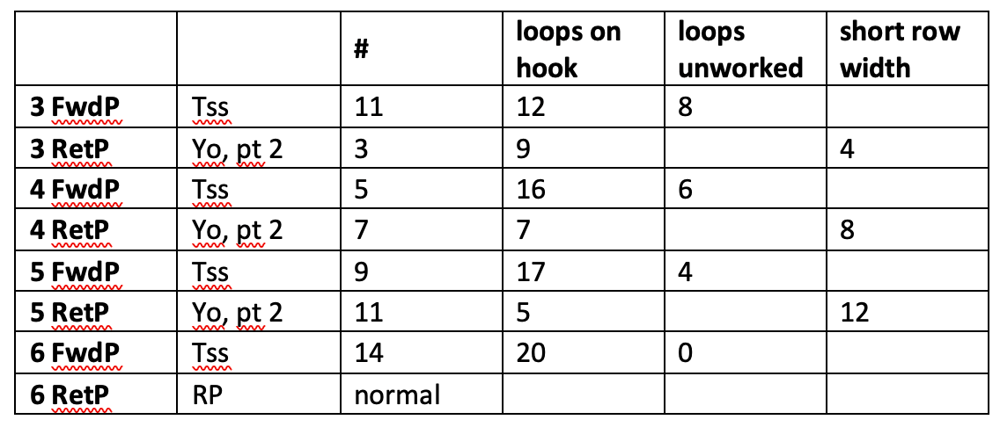
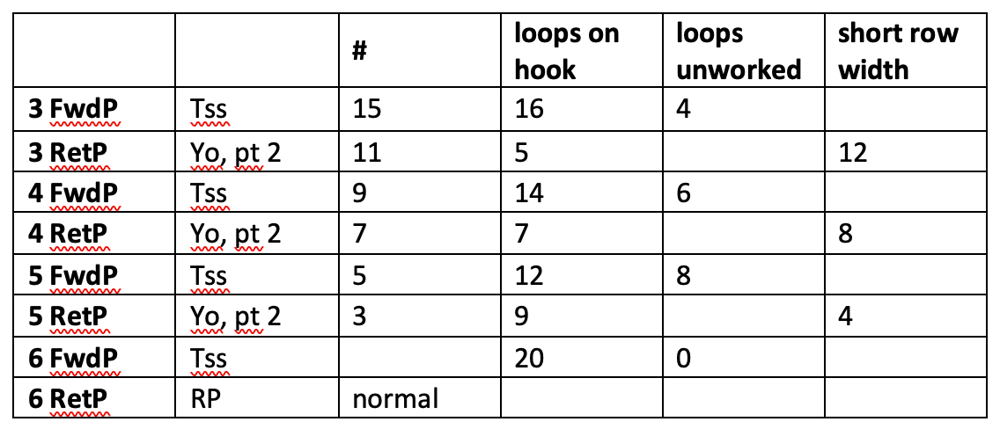
Row 3 FwdP: 11 tss – 12 loops on hook, 8 sts are not worked. PM in front and back loops of last st worked. The 1st FwdP short row is complete.
Row 3 RetP: *Yarn over, pull through 2 loops* 3 times – 9 loops remain on hook. PM in live loop. The 1st RetP short row is complete.
The next instructions are written generically. Refer to the table below for the appropriate stitch counts. The point of writing the instructions this way is to get used to using markers. Each FwdP and each RetP is 2 sts wider than the row before it.
Row 4-5 FwdP: Tss up to the marked st, tss using both front and back loops of marked st, 2 tss. Move marker up to front and back loops of last st worked.
Row 4-5 RetP: *Yarn over, pull through 2 loops* to the marked st, work the twisted/crossed RetP stitch as demonstrated in Return Pass Short Rows tutorial, *yarn over, pull through 2 loops* twice more.
Row 6 FwdP: Tss to end, pick up a loop in edge st – 20 loops on hook.
Row 6-7 RetP: As per Row 1 RetP.
Row 7 FwdP: Tss to end, pick up a loop in edge st – 20 loops on hook.
Bind off: Sl st bo in each st, fasten off and cut yarn.
Wide to narrow short rows
Watch this video for a demonstration of making this swatch and refer to the instructions below.
You will need 6 markers to make this swatch.
Row 1 FwdP: Ch 20, starting with the second loop from hook, pick up a loop in the back bump of each ch – 20 loops on hook.
Row 1 RetP: Ch 1, *yarn over, pull through 2 loops* until 1 loop remains on hook.
Row 2 FwdP: Tss to end, pick up a loop in edge st –20 loops on hook.
Row 2 RetP: As per Row 1 RetP.
Row 3 FwdP: 15 tss – 16 loops on hook, 4 sts are not worked. PM in front and back loops of last st worked. The 1st FwdP short row is complete.
Row 3 RetP: *Yarn over, pull through 2 loops* 11 times – 5 loops remain on hook. PM in live loop. The 1stRetP short row is complete.
The next instructions are written generically. Refer to the table below for the appropriate stitch counts. The point of writing the instructions this way is to get used to using markers. Each FwdP and each RetP is 2 sts narrower than the row before it.
Row 4-5 FwdP: Tss up to 2 sts before the marked st (1 tss and the marked edge st are unworked from row before). PM in front and back loops of last st worked.
Row 4-5 RetP: *Yarn over, pull through 2 loops* to 2 sts before the marked st. PM in live loop.
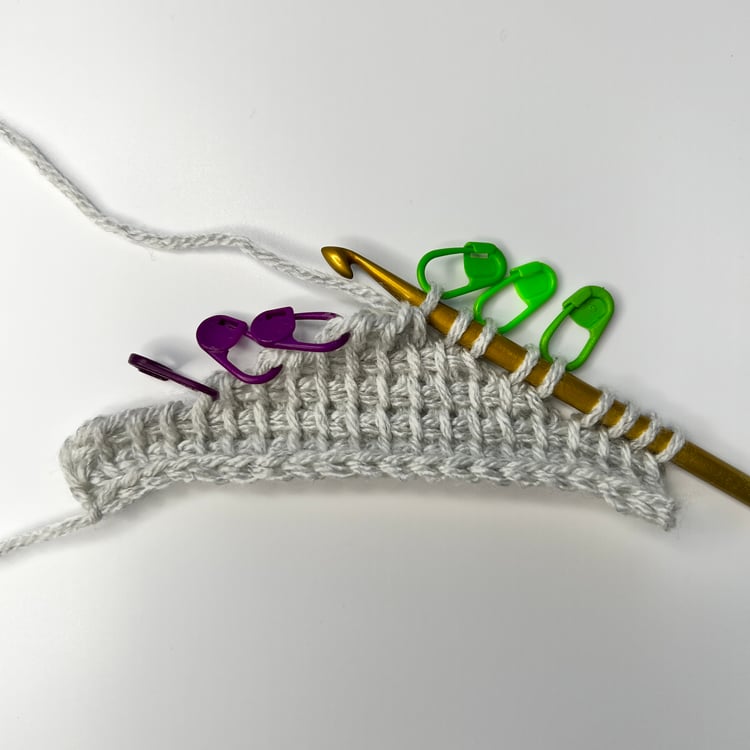
Row 6 FwdP: *Tss up to marked st, tss using both front and back loops of marked st* 3 times, tss to end, pick up a loop in edge st – 20 loops on hook.
Row 6 RetP: Ch 1, *yarn over, pull through 2 loops up to the marked st, work the twisted/crossed RetP stitch as demonstrated in Return Pass Short Rows tutorial* 3 times, *yarn over, pull through 2 loops* until 1 loop remains on hook.
Row 7 FwdP: Tss to end (inserting hook under both loops of the 3 twisted/crossed sts), pick up a loop in edge st – 20 loops on hook.
Row 7 RetP: As per Row 1 RetP.
Bind off: Sl st bo in each st, fasten off and cut yarn.
Comments ()