Your Cart
Loading

Short Rows in Tunisian Crochet

Short rows in Tunisian crochet are a fabulous way to introduce certain kinds of shaping. I’ve only seen them used by a few Tunisian crochet designers. Aoibhe-Ni was the first designer I came across who was using short rows. She used them to create wedge shapes within her shawls. I’ve used them in one of my early patterns, the Astrid hat. I’ve also used them extensively in my Tessellate Me pattern series as a way of changing the row counts of individual entrelac squares.


Years ago, I chatted with Rachel Henri about centre short rows and we both agreed how useful they are. Rachel incorporated them into a couple of her designs with great success - I tested this one. Rachel created some fantastic resources for short rows on her blog which includes several methods for creating each kind. I still refer to them today. None of us really 'invented' these techniques but the designers I know who focus on Tunisian Crochet, like me, are finding some pretty innovative ways of using them.


Are you wondering why we're working with short rows? What's the point of them? Well, I'm not using them in shawls all that much, because if you've been following me for a while, I'm really into garments. I want to use short rows in garments for things like:

  • Raising the back of a yoke in the neckline
  • Creating curved bottoms on jumpers
  • Making a shoulder drop.

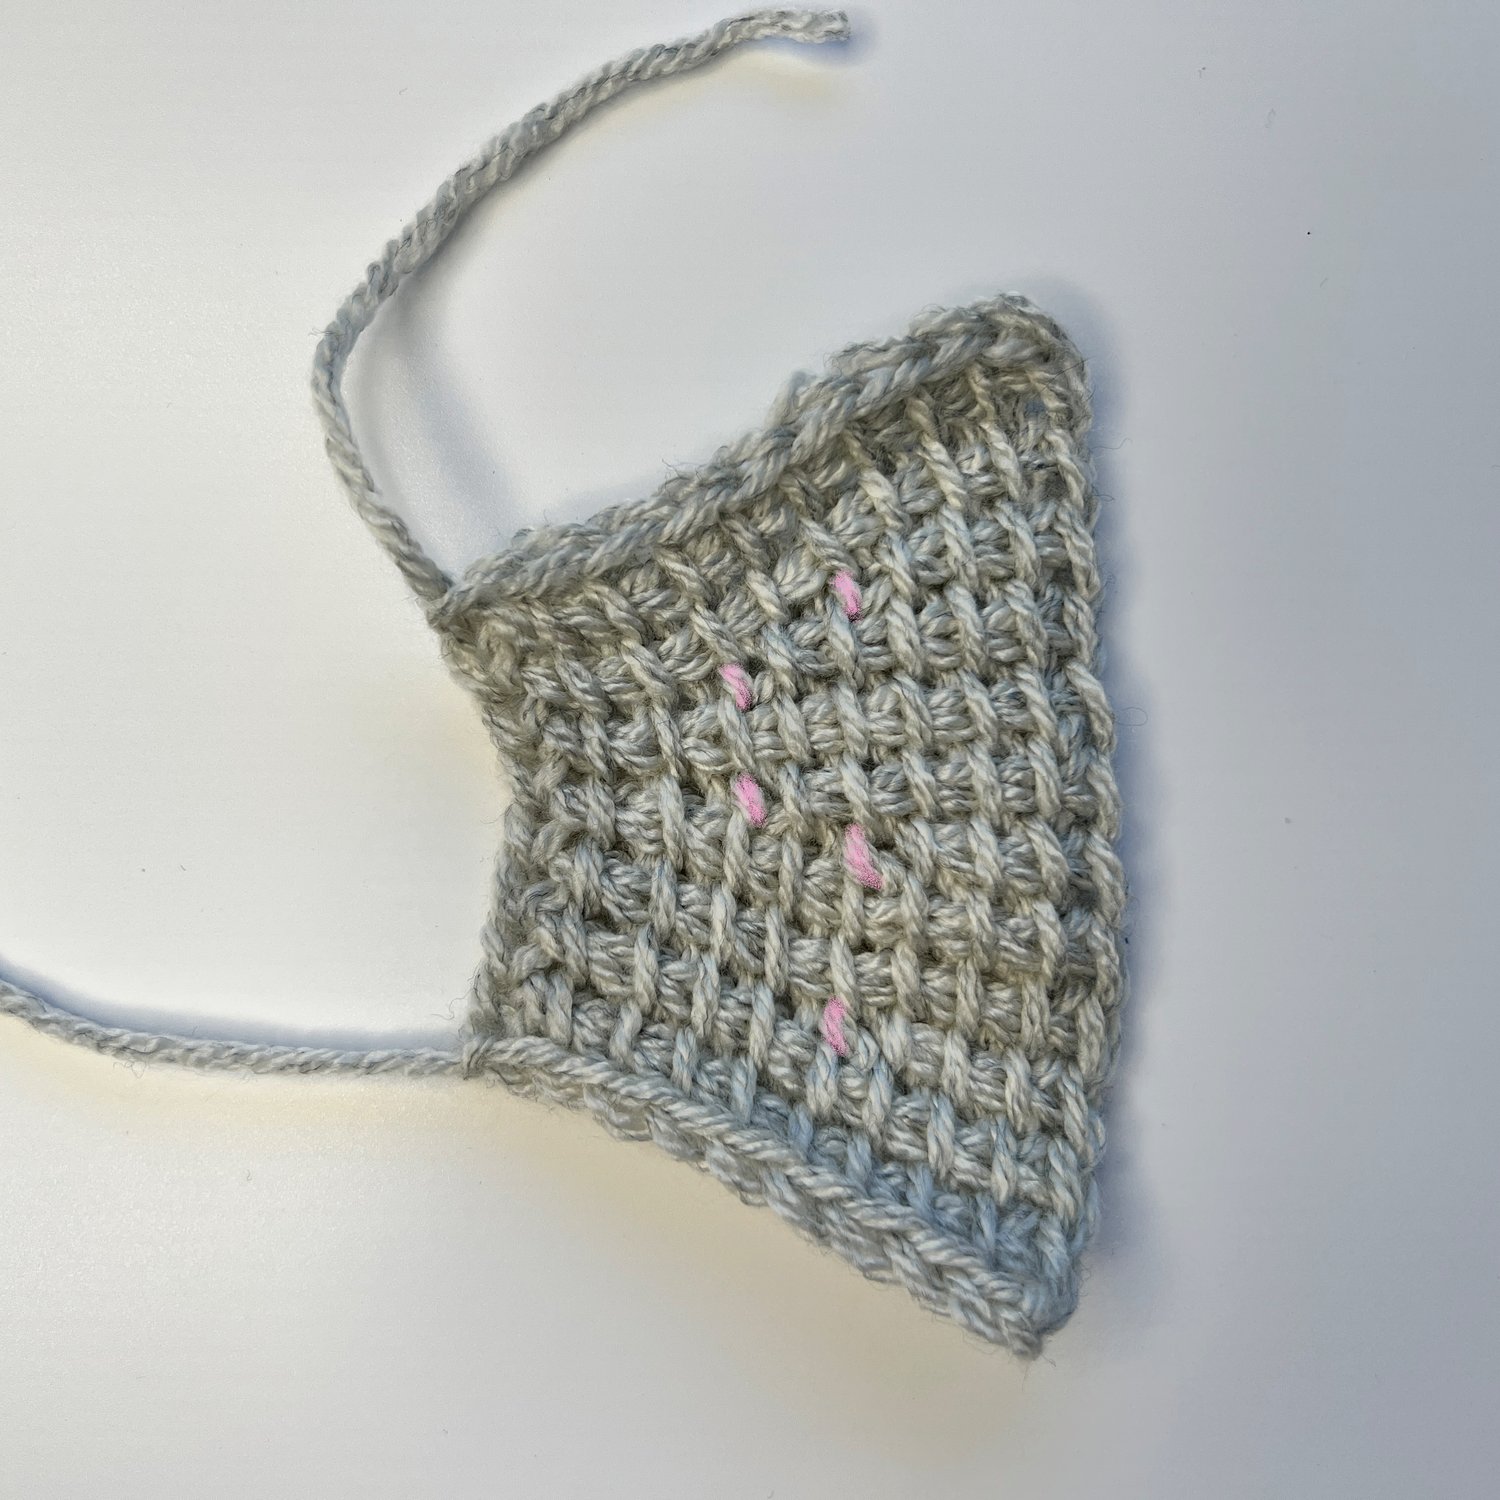
These applications for short rows will involve multiple centre short rows - using both forward pass and return pass short row techniques in the same row.


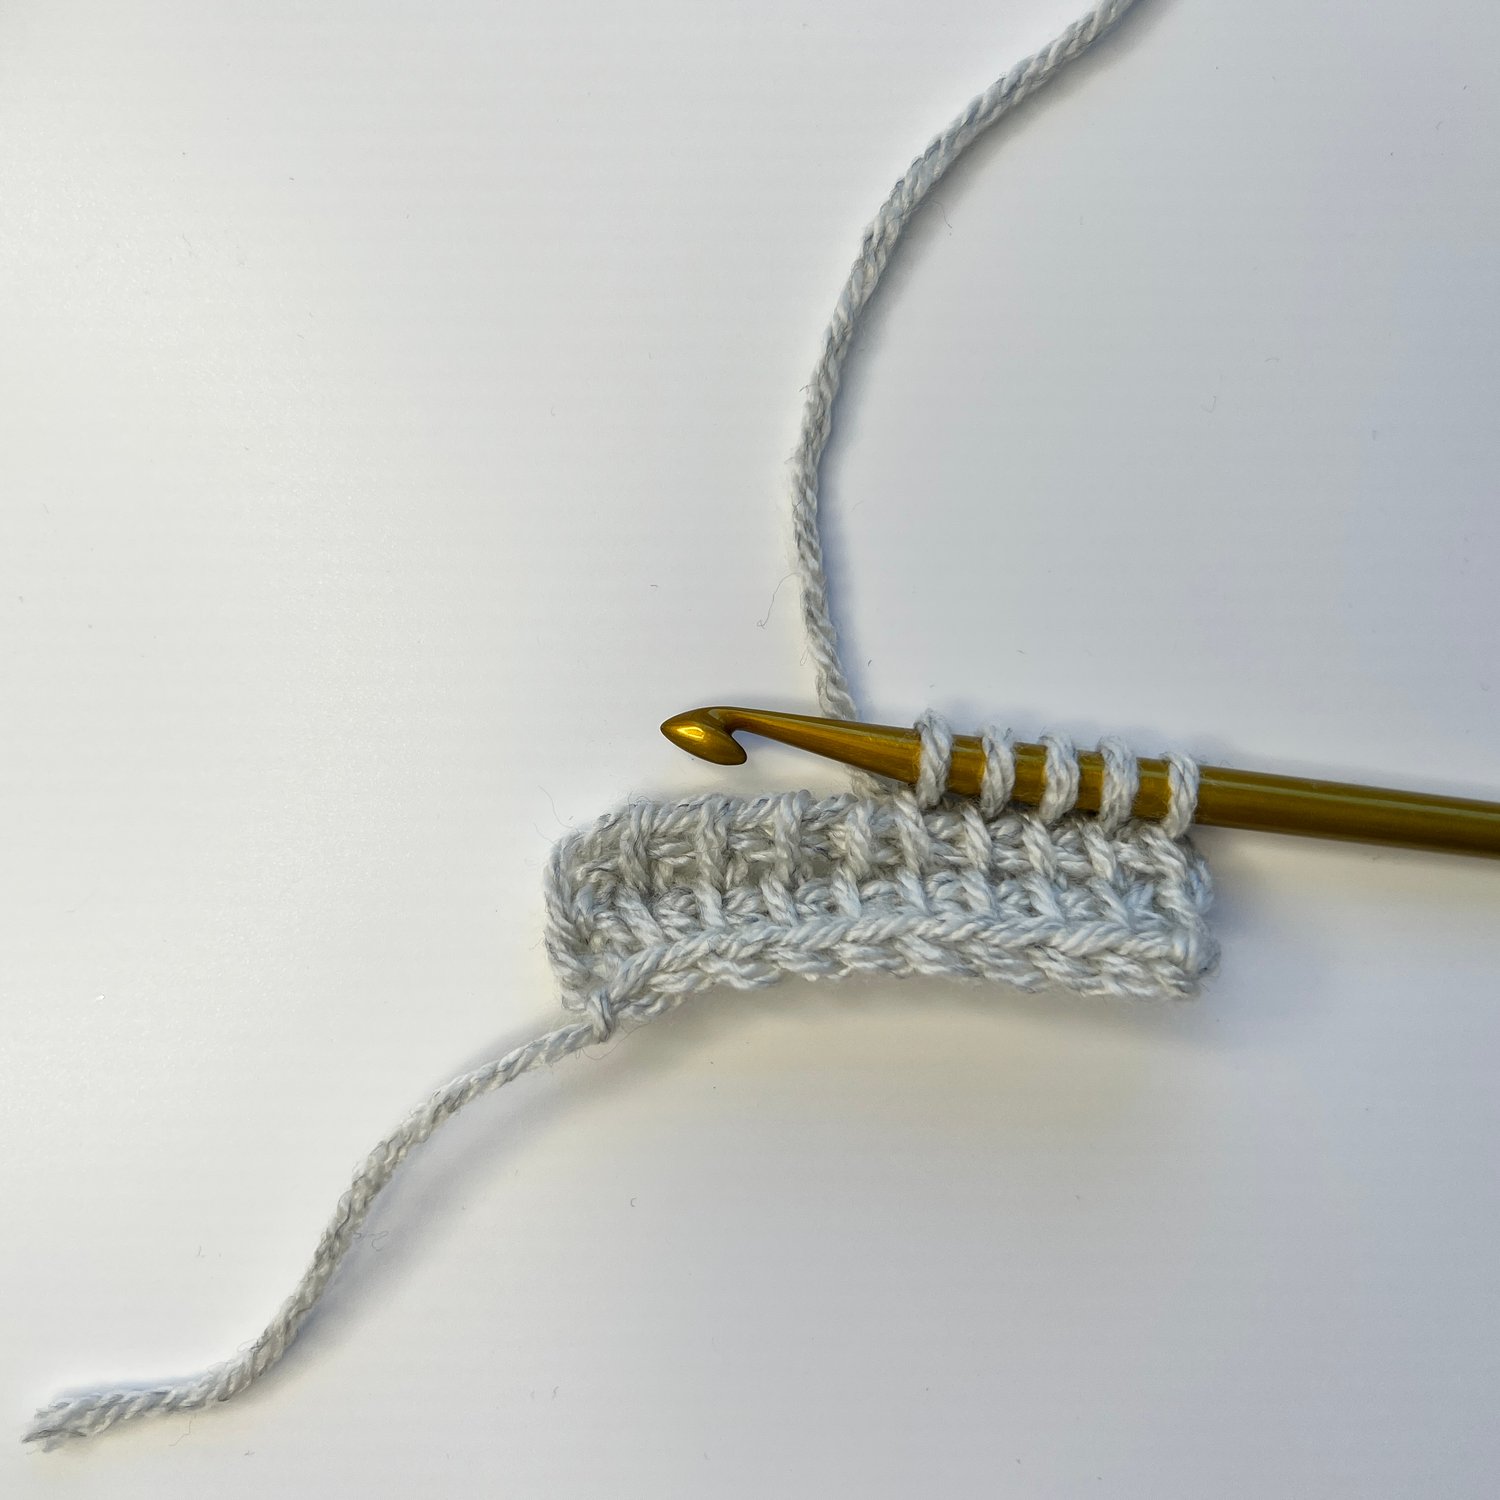
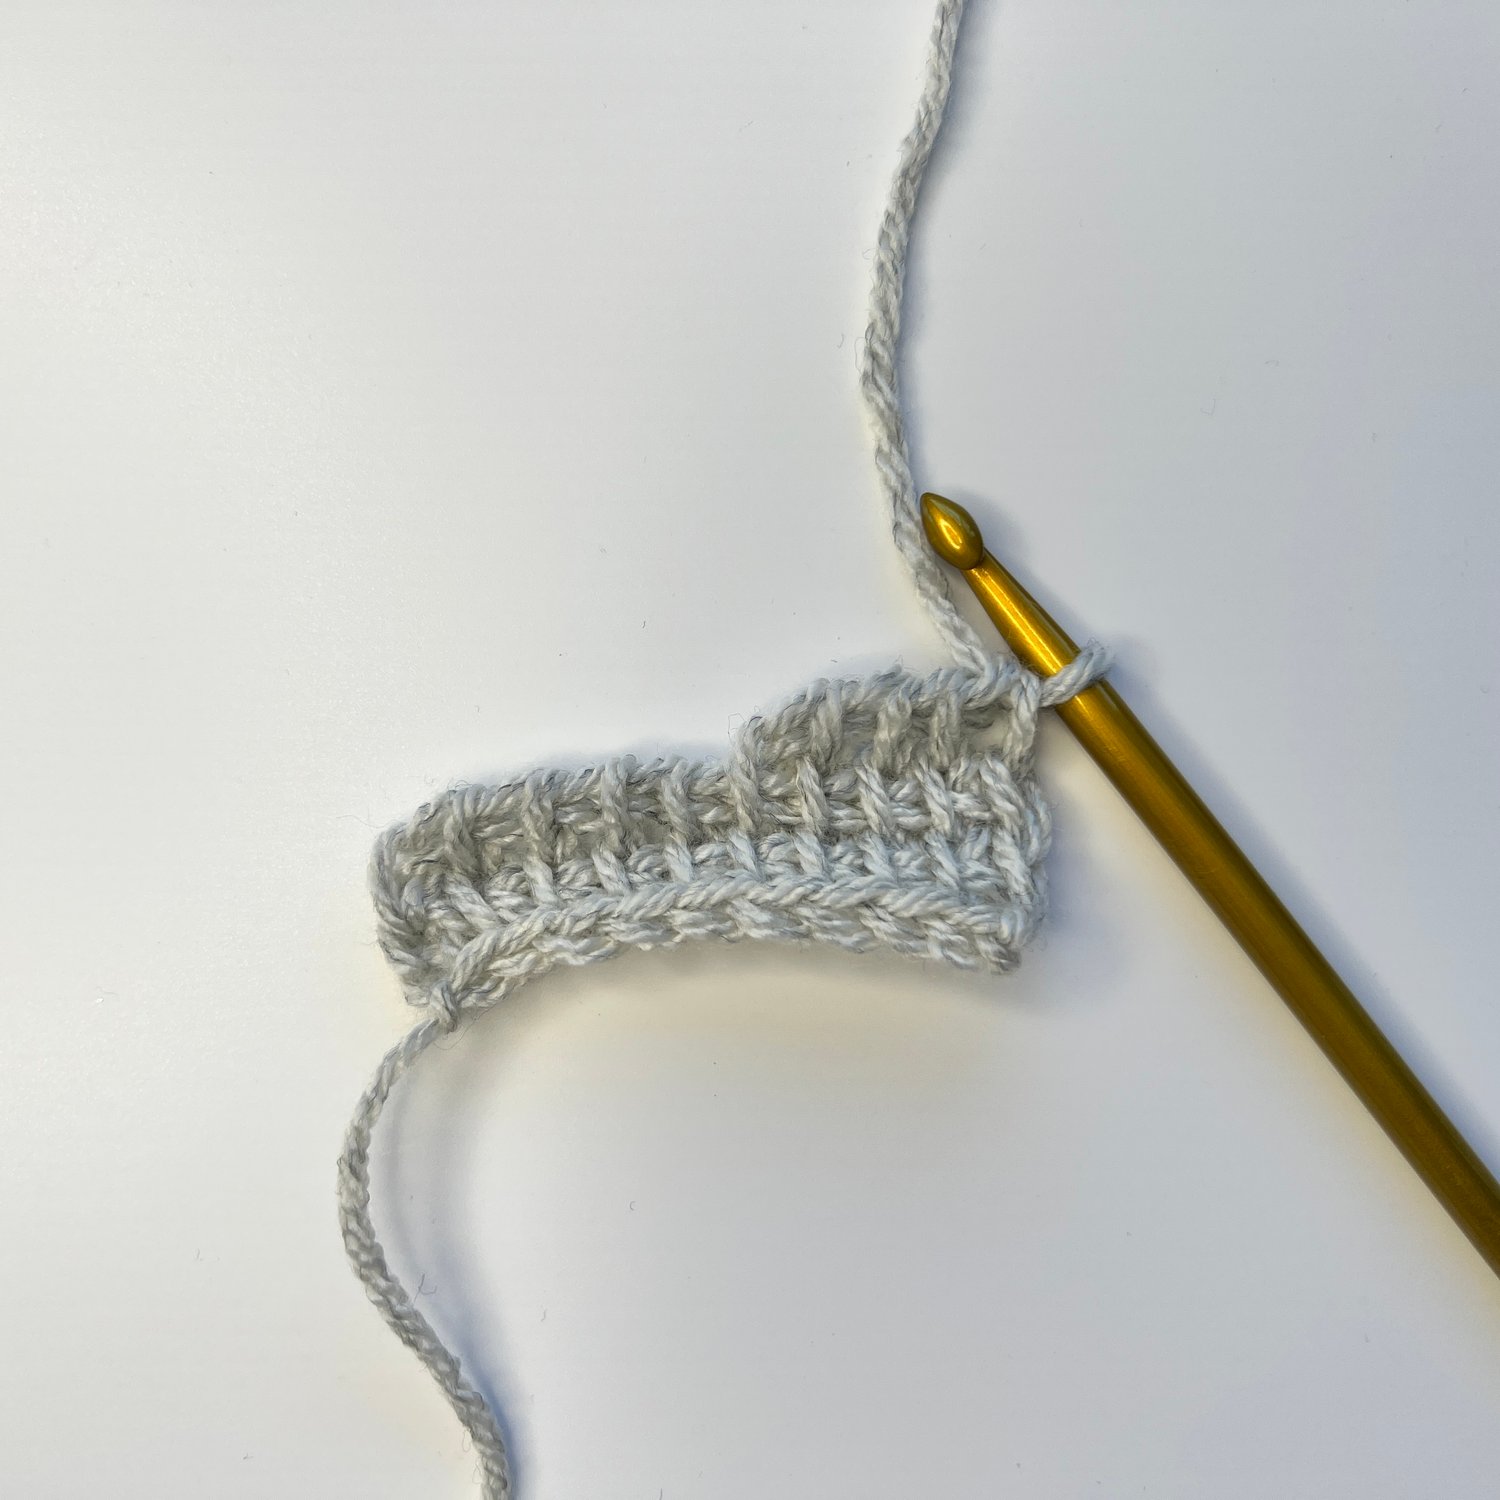
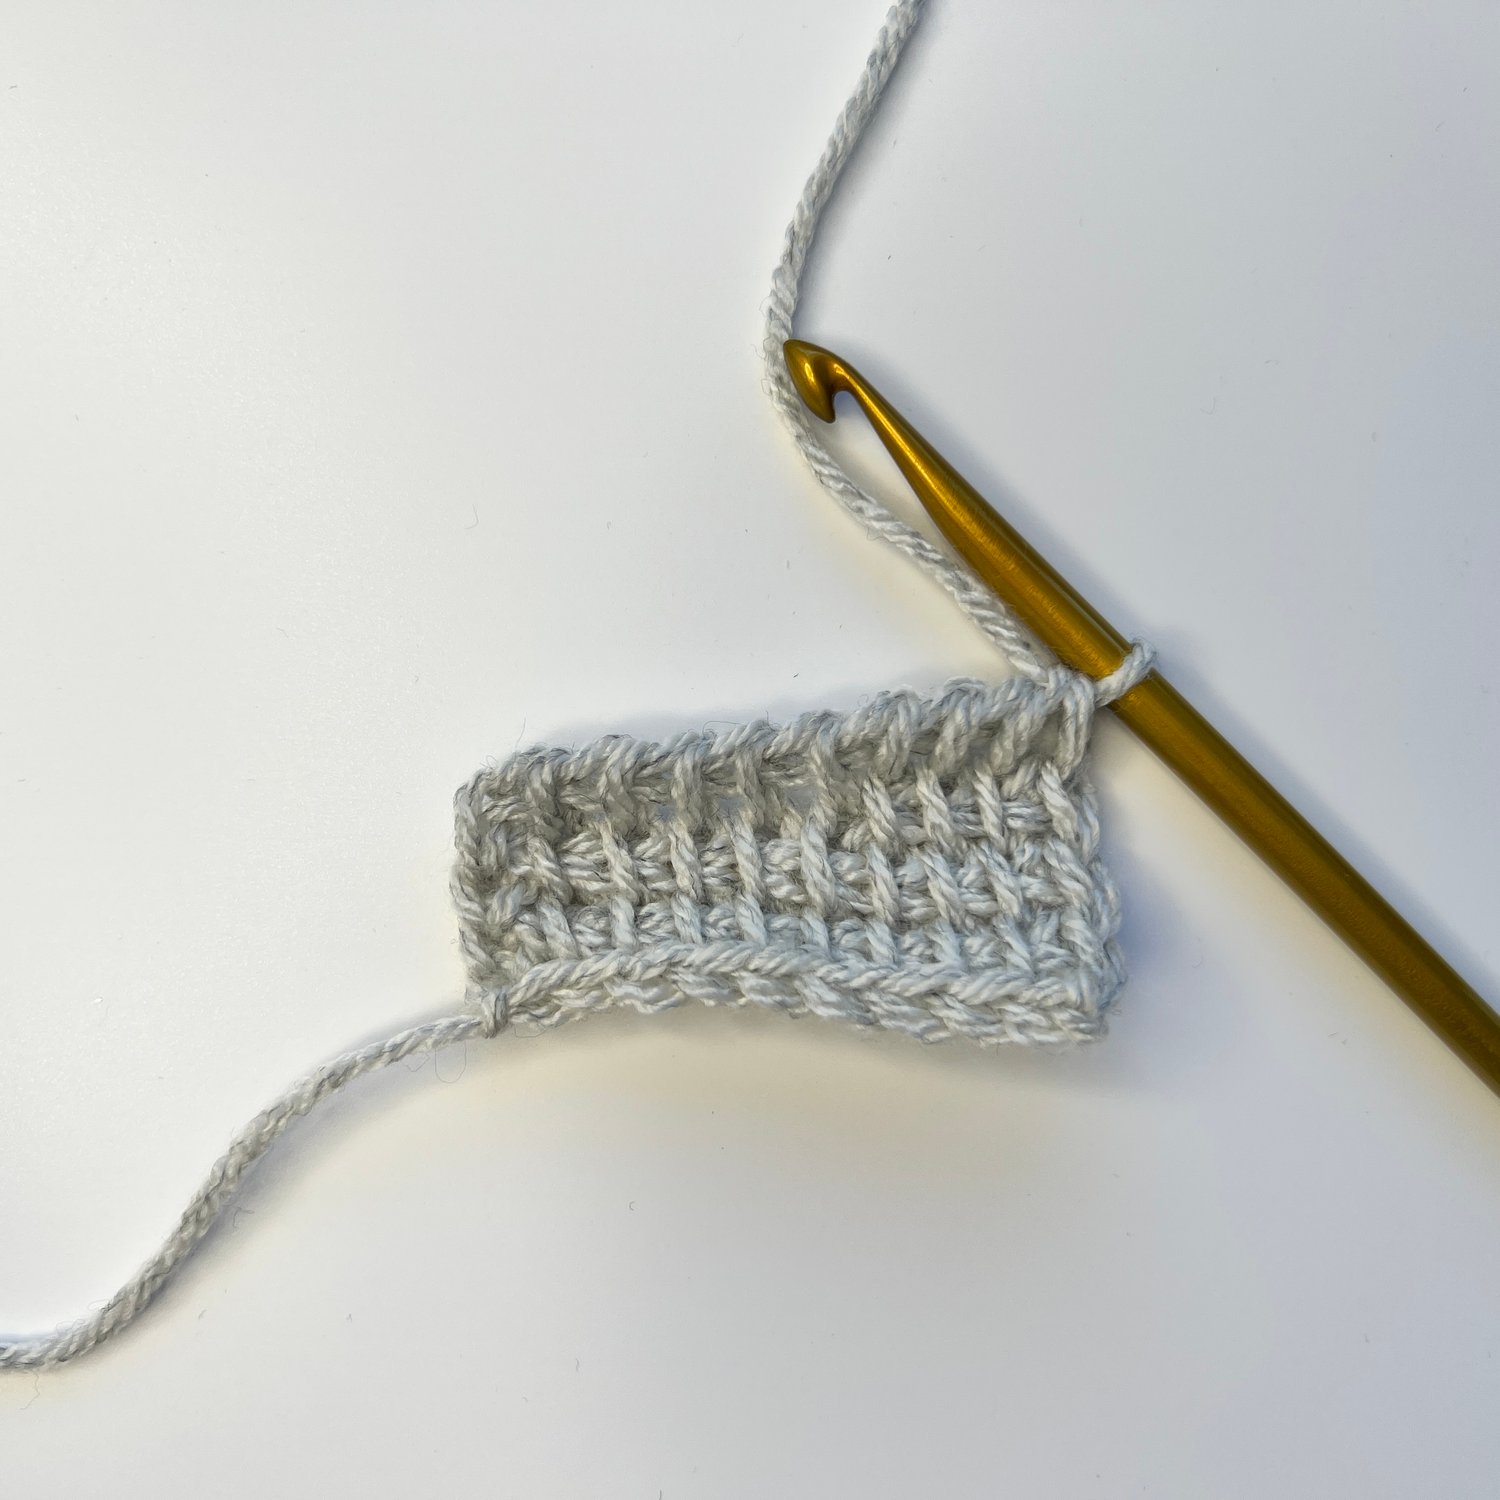
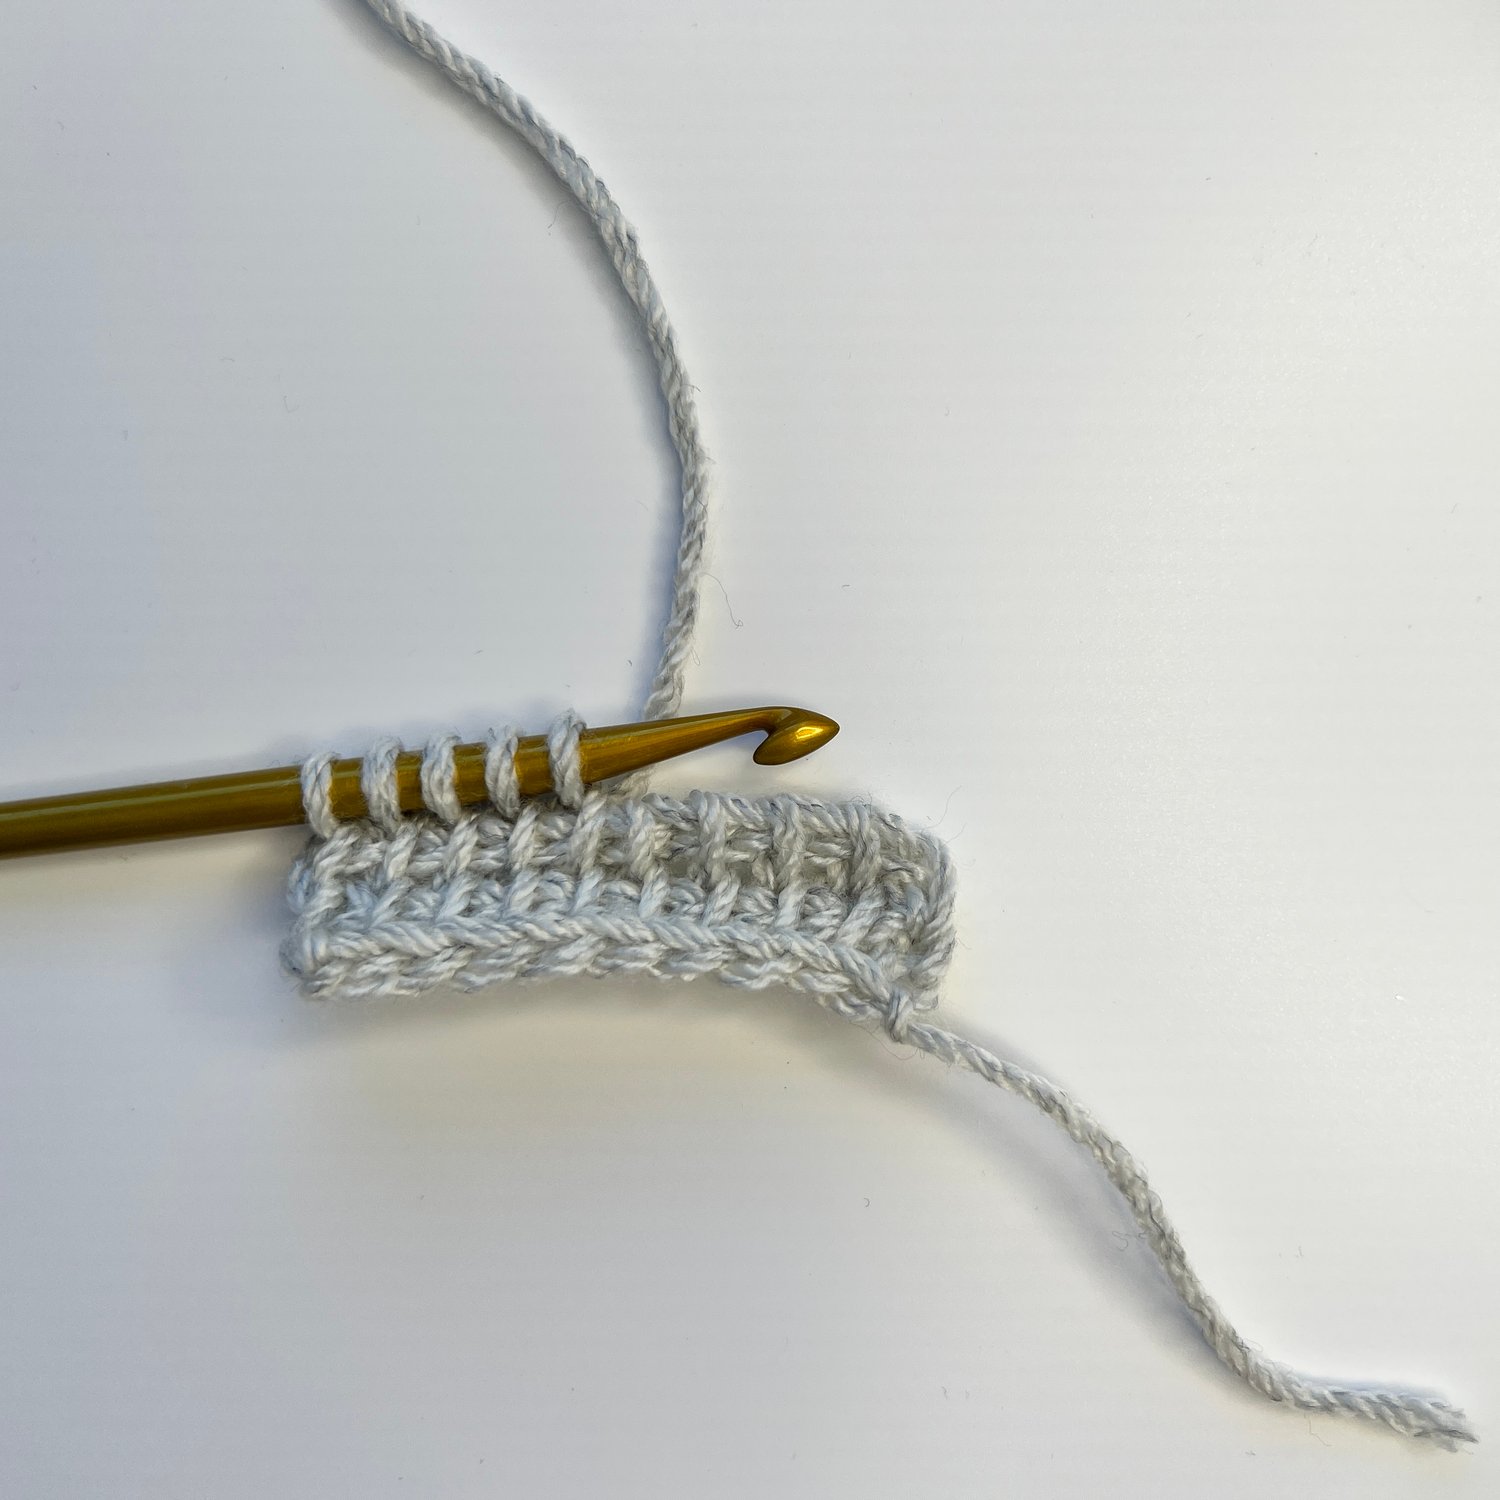
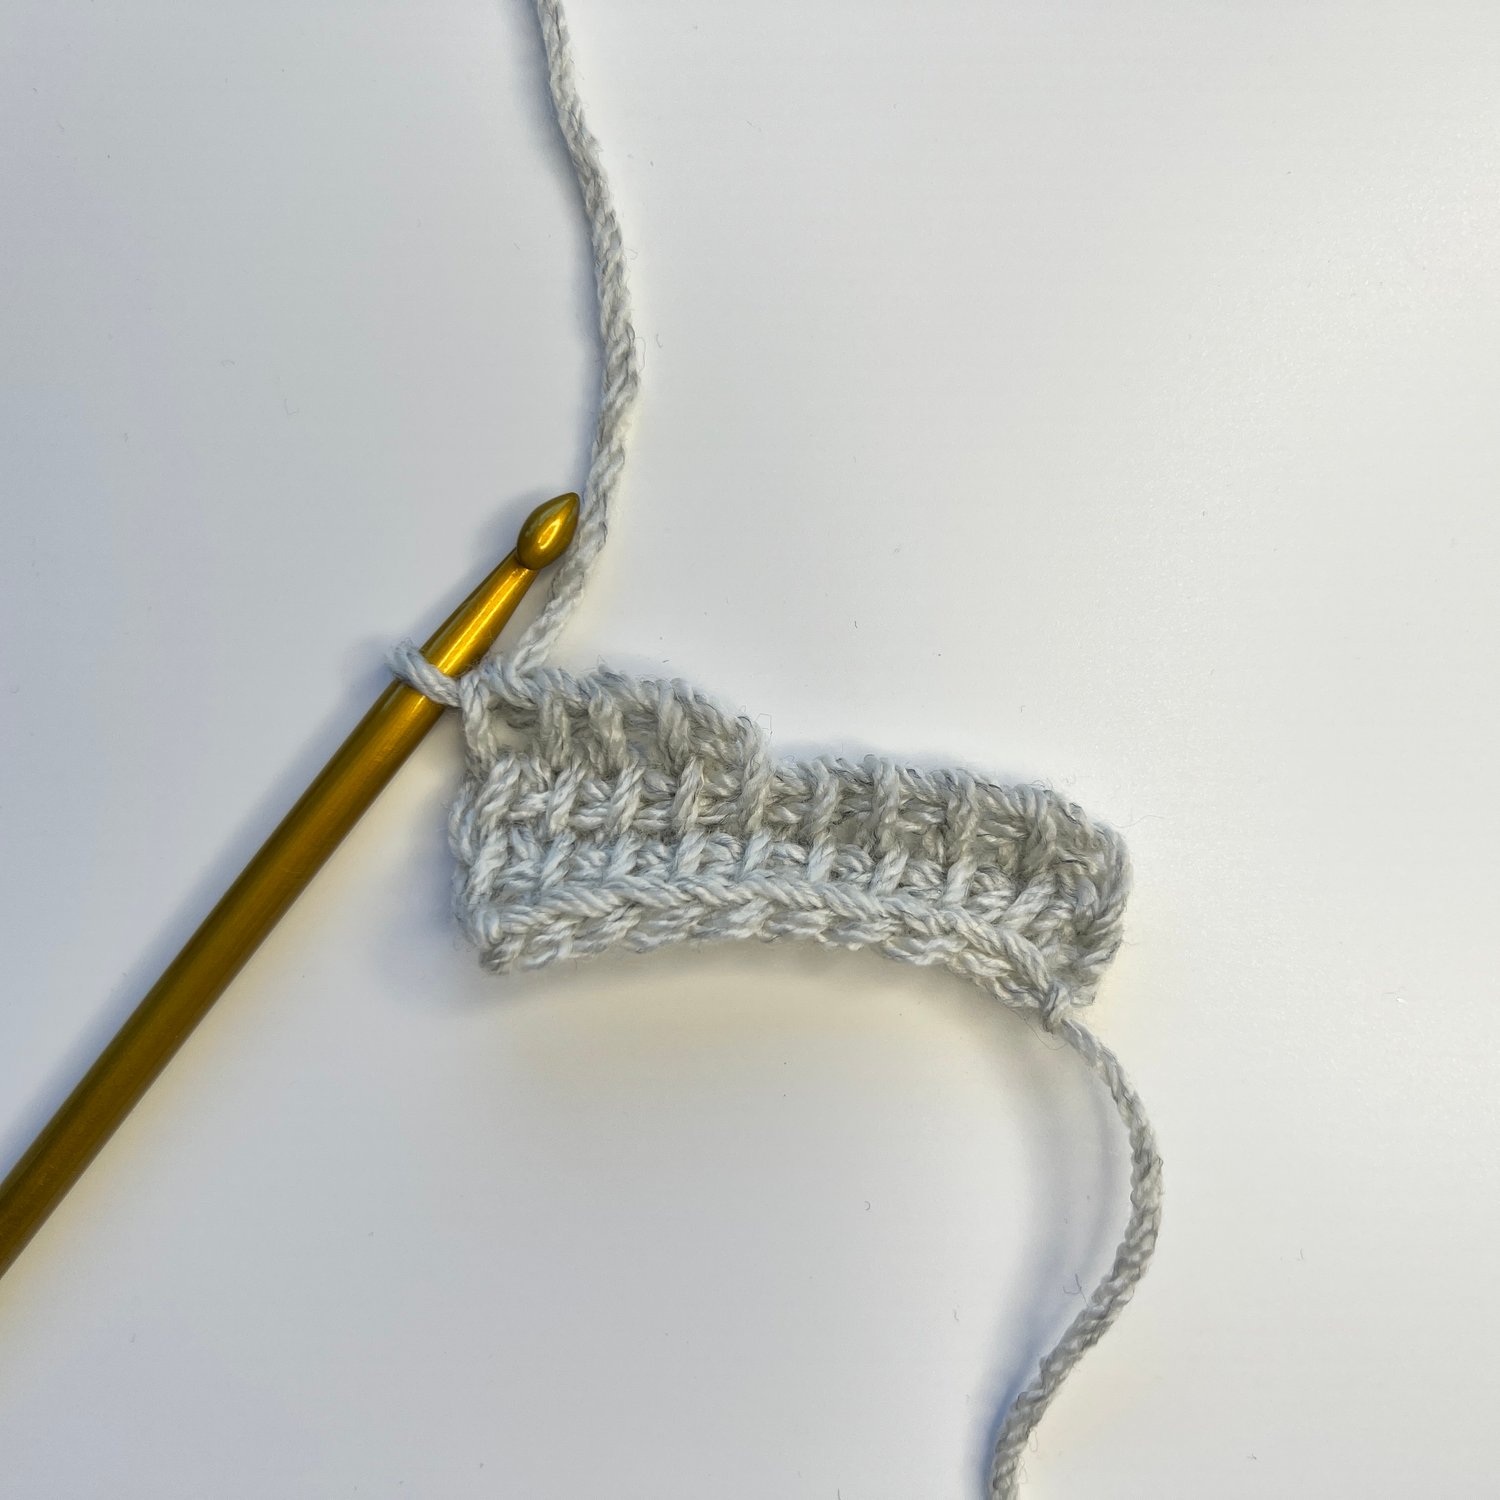
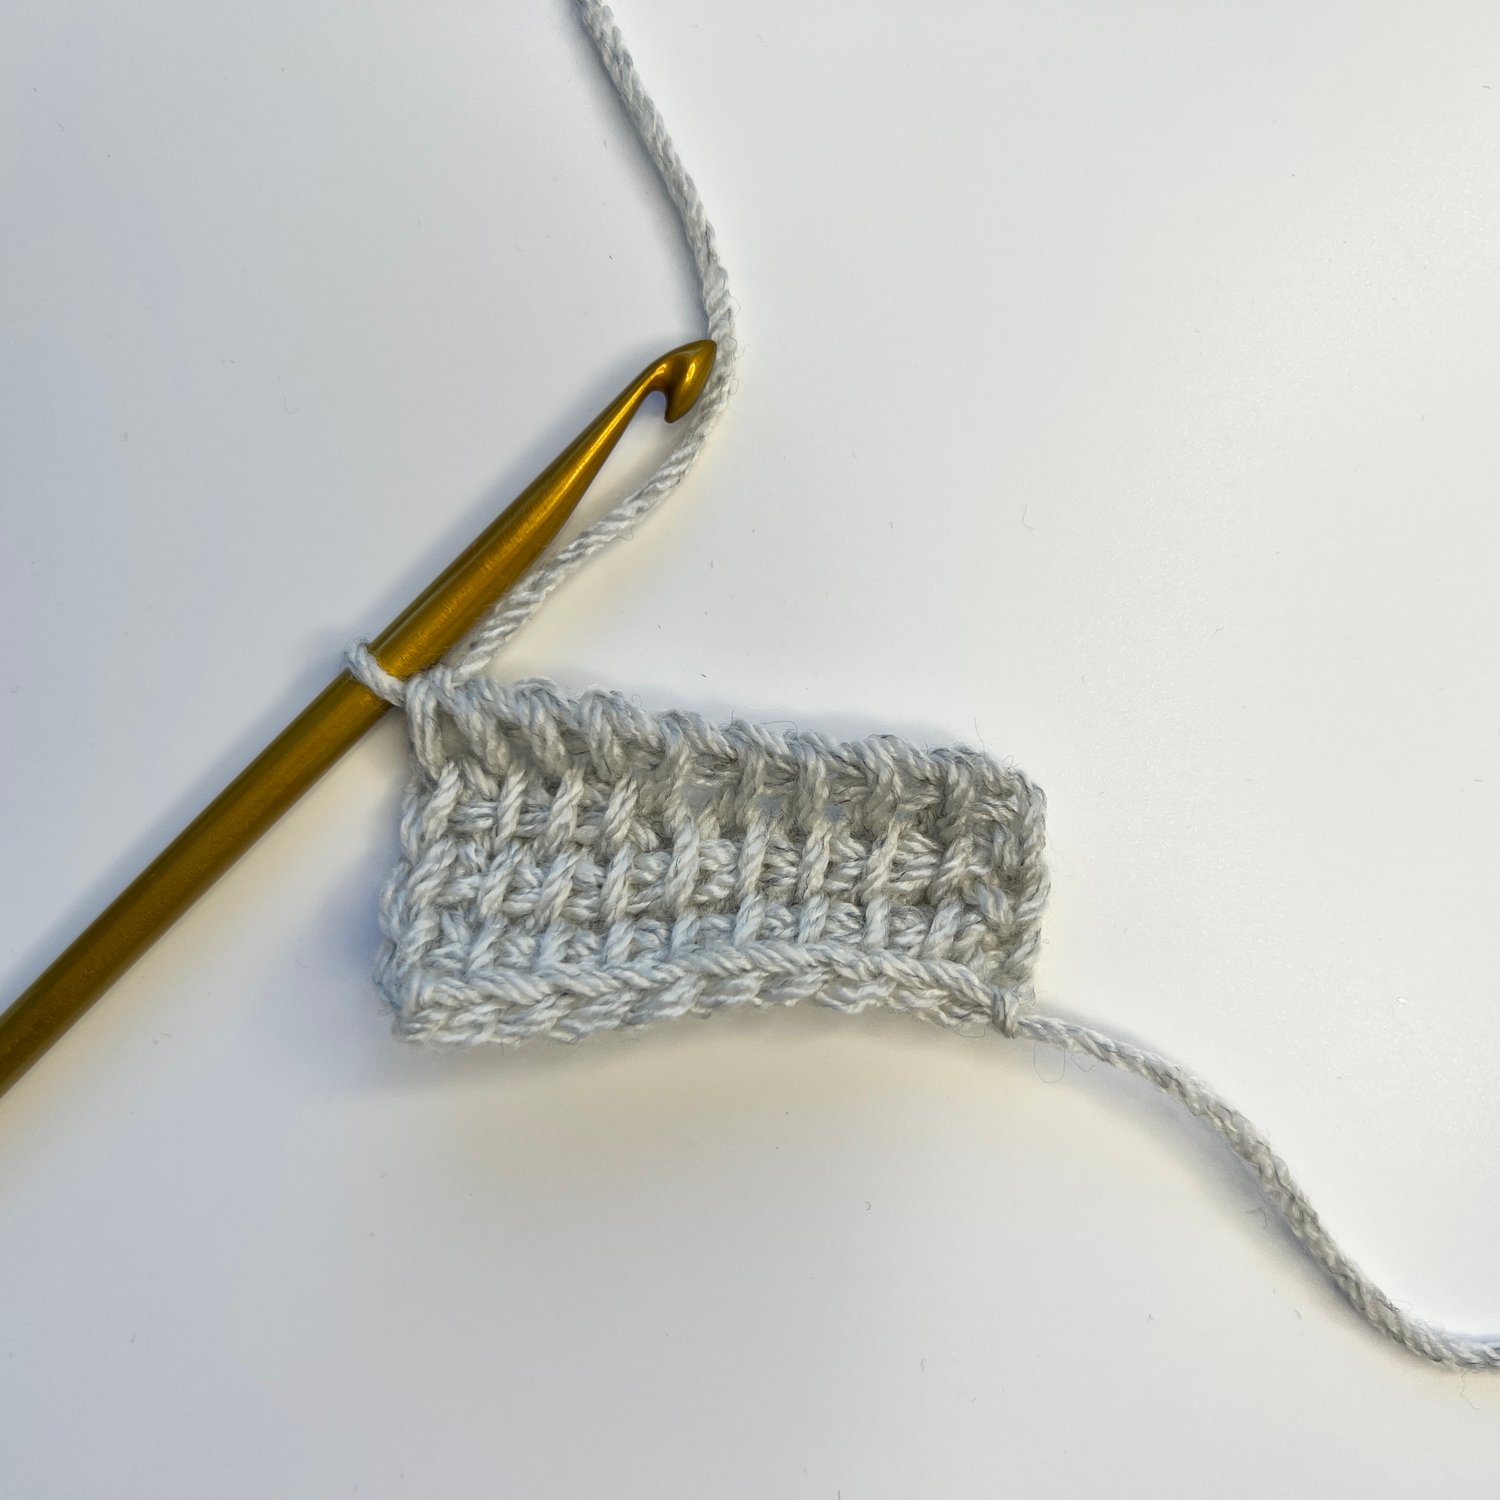
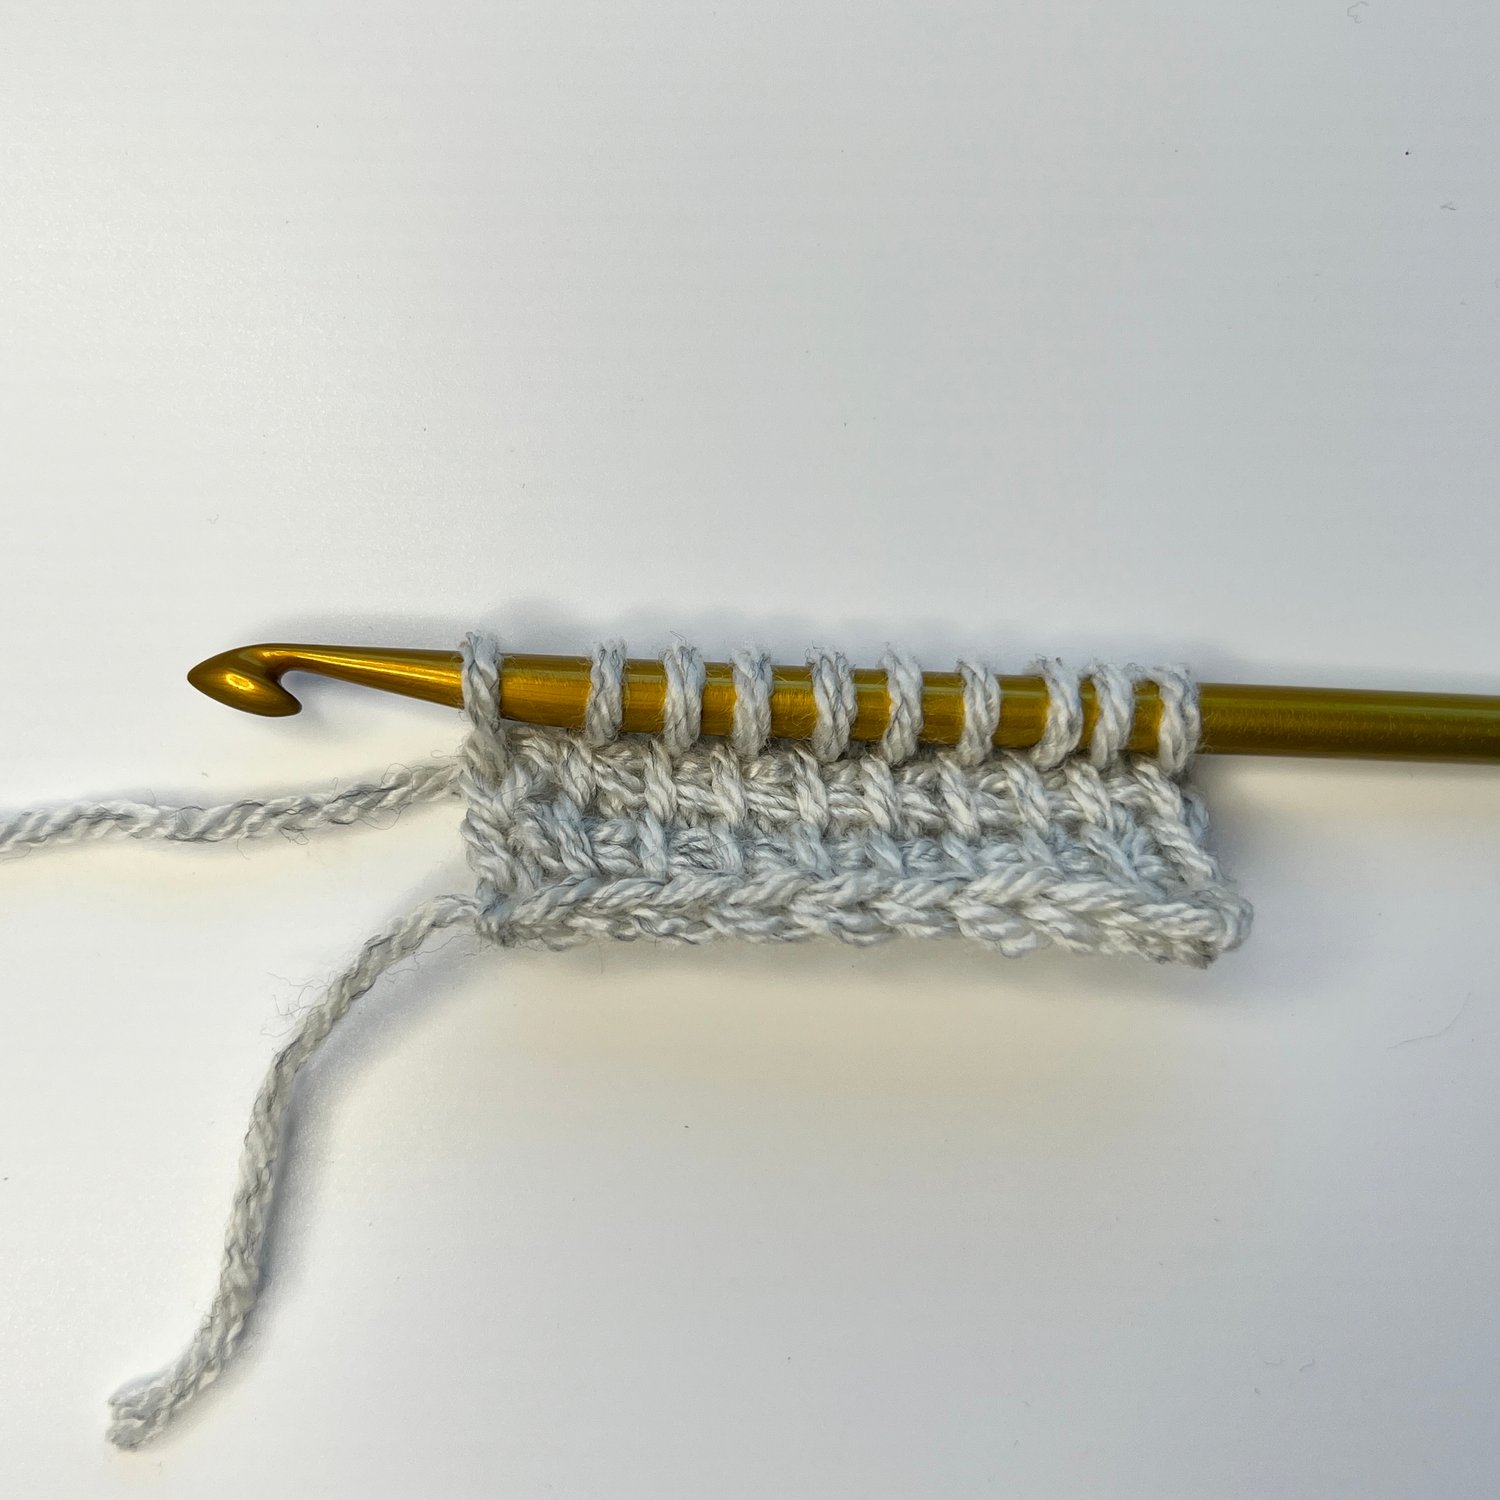
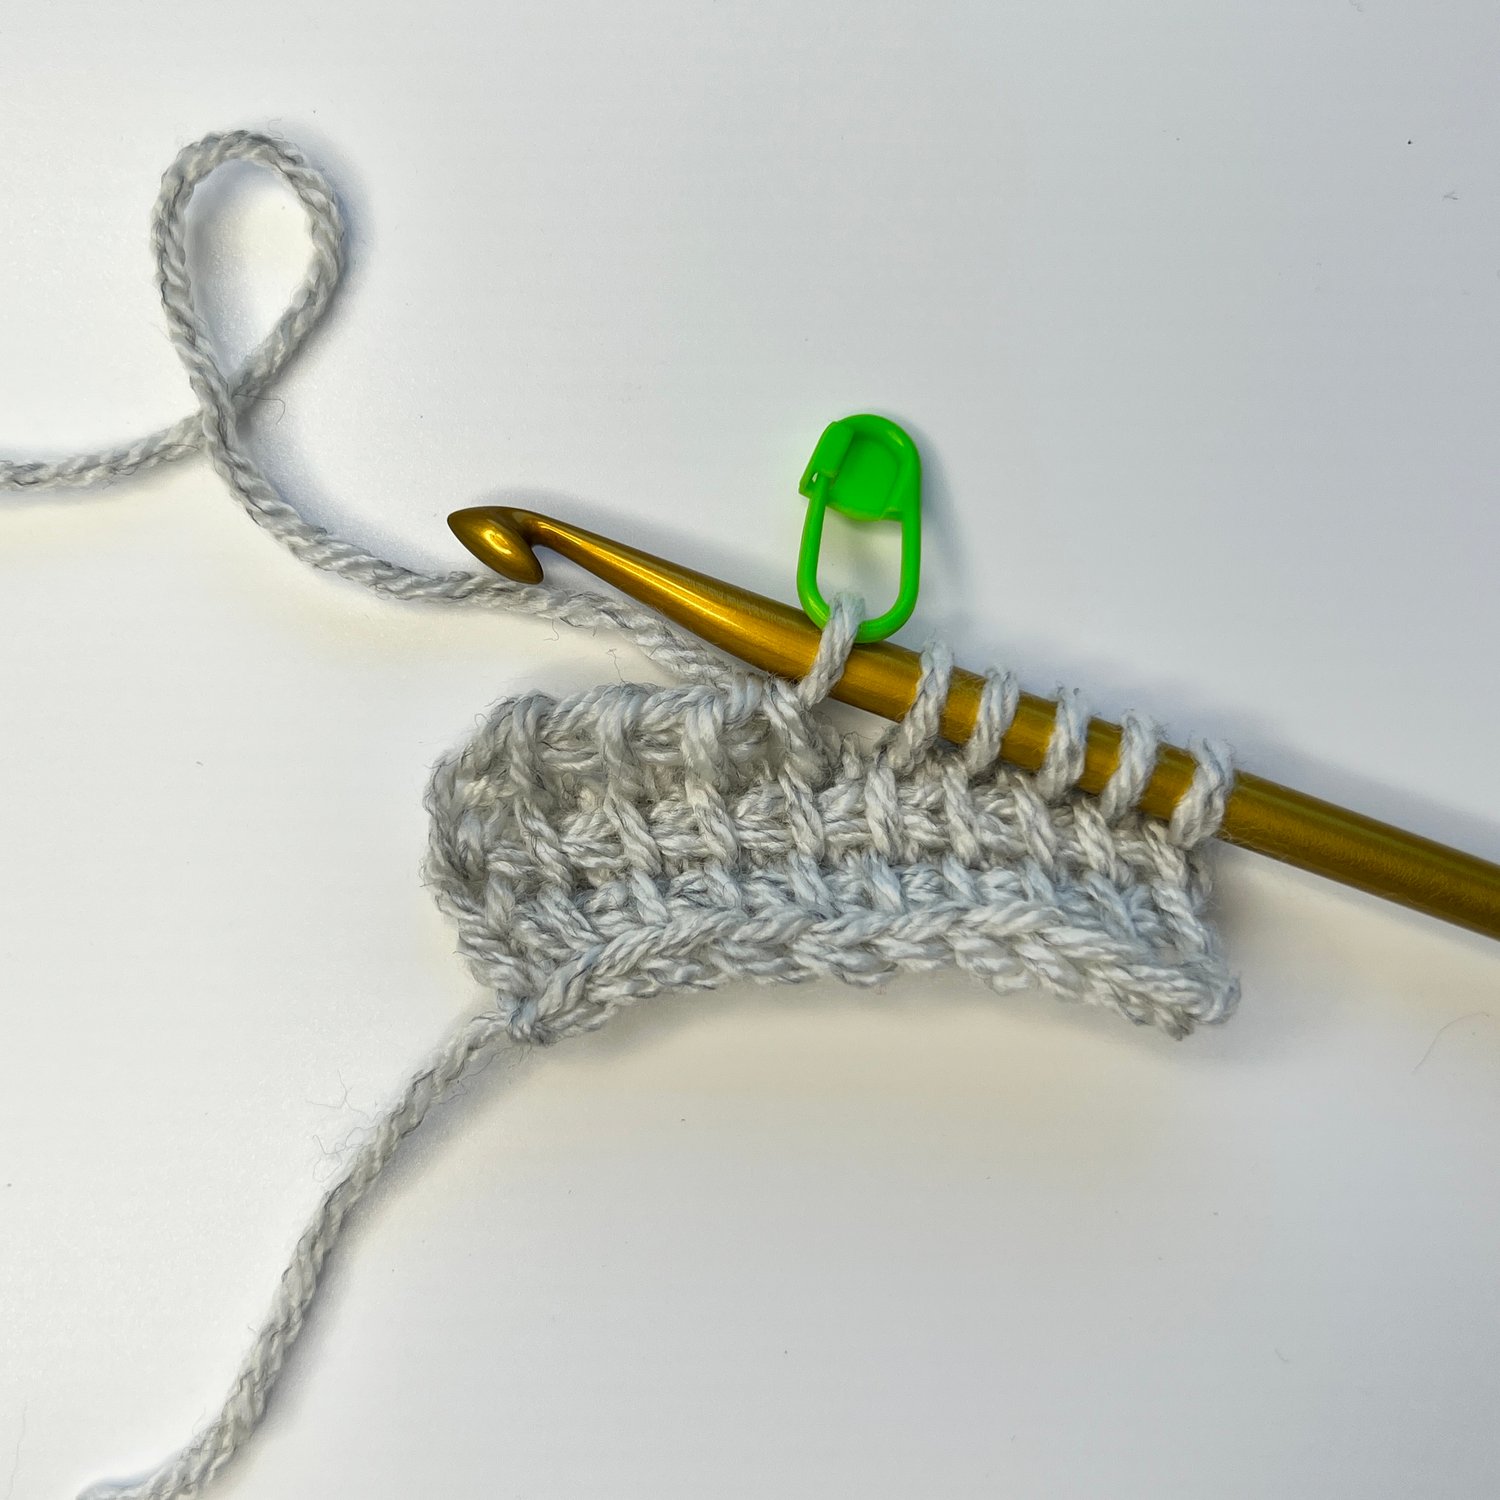
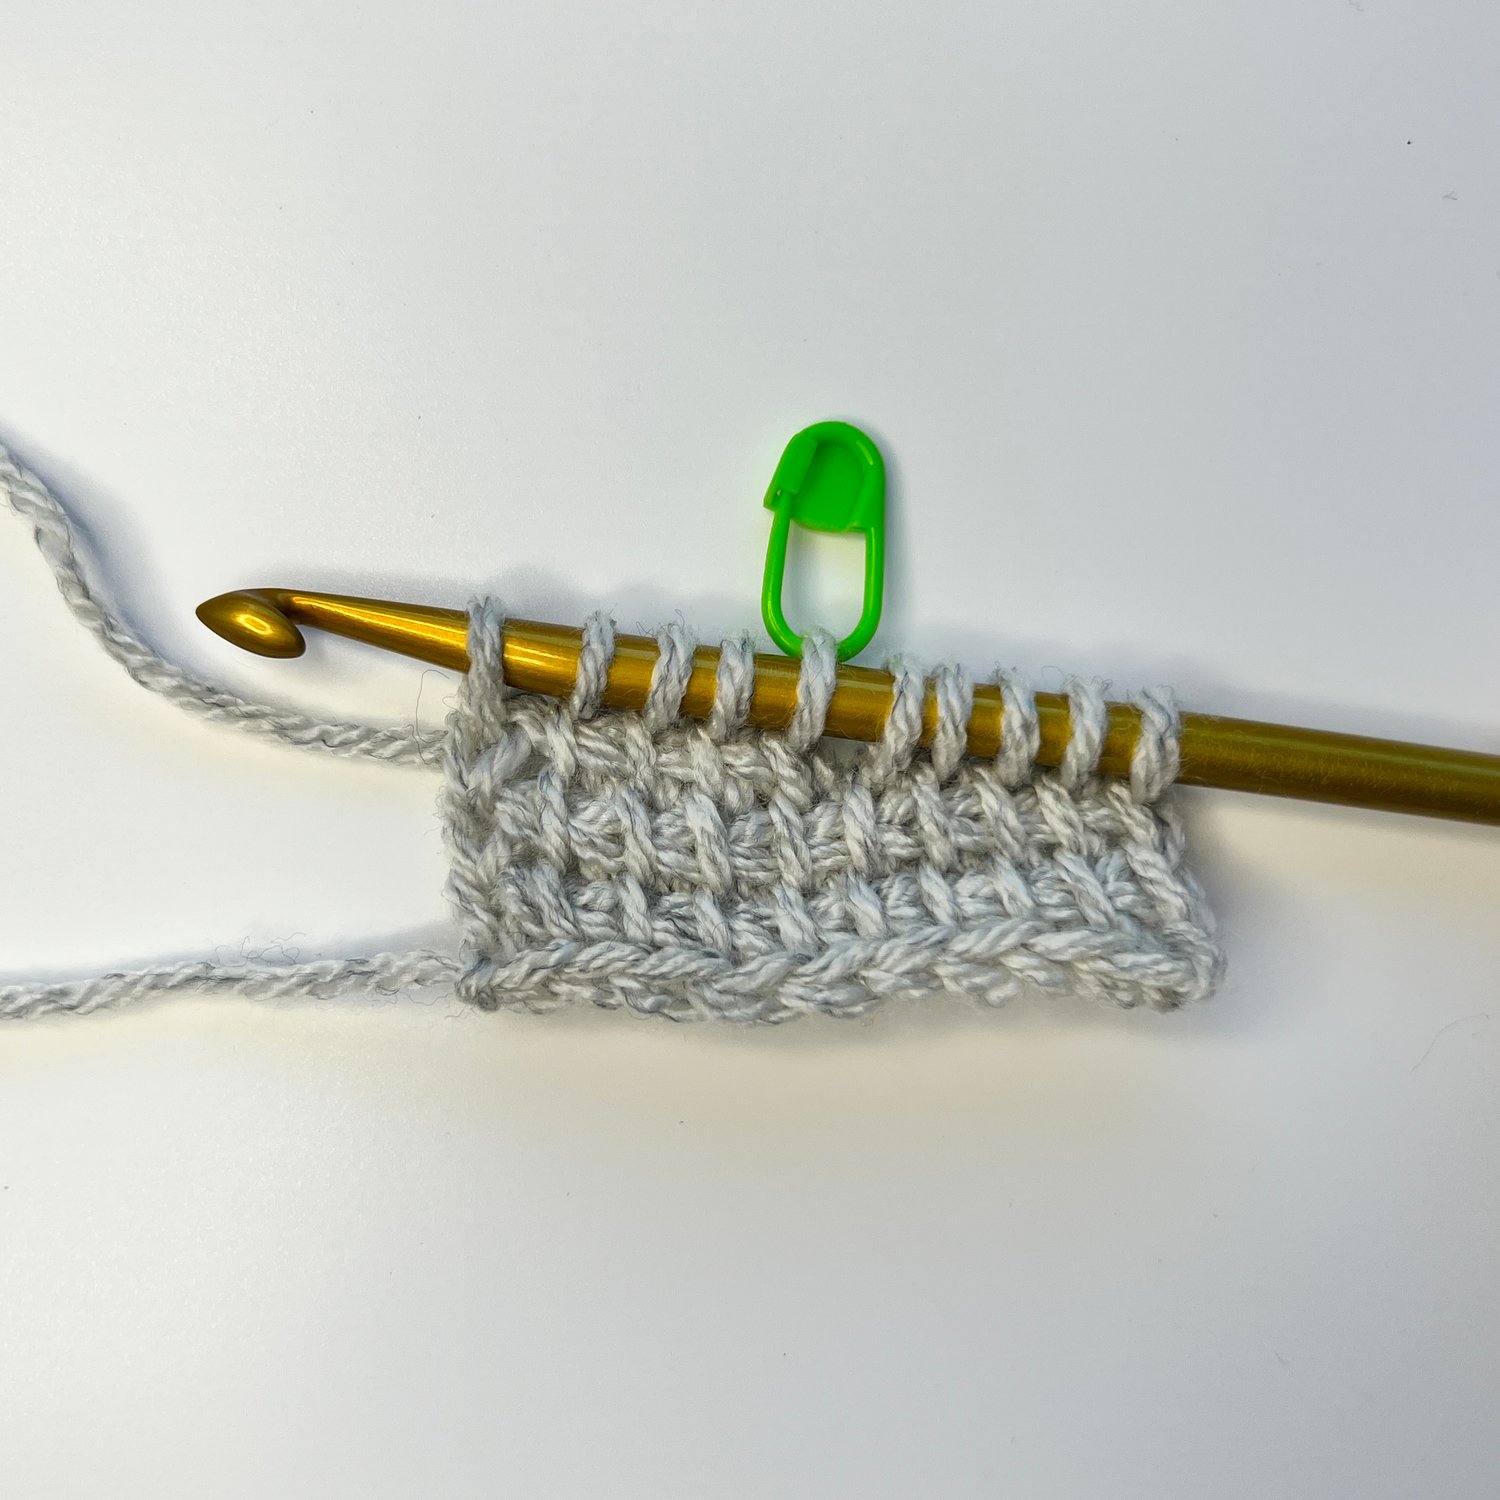
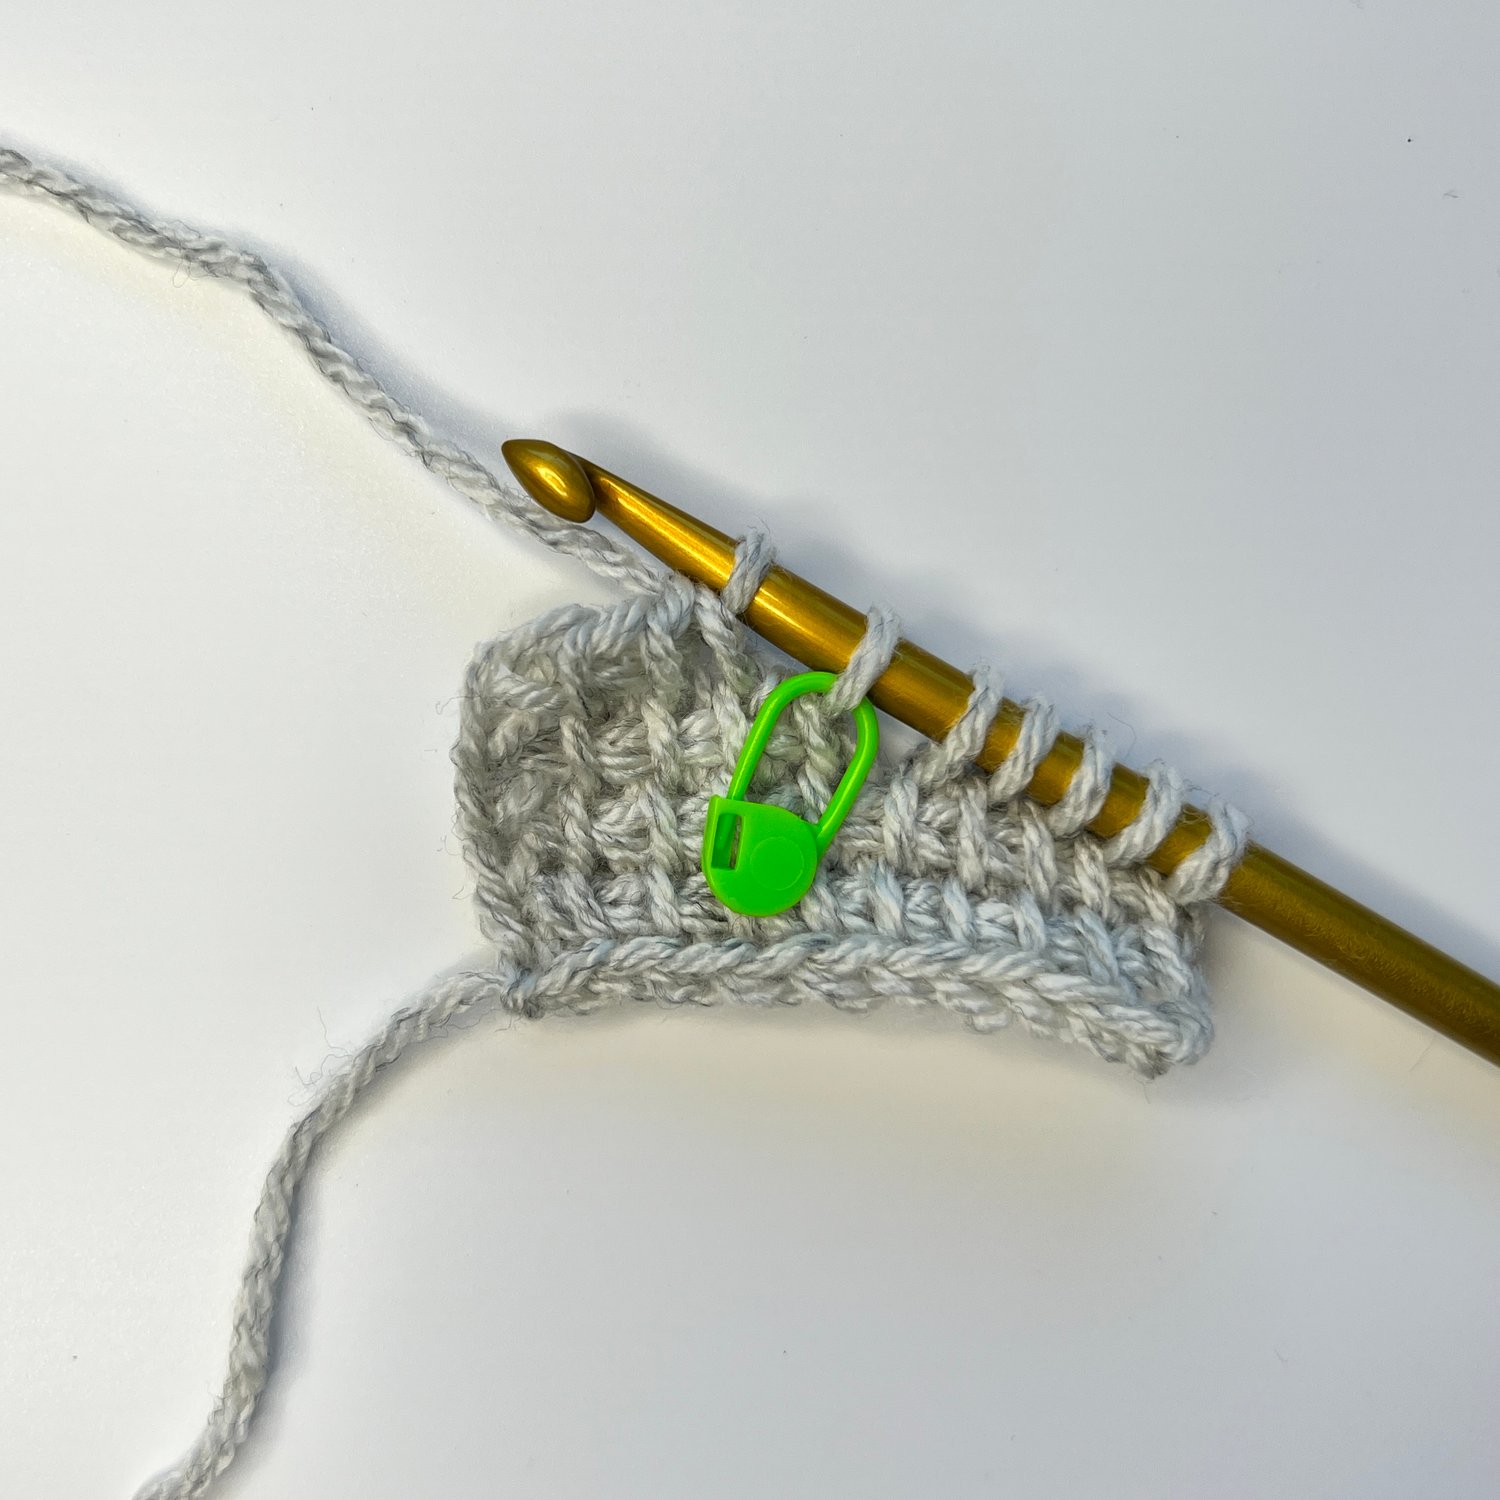
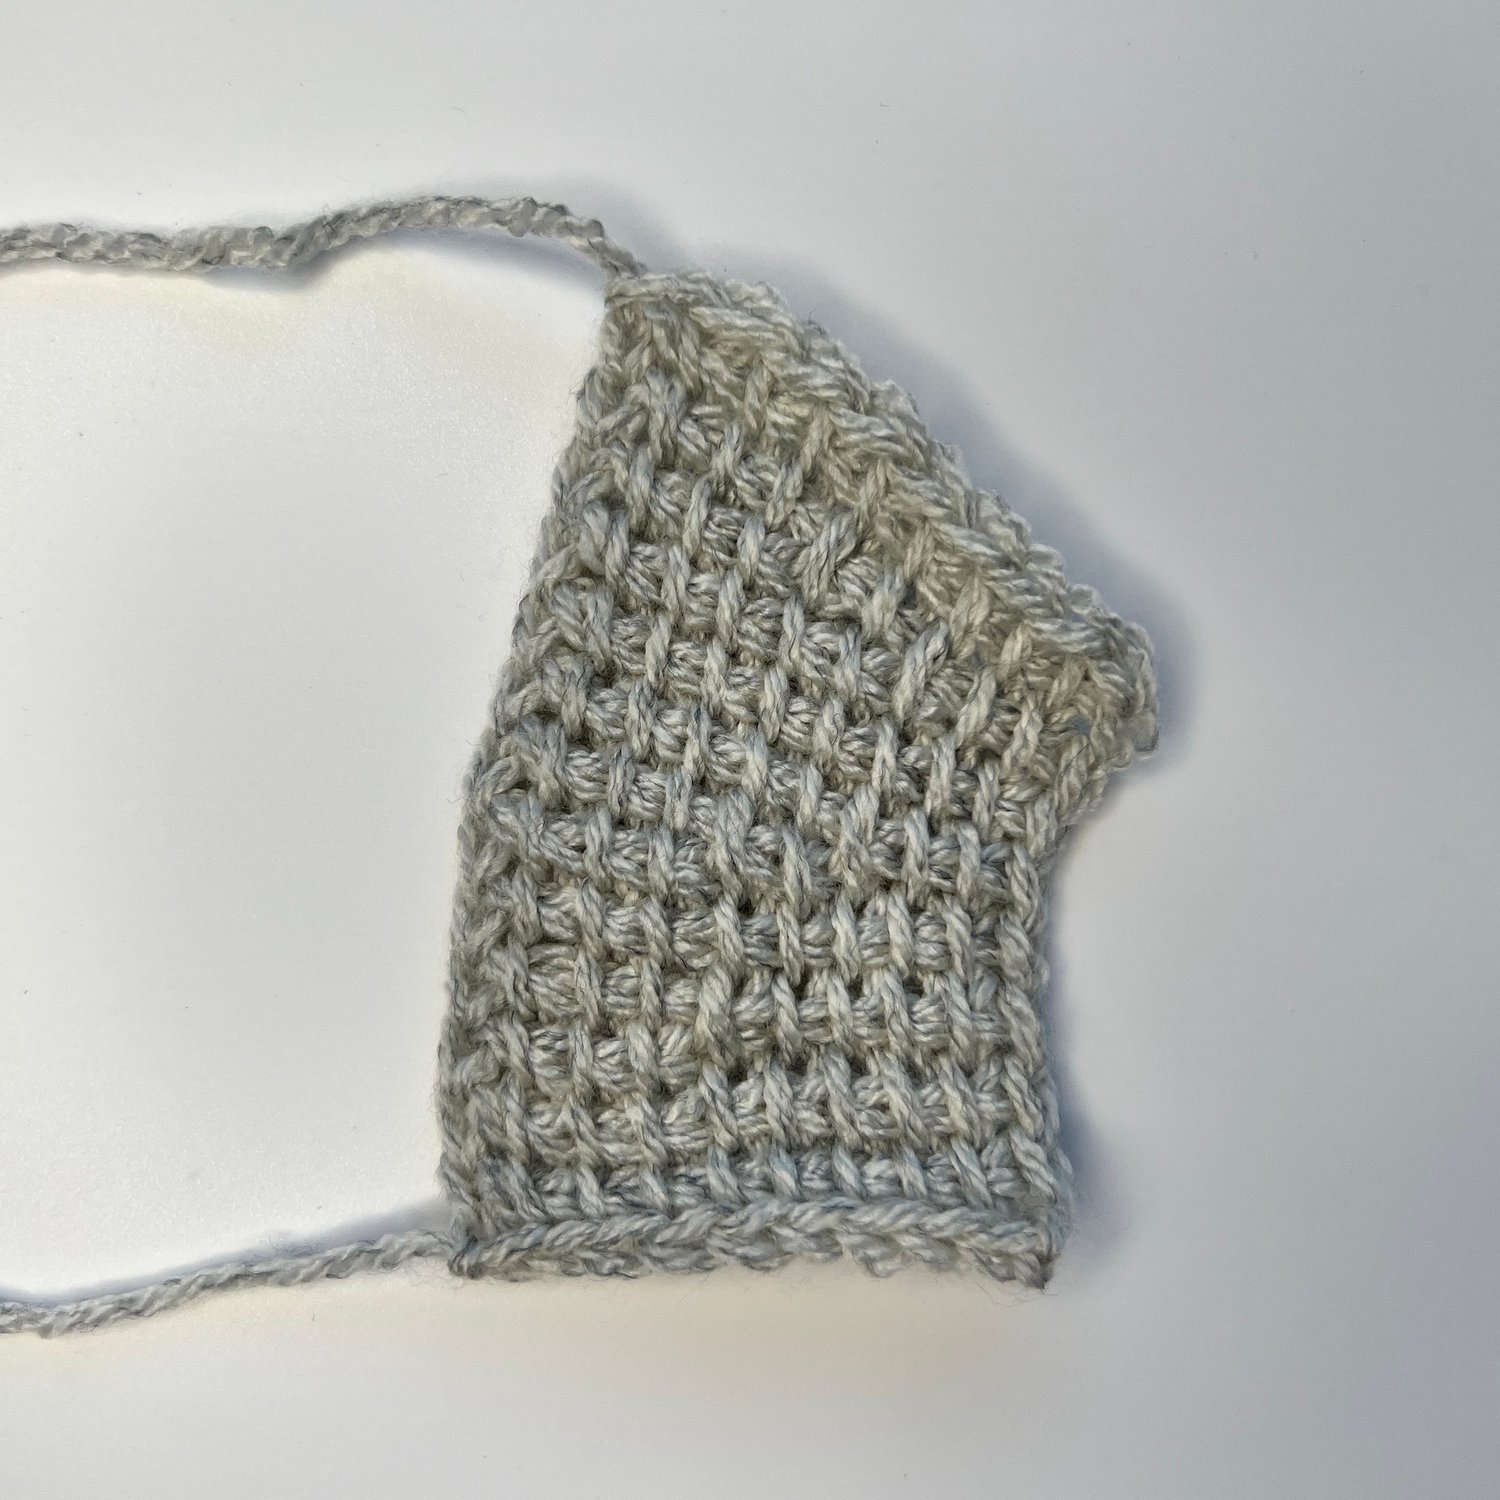
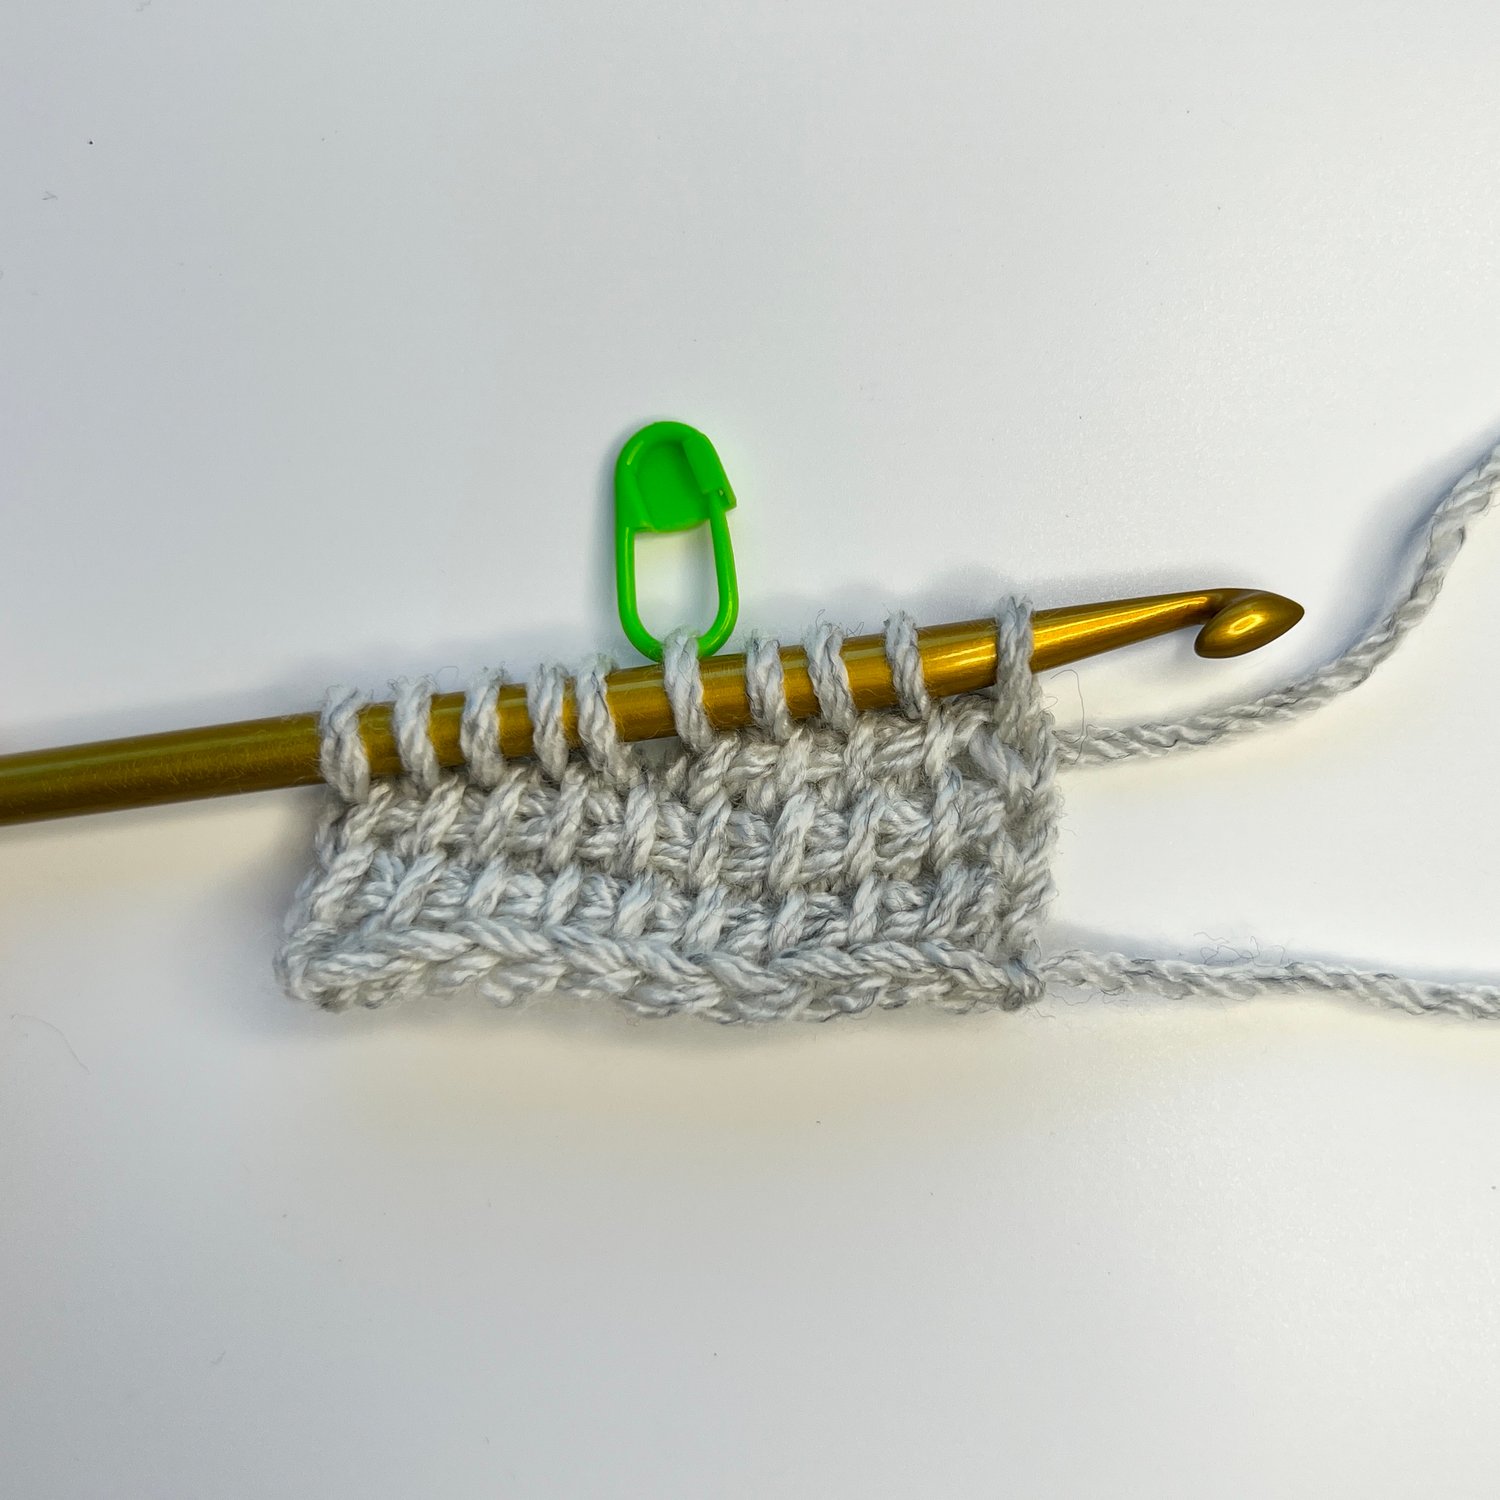
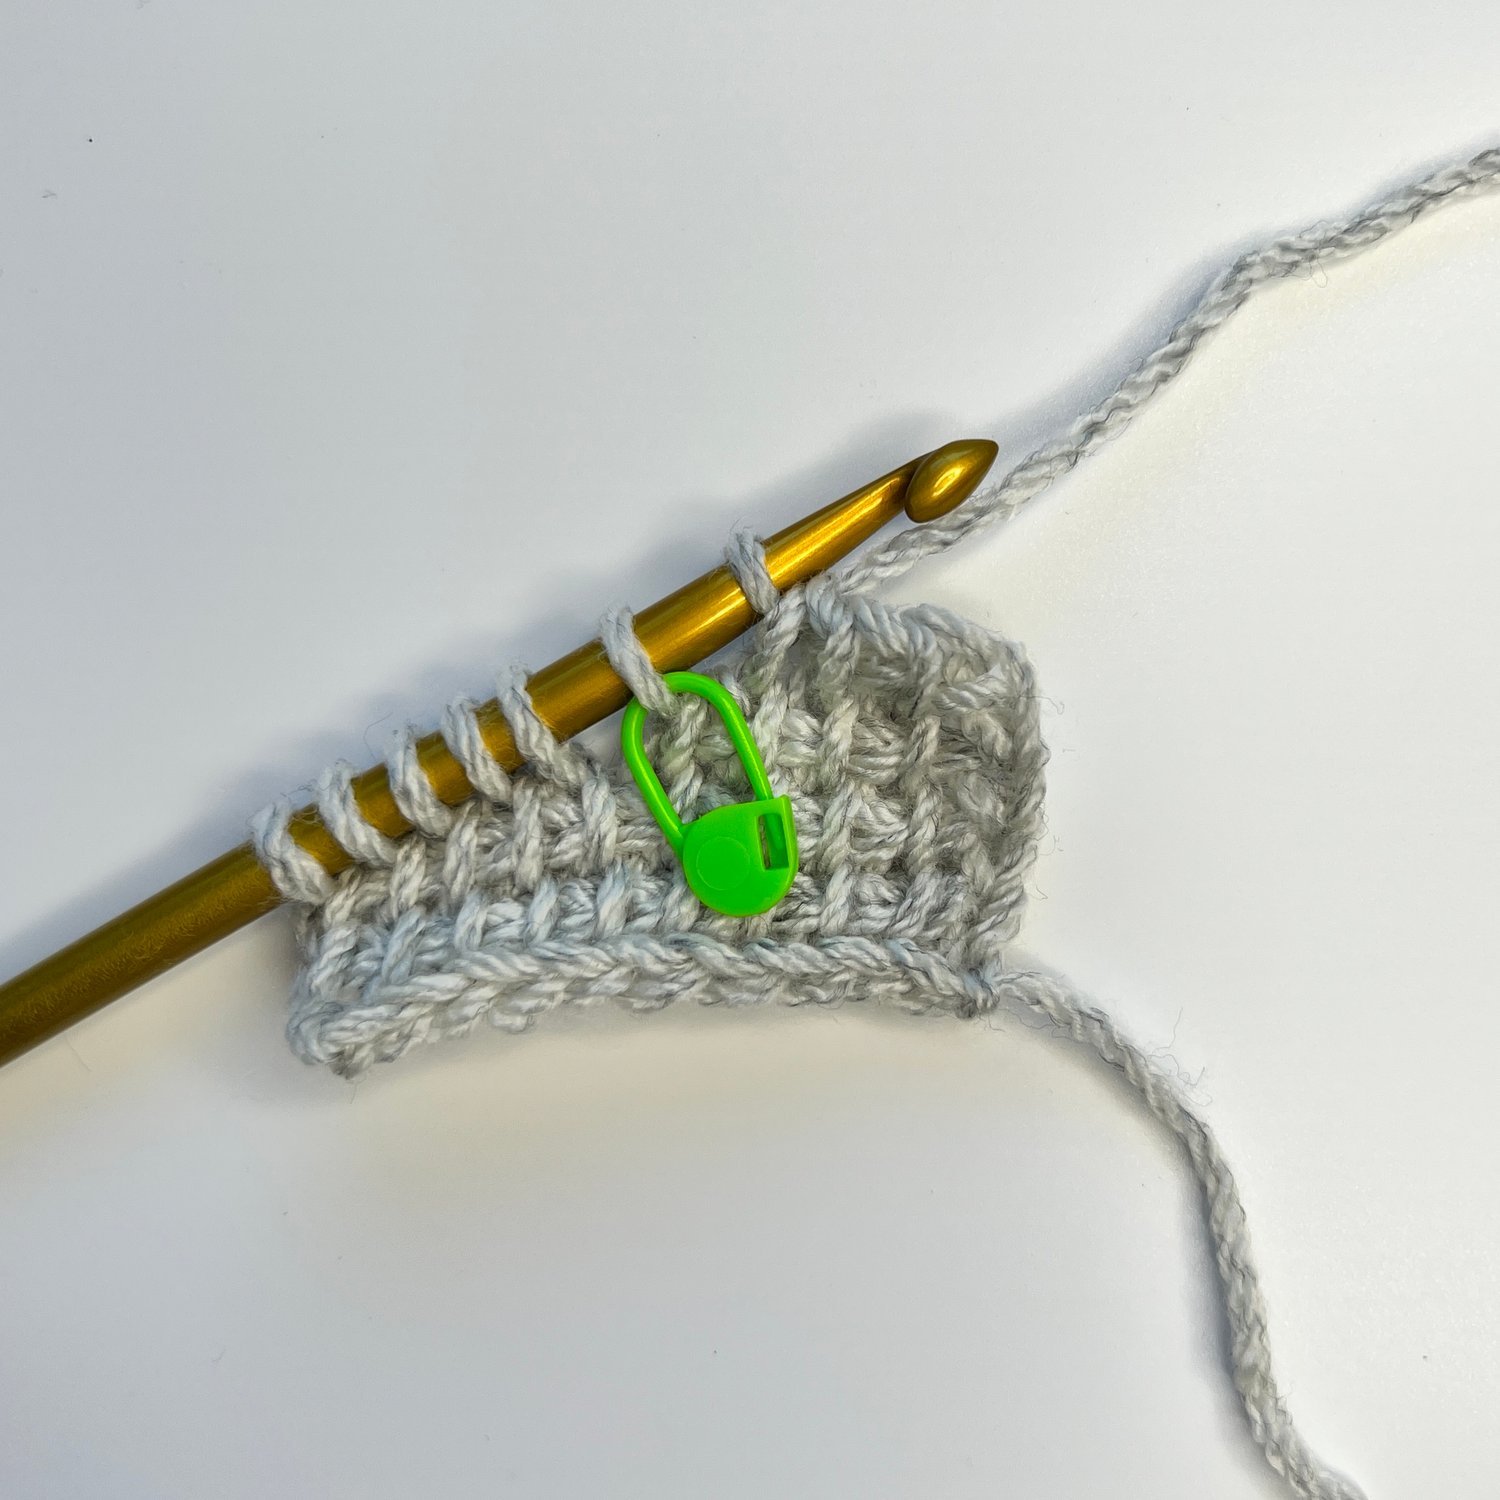
To understand centre short rows, it’s helpful to refresh yourself of the basic techniques for forward and return pass short rows. There are several ways of creating both kinds. I’m only going to show you one of the ways, being my favourite techniques to ensure there are no holes in the work. These are the techniques recommended to use in the patterns I’m creating. 

Forward Pass Short Rows

Forward pass short rows are used to create a piece that has more rows on the starting edge of the work and less on the finishing edge. So, for a right-handed crocheter, more rows on the right than the left and for a left-handed crocheter, more rows on the left than the right.

Method

Start with a base of Tunisian simple stitches. My sample has 10 ch and 10 tss x 2 rows. 

Short Row FwdP: Pick up a number of sts that is less than the full row, eg pick up 4 tss ­– 5 loops on hook.

Optional tip: Place one marker around the front and back loops of the last st on the hook.

Short Row RetP: *Yarn over, pull through 2 loops* until 1 loop remains on hook. Note that I have omitted the usual ‘ch 1’ at the start of this RetP. 

Row above the short row: Tss in each st until the marked st, pick up both the front and back loops of the marked st (the same as you would for an edge st at the end of a row), then continue the row like normal to the end – tss to end, pick up a loop in edge st – 10 loops on hook.

RetP: Ch 1, *yarn over, pull through 2 loops* until 1 loop remains on hook.

There is no limit to what you can do with short rows. You can make multiple short rows on top of each other but it’s best to stagger them – don’t make them all the same number of sts or you will get holes in the work! 


Here I've continued my swatch and changed up how I positioned the short rows. I've highlighted the last loop of the forward pass in pink so you can see where the rows differ.

Left handed view


Demonstration of forward pass short rows

Right handed view only.

Return Pass Short Rows

Short rows on the return pass are used to create a piece that has more rows on the finishing edge of the work and less on the starting edge. So, for a right-handed crocheter, more rows on the left than the right and for a left-handed crocheter, more rows on the right than the left.

Method

Start with a base of Tunisian simple stitches. My sample has 10 ch and 10 tss x 2 rows. 

Short Row FwdP: Worked as a normal tss row – Tss to end, pick up loop in edge st – 10 loops on hook.

Short Row RetP: Ch 1, *yarn over, pull through 2 loops* 4 times – 6 loops remain on hook. Place a marker in the 1st loop on the hook (closest to the hook). The stitch directly under the marked st is the first edge st of the short row.

Row above the short row:

FwdP: 3 tss, pick up a loop in edge st – 10 loops on hook.

RetP: Ch 1, *yarn over, pull through 2 loops* until you reach the marked st.

(Remove hook from live loop [blue], insert hook into vertical bar [pink] below the marked st [green], reinsert the hook into the live loop (blue), yarn over, pull through three loops), *yarn over, pull through 2 loops* until 1 loop remains on hook.

The instructions within the (brackets) above create a kind of twisted or crossed stitch.

2nd row above short row: Worked as a row of tss except when you get to the twisted/crossed stitch, insert the hook under both loops of that stitch and treat those loops as one tss.

Left handed view


Return Pass Short Rows Demonstration

Right handed view only.

Centre Short Rows


Centre short rows are used to make the middle of a piece of crochet taller than the edges. Before trying centre short rows, I recommend you practice the techniques used in both forward and return pass short rows first.


There are two main variations to making centre short rows. First method is when the first short row is the narrowest and each short row gets wider (bottom swatch on below image). I prefer this technique on a drop shoulder sweater or for raising the back of a yoke at the neck. This is because the piece curves along the foundation row edge.


The second method is when the first short row is the widest and each short row becomes narrower (top swatch on below image). I prefer this technique on a curved bottom of a tool-down sweater. This is because the piece curves along the bind off row edge.

centre short rows Tunisian Crochet tutorial


The techniques used for both methods are identical but are worked in a different order. The curving effect you can make with the two variations changes the look of the fabric and the method you use will depend on where you want your curved edge to be - closer to the foundation row or the bind off row.


There can be a lot of counting involved in making centre short rows. A good designer will give you all the different counts required to check the accuracy of your work, but you can avoid all the counting by using markers and understanding how much wider or narrower each short row will be. 


In the swatches for this lesson, each short row becomes either narrower or wider by 2 stitches on each side: 4 sts wider or narrower per centre short row. 


You can experiment with different shaped curves by making short rows wider or narrower by larger numbers. For example, if you make short rows wider by 5 sts on each FwdP and RetP (10 sts wider per short row), your curve will be more subtle than the one in this lesson.

Narrow to wide short rows

You will need two markers to make this swatch.

Written instructions and a table are provided below.

Row 1 FwdP: Ch 20, starting with the second loop from hook, pick up a loop in the back bump of each ch ­– 20 loops on hook. 

Row 1 RetP: Ch 1, *yarn over, pull through 2 loops* until 1 loop remains on hook.

Row 2 FwdP: Tss to end, pick up a loop in edge st ­–20 loops on hook. 

Row 2 RetP: As per Row 1 RetP.

Row 3 FwdP: 11 tss – 12 loops on hook, 8 sts are not worked. PM in front and back loops of last st worked. The 1st FwdP short row is complete.

Row 3 RetP: *Yarn over, pull through 2 loops* 3 times – 9 loops remain on hook. PM in live loop. The 1st RetP short row is complete.

The next instructions are written generically. Refer to the table below for the appropriate stitch counts. The point of writing the instructions this way is to get used to using markers. Each FwdP and each RetP is 2 sts wider than the row before it. 

Row 4-5 FwdP: Tss up to the marked st, tss using both front and back loops of marked st, 2 tss. ­Move marker up to front and back loops of last st worked. 

Row 4-5 RetP: *Yarn over, pull through 2 loops* to the marked st, work the twisted/crossed RetP stitch as demonstrated in Return Pass Short Rows tutorial, *yarn over, pull through 2 loops* twice more.

Row 6 FwdP: Tss to end, pick up a loop in edge st – 20 loops on hook.

Row 6-7 RetP: As per Row 1 RetP.

Row 7 FwdP: Tss to end, pick up a loop in edge st – 20 loops on hook. 

Bind off: Sl st bo in each st, fasten off and cut yarn.

Wide to narrow short rows

Right handed view only.

You will need 6 markers to make this swatch.

Row 1 FwdP: Ch 20, starting with the second loop from hook, pick up a loop in the back bump of each ch ­– 20 loops on hook. 

Row 1 RetP: Ch 1, *yarn over, pull through 2 loops* until 1 loop remains on hook.

Row 2 FwdP: Tss to end, pick up a loop in edge st ­–20 loops on hook. 

Row 2 RetP: As per Row 1 RetP.

Row 3 FwdP: 15 tss – 16 loops on hook, 4 sts are not worked. PM in front and back loops of last st worked. The 1st FwdP short row is complete.

Row 3 RetP: *Yarn over, pull through 2 loops* 11 times – 5 loops remain on hook. PM in live loop. The 1st RetP short row is complete.

The next instructions are written generically. Refer to the table below for the appropriate stitch counts. The point of writing the instructions this way is to get used to using markers. Each FwdP and each RetP is 2 sts narrower than the row before it. 

Row 4-5 FwdP: Tss up to 2 sts before the marked st (1 tss and the marked edge st are unworked from row before). PM in front and back loops of last st worked. 

Row 4-5 RetP: *Yarn over, pull through 2 loops* to 2 sts before the marked st. PM in live loop.

Row 6 FwdP: *Tss up to marked st, tss using both front and back loops of marked st* 3 times, tss to end, pick up a loop in edge st – 20 loops on hook. 

Row 6 RetP: Ch 1, *yarn over, pull through 2 loops up to the marked st, work the twisted/crossed RetP stitch as demonstrated in Return Pass Short Rows tutorial*  3 times, *yarn over, pull through 2 loops* until 1 loop remains on hook.

Row 7 FwdP: Tss to end (inserting hook under both loops of the 3 twisted/crossed sts), pick up a loop in edge st – 20 loops on hook. 

Row 7 RetP: As per Row 1 RetP.

Bind off: Sl st bo in each st, fasten off and cut yarn.