

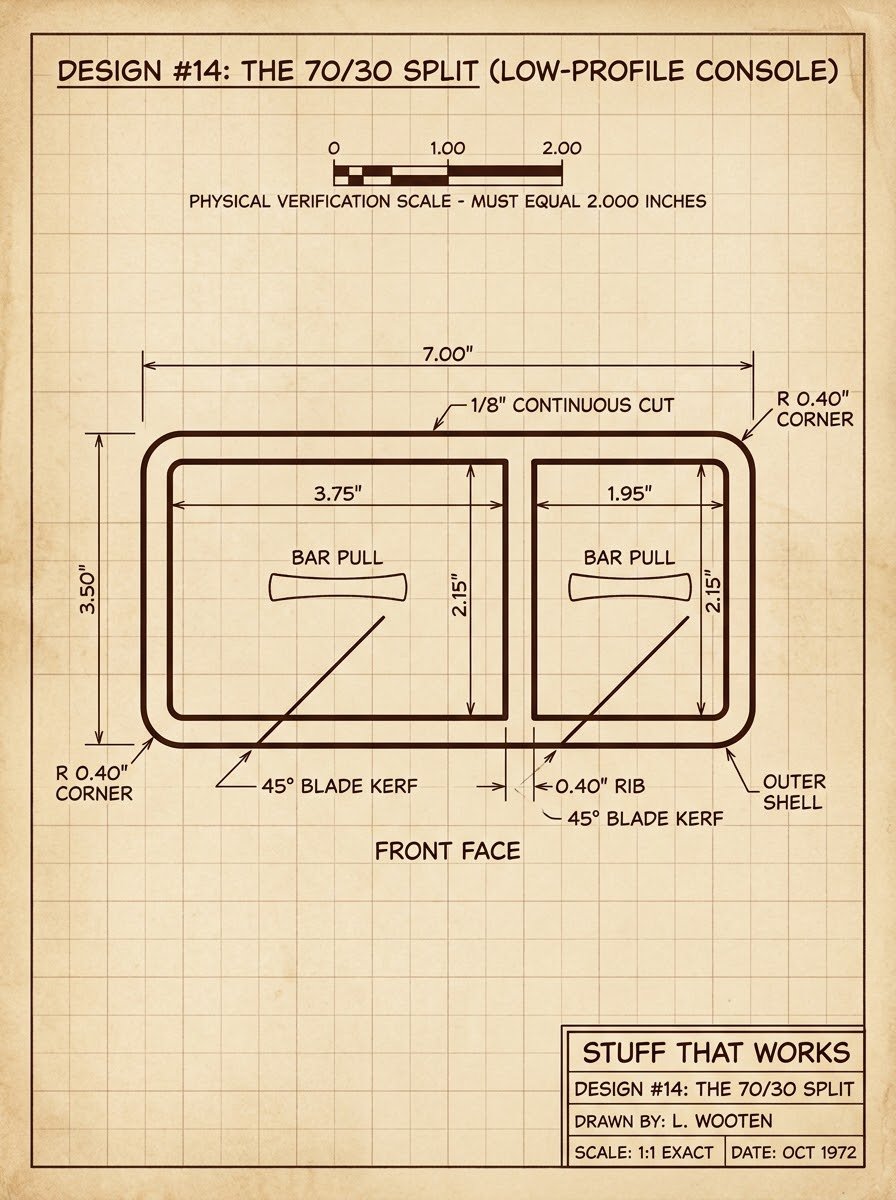
# Why 1:1 Scale Printable Bandsaw Box Patterns Beat Freehanding
Ask five woodworkers how they design their bandsaw boxes, and at least two will tell you they just take a chunk of firewood, grab a pencil, sketch a couple of wild swoops on the face, and head straight to the bandsaw.
There is certainly romance in spontaneous woodworking. But if you have ever spent an entire afternoon milling, planing, and gluing up an expensive blank of walnut, cherry, and maple—only to hear your 3/16-inch blade squeal, bind, and scorch the wood inside a turn that was drawn too tight—you know the heartbreak of freehand guesswork.
Here is why utilizing precision **1:1 scale printable bandsaw box patterns (PDF)** is the smartest move for your workshop, how it elevates the craftsmanship of your finished pieces, and how to get the most out of digital woodworking templates.
---
## The Hidden Traps of Freehand Bandsaw Box Design
Freehand sketching looks effortless on video, but wood has physical constraints that pencil sketches routinely ignore:
### 1. The Minimum Radius Trap
Every bandsaw blade has a minimum cutting radius determined by its width:
- **1/4-inch blade:** Minimum radius of ~5/8 inch
- **3/16-inch blade:** Minimum radius of ~5/16 inch
- **1/8-inch blade:** Minimum radius of ~3/16 inch
When sketching freehand, it is easy to draw sweeping curves that suddenly dip into an acute 1/4-inch radius corner. When your blade hits that corner mid-cut, it binds, twists, burns the wood, or pulls out of its guide blocks. A professionally drafted 1:1 template respects real-world blade geometry, ensuring all curves flow without exceeding turning tolerances.
### 2. Inconsistent Wall Thickness
A bandsaw box relies on visual balance. If the top wall of your carcass is 1/2 inch thick while the bottom wall tapers down to a fragile 1/8 inch, the box looks lopsided and structurally weak. Printable templates ensure consistent 3/8-inch perimeter walls, giving your finished box substantial weight and balanced proportions.
### 3. Drawer Stop and Clearance Issues
When you cut a drawer cavity freehand, you must also consider how that drawer will sit when closed. Without calculated drawer stops or bottom-lip geometry, drawers can sag, tilt forward, or push entirely through the back if the rear plate isn't carefully offset.
---
## The Advantages of 1:1 Scale Full-Size PDF Templates
Using dedicated, full-size printable PDF templates bridges the gap between artistic woodworking and mechanical precision:
- **True 1:1 Scale (Zero Scaling Guesswork):** You print the PDF at 100% on standard letter paper, trim the borders, and stick it directly to your wood. Every dimension, radius, and centerpoint is already mapped out.
- **Engineered Entry & Kerf Lines:** High-quality plans clearly indicate where your blade should enter the block to minimize visible seam lines. An entry cut made on an angle along the grain is almost imperceptible once glued and sanded.
- **Repeatability:** When family, friends, or craft show customers ask for another box, you can reproduce your best-selling designs identically.
- **Cohesive Collections:** A curated pattern bundle lets you build complementary sets—such as a single-drawer jewelry valet, a double-drawer dresser caddy, and a multi-drawer trinket chest—sharing consistent design DNA.
---
## 4 Pro Tips for Applying Printable Templates to Wood
To get crisp, clean cut lines without ruining your wood surface, follow this workshop routine:
1. **Verify Printer Scaling:** Always print with your printer settings configured to **"Actual Size"** or **100% Scale**. Never choose "Fit to Page" or "Shrink Oversized Pages," which can alter the outer dimensions by 5% to 10%. Check the reference scale line printed on the template with a metal shop ruler before cutting.
2. **The Painter’s Tape Shield:** Apply overlapping strips of standard 2-inch blue painter’s tape across the reference face of your wood block.
3. **Light Adhesive Tack:** Use a light spray of multi-purpose adhesive (such as 3M 77 or Elmer’s CraftBond) on the back of the printed paper. Let it sit for 30 seconds to become tacky, then press it firmly onto the painter's tape.
4. **Clean Removal:** Once all interior and exterior cuts are finished, peel the blue tape off. The paper comes with it instantly, leaving zero sticky residue, no gummy paper pulp on your wood, and no solvent clean-up required.
---
## Discover the "Stuff That Works" Difference
If you are looking for classic, clean-lined templates inspired by mid-century architecture and vintage drafting blueprints, explore the [9 Bandsaw Box Pattern Bundle on Payhip](https://payhip.com/b/EFgd0).
Drawn with bold, high-contrast cutting paths and clean single-line radiuses, each plan in the catalog provides full-scale printouts for proven designs:
- **The Classic Flat:** The benchmark single-drawer box (6.5" W x 4.0" H).
- **The Tapered Block:** Modern angled profiles with clean lines.
- **The Arched Crown:** Soft upper arcs paired with flat bottoms for accent feet.
- **The Twin Core & Classic Stack:** Double-drawer patterns for advanced makers.
- **Bonus Content:** Modular templates for plinth bases, bun feet, angled legs, and matching wooden drawer pulls.
Download the printable PDFs instantly, head to your shop, and make sawdust with total confidence.
Comments ()