


There are many ways to finish an overlay mosaic project. You can weave in all the ends, create tassels or enclose all the ends in an envelope border. I like to use an envelope border as I think it gives the most polished finish.
In this example I will use 2 contrasting yarns, but I recommend using the same colour yarn throughout.
NOTE: all dcs are worked through both loops for the border.
Using a hook size down from the main piece, slip stitch the entire way around the front side of the piece. Along the edges, ensure you have one stitch per row and stitch between the mosaic stitches and the ending and joining stitches.

Cut your yarn and fasten off. Your piece will now look like this:


Starting at the back side of the piece join your yarn into the back of any of the slip stitches and chain 2. Dc into every slip stitch until you reach the corner.
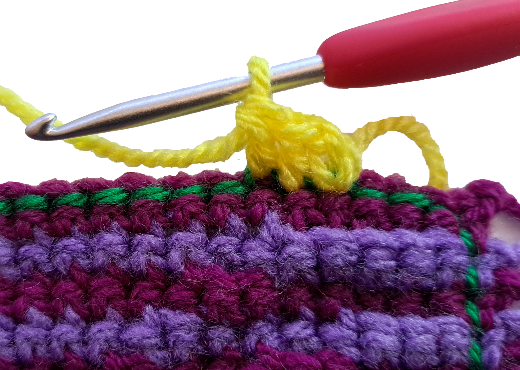
In the last stitch of the first edge, complete 2 dc then chain 2. Complete 2 dc into the first stitch of the next edge.
Continue all the way around your piece and join to the top of your initial chain 2 with a slip stitch.
Chain 2 and dc all the way to the next corner. In the chain 2 space at the corner, complete 2 dc, chain 2, 2 dc. Continue all the way around your piece and join to the top of your initial chain 2 with a slip stitch. Cut your yarn and fasten off.

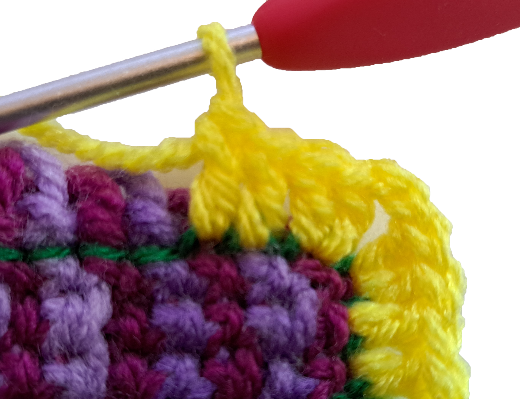
Now flip your work and join your yarn to any of the slip stitches on the front side of your work and chain 2. Dc into every stitch until you reach the corner: in the last stitch of the first edge, complete 2 dc then chain 2. Complete 2 dc into the first stitch of the next edge. Continue all the way around your piece and join to the top of your initial chain 2 with a slip stitch.
Chain 2 and dc all the way to the next corner. In the chain 2 space at the corner, complete 2 dc, chain 2, 2 dc. Continue all the way around your piece and join to the top of your initial chain 2 with a slip stitch. Do not cut your yarn – insert a stitch marker into your working loop to hold it in place.

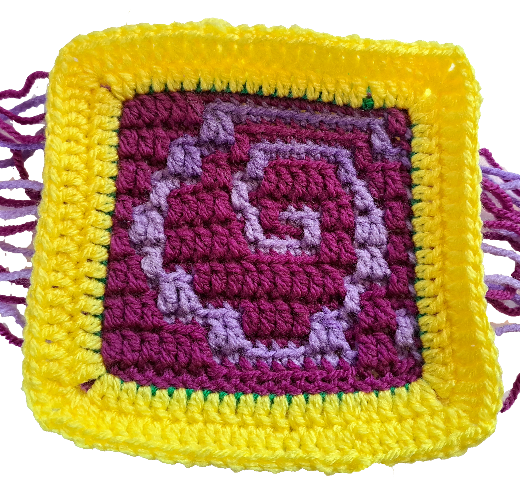
Your piece will now look like this.
Trim all your ends to about 2cm long.

Picking up your yarn where you left off and working from the front side of your piece, slip stitch all the way around through the back loop of the front side and the front loop of the back side. These are the loops closest to each other. As you work down the edge, tuck all your ends into the envelope you’re creating. At each corner, sip stitch into each of the 2 chain stitches.

Having worked all the way around, slip stitch into your first stitch, cut your yarn and fasten off. Your border is now complete.

Comments ()