

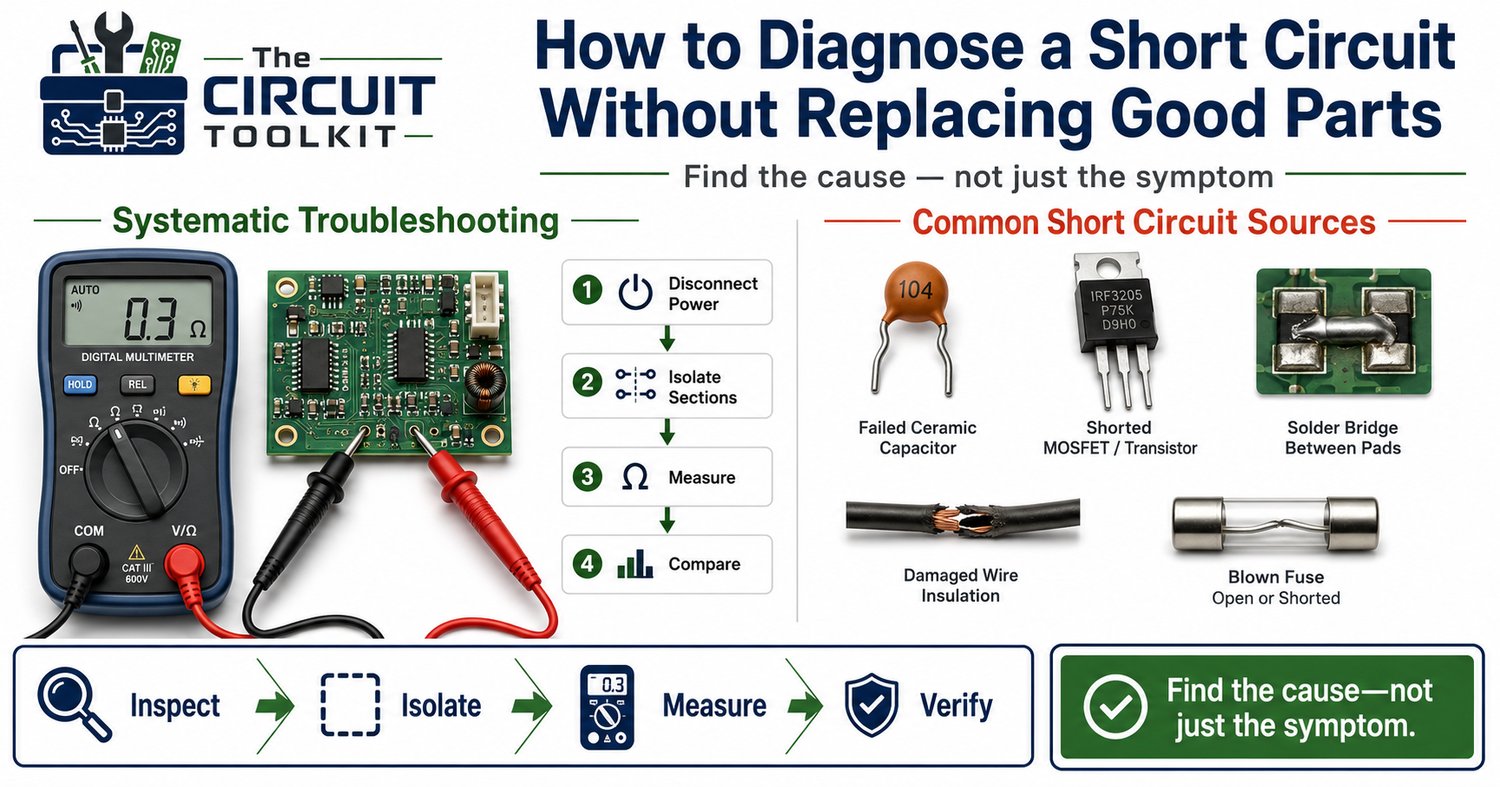
One of the fastest ways to waste time during an electronics repair is to assume the first component that looks suspicious is the one that failed.
A blown fuse.
A burnt resistor.
A damaged connector.
These are often symptoms, not the actual cause.
Many technicians immediately begin replacing parts, only to discover that the new component fails exactly the same way because the original short circuit is still present.
Professional troubleshooting follows a different approach.
Instead of replacing parts, experienced technicians isolate the fault one measurement at a time until the short circuit reveals itself.
What Is a Short Circuit?
A short circuit is an unintended low-resistance path that allows current to bypass the normal load.
Instead of current flowing through the designed circuit, it takes an easier path.
The result can include:
- Blown fuses
- Burned PCB traces
- Overheated wires
- Damaged semiconductors
- Tripped power supplies
- Smoke and component failure
Finding the actual location of that unwanted path is the real troubleshooting challenge.
Step 1: Disconnect Power Safely
Before making resistance or continuity measurements:
- Disconnect all power sources.
- Remove batteries if possible.
- Discharge large capacitors safely.
- Verify that hazardous voltages are no longer present.
Resistance measurements should never be performed on energized equipment.
Step 2: Confirm the Short Exists
Set your multimeter to resistance or continuity mode.
Measure between the supply rails or between the suspected shorted conductors.
Keep in mind:
- A true short generally measures only a few ohms or less.
- Some circuits naturally have low resistance because of transformers, motors, relay coils, or large capacitor banks.
- Always compare your reading with the schematic or a known-good board when available.
Don't assume every low-resistance reading indicates a fault.
Step 3: Divide the Circuit Into Sections
Rather than testing every component individually, separate the circuit into logical sections.
Disconnect:
- Connectors
- Plug-in modules
- Daughter boards
- Loads
- Cable assemblies
After each section is disconnected, measure again.
If the short disappears after disconnecting one section, you've immediately narrowed the search dramatically.
This "divide-and-conquer" approach is much faster than randomly replacing parts.
Step 4: Look for Common Failure Points
Many short circuits occur in predictable locations.
Pay special attention to:
- Electrolytic capacitors
- Ceramic bypass capacitors
- MOSFETs
- Power transistors
- Rectifier diodes
- Voltage regulators
- Damaged wiring insulation
- Metal debris inside enclosures
- Burned PCB traces
These components frequently fail by becoming electrically shorted.
Step 5: Compare Measurements
One of the best troubleshooting habits is comparison.
Measure similar components that are known to be functioning correctly.
If one capacitor measures nearly zero ohms while identical capacitors measure much higher, you've found an excellent suspect.
Comparisons often reveal abnormalities much faster than relying on absolute values alone.
Step 6: Don't Ignore Visual Inspection
Many faults can be found before taking a single measurement.
Look carefully for:
- Burn marks
- Cracked IC packages
- Discolored resistors
- Melted insulation
- Corrosion
- Loose hardware
- Foreign metal objects
- Solder bridges
Even a tiny solder splash can create an intermittent short that's difficult to detect electrically.
Step 7: Verify the Repair
After replacing the failed component:
- Measure resistance again.
- Confirm the short has disappeared.
- Power the circuit gradually if possible.
- Monitor current during startup.
- Verify correct operating voltages.
Never assume the repair is complete simply because the equipment powers on.
Confirm the entire circuit operates normally under load.
Common Mistakes
Many troubleshooting sessions become longer because of simple mistakes:
- Replacing parts before confirming they're defective.
- Measuring resistance on a powered circuit.
- Ignoring connectors and wiring.
- Forgetting that multiple failures can exist.
- Assuming the blown fuse is the problem instead of asking why it opened.
Every measurement should answer a specific question.
If you don't know what question you're asking, you're probably guessing.
Think Like Current
Current always wants the easiest available path.
When a short develops, ask yourself:
- Where should the current be flowing?
- Where could it be bypassing the load?
- What component could create that alternate path?
Thinking this way transforms troubleshooting from trial-and-error into a logical investigation.
Conclusion
The fastest technicians aren't the ones who replace components the quickest—they're the ones who isolate problems systematically.
By disconnecting sections, comparing measurements, inspecting carefully, and verifying every repair, you'll locate short circuits faster while avoiding unnecessary part replacements.
The goal isn't simply fixing today's fault.
It's developing a troubleshooting process that works every time.
If you're building your troubleshooting skills, the Beginner Circuit Troubleshooting Guide from The Circuit Toolkit provides a practical, step-by-step workflow for diagnosing shorts, opens, voltage problems, and intermittent faults using the same logical process professional technicians use. It complements the store's multimeter and Ohm's Law reference guides by helping you decide which measurement to make next instead of guessing.