You may are a pro of this, but if not, just continue reading...
You have to add the files in Snapmaker Orca, before slicing.
Steps:
A) have the (main) object on the plate
A.1. open the 3MF file.
A.2. only for Viewer and Snap parts: they have several obejcts on the Plate, delete them until there is only one left. Rotate 90 degrees counter-clockwise.
A.3. Center the object !
A.4. switch to Objects view (instead of Global view) on the left side at Process.
B) do for each corresponding color file:
B.1. Right click on the main object and Add Part / Load / choose one of the color files
B.2. Center the recently loaded file (right click, Center)
B.3. Change filament for the recently loaded file (right click, Change filament)
C) repeat B) for all color files.
C.1. Always start Add the next color by clicking on the main part, not on one of the color parts.
C.2. I suggest adding color files by color majority: first orange, then gray/black
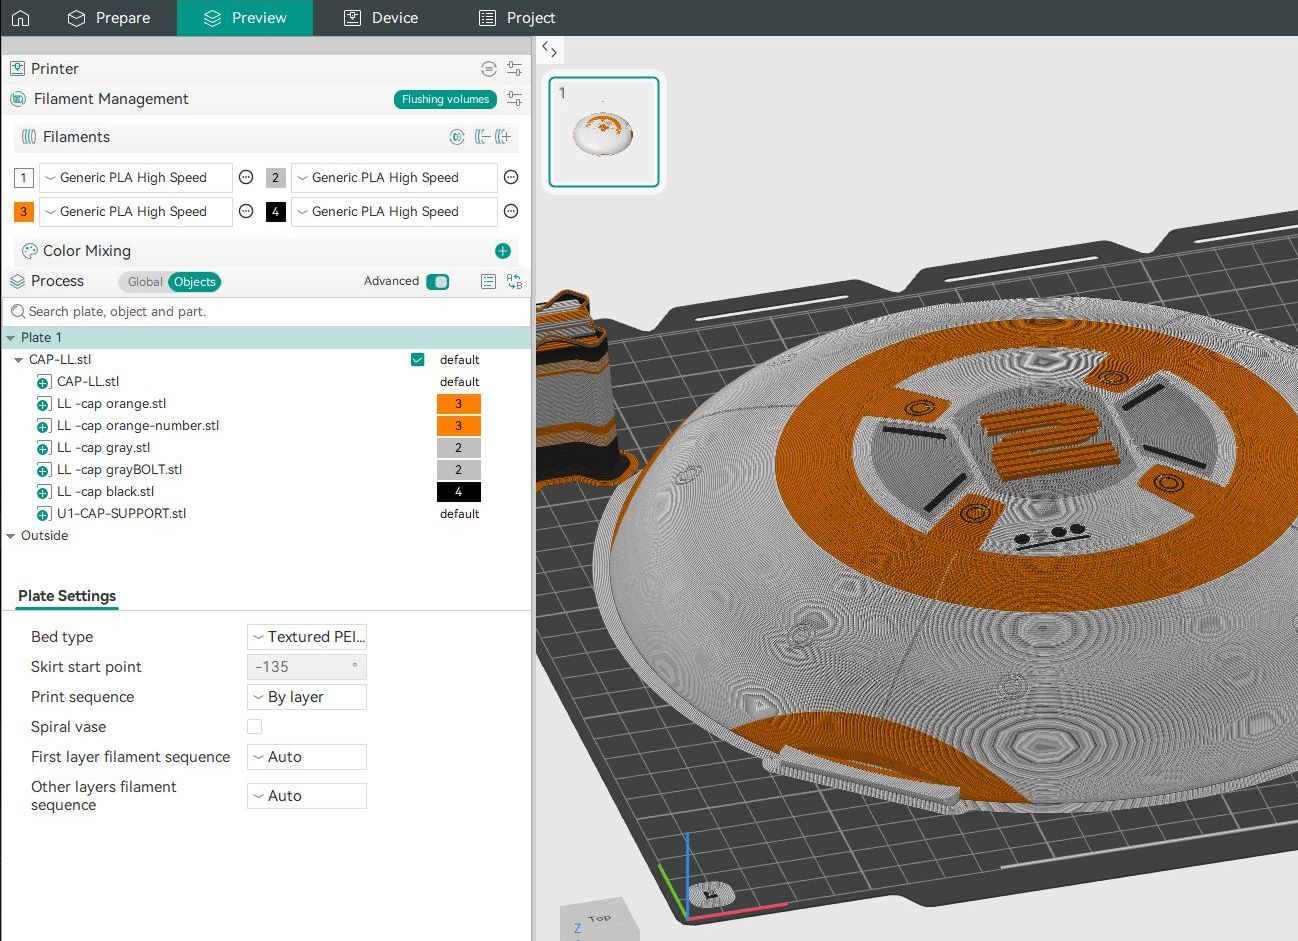
C.3. After you added successfuly, they have to be one(!) subassembly - see the picture below
D) check print parameters
D.1. all parameters should be intact, since you started from the 3MF file (eg. including variable layer height).
D.2. check the wipe-tower (is it OK for your filaments (size, mostly)
D.3. check if the major print parameters (I described for the original files) are set, like variable layer height, support, speed.
E) tips
E.1. you may notice dots or corner-line marks in each files (at left lower / right upper corner), they help proper centering of colors.
E.2. you can print in color several of the same object in one go: eg. 2 snaps on one plate. When you are done with adding colors to the first object ( B) and C) ) you can move the entire subassebmly aside on the plate. And this way, you freed up the center of the plate to repeat the add-center excercise for the second object.
E.3. Variable height: Orca preserves variable height settings as long as the Sub-group/Assembly exists. In my case this impacts 2 files:
E.3.a. CAP: you can preserve the existing variable height in the 3MF file. The cap 3MF file has 3 files: the support, the cap and the number. Cap and number consist of one subassembly. So, first add a color file to the 'cap' and after that remove the 'number' file, but not vica versa.
E.3.b. SNAP: you can not preserve my variable height settings, because the subassembly is the 8 snaps on the plate. But you can create a new variable layer height to the color-added snap before slicing, I am pretty sure. It probably will be nicer than mine ;)
E.4. I experienced only one 'strange' behaviour of adding colors with my v2.3.5 Orca: when I added color files to the object, sometimes it loaded on the top of the existing object (despite proper centering), instead of loading on plate level. Maybe I did something wrong. I found an easy way to fix: I just 'Split' the assembly and after that 'Assemble' again.
Happy customizing!
LIKO