Replacement work
Historical replacement work of sandblasting art by glass artist Darren Burch. Making sure that patterns line up can certainly be a challenge. The frame wasn't your standard wooden frame; instead, it was completely made of steel, probably stainless steel. Unfortunately for me, I wasn't given a glass sample of the broken piece to match up the pattern to its outside edges. The glass was inside a steel channel, so taking the rebate to where the pattern starts and finishes wasn't easy as it was hidden. Figuring out the width of the pattern was easy as it was centered. But the height of the pattern needed to be correct as it had to match and line up with its counterpart. Replacing both pieces, left and right, would have been so much easier. A rubbing was also taken on-site of the broken piece to keep both patterns consistent.
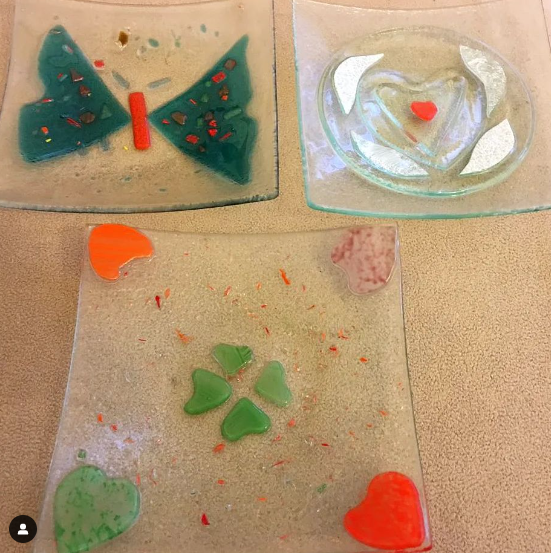
Glass fusion course
Berna, my wife, took us to a glass fusion course at Cam Ocağı Vakfi in Istanbul to learn all about it. I had never tried glass fusion before, but I found it very interesting, especially when they showed us how to add colour. So, what is glass fusion? Basically, you create a picture using broken pieces of coloured glass. You can also add different textures with other products designed for this type of work. If you only have clear glass, painting it with coloured paints is another option. All designs for glass fusion are later placed into a kiln for fusion. What happens in the kiln? You carefully place the glass into a kiln and, by adjusting the temperature, the glass pieces that sit directly onto a flatter piece of glass melt together, creating a picture. You can also manipulate the shape as it melts by placing it into a metal shape like a bowl or flat dish with sides.
Glass trophies
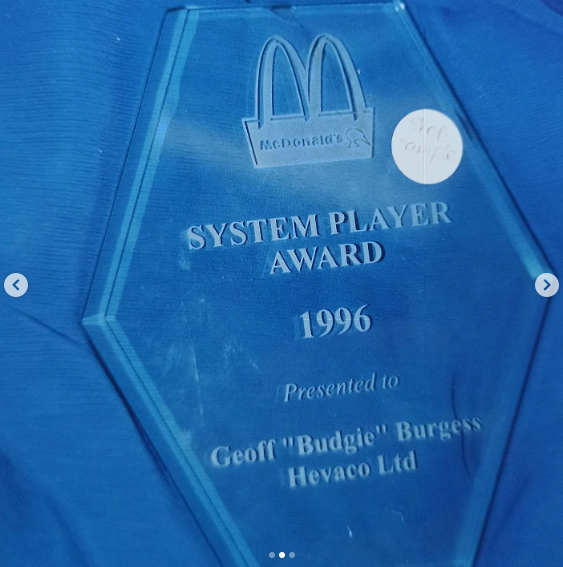
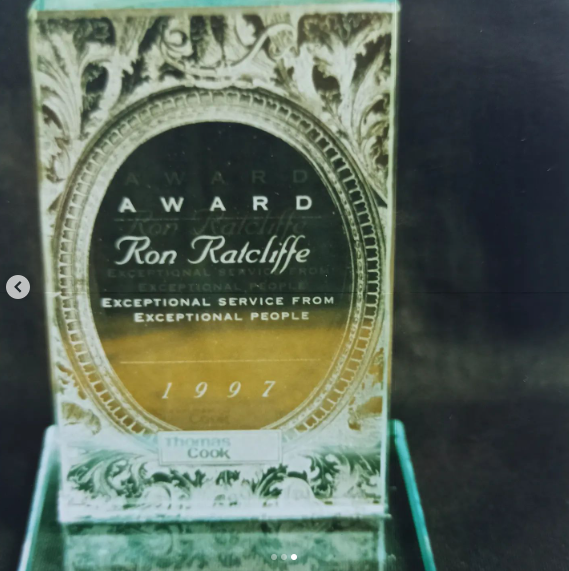
Here are some examples of glass trophies I created in the past. I never advertised this as one of my specialties since one of my best clients, who supported me throughout the years, was also a trophy maker for the entire region. It was essential for me to maintain a good relationship with them, not just because they were my good friends, but also because I didn't want to bite the hand that feeds me.
Glass trophies
I have always practiced respect for others. Unfortunately, in the business world, not everyone follows this principle. Two of my main glass suppliers once decided to go out on their own and took my clients without my knowledge.
Glass trophies
I started receiving complaints for work that I never did, and my sales dropped by over half. It took me almost three months to realize what was going on. Only someone who worked from the inside and whom I knew well told me the truth. Eventually, their business dissolved due to too many complaints, and like most, they came back after a year or two.
New Zealand Tui bird
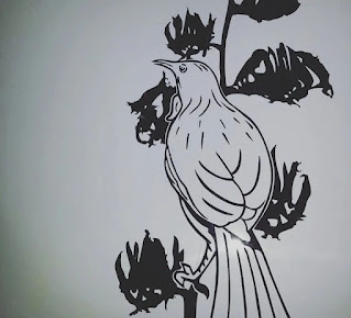
This is a sizable glass door panel featuring a clear image of a New Zealand native tui bird. I created this piece for a client in 2013. Interestingly, the black areas in this image represent the clear parts of the glass. It all depends on one's perspective. When we sandblast an image onto a piece of glass, it appears white in color. In this case, it's a negative image. A positive image, on the other hand, results from sandblasting only the picture itself, leaving the background untouched.
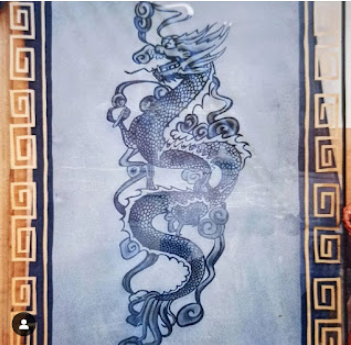
Glass ranch slider samples
(1992) Before you scroll past this post, allow me to provide some context for this sandblasted picture. During the setup of my second sandblasting business location, I found myself in need of sandblasted examples to showcase my capabilities to potential clients. Given my limited budget, I decided to repurpose an old ranch slider door that had been generously given to me. In fact, I had three of these ranch slider doors, each measuring 220cm in height and 120cm in width. If I happen to locate any other works from that time, I'll be sure to share them as well. The image of the Chinese dragon originally came from a business listing in the Yellow Pages. It was incredibly small, measuring only about 2.5cm by 1cm. Scaling it up to a larger size was a significant challenge. The entire process was executed by hand, without the use of a vinyl cutter (the old-school way). First, I applied masking tape to the glass surface and then freehanded the design onto the masking tape. Subsequently, I began the painstaking process of hand-cutting the pattern, leaving the majority of the cut parts to be removed later for sandblasting in the shaded sections (similar to airbrushing). Afterward, I painted the border in gold, and the remaining masking tape was removed, revealing the clear glass. From start to finish, this project consumed six hours. So, you could say I was quite adept at what I did.
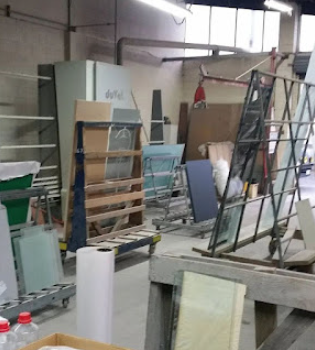
MGM glass workshop
MGM Glass Sandblasting: I recently stumbled upon this old photograph of my workshop. As you can observe, I had a multitude of projects, and I always saw them through independently. There were times when I juggled five or more jobs simultaneously, making solitary work quite a challenge. However, I had a well-established routine to manage the workflow. Occasionally, I would receive urgent requests, causing the order of tasks to shift. Consequently, I refrained from making promises unless absolutely necessary. As you peruse my previous posts, you'll gain insights into the various tasks required for each unique job.
splashback
This is not a pencil drawing. This is my imagination's sandblasted picture of Auckland harbor with Rangitoto Island in the background. The shaded parts were created by carefully lowering the air pressure to my sandblasting gun. I always preferred my sandblasting nozzle to be a little wider than usual when creating pictures like this because it creates a softer edge and makes it a lot easier for me to see the grit as it's coming out of the sandblasting gun nozzle. Sandblasting is the same as airbrushing, except I used garnet or aluminum oxide as my medium. This job was created for a client's kitchen splashback. The dark parts of this picture were the clear parts of the glass. I believe the glass was going to be used as a barrier between two walls to bring light through the hallway side into the kitchen.
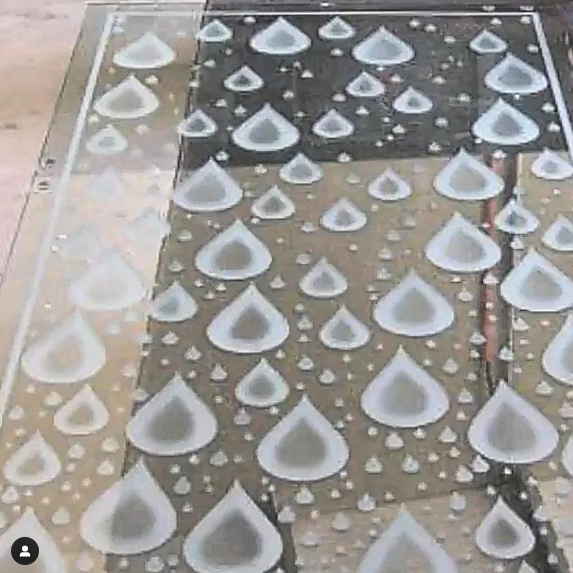
Showerscreen
Here's an old photo of one large shower screen with lots of sandblasted water droplets, all custom-made for my client. Each droplet has been individually sandblasted with a light shading effect around its outer edges.
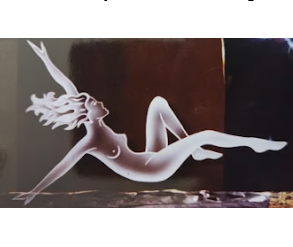
Nymphs
When people asked me about my industry, explaining it wasn't easy. Many couldn't grasp or understand my glass art practice unless I showed them a picture. Thankfully, Instagram came to the rescue. Back in the early 80s and 90s, we used to sandblast shower units with bullrushes, flax, and nymphs to provide privacy to occupants during showers. One of the companies we worked for was called Shower Right. This art piece you're seeing now was created for a client's boat. I did the sandblasting on a piece of brown reflective glass, without the bullrushes, to create a picture of this nymph. This was done in 1993.
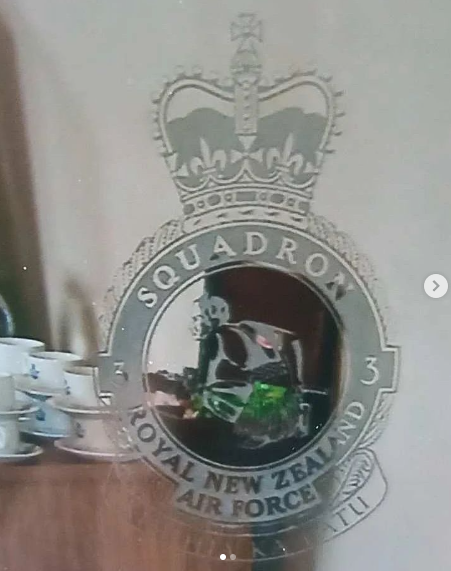
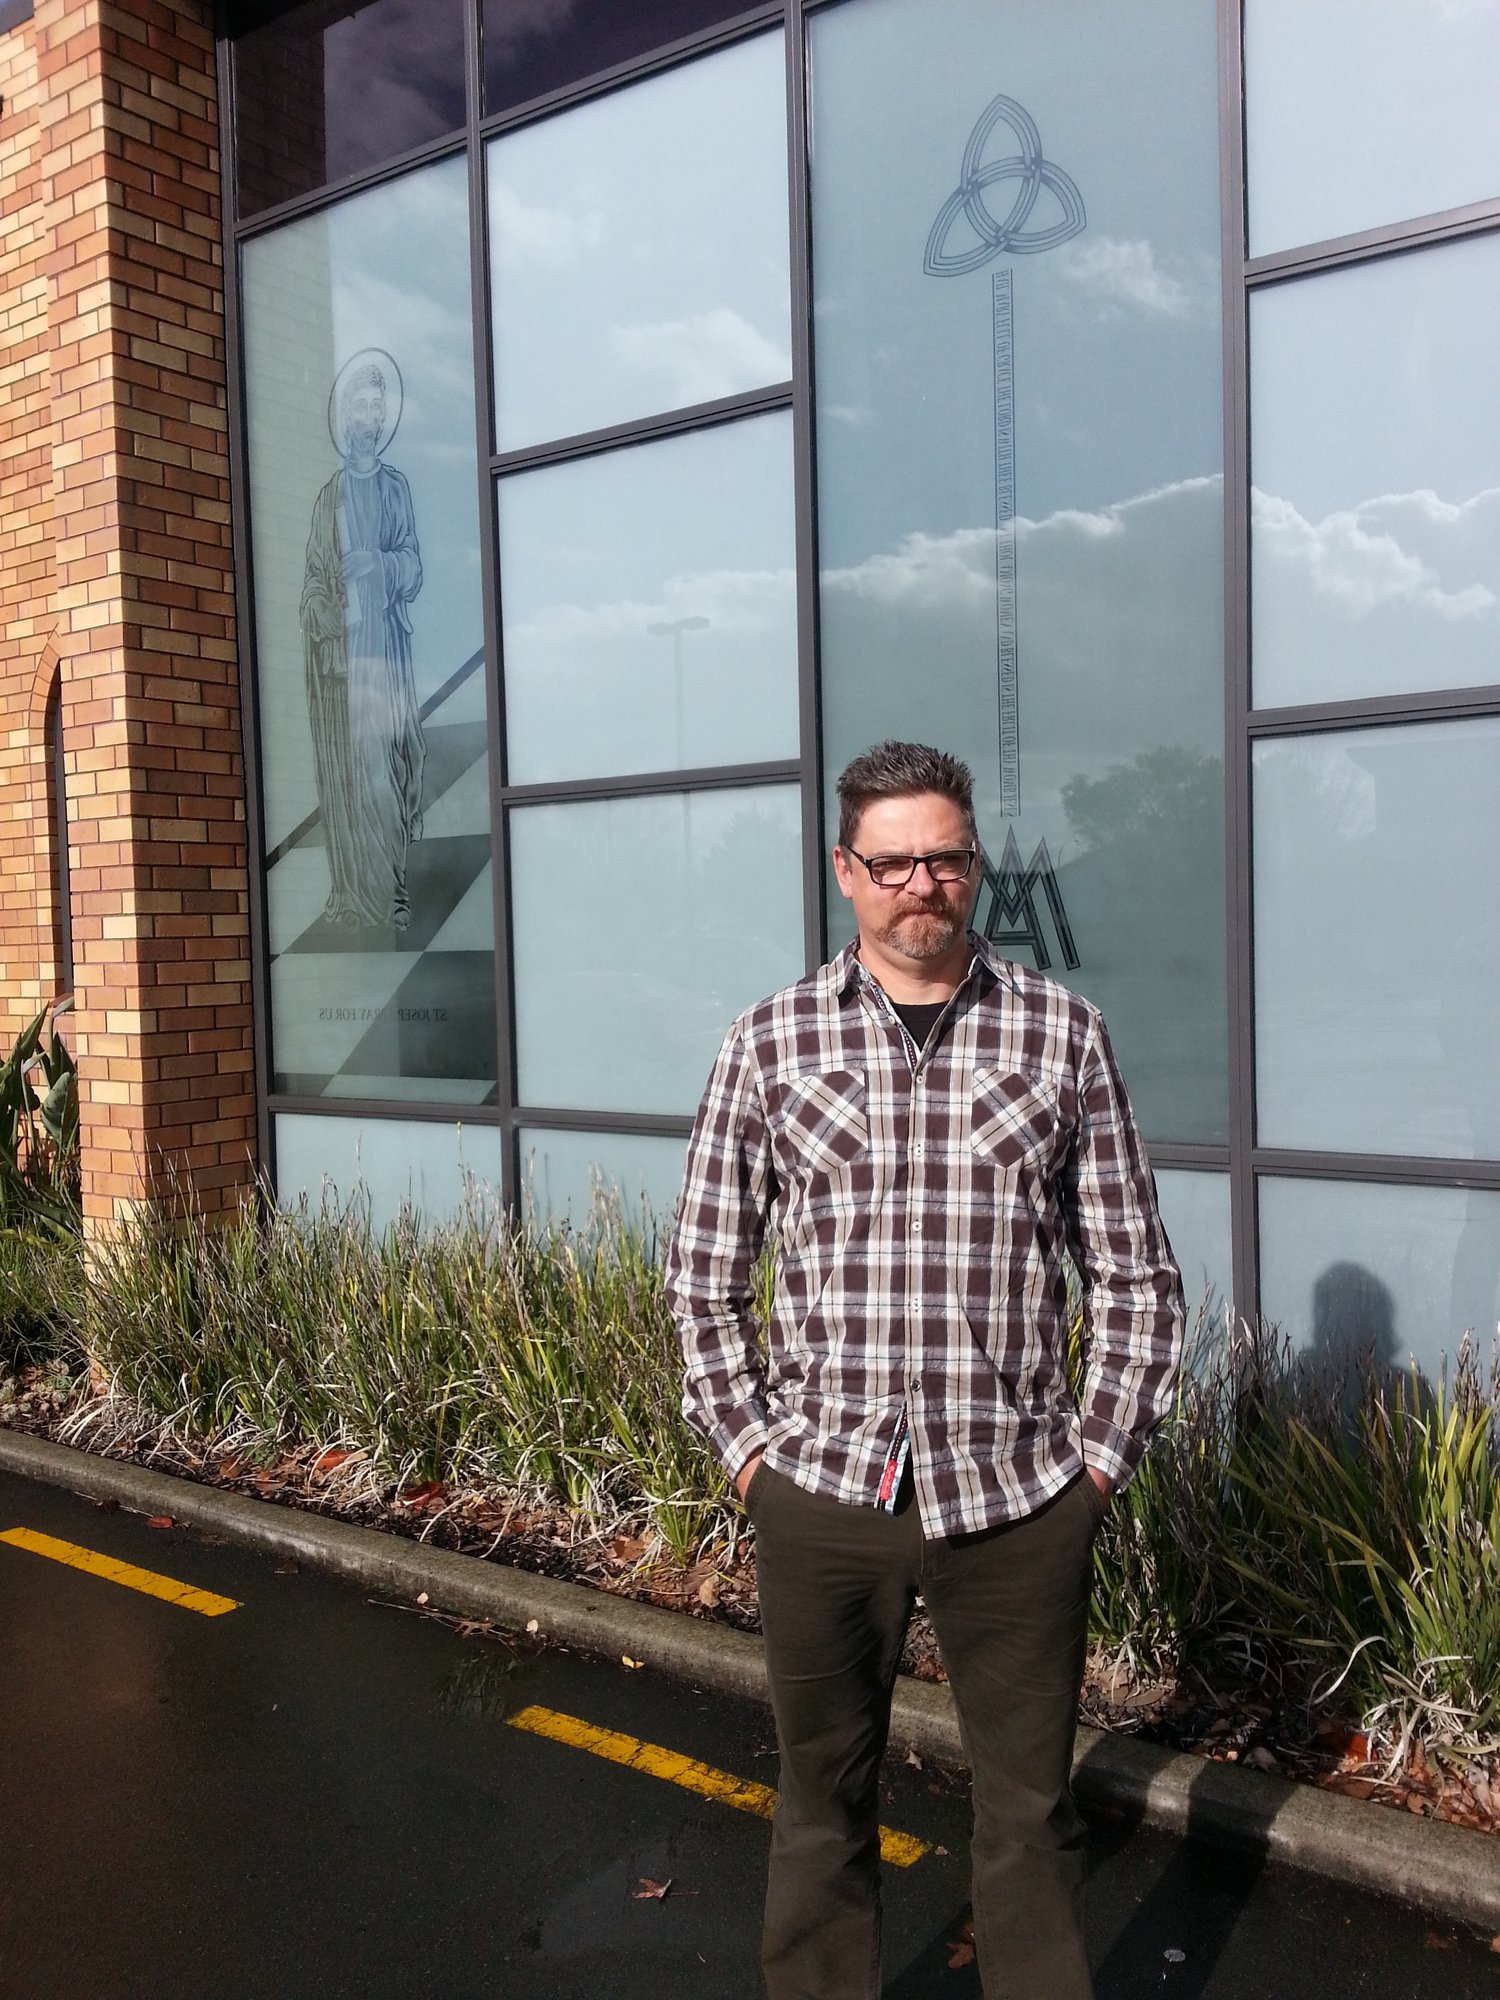
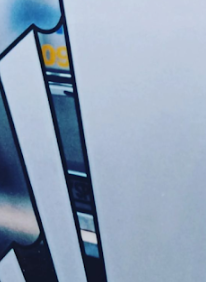
RNZF
Sometimes, I would take on jobs for the Royal New Zealand Air Force, such as replacement panels and other types of work. One particular job required me to replace two panels that were quite different from each other. I had received this job through a glass merchant. Interestingly, I had actually sandblasted the original panels when I was working for Maurice Glass Blasting back in 1991.
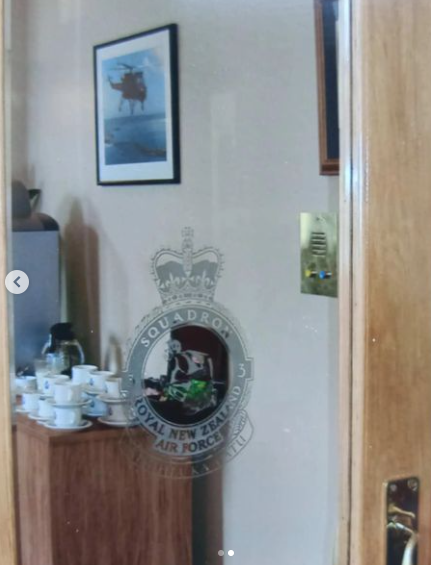
RNZF
At that time, the company was located on Browns Street in Ponsonby, but had since moved to Eaglehurst Road in Ellerslie. By taking on these diverse jobs and expanding my horizons, I was given the opportunity to learn more about other types of products in my trade. It was a great experience, and it allowed me to hone my skills and knowledge in the field.

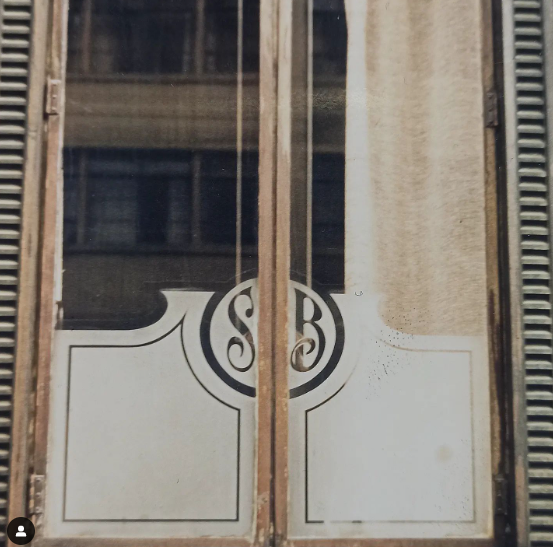
A challenging one
To be honest, I'm not sure how we managed to pull this one off. This job was done back in 1992. Every clear 'S' you see on those large glass panels was carefully cut out by hand by my business partner, myself, and our employees. I was the only one with the experience, so I commanded the operation. We placed a paper template of the design under the glass and added a thick layer of clear plastic film/tape on the surface of each glass piece. This allowed us to see the design from the other side, making the cutting easier. By looking down directly onto the glass, we could cut out the design according to the pattern that was showing from underneath. Now, that was the easy part.
A challenging one
Not only did we have to hand-cut the patterns for all of those large front windows, but we also had to create 12 large internal glass partitions with the same design. Thankfully, we didn't have to install all of them. The sandblasting process was extremely difficult as well. I had to sandblast each piece by hand, leaving a 60cm clear area at the top that gradually fades into the sandblasting area. Additionally, all the glass pieces had to match up since they were going to be placed side by side. However, for some unknown reason, I was able to blast them evenly without any issues. There's one more thing I need to add: vinyl cutters were only starting to emerge in the market at that time.
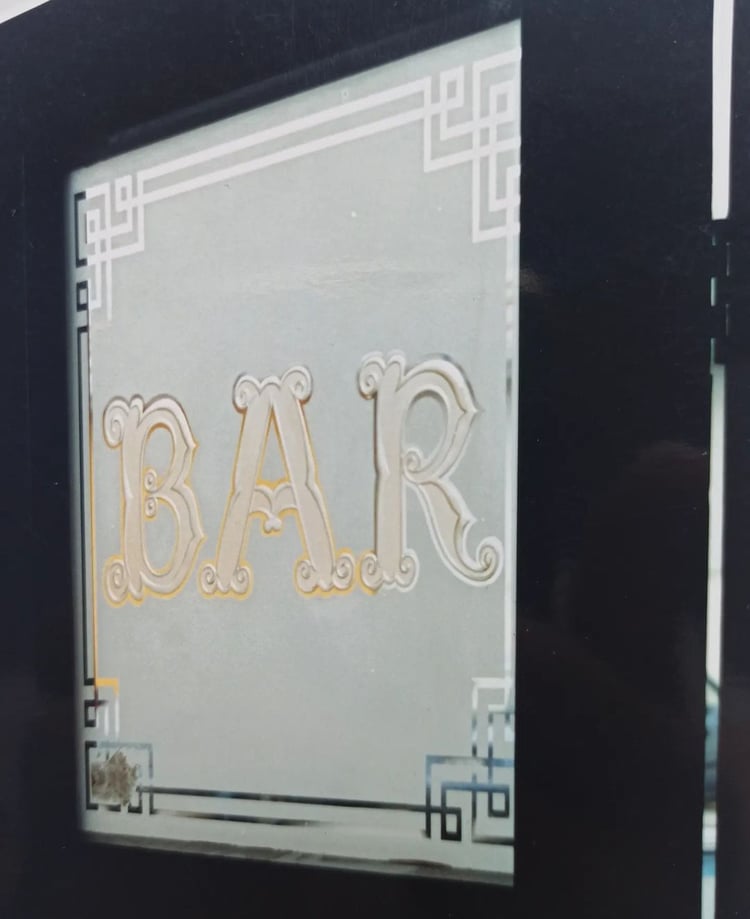
Fancy bar door
Here's something we did back in the late 80s and 90s: a bar door for those who had their own private watering holes at home. It was always fun to make because each one was personalized according to their liking. The words on this bar door were deep-blasted in different steps, and a clear gloss paint was added to give it an acid-etched look. The border around the outside edge of the glass had a negative pattern. It was pretty fancy, I must say. Cheers!
Custom made
Here's a sandblasting picture I did some time ago for a friend's mother. Unfortunately, it was broken during installation because the glass thickness was 3mm clear float. I wanted to use a thicker piece at the time, but the only size that would fit into their glass window frame was 3mm. So I had to make another one. I believe their window size was 70 x 60cm. Due to its thickness, glass of this nature couldn't be toughened, so I had it semi-hardened by Pilkington glass.
Custom made
I'm not sure why some houses back home in New Zealand had 3mm clear float installed in their windows. I guess it had a lot to do with cost or the era of the time. Some old houses built between the 1920s and 1990s had 3mm, 4mm, or 6mm glass installed for interior or exterior purposes. Safety glass options like laminated or toughened glass weren't available at the time, so there weren't any other alternatives, or perhaps they were not aware of them. However, there was a product called Georgian wired glass, which had wire mesh embedded in it to prevent shattering and increase its fire rating. Though it has been mentioned that this product has been banned due to safety concerns. Thankfully, new glass products and glass regulations have come into place.
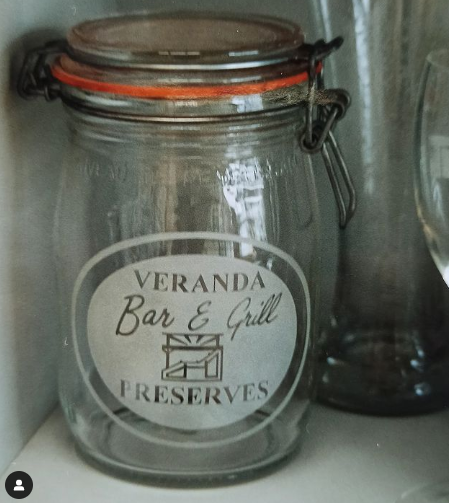
Veranda Bar & Grill
Our first business started back in 1992. It was located on Middleton Road in New Market, situated in an old abandoned industrial site. The memories of that time are still vivid in my mind, as if it were yesterday. My neighbor, who used to live right across from me, happened to be a friend of one of my business partners. One day, he suggested to his boss at the Veranda Bar & Grill, where he worked at the time, about the possibility of having some custom-made preservation jars. By the way, he was one of the most talented chefs I have ever known. Thus, I captured this picture as a reminder of those early days, as it represents one of our first jobs.
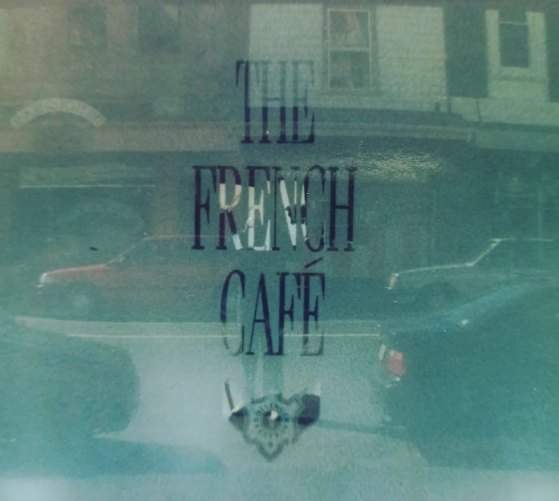
The French Café
Sandblasting can be a challenging endeavor, especially for those starting out on their own. It requires a comprehensive understanding of the trade's techniques. Moreover, when entrusted with sandblasting another person's glass, a high level of trust between you and your client is crucial. In most cases, the glass supplier would not want any mistakes to be made, given the costliness of replacing glass. Once the abrasive grit comes into contact with the glass, there is no turning back, making rectifying errors a daunting task. For those embarking on this trade, I recommend creating a checklist to ensure clarity and alignment with your client's expectations.
Winstone Glass in Mount Roskill forwarded us a job for the French Café. There's an old saying, "How long is a piece of string?" On our premises, we constructed an expansive sandblasting booth measuring 3 meters in height and 4 meters in length. Despite its size, we encountered a challenge when we received a glass piece that was taller than the booth. It was impossible to rotate the glass on its axis, and reaching certain areas for hand sandblasting proved difficult. Consistency and uniformity were vital for the blasting areas, and the design was executed in reverse, with the smooth side facing outward towards the street. We assisted with the glazing, ensuring only millimeters separated the glass from the sidewalk due to its height. It was undoubtedly a nerve-wracking experience for all involved. The final stage involved extensive cleaning of the sandblasted glass panel. This job took place on Symonds Street in Auckland in 1994.
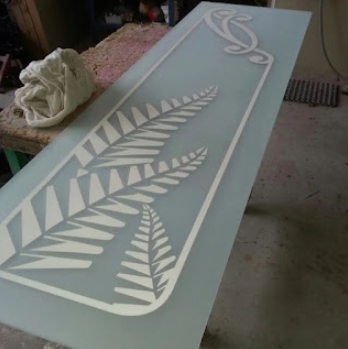
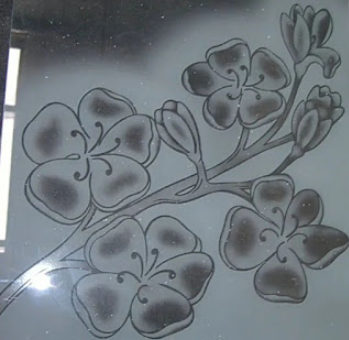
Decorative fern panel
While searching for a suitable fern design, I scoured numerous online resources. Regrettably, none of the available options seemed to align perfectly with my client's glass project. In response, I took matters into my own hands by modifying and manipulating fern designs that showed promise. Through this creative process, I ultimately crafted an entirely new design. The top portion of the design was entirely my own creation, driven by the necessity to seamlessly blend with the angles of the kitchen cabinet tops. These cabinets presented a unique challenge as they were angled, with one tilting to the left and the other to the right. All elements of the design were carefully sandblasted onto the glass, resulting in a clear and precise image. To maintain the integrity of the design and prevent unsightly fingerprints, I sealed the glass surface with meticulous care.
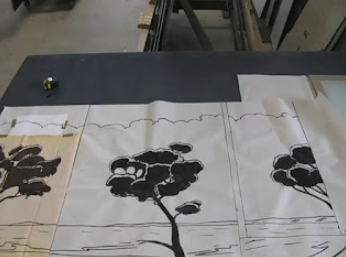
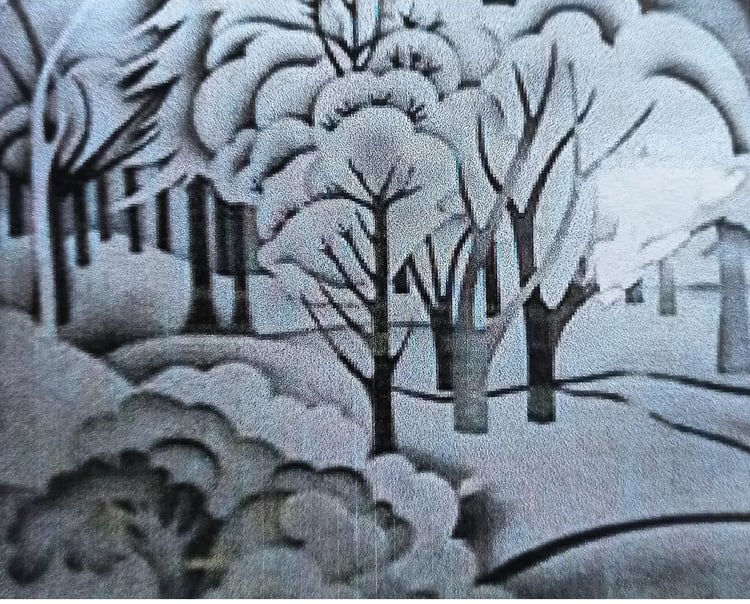
The sketch
Here's a preliminary sketch featuring Pohutukawa trees that I've prepared for a client's kitchen splashback. These iconic trees are often referred to as 'Christmas trees' due to their vibrant display of red flowers, which bloom early in the New Zealand spring season, from October to December, just in time for Christmas.
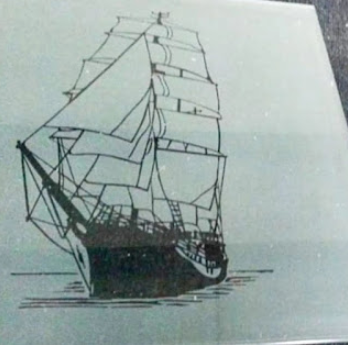
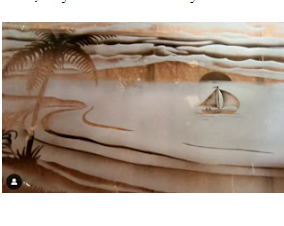
Ship ahoy
I regret to say that the quality of these pictures is less than ideal, and they are all that remains for me to share with you. I originally crafted these pieces for a customer, although I'm uncertain about their intended purpose. The images depict sailing vessels and have been meticulously sandblasted across the glass surfaces, with a protective seal applied. It's important to note that the darker areas in the images represent the clear sections of the glass.
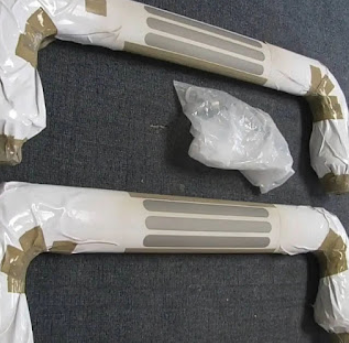
Alloy Yachts
It takes years to earn the trust and respect of some of the biggest companies in New Zealand. When additional work was required, many companies that implemented changes had a 'no responsibility' attitude in case things went wrong. This presented a significant challenge because no one was willing to risk their expensive products. Thankfully, my expertise extended beyond the immediate task at hand. Nothing was executed unless all specifications were met, and I consistently exceeded expectations. In some cases, I even took responsibility for the outcome. Thanks to this approach, companies had no reservations about entrusting me with their projects. One such company was Alloy Yachts, a major boat-building firm located in West Auckland. I used to handle the sandblasting of various products for them. Their architects would occasionally provide instructions for some of the most challenging jobs. To ensure we were aligned in our thinking, we often used samples as a way to confirm our mutual understanding. The image you're viewing depicts stainless steel steps for one of their smaller yachts, featuring sandblasted stripes to prevent slippage. Sadly, Alloy Yachts experienced a downturn in demand for large sailing yachts, coupled with challenges faced by New Zealand exporters. As a result, they quietly ceased their operations and closed their doors in April 2016, a fate shared by many other companies during that period.
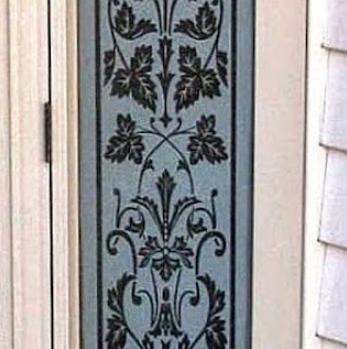
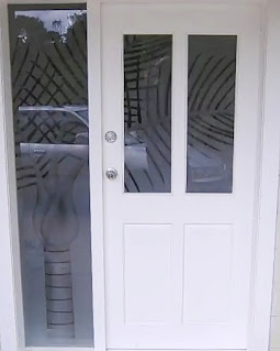
Replacement panels
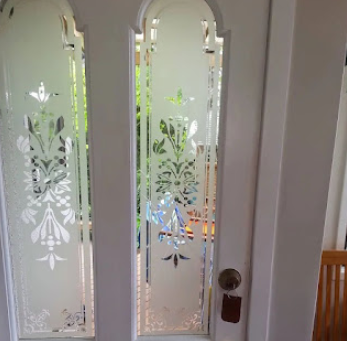
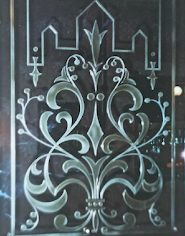
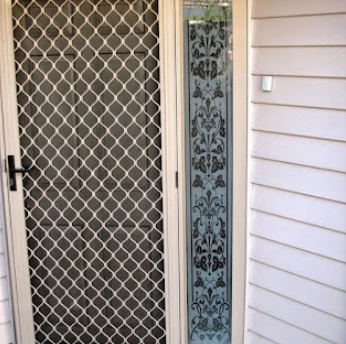
Here's another example of my craftsmanship: repairing a broken door panel by crafting a custom replacement. Working on glass door panels with intricate Corinthian designs is always a challenging task.
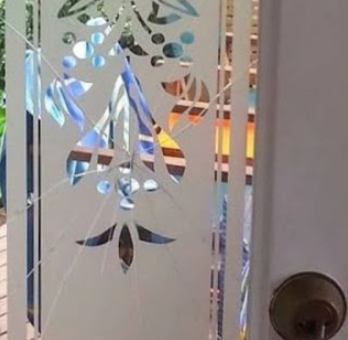
Replacement panels
Measuring the rebate accurately can be particularly tricky, especially when dealing with curved tops. It becomes even more demanding when you're replacing one panel of a pair, as the lines within the pattern must align perfectly with the existing one.
Time capsules.
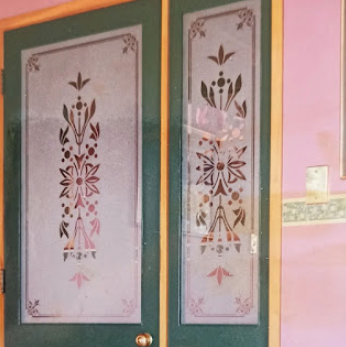
Sandblasting designs for doors constituted one of my primary sources of income. These entrance doors, which I worked on in the 1990s, featured what I believe to be an MS191 pattern. (MS stands for Maurice Sandblasting, and after the company was sold, I began working independently in 1992). Once the pattern was meticulously hand-cut, rubbings were taken and subsequently cataloged with their respective numbers. I continued to hand-cut patterns for 32 years, starting in 1984. It wasn't until a decade later, in 1994, that I discovered the vinyl cutting machine.
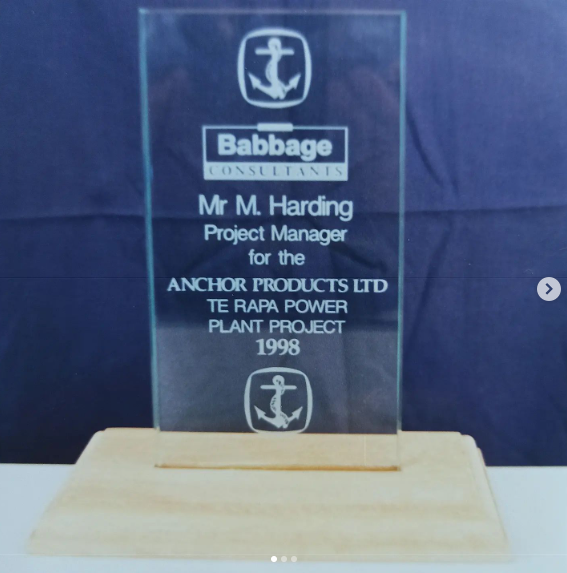
My certificate of merit
From 1984 to 2016, I dedicated 32 years to my craft as a glass sandblasting artist. Regrettably, there was no one else in the industry who held a higher position or could be credited as my mentor to grant me an official award. As a result, my friends from Express Graphics in Auckland took it upon themselves to create this certificate of merit in my honor. While the current whereabouts of the award remain uncertain, I still possess a cherished photograph of it.
Custom made artworks
Creating a Nikau Palm design to seamlessly span across multiple glass panels was a challenging endeavor. Let me first explain why it was so challenging. The spaces between each piece of glass vary, requiring precise measurements to ensure the pattern flows seamlessly. Once I gathered all the necessary measurements, I drafted the design on the computer to ensure alignment and perspective. Additionally, I had to calculate the gaps within the frames where the glass sits. If you've read my second-to-last post, you'd understand the diverse processes involved in completing a project like this. The approach taken depends on the unique requirements of each job, as no two jobs are identical.

Decorative fern panel
As someone with extensive experience in creating glass designs, I understand the importance of being able to sketch something quickly when asked. Creating rapid mock-ups allows clients to visualize the design, and subsequent fine-tuning ensures approval. However, there were occasions when I simply went with the flow. In this particular project, I sandblasted and sealed a native New Zealand fern design, leaving the fern pattern clear while the rest of the glass was frosted. This glass panel was intended for a bathroom window, and my client was highly satisfied with the design because it not only provided an aesthetic touch but also ensured privacy.
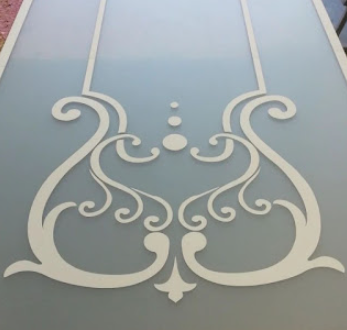
Imaginative designs
This is one of many designs I've developed over the years in the trade. It's a sandblasted glass kitchen cabinet panel featuring a decorative design of my own creation, tailored for one of our clients. They specifically requested it to be sealed to prevent fingerprints from marring the glass surface. This panel stands at a height of 2420 mm. The masking tape is still in place, covering the areas that weren't sandblasted. Once it's removed, you'll be able to see the clear parts of the glass.
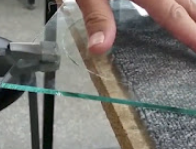
YouTube video from Koru Kiwi Arts
How to Cut Out a Glass Circle: Step-by-Step Instructions
Tools Used: Glass pliers (with flat jaws), Circle cutter, Cutting oil.
Glass Circle Details: The glass circle was cut from a piece of 4mm clear float glass.
Koru Kiwi Arts
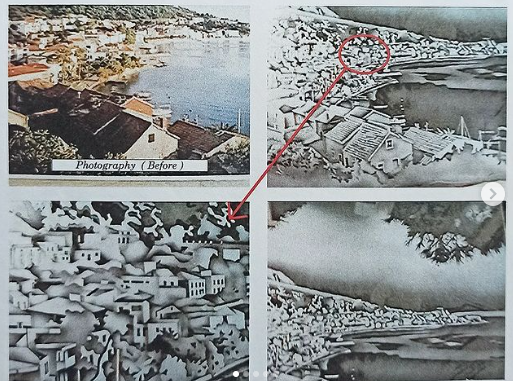
Mediterranean Sea Village
Here's another piece of glass art I created for one of my clients. The approximate size of the artwork is 90 by 100cm. They commissioned me to sandblast a depiction of their Mediterranean Sea Village onto a piece of mirrored grey glass, which would be installed outdoors near their spa-pool area. The entire artwork was drawn and cut out by hand, and each individual piece was meticulously sandblasted inside a sandblasting booth. Unfortunately, these pictures are photocopies, so the quality may not be the best. However, they should still give you a general idea of the piece. Thank you for taking the time to read about it.
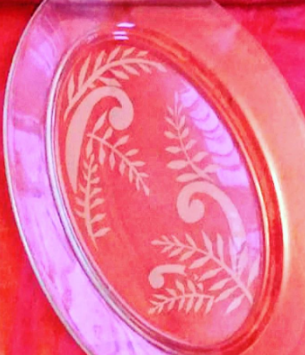
Elegant Fern Designs
This design features one of our fern-inspired creations, meticulously sandblasted onto a glass serving dish. Interestingly, I also proudly wear this design on my business t-shirt. Without the aid of a vınyl cutter, I carefully drew my pattern on masking tape and with a scalpil. I cut out my pattern by removing the areas to be sandbalsted. It's a slow process but one thing you need to be aware of is not to lift any of the tape while you hand is moving around the tape. A sweaty hand can create moisture, which can prevent your tape from stıcking to the glass.
Decorative Glassware
From glassware to coasters, I've done it all. It all began back in 1992 when we embarked on our business journey. Glassware swiftly emerged as our primary source of income. For our glassware supplies, we frequently turned to ACI in Ellersile, from which we procured a substantial portion of our stock. At times, this amounted to an impressive 10 thousand units per month. Regrettably, our success drew the attention of other opportunistic players in the industry – companies previously unfamiliar to me. This led to price wars and forced me to leverage my technical expertise in manufacturing. This was imperative to deliver a superior product at a more competitive price point. Over time, however, our efforts couldn't withstand the inundated market and the waning interest of the general public. This turn of events prompted me to revisit my roots in glass sandblasting, a skill I had previously practiced. I was fortunate to have alternative avenues to explore. The coasters captured in this photo also originated from our premises. They stand as a testament to the breadth of our endeavors.
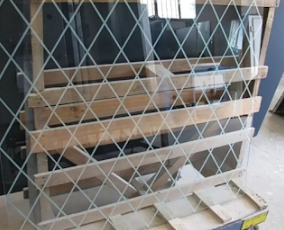
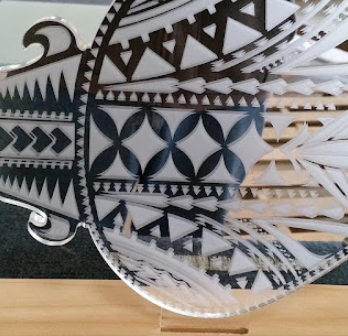
Diamond patterns
Working with diamond patterns can be challenging, especially when you don't have all the necessary dimensions. This difficulty intensifies when you must align them with other elements based solely on the sizes provided by a glazier. Therefore, it's advisable to start with a precise rubbing. Additionally, you must determine the number of diamonds both horizontally and vertically, and ascertain if they begin at the midpoint or extend beyond the top or bottom. Some of these diamonds may also be painted black, requiring meticulous care to ensure the paint adheres smoothly within the cavities. This process can be time-consuming, especially when measuring and cutting the shapes by hand. I undertook this task personally, creating a positive pattern.

Trying out new products
I hope you are all enjoying my intrinsic writings. Here's something that will keep you guessing. But before I continue, I'm not absolutely sure, but I believe I made two of these decorative glass panels for two separate jobs. In this type of trade, ingenuity plays a necessary part in understanding what works or not. And only years of trial and error can give you this experience. Replacing old traditional glasswork certainly tests you, and this is what I love doing. First, you need to understand these steps:
1 - What glass type or what other materials were used for their surface working area. 2 - What techniques were used? 3 - What materials were used? 4 - Also, new glass regulations could be given if safety requirements are at play. 5 - Dimensions and glazing requirements are taken into account. 6 - But before anything else is done, this part should be done first (working out the formula).
Trying out new techniques
This means determining which parts of the design were done first. By working out the different steps of the design, everything else should fall into place.
A single glass panel design could incorporate numerous techniques in its picture: acid etching, clear etching, deep blasting, shading, gold embossing, brilliant cutting, paint, engraving, glue chipping, screen printing, mirroring, sandblasting, kiln work, SBX film, vinyl, flash glass added, clear gloss, and the type of glass used, among others. The picture you are seeing was completely done on one piece of 6mm clear toughened glass. Can you work out my formula? It's all original, and there are only one or two like it in the world.
Mirror on Vulcan Lane
On Vulcan Lane, in Auckland's bustling business district, there stands a local pub by the name of 'The Occidental.' Once upon a time, I frequented this establishment with my friends, indulging in beer as if there were no consequences to tomorrow. However, that chapter of my life belongs to a bygone era, and I am grateful to have left it behind. The image before you captures one of my glassworks, a project undertaken at Maurice Sandblasting on Brown Street, Ponsonby, back in 1986. This particular piece served as a replacement panel, replacing the original one that had met an unfortunate fate. We meticulously crafted hundreds of drawings and took rubbings of each, subsequently cataloging them in a notebook and filing them away on a towering shelf. The meticulous nature of our preparation made it unnecessary to take additional rubbings on-site, but I erred on the side of caution and did so regardless. Once I had finished cutting out the template, which adhered directly to the mirror's surface, I proceeded to take a rubbing and assigned it a code and a name.
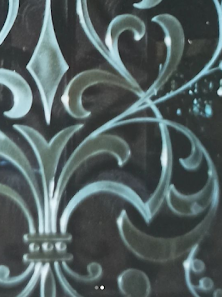
Mirror on Vulcan Lane
For this precise task, I relied on heavy-duty 3M masking tape (280). The mirror then underwent a deep blasting process, selectively targeting the exposed areas of the pattern. After the sandblasting was complete, we took great care in cleaning the affected areas. We chose to leave the remaining tape on the mirror in place, allowing us to later apply clear gloss paint to those specific sections, creating an elegant acid-etched appearance. Once the paint had dried, we carefully removed the tape. Regrettably, a small piece of tape inadvertently landed on the lower portion of the design. Left with no alternative, I had to remove it, inadvertently causing a minor blemish in the clear gloss. To rectify this, I painstakingly applied a coat of clear gloss to that affected area. If you examine my work with keen eyes, you may still discern this subtle imperfection—a testament to the meticulous nature of the Victorian design etched onto the mirror.
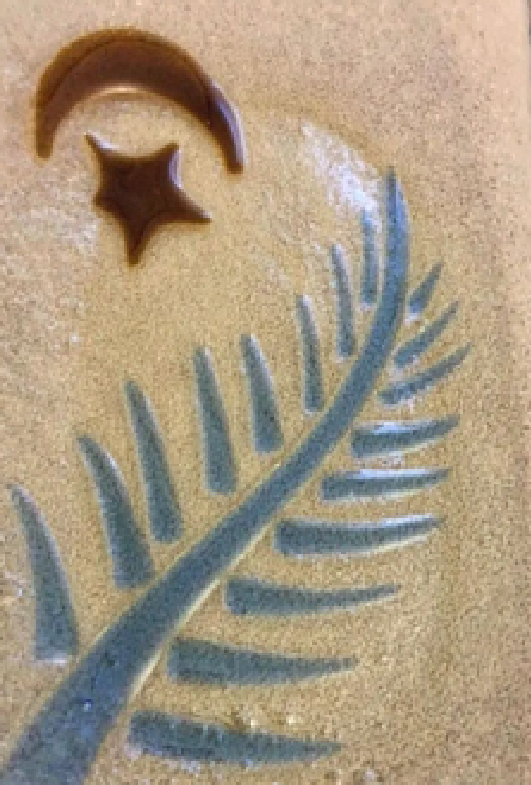
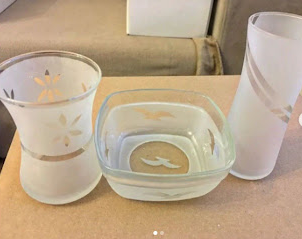
Glass Fusion
A Turkish Star and Moon with a New Zealand Fern: this is a glass serving tray that my wife, Berna, and I crafted together. Berna, my wife, introduced us to the world of glass fusion by enrolling us in a course at Cam Ocağı Vakfi in Istanbul. It was a completely new experience for me, as I had never tried glass fusion before, and I found it incredibly intriguing, especially when they demonstrated how to incorporate colors. What is Glass Fusion? In essence, glass fusion involves creating an image using broken pieces of colored glass. You can also introduce various textures using specialized materials designed for this craft. If you happen to only have clear glass, another option is to apply colored paints specifically made for glass fusion. All these elements contribute to the artistry of glass fusion. The final step involves placing the design into a kiln for the fusion process. What Happens in the Kiln?
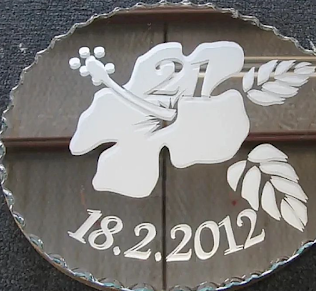
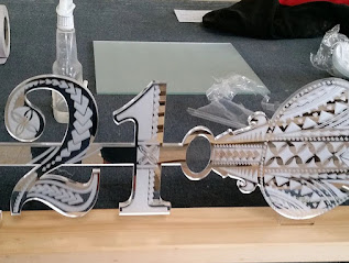
Hıbıscus flower to custom made 21st keys
The glass is carefully positioned within the kiln, and the temperature is adjusted accordingly. As the glass pieces, which rest upon a flatter piece of glass, heat up, they meld together to form an image. Additionally, you have the creative freedom to shape it as it melts by placing it within a metal mold, such as a bowl or a flat dish with sides. When someone in New Zealand turns twenty-one, they receive a special 21st key as a tradition. I'm curious to know if similar customs exist in other countries. This was one of my favorite job requirements - creating custom 21st keys. While there are standard mirrored twenty-first keys available for purchase, I particularly enjoy crafting unique ones.
Hıbıscus flower to custom made 21st keys
Here's an example of a custom key I made for a friend who used to work at Glass Relate in West Auckland. As you can see, I added vibrant colors and removed the mirroring from the back to allow for the addition of photos and various text styles. Each key also came with a wooden backing, making it easy to hang on a wall. Another enjoyable aspect of my work was drawing their favorite themes or topics on their 21st keys.
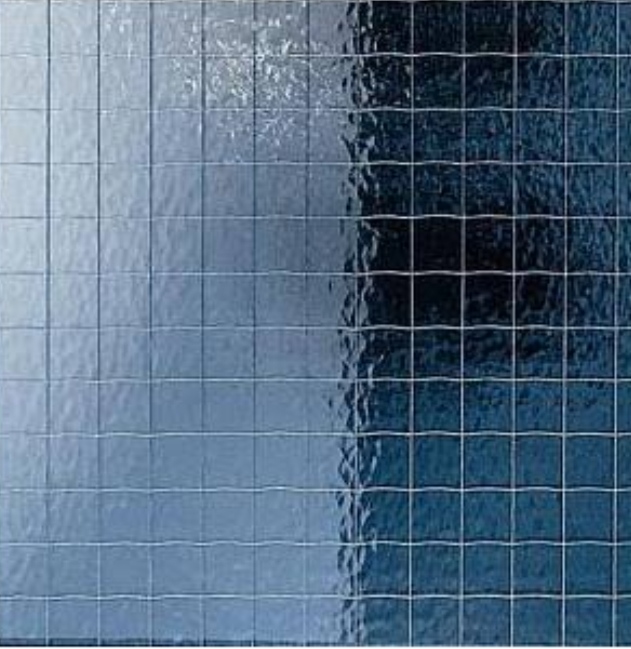
Privacy glass
One of our main money earners was sandblasting glass stock sheets. Most customers would order 10 at a time, either 4mm, 5mm, or sometimes 6mm clear float glass to be sandblasted all over. The sizes varied depending on the customers' requirements. Some customers would bring their own glass to be sandblasted, or I would order some to keep in stock as sandblasted sheets. The standard sizes were 2400 x 1200mm or 1200 x 920mm. The photo displayed here showcases one of our projects. It originally started as a 4mm stock sheet, which we sandblasted all over, cut to size, and then installed as privacy glass in a residential window.
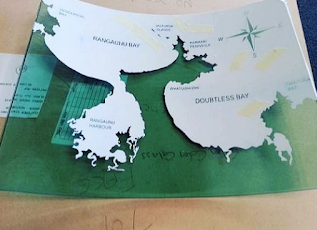
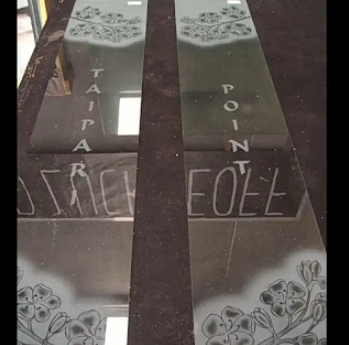
Glass fishing trophy
Doubtless Bay: A Unique Fishing Trophy. My latest project involved crafting a one-of-a-kind fishing trophy, and it revolved around the stunning Doubtless Bay region. My client's request was to etch a portion of Doubtless Bay onto a single piece of curved glass using a sandblasting technique. To achieve this, we employed our kiln to gently mold an 8mm thick green float glass into a graceful curve.
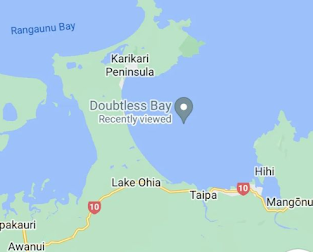
Glass fishing trophy
Beforehand, we meticulously polished all the edges, and it was my responsibility to create and apply the map of Doubtless Bay onto the glass surface. What you currently see is the vinyl overlay on the glass, which is soon to undergo the sandblasting process. Doubtless Bay, situated on the eastern coast of New Zealand's Northland Region, lies to the north-east of Kaitaia. It stretches from Knuckle Point on Karikari Peninsula in the north to Berghan Point at Hihi in the south.
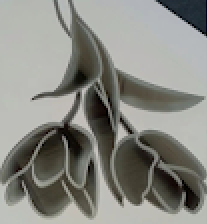
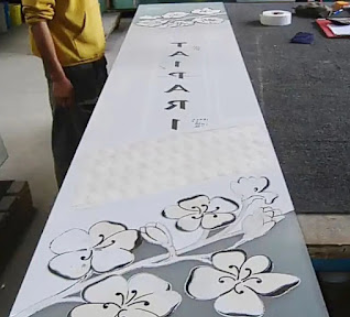
Sandblasted tulips
I created a simple tulip picture on glass using a specific technique. Initially, I masked off the glass using white vinyl with a width of 600mm (or 60cm). Typically, I hand-cut my designs directly onto the glass with a knife. However, considering that there would be more tulips in this project, I opted to design the tulip pattern on Corel Draw.
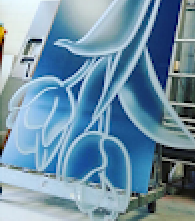
Sandblasted tulip
Subsequently, I used my vinyl cutting machine to cut out the tulip design. I meticulously removed the individual parts of the tulip design, allowing the tulips to take shape. To achieve this, I employed a sandblasting technique around the outer edges of the design and delicately shaded the inner parts of the tulips. This method added an elegant and refined touch to the overall look and feel of the artwork.
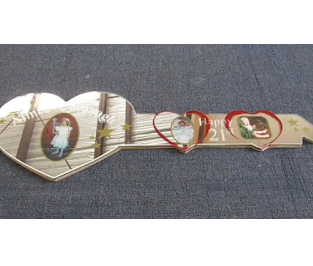
Custom made 21st key's
How far would you go to make your clients happy? I would go to great lengths. After numerous telephone conversations, they finally approved my 21st key concept, and price was not a concern. Glass with intricate cutouts could easily be achieved with a laser cutter (which uses high-pressure water). However, considering that 21st keys of this nature are handled extensively during celebrations, there's a risk of breakage. To address this, I opted for two layers of durable and lightweight plastic perspex: one in a mirrored finish and the other in clear. Both pieces were precision-cut using a laser cutter, although it took several attempts and file format exchanges to make it compatible with their cutting machine.
Custom made 21st key's
The entire design was created by me using Corel Draw and, once approved, I proceeded to cut it out using my vinyl cutting machine. For the wooden base, I enlisted the expertise of a friend who did an outstanding job. We incorporated a slot at the top to securely hold the key within the stand, and a wood stain was applied to the base to add the finishing touch. The creation of this 21st key involved meticulous preparation and countless hours of work. To ensure the key's safe delivery and avoid any courier mishaps, I personally drove 700 kilometers from Auckland to Wellington to hand-deliver it. I also provided them with the working file in case they needed a replacement. The key itself can be easily removed from its stand, allowing their guests to sign the back and insert a photo into the central oval.
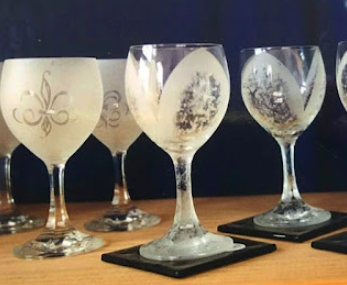
Sandblasted wine glasses
From glassware to coasters, my journey has encompassed a wide range of creative endeavors. It all began in 1992 when we embarked on our entrepreneurial journey. Initially, glassware emerged as our flagship product line, generating the bulk of our revenue. We sourced most of our glassware from ACI in Ellerslie, procuring as many as 10,000 units each month. However, as time passed, a host of other companies, some previously unfamiliar to me, recognized the market's potential and entered the fray. This sparked intense price competition, compelling me to leverage my technical expertise to produce a superior product at a more competitive cost. Yet, as the market grew increasingly saturated, public interest began to wane. This shift prompted me to return to my original passion for glass sandblasting. Fortunately, I had diversified my business interests, offering a safety net. The coasters featured in the photo you see were also meticulously crafted right here on our premises.
The different processes 1
Different processes to check out for. While it may appear simple, this project actually involved a thirteen-stage process:Initial phone discussion with the client.
1 - On-site visit to the client's property to take measurements and discuss their design requirements.
2 - Placing an order for 6mm clear toughened glass.
3 - Drafting the design.
4 - Reviewing the design with the client for their approval.
The different processes 2
5 - Hand-cutting the design and carefully positioning it on the glass surface.
6 - Precisely masking off areas to be exempt from sandblasting and conducting a final check.
7 - Sandblasting the pattern with added shading.
8 - Thoroughly cleaning and wrapping the glass.
9 - Delivering the finished glass to the client's premises.
The different processes 3
10 - On-site glazing of the glass panels.
11 - Cleaning up and returning to the factory.
12 - Preparing a detailed job description and invoicing the client.
The project consisted of two tall glass sidelight panels, positioned opposite each other, framing a large steel door.
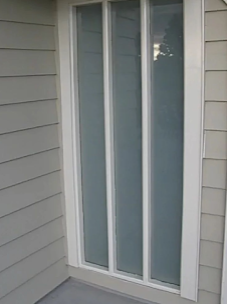
Sidelight entrance panels
Here's a glass sandblasting artwork I created for a private residence in Glendale Heights, Auckland. The residence had a solid front door, with a glass strip adjacent to it, measuring 2470mm in height and approximately 250mm in width. Crafting this piece was a challenging task because the chosen design from my collection had to fit precisely within the dimensions of the glass panel.