

I will review key trading points from this week, focusing on the trades I executed.
This “Weekly Trade Report” is posted every Saturday.
If you read it together with “Trade Scenarios,” which is posted every Sunday, I believe it will help you see how I think in advance and how I actually execute trades based on those scenarios.
This is not advice saying “let’s trade this way,” nor am I claiming it is the correct answer.
Nor is it a showcase of individual wins and losses, or a recommendation of any particular strategy based on those outcomes.
Its purpose is to demonstrate, at an operational level, the consistency of process—how I repeatedly apply pre-defined scenarios—and to serve as a reference for your own strategy-building and process consistency.
The results are solely my own and do not guarantee your future profits.
Please keep that firmly in mind, perform your own testing and preparation, and take full responsibility for your own trading.
I execute pullback buys and sell-the-rally trades on the 4h timeframe.
For my pullback-buy and sell-the-rally strategies, please refer to my prior blog posts on Dow Theory and multi-timeframe analysis.
Please see the charts below.
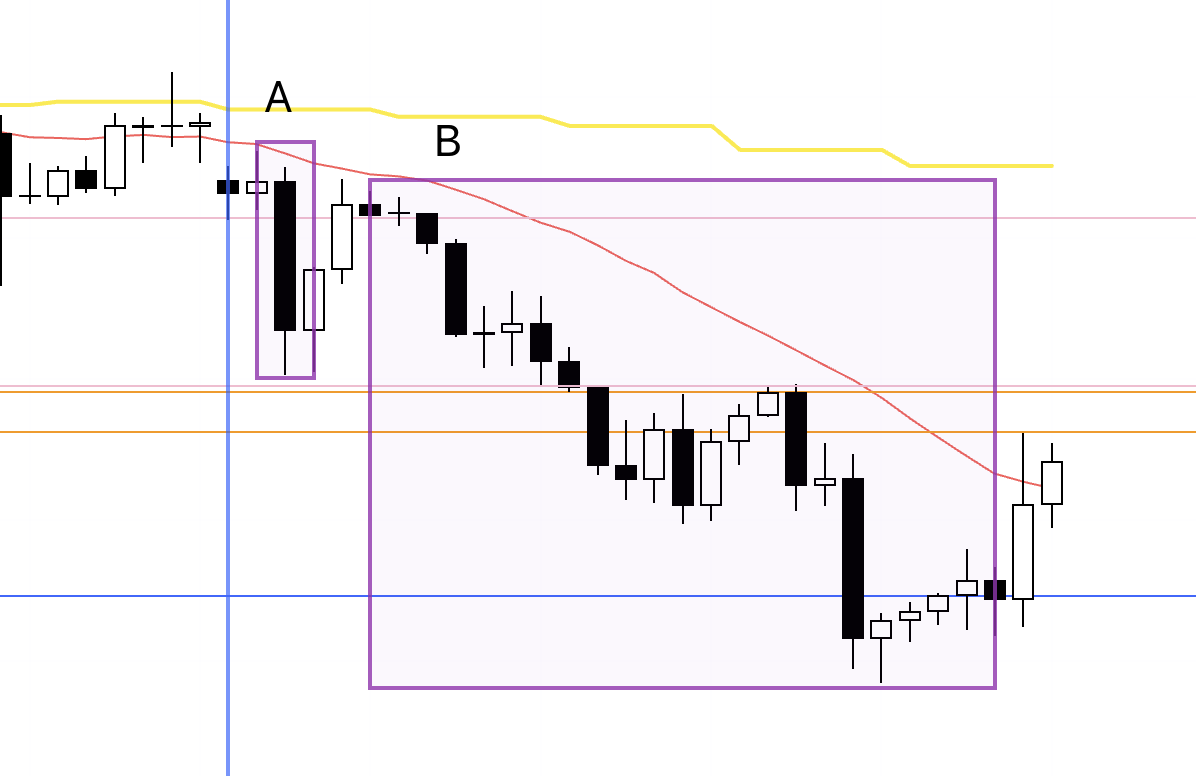
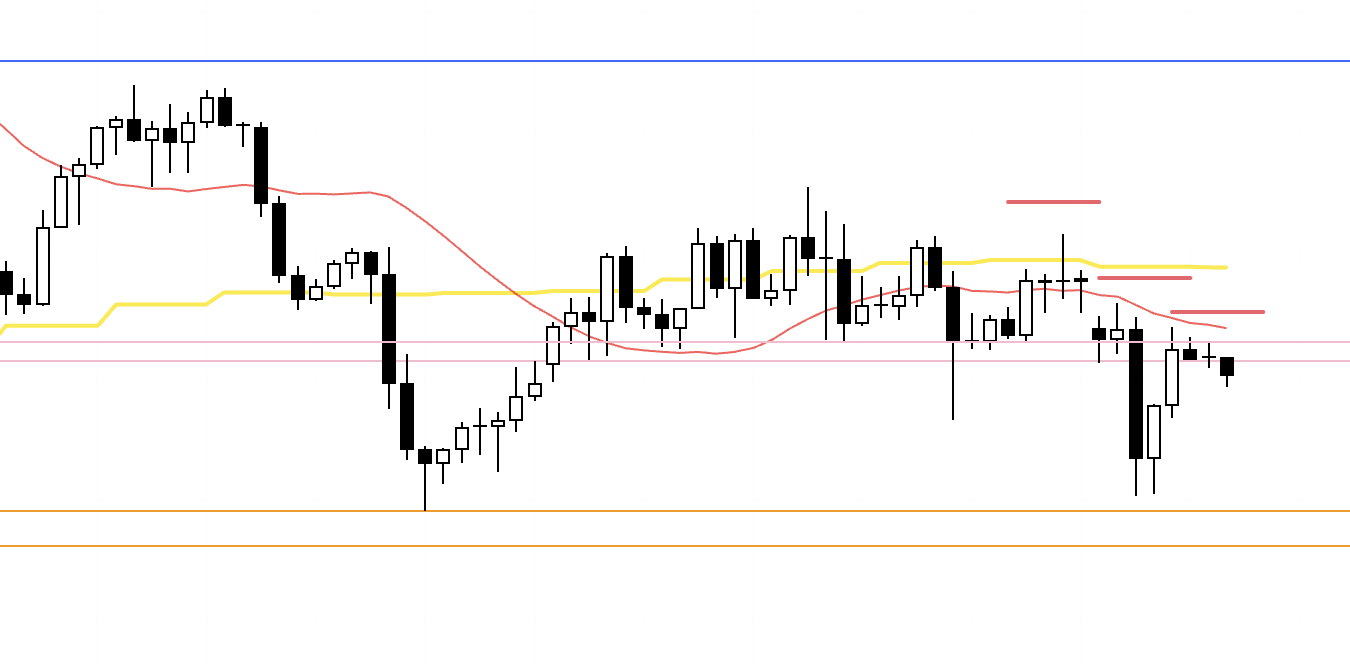
USDJPY 4h

This is the USDJPY 4h chart.
This week’s price action is the portion after the blue vertical line shown on the chart.
At the start of the week, USDJPY gapped out of its prolonged range and continued higher.
While the move ultimately advanced sharply, there were no actionable setups under my rules, so this was a rally I did not participate in.
Next, please see the EURUSD chart below.
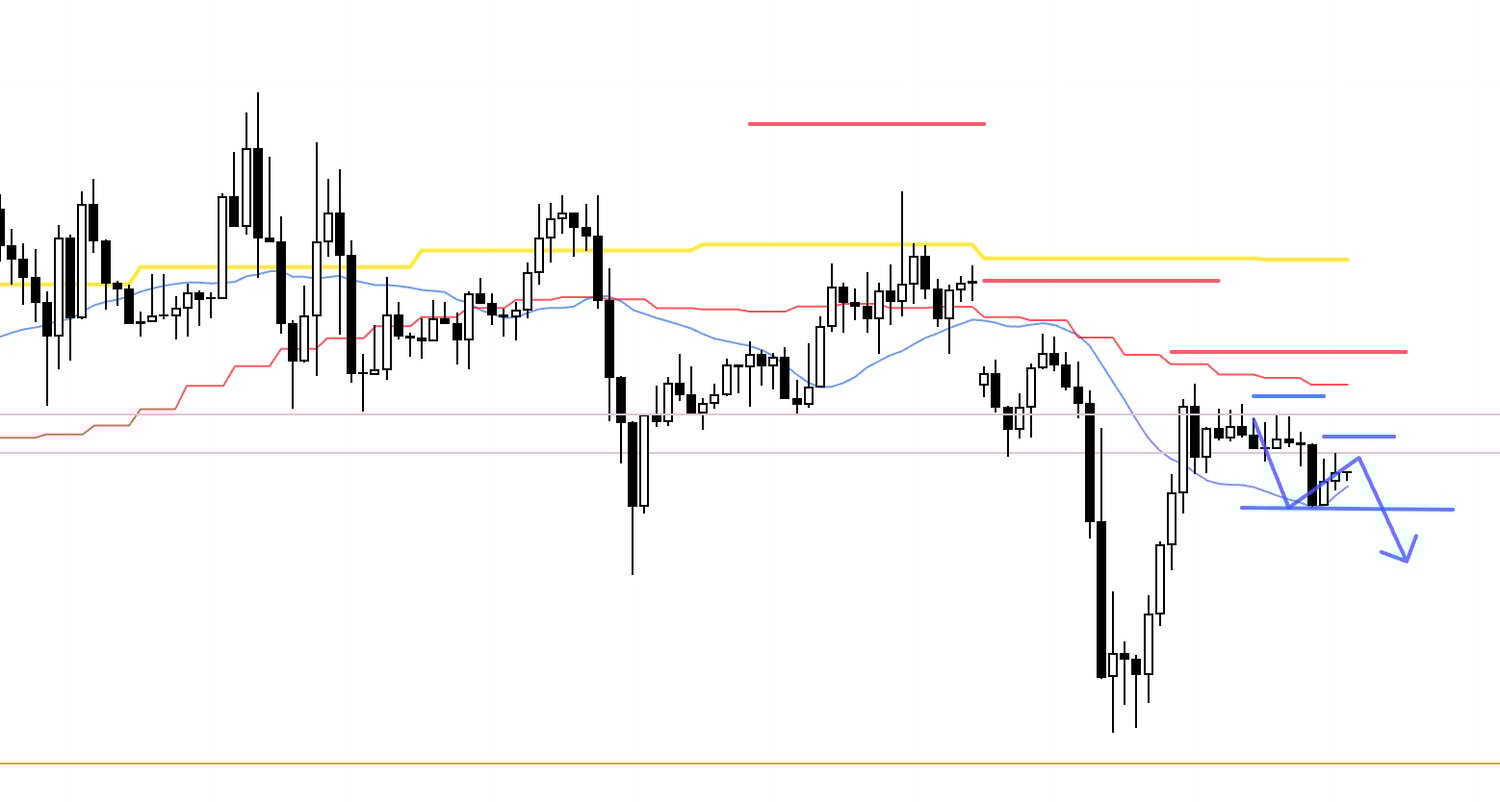
EURUSD 4h

This is the EURUSD 4h chart.
There were two points this week where I considered trades in EURUSD.
Both were the usual trades in line with the scenario.
I took screenshots during each trade and wrote commentary, which I will introduce below.
〜・〜・〜・〜・〜・〜・〜・〜・〜・〜・〜・〜・〜・〜・
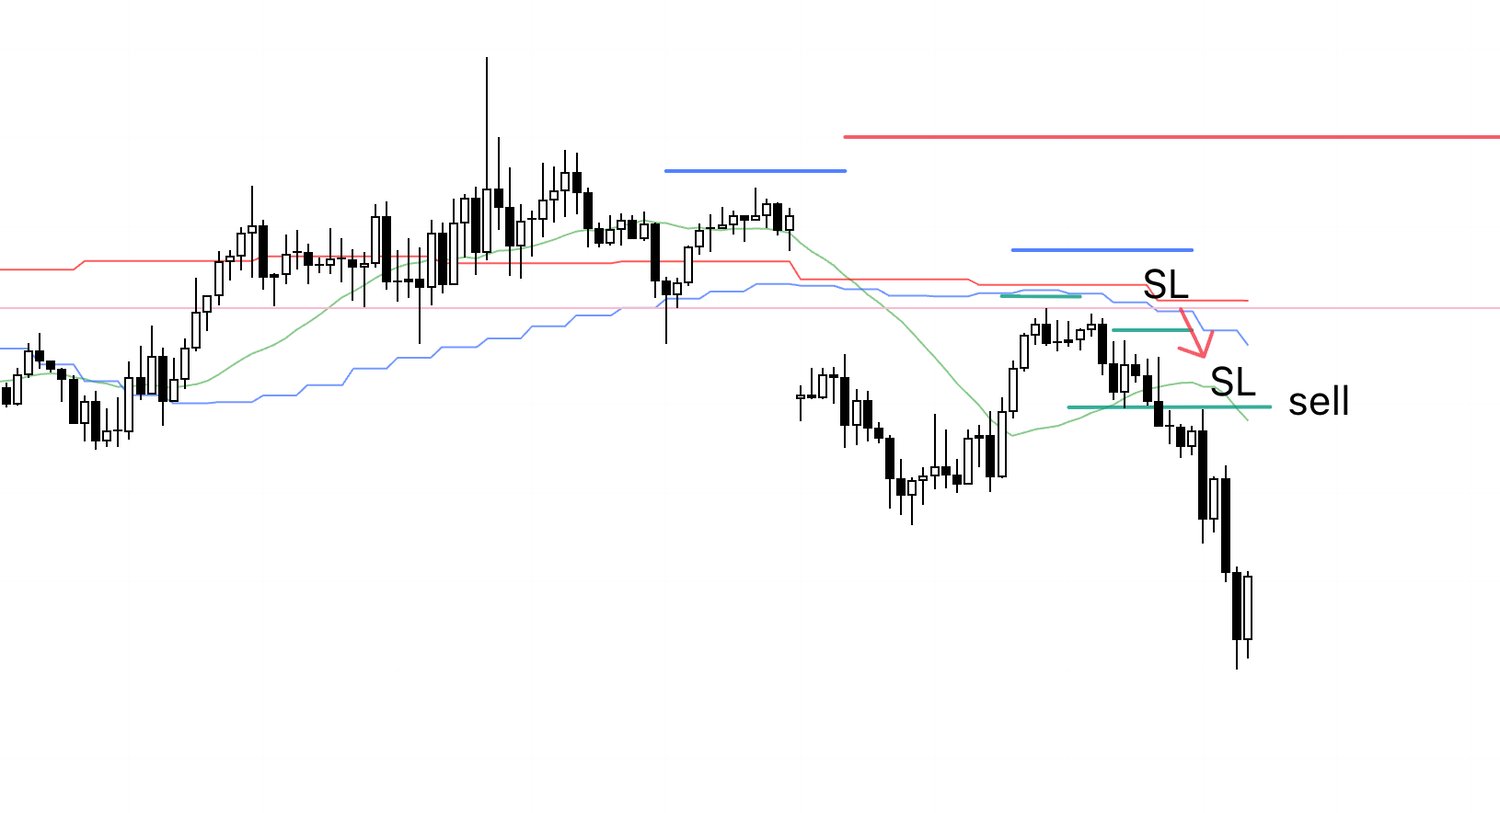
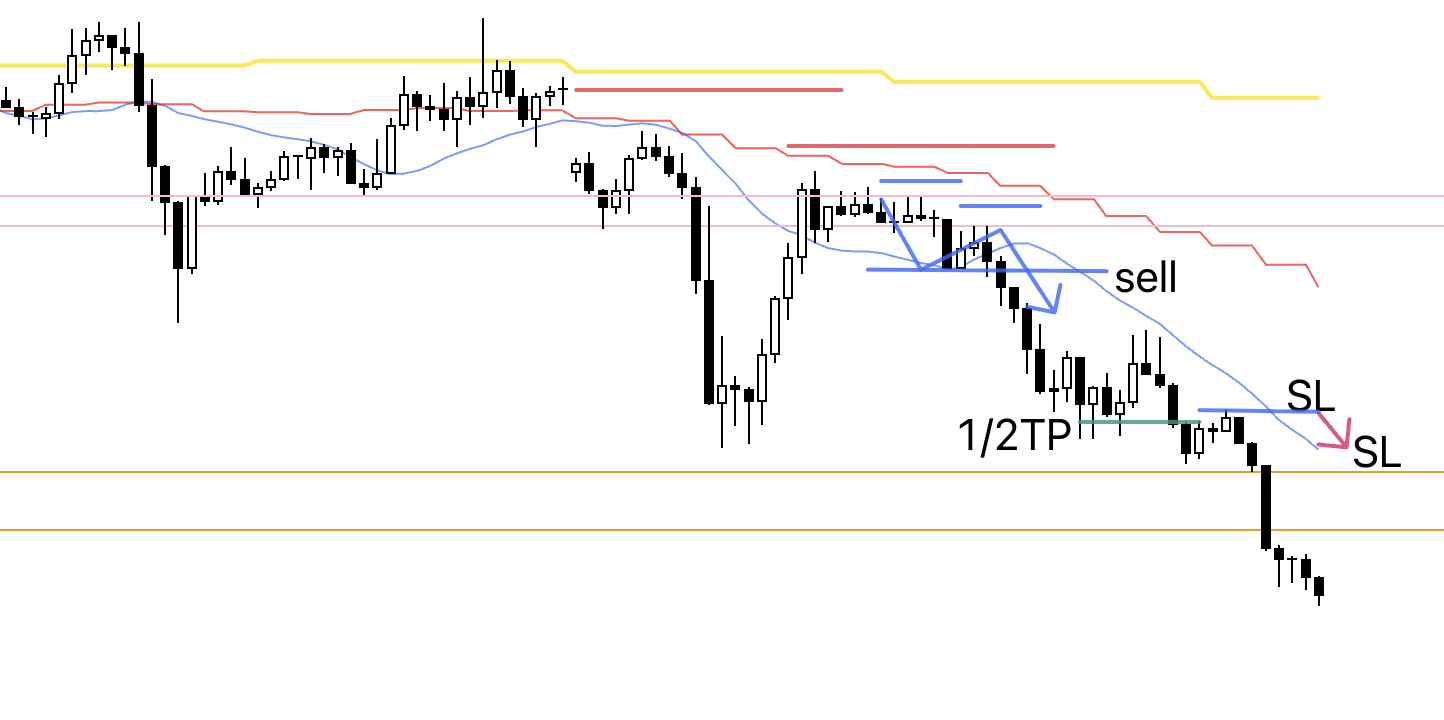
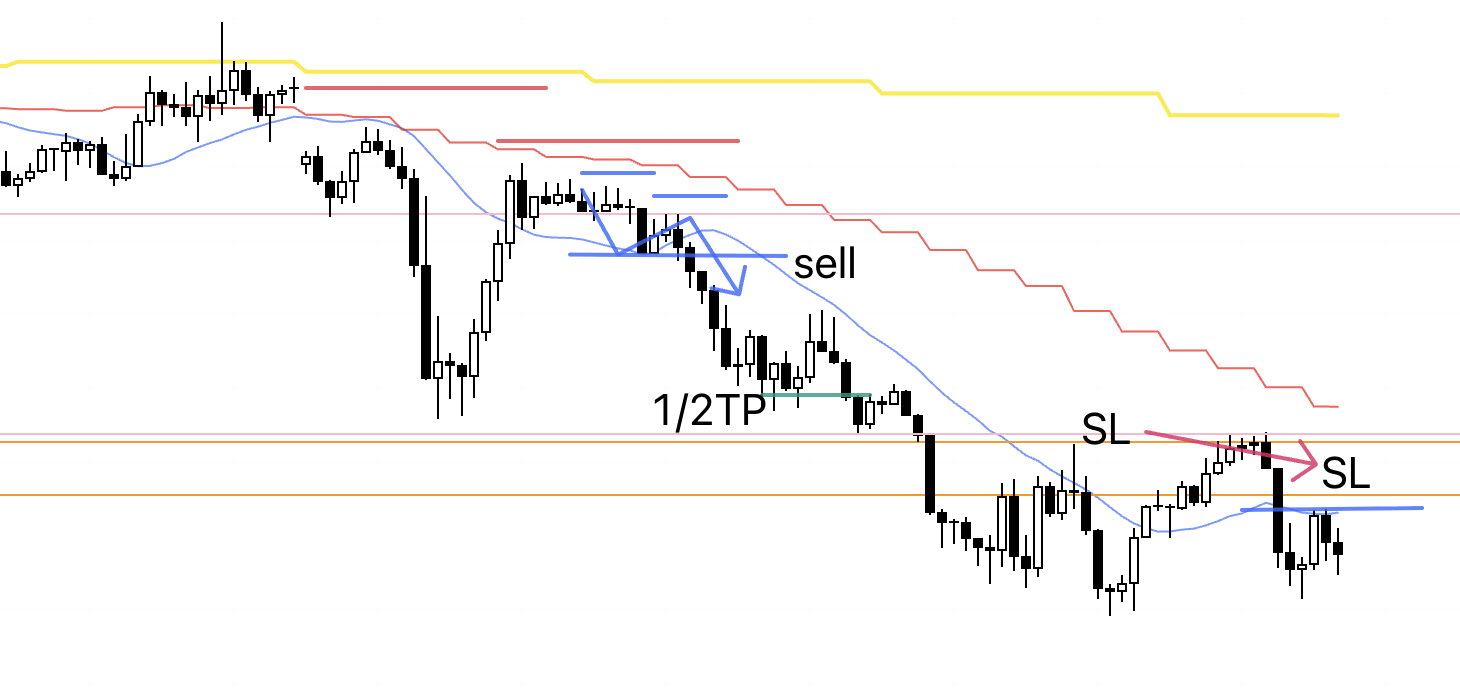
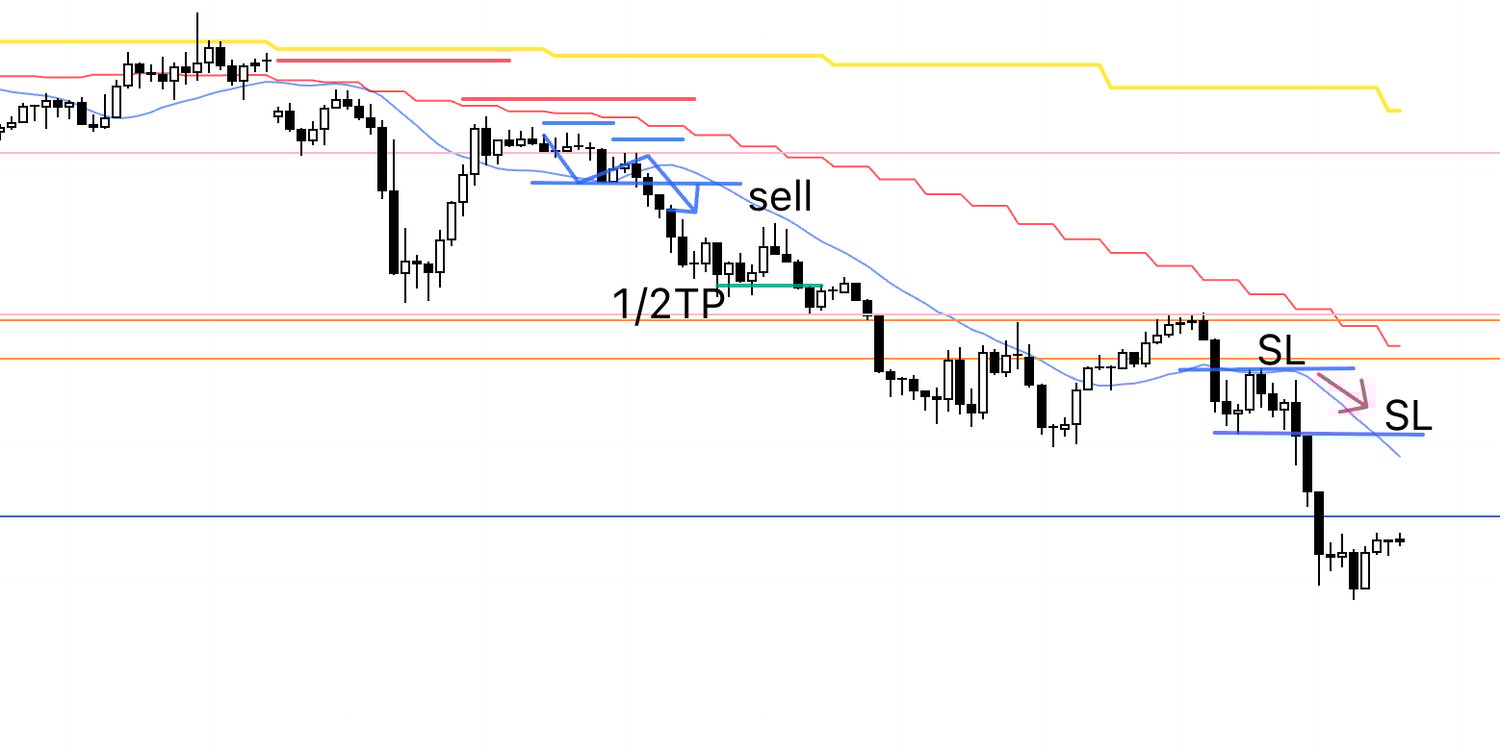
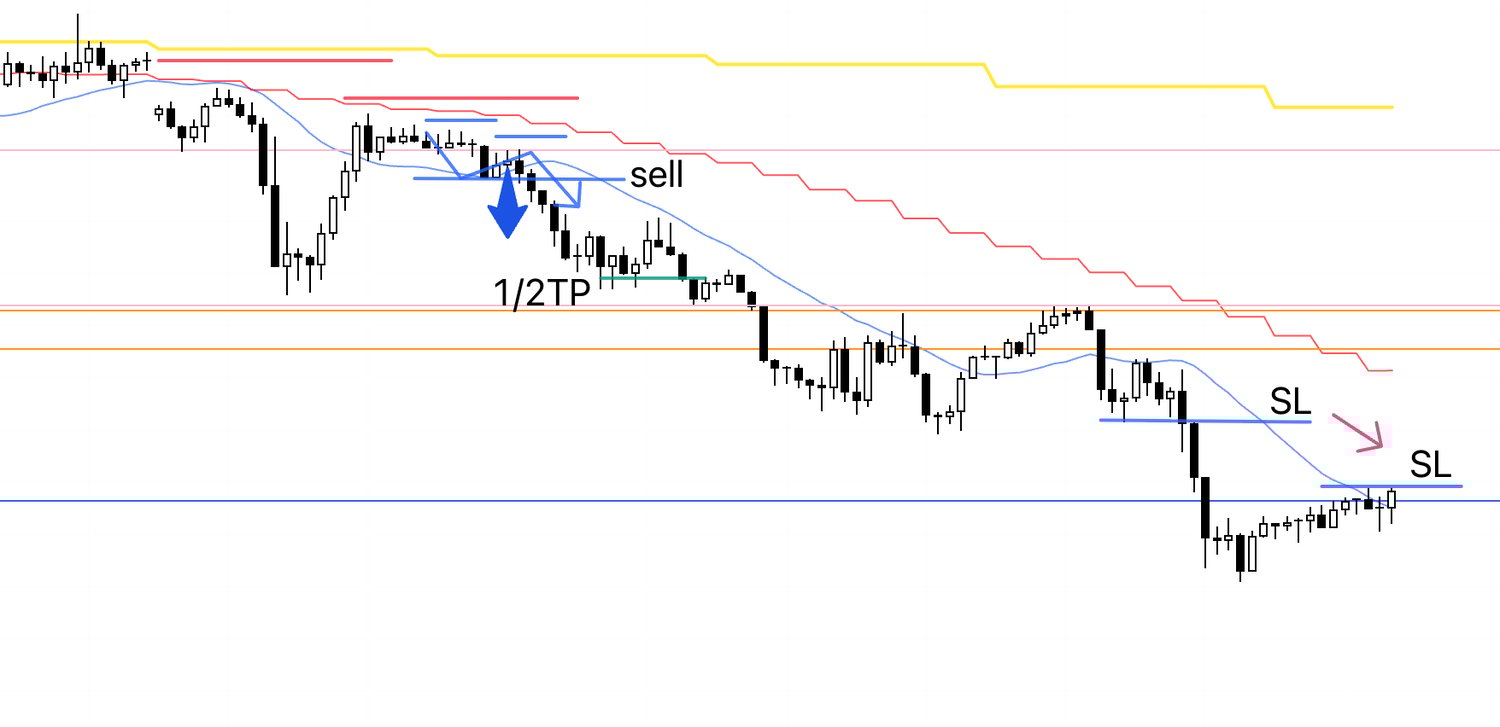
Monday, October 6.
EURUSD
4h Chart from Sunday’s Scenario Blog.
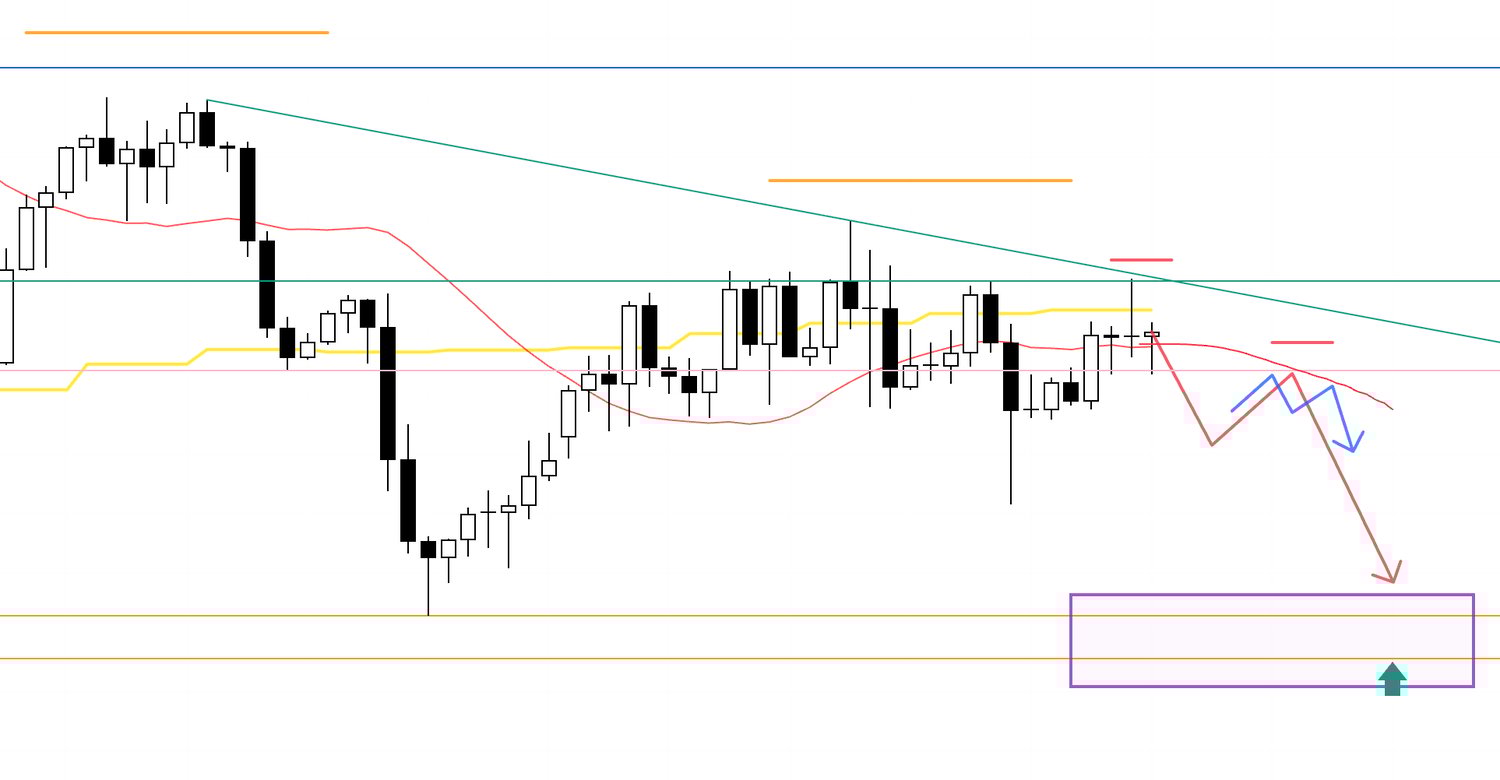
This is the image posted in Sunday’s scenario blog.
The short scenario outlined there materialized, so I placed a sell stop order.
As I also noted on Sunday, the area highlighted by the purple rectangle is the weekly pullback-buy zone, so caution is warranted.
Because it is a weekly zone, it is an approximate area rather than a pinpoint price, so as price approaches that boxed region, I plan to secure half the profits while watching the price action.
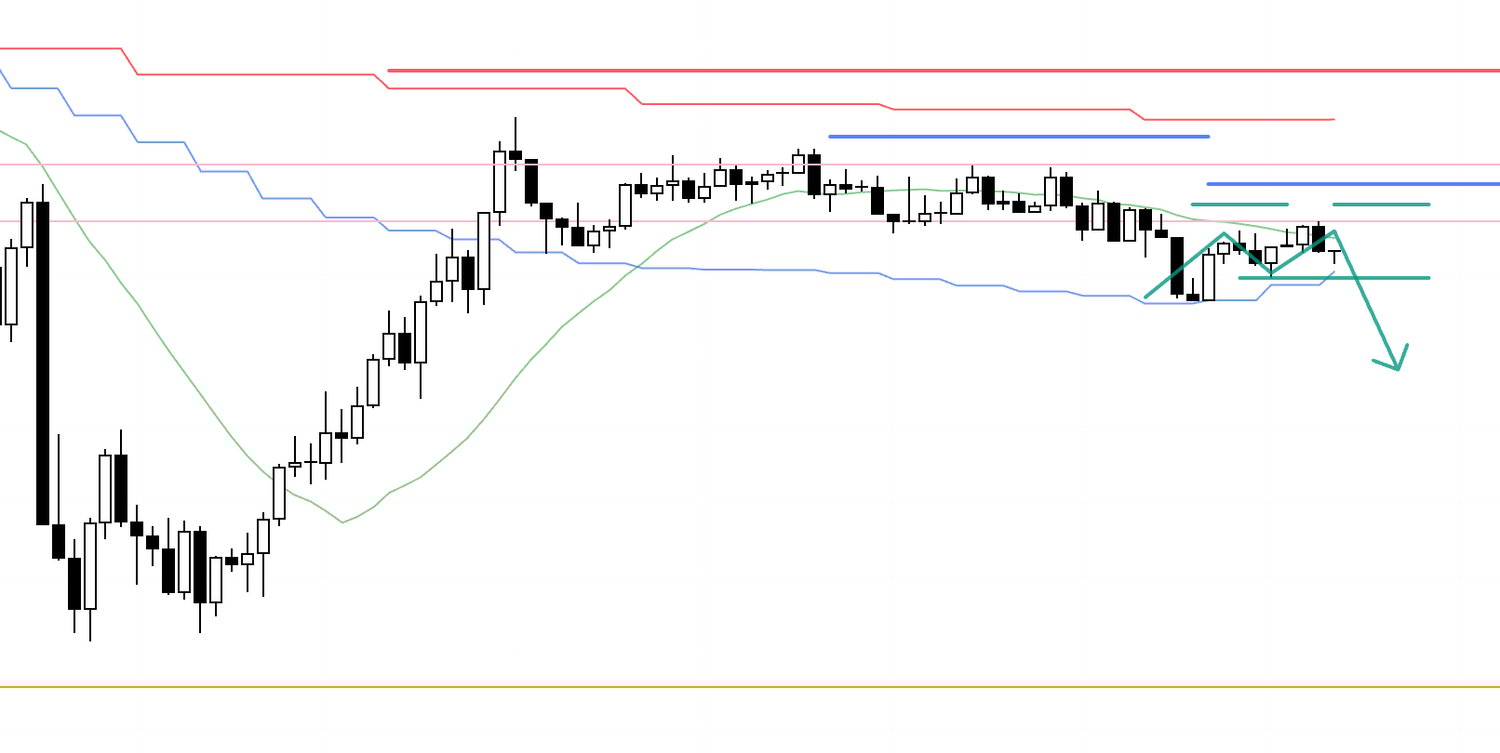
Now, the actual 4h chart.
4h

As you can see, a new lower-high point formed on the 4h.
This is also a lower high within the higher time frame—the daily—sell-the-rally context, making it a point with strong edge for shorts.
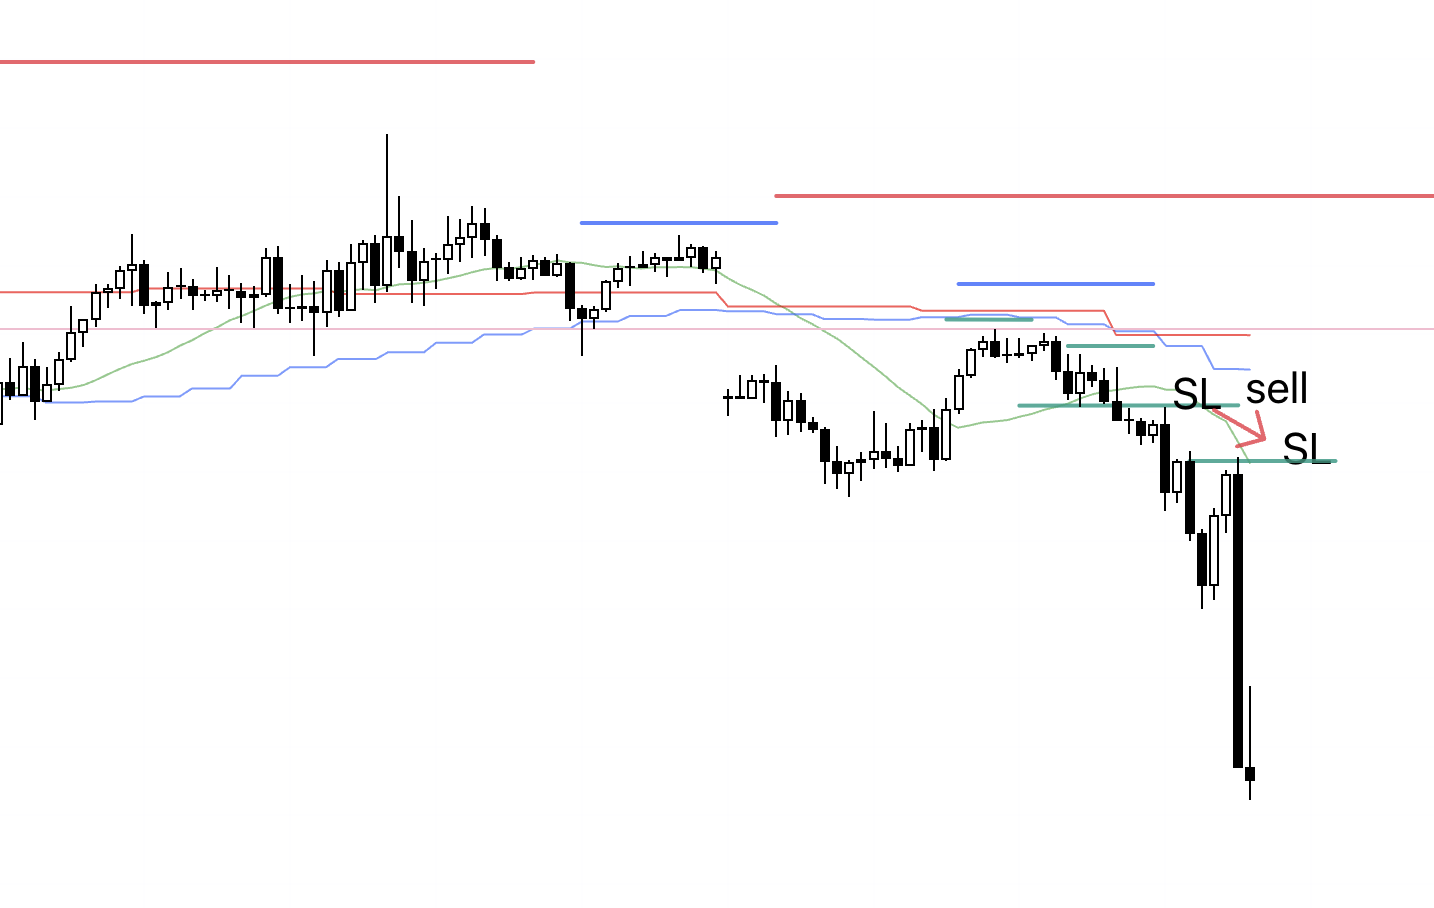
1h
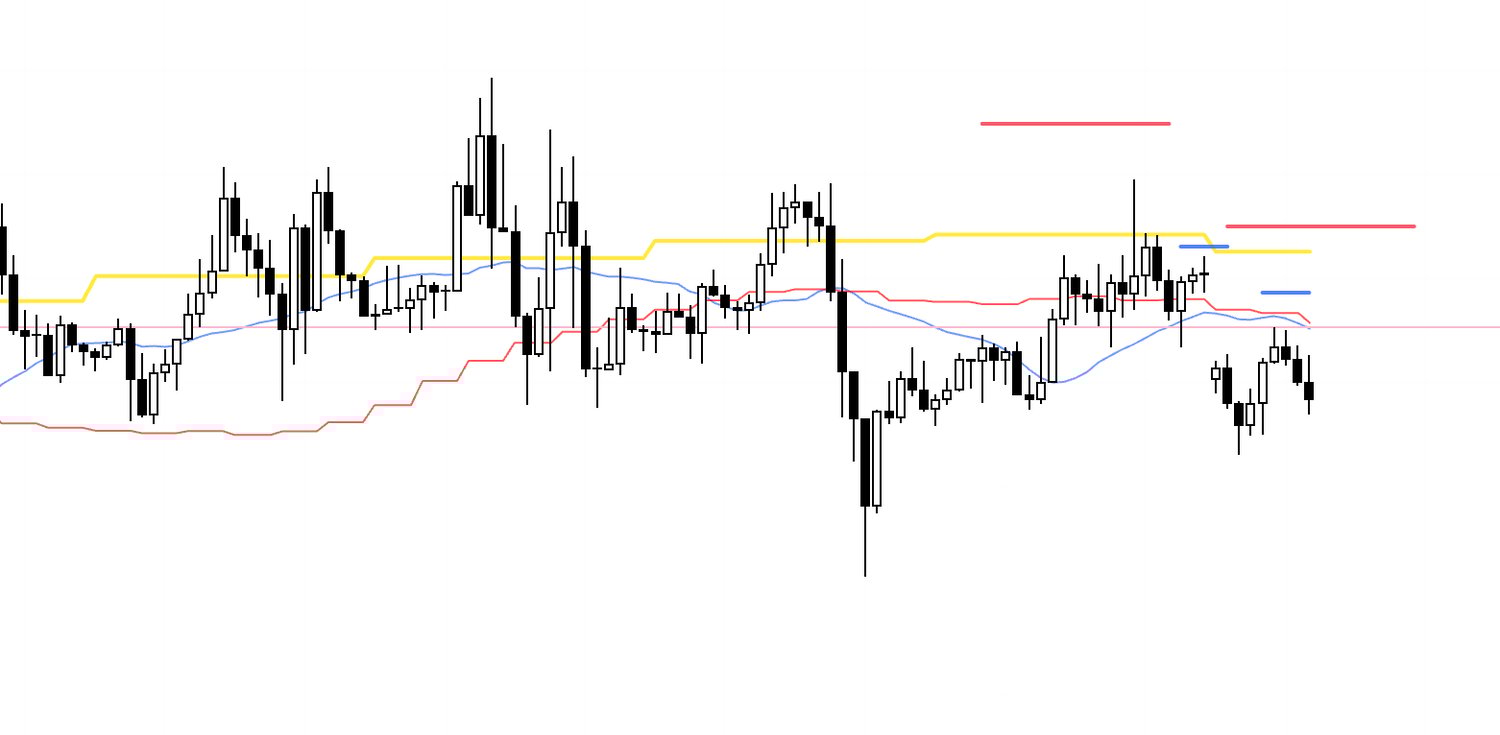
The order was triggered.
This is the 1h chart, but the entry is the initial turn of a bearish trend: within the 1h lower-high structure, at a 15m lower-high and lower-low point.
Let’s look at the 15m as well.
15m
As usual, I intend to hold until the 15m trend breaks, but as noted in Sunday’s scenario, this short carries the risk of weekly pullback buying.
Therefore, if price stops making new lows around a key level or shows a rebound, I plan to take half off.
15m
With a lower high formed, I moved the SL to that lower high.
15m
I lowered the SL further.
15m

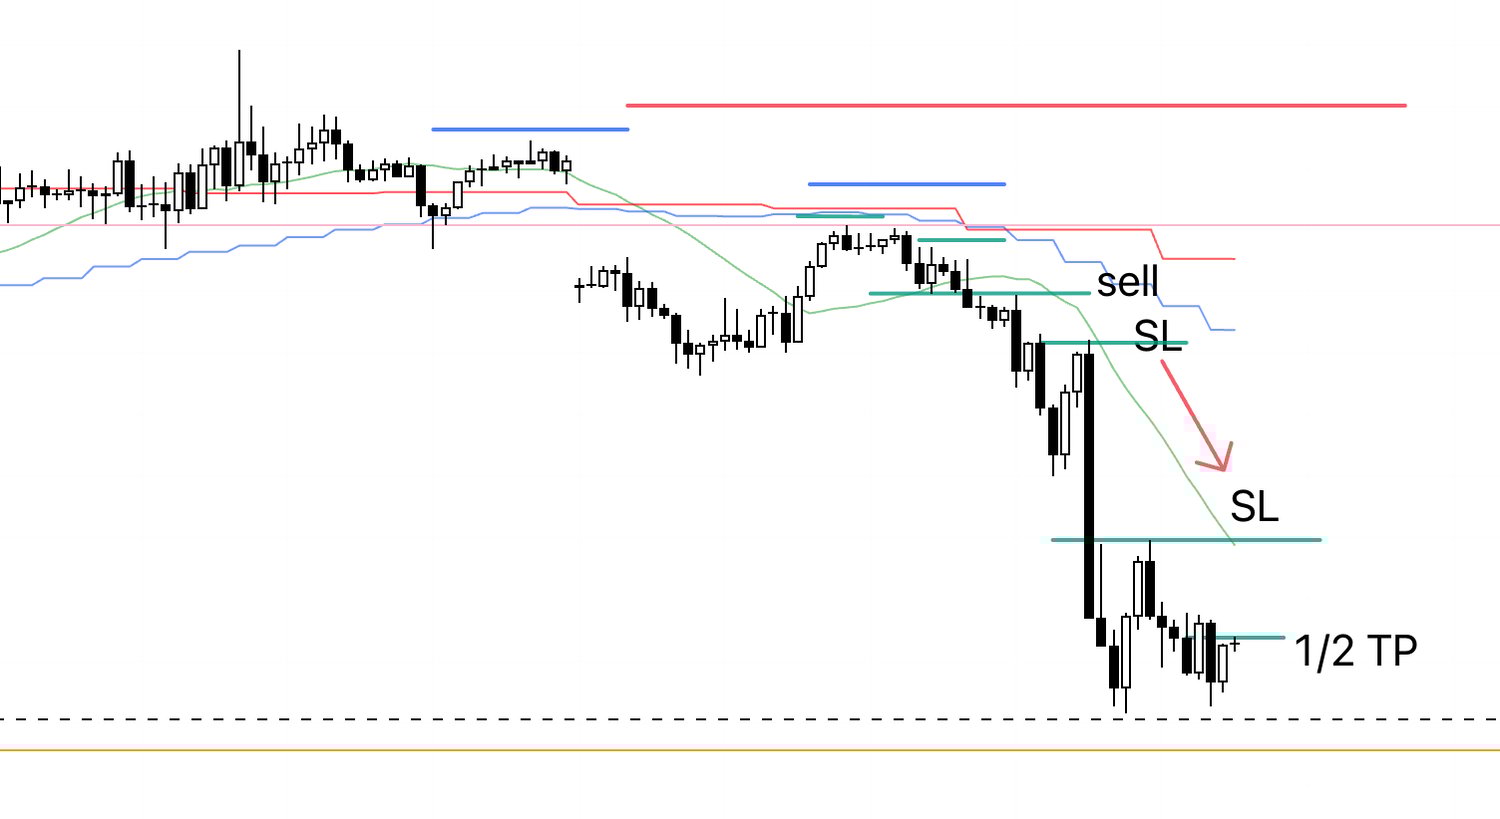
The area near the orange line below is the weekly pullback-buy zone where buy orders may increase, so I set an alert just ahead of it.
If the alert triggers, I will secure half the profits.
15m
I lowered the SL again.
On review, price fell just short of the lower alert and began forming a double bottom, failing to make new lows and reversing, so I secured half the profits.
15m
The trend broke, the remaining position was closed, and the trade ended.
〜・〜・〜・〜・〜・〜・〜・〜・〜・〜・〜・〜・〜・〜・
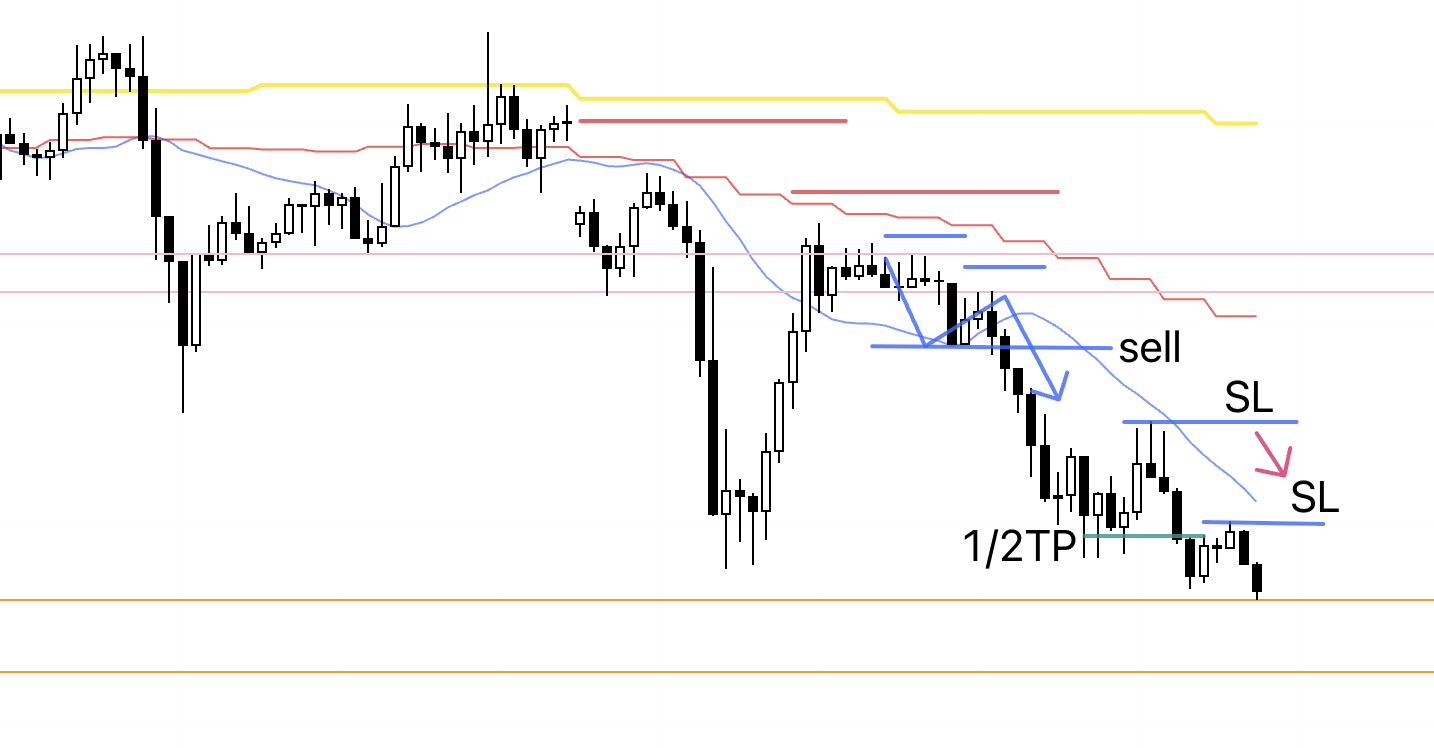
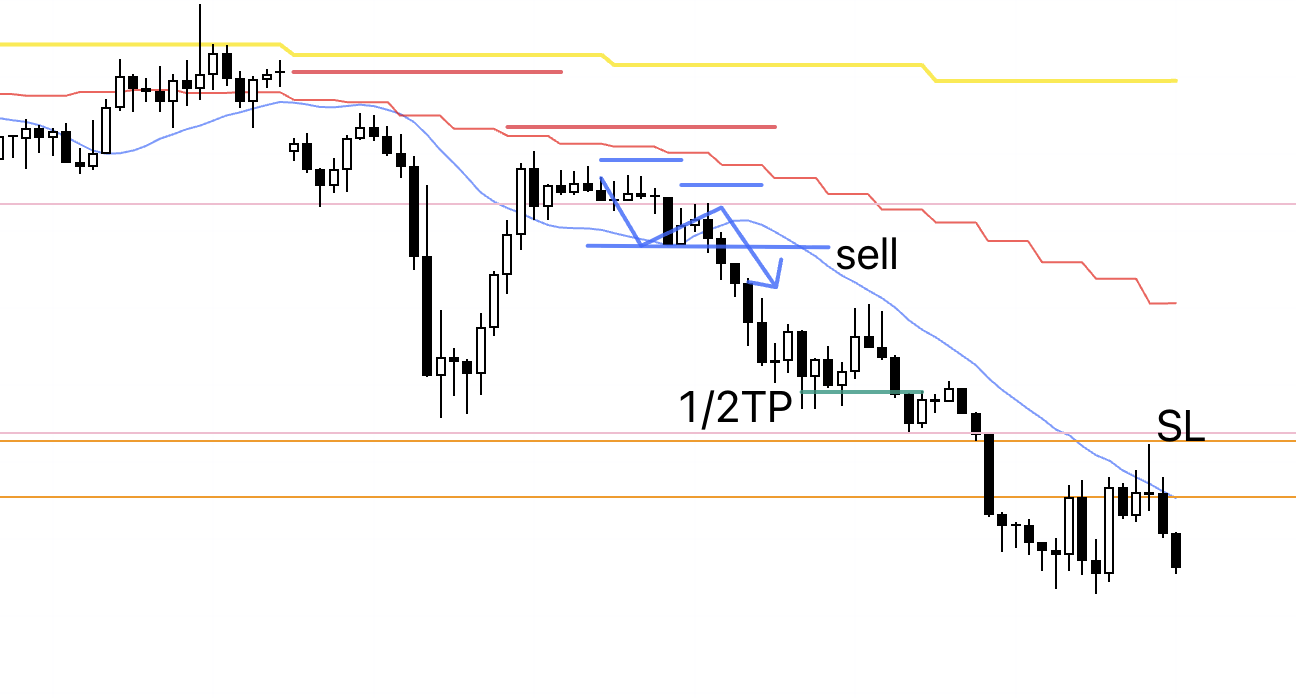
Tuesday, October 7.
EURUSD
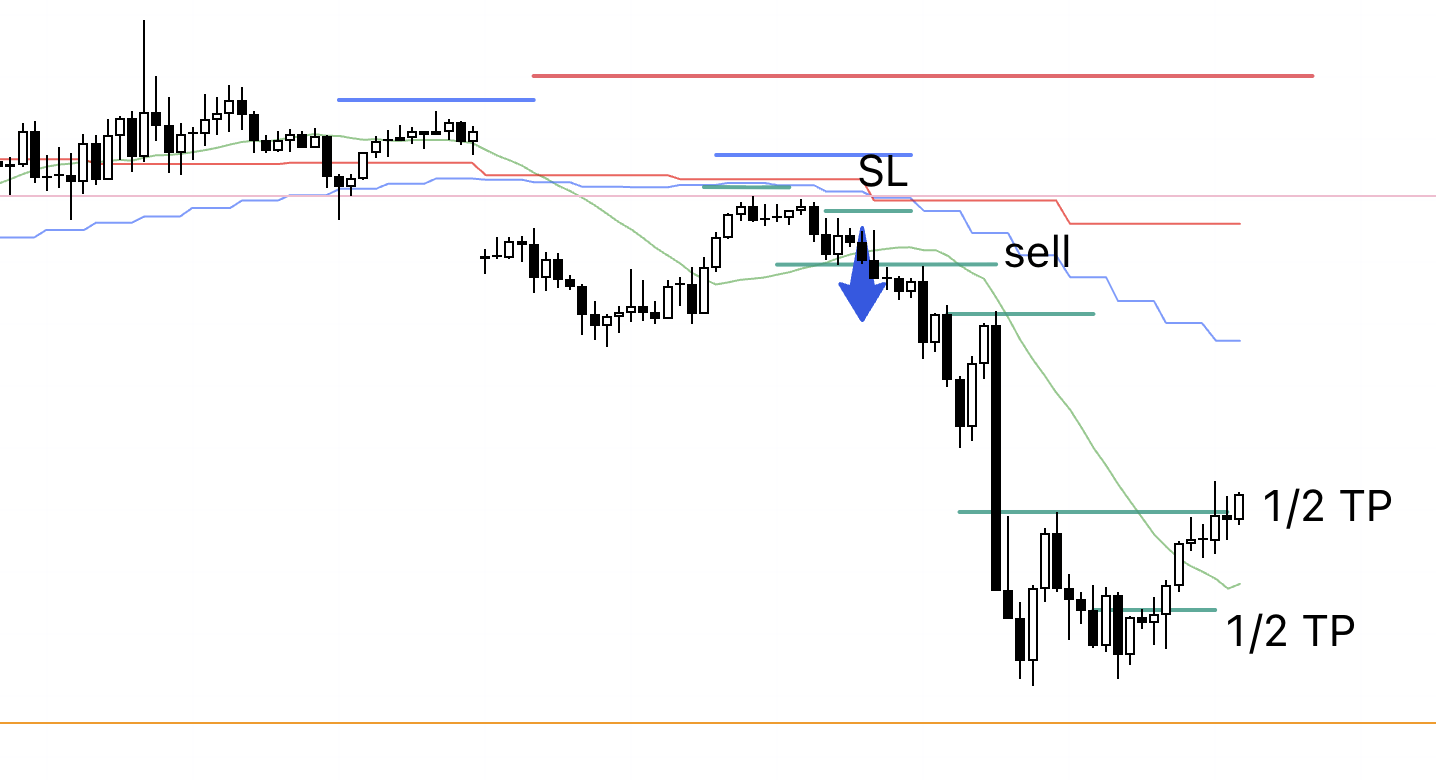
4h
A lower high formed as a 4h sell-the-rally point, so I set a sell order.
Let’s look at the lower time frames.
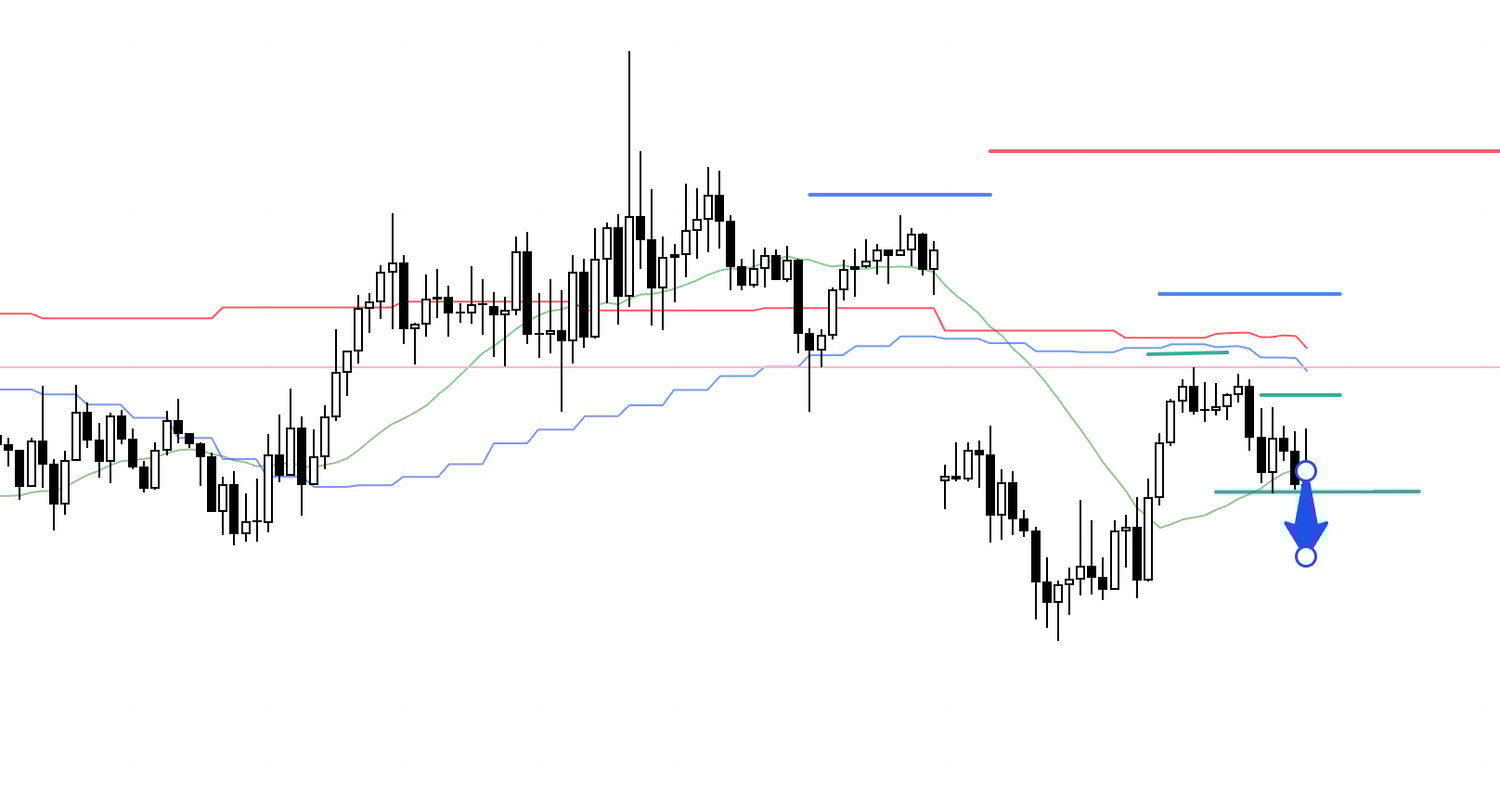
1h
As I note each time, I trade within the 4h lower-high structure when the 1h is also printing lower highs and breaking to new lows.
The 1h moving average (blue) is currently sloping sharply upward.
Let’s view this on the 15m as well.
15m
On the 15m, within the 1h lower-high area, price is nearly forming a double top and attempting to break to new lows.
However, in this case, the 15m has marginally made a higher high, and as the green line indicates on this chart, entering on a 15m break of the low would leave the 1h moving average (blue) supporting price from below, so I intend to trade as a 1h trend-follow by waiting for a break of the 1h low, which is more reliable.
1h

The pending sell stop order was hit, and I was entered.
As with the prior trade, the deeper it falls, the greater the risk of weekly pullback buying.
Because the prior move reversed before reaching the orange line, this time I set an alert (dotted line) near the prior low with the plan to take half off there.
1h

The alert fired and price reached the prior low, so I took half profits.
I also lowered the SL slightly.
I plan to hold the remainder until the 1h trend breaks.
1h

With another lower high, I moved the SL down to just above that high.
1h
Another lower high formed, so I lowered the SL.
1h
I lowered the SL again.
1h
I am going to sleep now.
The SL is set above the light pink line drawn from the prior low.
1h
Fortunately, price fell without clipping the SL, printed another lower-high point, and I lowered the SL.
1h

The SL is unchanged, and I am turning in.
1h
After waking up, I lowered the SL slightly.
1h
I lowered the SL.
1h
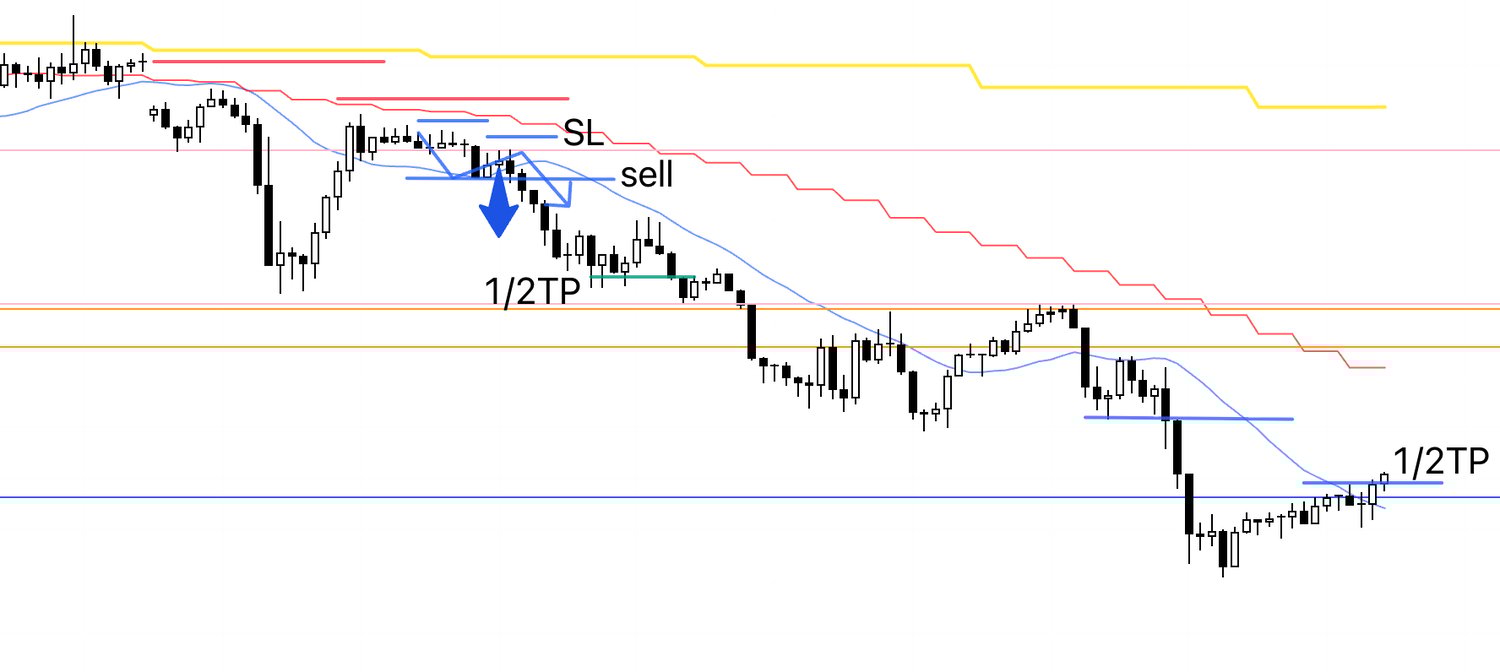
Price hit the tightened trailing stop, the remaining half was closed, and the trade concluded.
〜・〜・〜・〜・〜・〜・〜・〜・〜・〜・〜・〜・〜・〜・
That is all.
Each week, I consistently execute the same type of trades based on pre-established scenarios.
I know in advance what conditions create an edge for longs and what conditions create an edge for shorts, so I act according to the scenario only when those conditions appear, and do nothing when they do not.
This is not a prediction of the future.
It is a plan to take pre-defined actions when ideal conditions present themselves.
By pairing the Sunday scenario post with Saturday’s review of how I acted against it, I hope the value of this blog comes through.
I do not write this blog to boast about winning trades.
I write it to provide a reference for how to build scenarios in advance and adhere to the process with consistency.
In particular, USDJPY has been in an extended range recently and conditions have been poor, leaving few trading opportunities, but even then I clearly document why I am not trading.
Readers who follow each week will see that my scenarios and execution are the same repeated routine.
I do not trade according to my mood, and I simply keep repeating the same process each time.
That repetition is precisely what is essential to sustaining profitability in trading.
It is not flashy at all, but I hope the importance of a consistent process comes through.