


How to make a Segmentation email in Mailerlite
*Affiliate disclaimer: Some of the links in this page are affiliate or referral links, which means that if you click on a link and make a purchase, I may receive a commission. This commission comes at no additional cost to you and helps to support my business.
A Segmentation email (also can be called a sort email) is an email you send to your email list that allows you to segment your audience and allows them to choose what emails they want to be given.
This email can have buttons or links that allow your audience will click on and this will segment your subscribers.
I recommend having your first email in the welcome email sequence as the Segmentation email to segment, personalize, and engage your email list as early as you can. This can help you send emails your email list will want to read and keep subscribed.
One of my first welcome email is a segmentation email that has links that allow you to choose to be sent finance, Mailerlite, and Payhip tips.

Step One Create webpage(s)
First create webpage for each group you want to segment your email subscribers into. These website pages just need to have text confirming that they clicked the right button or link. You could also add a picture.

You can create a webpage with Mailerlite or create a custom page on your main website.
It doesn't matter what the webpage contains, as long as the webpage is published, it works.
Then copy the links of these webpages. I recommend pasting these links on a digital doc/notebook. So you don’t go back and worth finding the website page links. I also put a label by the links of what group they will be used for.
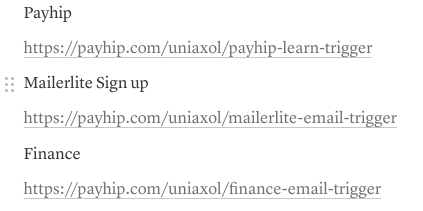
Also if you copy a link/URL of your Mailerlite webpage from the Overview page, it doesn't include the "https://", the "https://" is needed for the URL to work.

Insert all of the links from your doc into an email. I think the first email in your welcome sequence is the best place to put the links in.
You can insert the links in buttons, but you can also make them just linked text for better email deliverability. From my experience, emails with buttons are more likely to be put in spam.
If you insert a link from a webpage you made from Mailerlite, make sure there is a "https://" at the beginning, if there isn't a "https://", the URL won't work.
Type "https://" at the beginning if there isn't a "https://".
Then highlight it.

Then copy the link and paste it.
(ctrl + C) on windows (ctrl + V). command + C and command + V on Mac.

Sometimes when you insert a link into an email, you can click on it and a UI box will appear. Click "Edit".
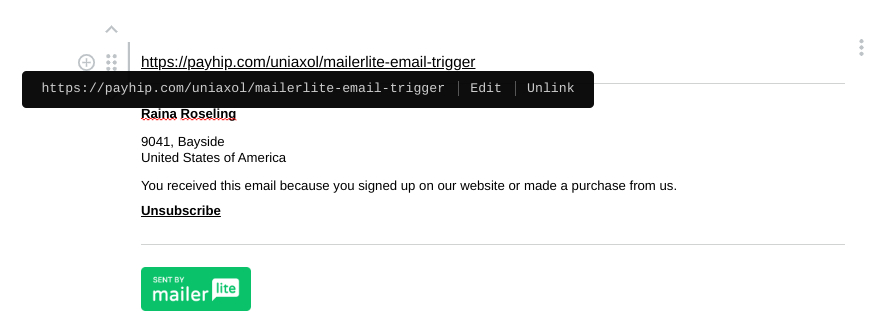
This box will appear

Replace the URL in the text box with "Click Here if you want emails about [insert topic or product]"

Here is an example of what I typed in the text box.

Make sure to select the box next to "Open link in new tab" This will open your webpage in a new tab. Your email subscribers might want to keep their email tab open. Also, press save.

Repeat this step for each link you want to use for a segment or group you want to put subscribers into.
You should also write text above the buttons or links saving around the words:
“Click the links what topics you want me to send emails about.”
After you inserted and edited your links, you then can save and exit creating the email.
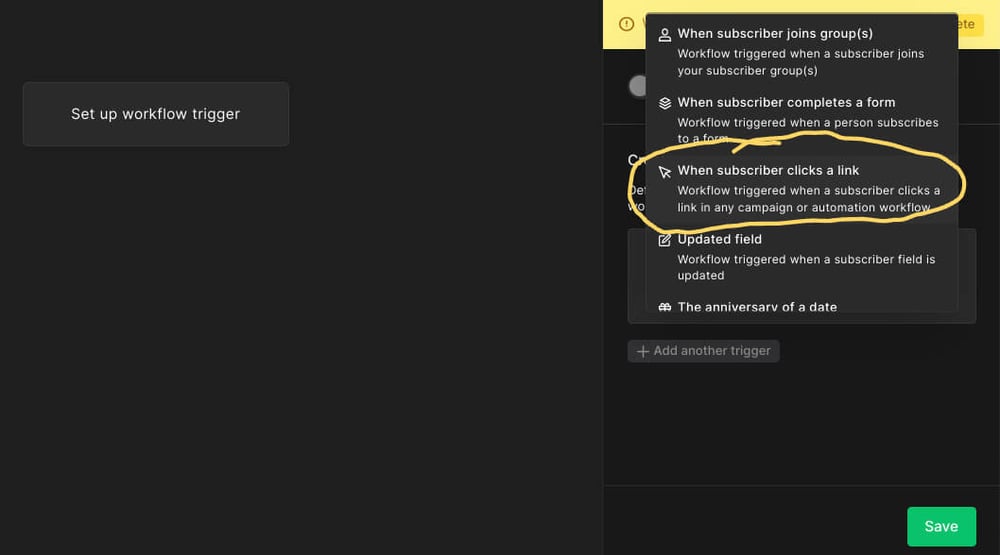
Now create an automation for each topic group.
For the trigger (or starting point) set the trigger to “when subscriber clicks a link”.
Then add the link the website your subscriber clicks on. Since this is my finance I will insert finance page link. Then click save.
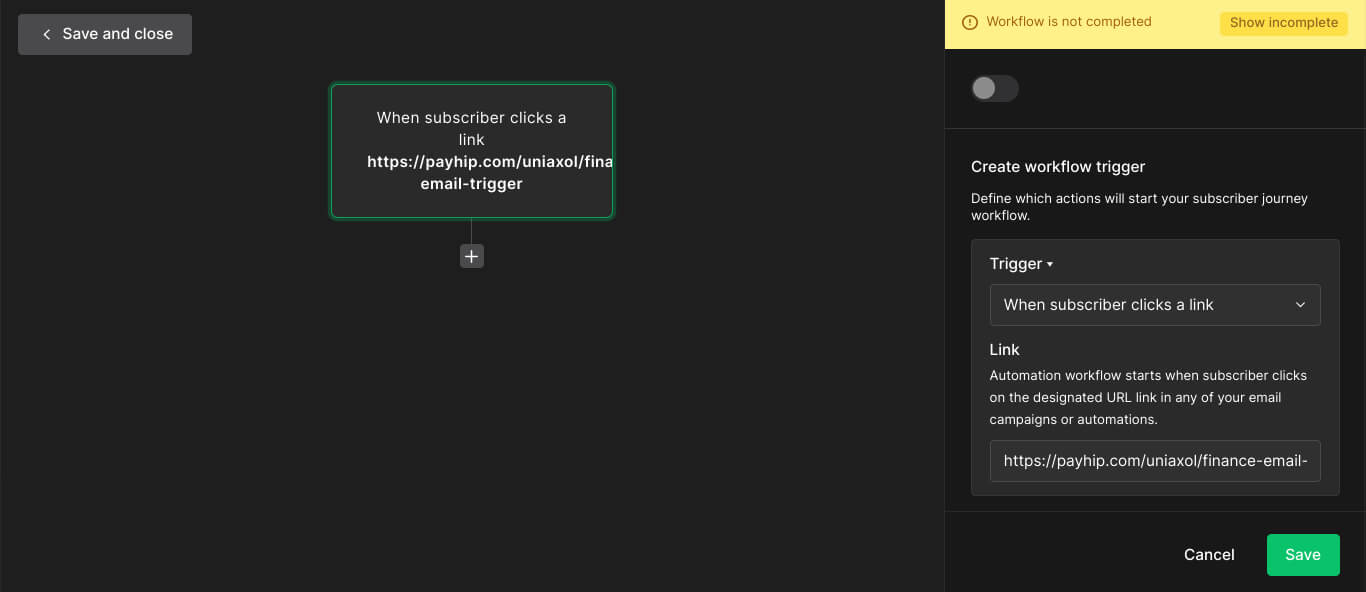
If you use a link of a webpage you made with Mailerlite, make sure there is a "https://" at the beginning of the URL when it is in the Link box.

If you save the automation without the https:// at the beginning it won't work.

If there isn't a https:// go type it at the beginning of the link.
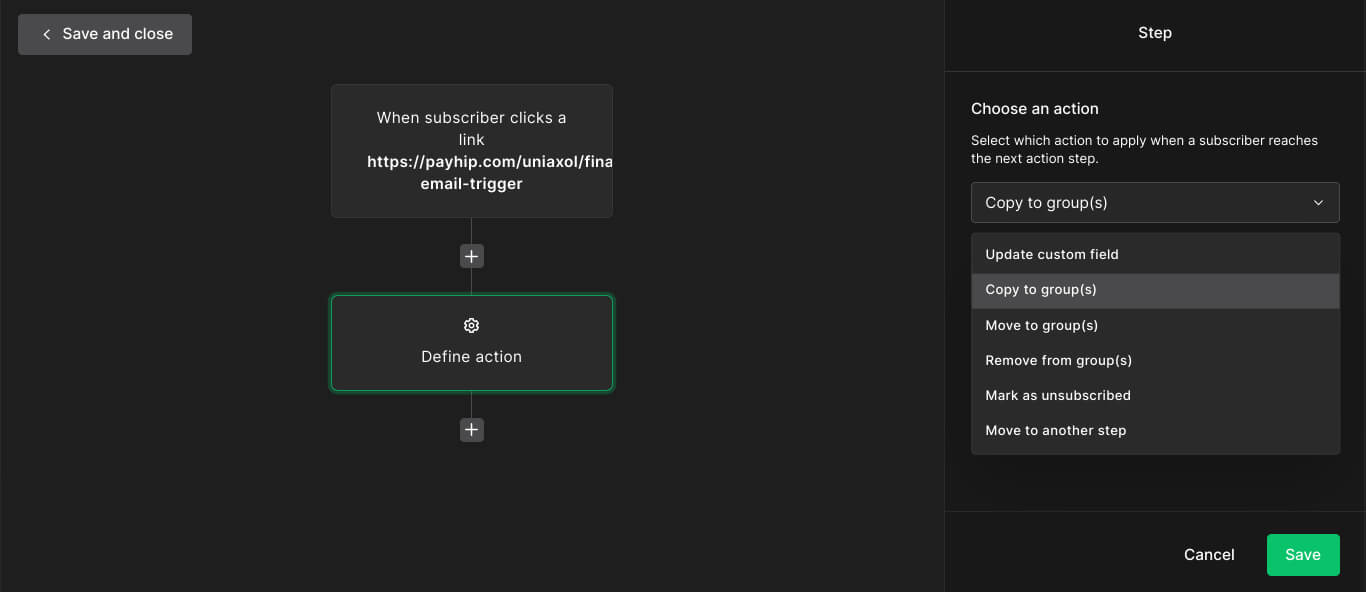
Click the plus button to add an action.
Now there is two methods you can use to finish the automation.
First method is with groups.
You can set the action to copy to group(s) or move to group(s).
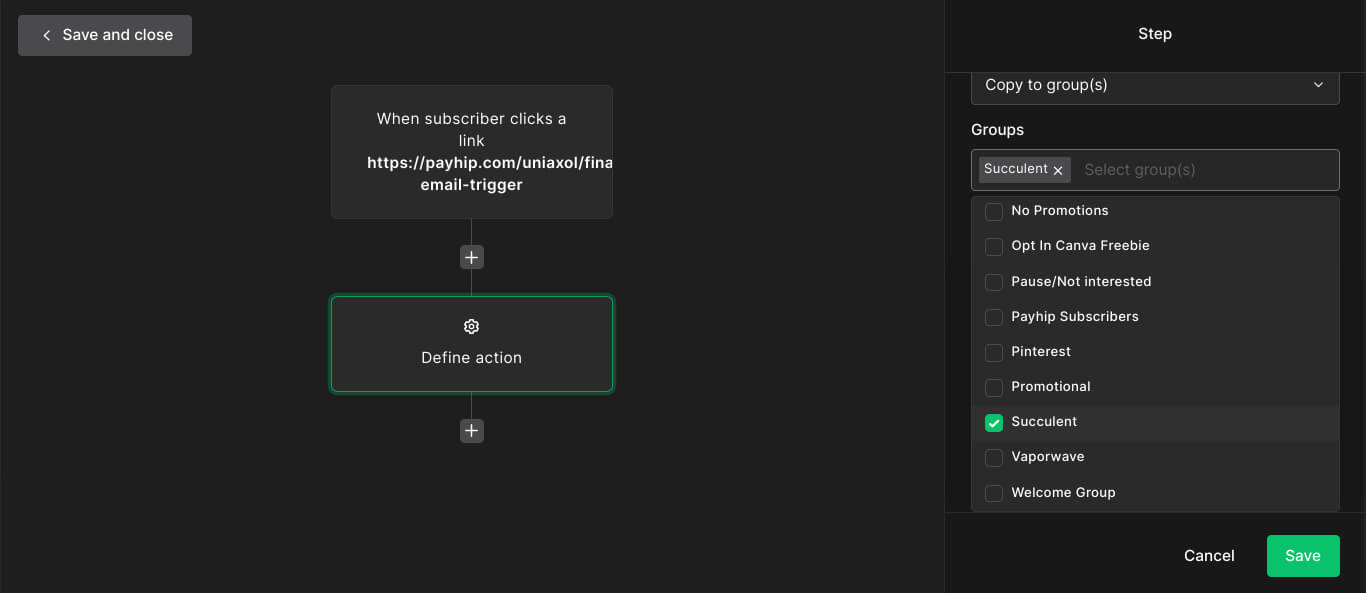
You can create a group for the topics you will be sending.
Then select the group you want to put the person in when they click the link.
For example, if you want a group for people that want to learn about succulents. They will be copied to the group succulents.
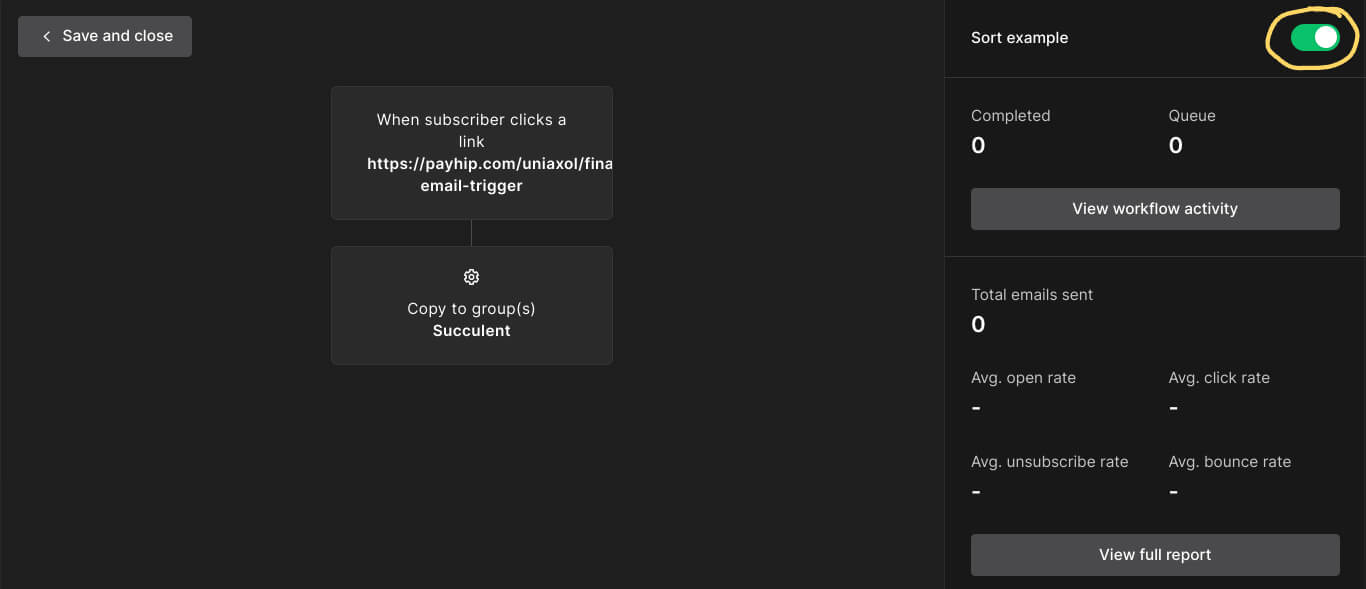
Also, make sure to click to turn the automation on.
[insert photo on how to turn automation on]
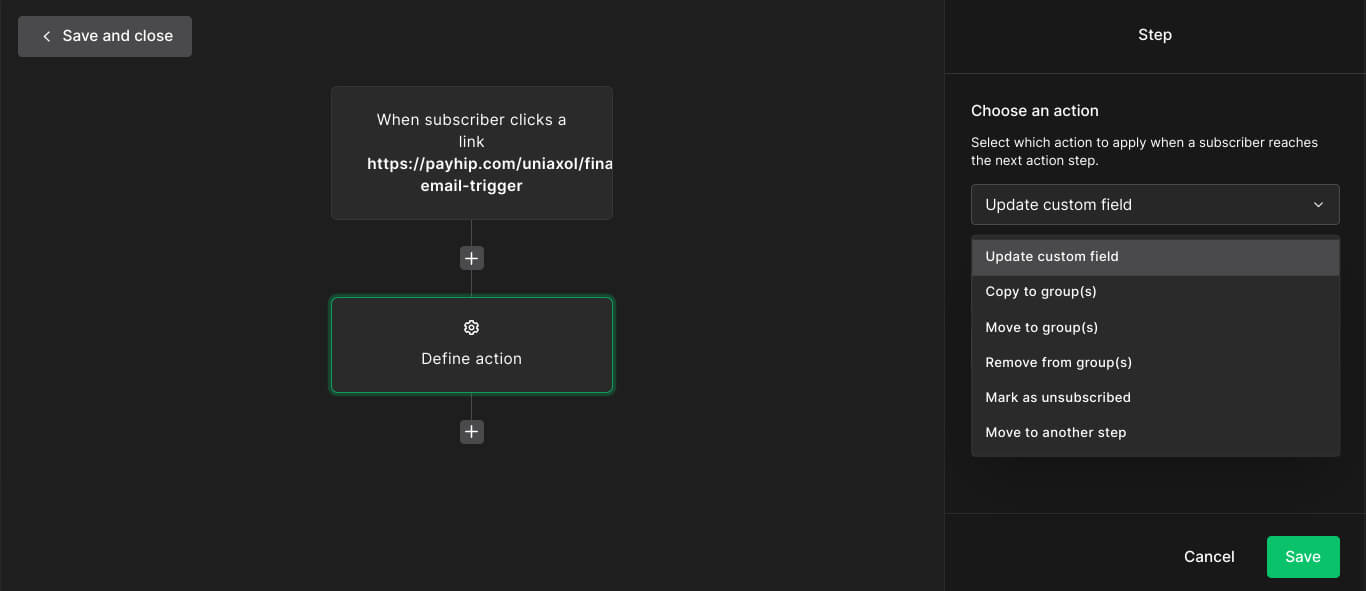
The 2nd method has custom fields. Custom Fields basically are tags.
This one looks complicated. I only recommend doing this method if you have lots of groups in Mailerlite.
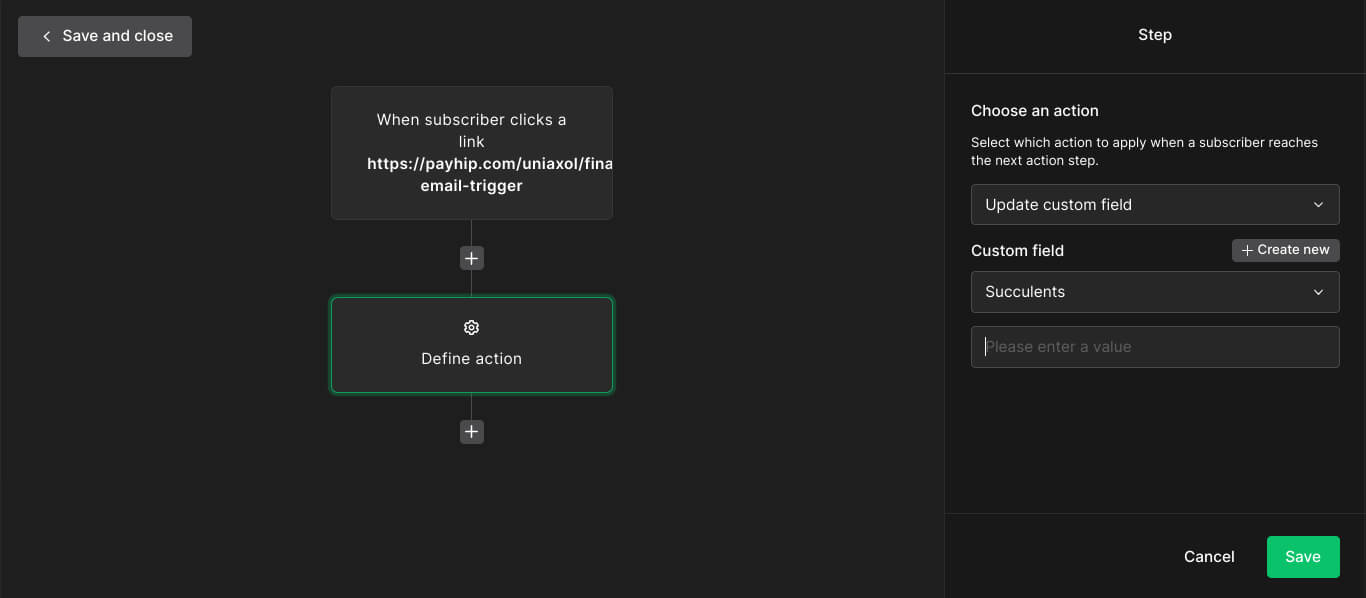
Instead of choosing group choose update custom field.
Click "+ Create new" button, to create a new field.
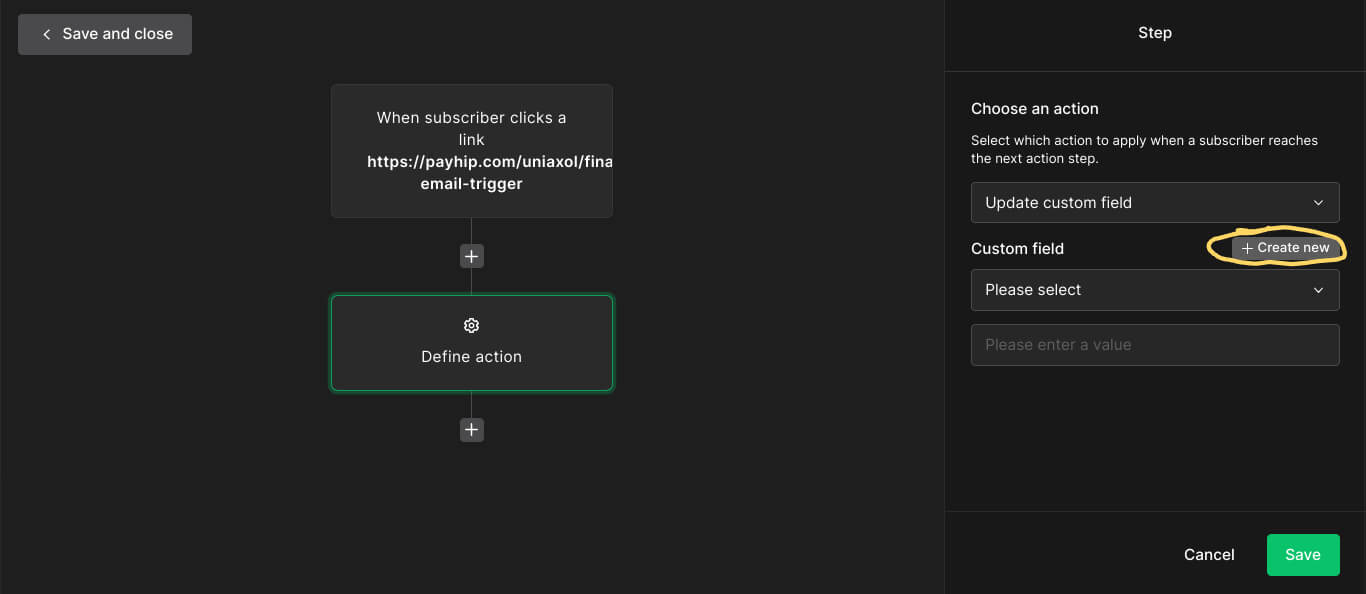
Set the field type to text and give it a name.
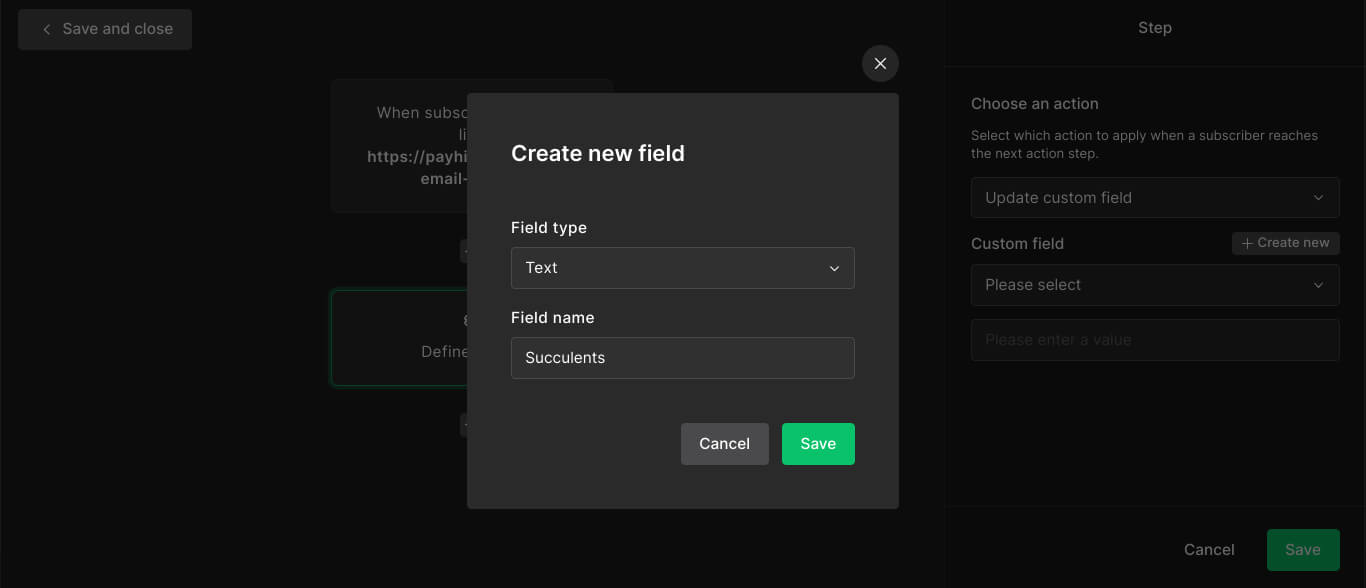
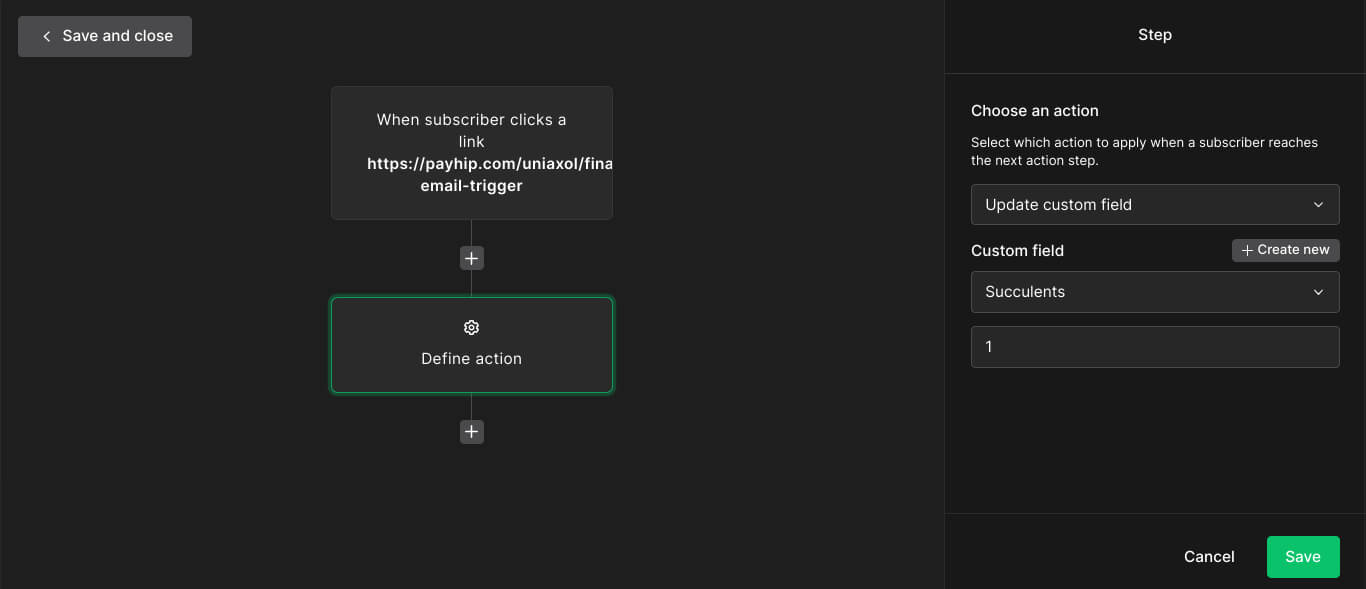
Then enter the value "1".
After you do one of the methods, turn the automation on with the toggle at the upper right corner.
Now you have one topic automation is finished. You also will have to recreate this automation for each topic and link.
So then when sending emails you can set conditions to send an email if the person is in a group or has a tag. People that are in a group will receive the email, while people that aren’t will receive a different one.
If you don’t have the emails yet for that topic. Your email list can wait and you can send those emails later.
You can uses these tricks to give your audience the option of how frequently they want emails to be sent.


Comments ()